

Enjoy the benefits of a premium membership!
Upgrade Account
-
TalkBass has been independent since 1998. Add your voice.
Create a free account to reply to discussions, view embedded media, and browse with fewer display ads.
Join free Log in
Want zero display ads or expanded classifieds tools? Compare plans.
You are using an out of date browser. It may not display this or other websites correctly.
You should upgrade or use an alternative browser.
You should upgrade or use an alternative browser.
First project: Folk Bass DIY upright
- Thread starter NKBassman
- Start date
More options
Who Replied?

Yeah, they started that during Covid - I had to register a commercial account with them before they would ship to me back in early 2021. I hoped it would be over by now.aaaaand McMaster-Carr just cancelled my order "due to the cost and complexity of shipping things to Canada".
Never heard that before from an online shop.
 For the convenience, I've been using Fastenal for lots of things I used to get at McMaster-Carr.
Fastenal appears to be similar. Could not register an account online without a business behind the name.Yeah, they started that during Covid - I had to register a commercial account with them before they would ship to me back in early 2021. I hoped it would be over by now.
Dang.Fastenal appears to be similar. Could not register an account online without a business behind the name.
Other suppliers I've used are MSC Industrial: Invalid Link Removed
and also good ol' Grainger: Invalid Link Removed

Last week I almost cut myself in the kitchen because my main knife had gotten so dull. So I picked up a new knife on the weekend and almost immediately sliced into my fingernail. If that’s not irony I don’t know what is. I'll spare you all the gory bandage-free picture, but I’ve decided that it doesn’t need stitches and thankfully it doesn’t hurt. It might make my gig this weekend a little interesting though.

Fingerboard glueup seems to have turned out ok. The truss rod turns freely so that’s a win in my book. The neck is so stiff I didn't see any movement at all when I tried tightening it though . We'll see if that changes after I thickness the back but I'm not taking off thaaat much so I imagine it'll still be really stiff. There’s a small gap between the FB and the heel on one side but I’ll just wick some CA glue into it before finishing.
One thing I should have done before gluing on the fingerboard (while things were still square) was drill the pilot holes for the bolt anchors in the heel. Oh well, too late now.
I built a little cradle to hold the neck while working on the backside of it. You can’t see but there are 7.25R cutouts on either end of the block, cut using a router circle cutting jig, to cradle the fingerboard. I keep a bag full of old holey socks in the garage for staining and sopping up small messes, which also work nice here to add a bit of cushioning.

Tapered the fingerboard to match the neck. Rough cut with my little Japanese flush cut saw first and then progressively filed and sanded flush. I got a little over zealous and went too deep with the Shinto in one spot, but it’ll be ok. That’s hard work! Its been pretty hot and humid here lately, so I was pretty gross by the end of it.


Fingerboard glueup seems to have turned out ok. The truss rod turns freely so that’s a win in my book. The neck is so stiff I didn't see any movement at all when I tried tightening it though
. We'll see if that changes after I thickness the back but I'm not taking off thaaat much so I imagine it'll still be really stiff. There’s a small gap between the FB and the heel on one side but I’ll just wick some CA glue into it before finishing.One thing I should have done before gluing on the fingerboard (while things were still square) was drill the pilot holes for the bolt anchors in the heel. Oh well, too late now.
I built a little cradle to hold the neck while working on the backside of it. You can’t see but there are 7.25R cutouts on either end of the block, cut using a router circle cutting jig, to cradle the fingerboard. I keep a bag full of old holey socks in the garage for staining and sopping up small messes, which also work nice here to add a bit of cushioning.
Tapered the fingerboard to match the neck. Rough cut with my little Japanese flush cut saw first and then progressively filed and sanded flush. I got a little over zealous and went too deep with the Shinto in one spot, but it’ll be ok. That’s hard work! Its been pretty hot and humid here lately, so I was pretty gross by the end of it.
Last edited:
Re. neck bolts, I'm just going to go to home depot and see what I can find there. I realized I was limiting myself unnecessarily by looking for the same style of socket cap head screws that I bought for the bridge, when really that's not at all necessary. Any machine screw with a corresponding threaded wood insert will do.
Edit:
Also, I was limiting myself to the current shape/depth of the mounting block, which I was already planning on reshaping anyway, so I guess I'm not stuck trying to find odd sized 3-1/4" bolts either... so I picked up some 3" 1/4-20 machine screws and wood inserts on my lunch break and we're back in business.
Edit:
Also, I was limiting myself to the current shape/depth of the mounting block, which I was already planning on reshaping anyway, so I guess I'm not stuck trying to find odd sized 3-1/4" bolts either... so I picked up some 3" 1/4-20 machine screws and wood inserts on my lunch break and we're back in business.
Last edited:

Last week I almost cut myself in the kitchen because my main knife had gotten so dull. So I picked up a new knife on the weekend and almost immediately sliced into my fingernail. If that’s not irony I don’t know what is. I'll spare you all the gory bandage-free picture, but I’ve decided that it doesn’t need stitches and thankfully it doesn’t hurt. It might make my gig this weekend a little interesting though.
View attachment 5136092
Fingerboard glueup seems to have turned out ok. The truss rod turns freely so that’s a win in my book. The neck is so stiff I didn't see any movement at all when I tried tightening it though
One thing I should have done before gluing on the fingerboard (while things were still square) was drill the pilot holes for the bolt anchors in the heel. Oh well.
I built a little cradle to hold the neck while working on the backside of it. You can’t see but there are 7.25R cutouts on either end of the block, cut using a router circle cutting jig, to cradle the fingerboard. I keep a bag full of old holey socks in the garage for staining and sopping up small messes, which also work nice here.
View attachment 5136093
Tapered the fingerboard to match the neck. Rough cut with my little Japanese flush cut saw first and then progressively filed and sanded flush. I got a little over zealous and went too deep with the Shinto in one spot, but it’ll be ok. That’s hard work! Its been pretty hot and humid here lately, so I was pretty gross by the end of it.
View attachment 5136094 View attachment 5136095

If you go to ikeas website you can get one from their spare parts section....Do they sell those on Amazon?
Haha yeeaaah, that was the joke I was trying to make. Since almost everything else I've bought for this project has come from Amazon...If you go to ikeas website you can get one from their spare parts section....
Last edited:
I got a bit of work done thicknessing the neck blank last week, but my evenings were mostly spent brushing up on the set list for my gig last night. After not gigging with this band for the last month or two I was feeling a bit rusty, but it turned out alright.
I've done the thicknessing entirely by hand so far with the shinto rasp. It's a great tool, but it takes off quite a bit of material in a hurry and you really have to be careful with your stroke to make sure you're cutting level and not diving down on the far side. Totally unrelated, the neck is going to be a bit thinner than intended.
I'm hoping to finish thicknessing and get on to shaping the neck this week. I'm at a point now where I think a few minutes with the orbital sander or a light belt sanding will clean things up nicely. I'll get things squared up and then take some measurements to lay out my first set of facets.
I've done the thicknessing entirely by hand so far with the shinto rasp. It's a great tool, but it takes off quite a bit of material in a hurry and you really have to be careful with your stroke to make sure you're cutting level and not diving down on the far side. Totally unrelated, the neck is going to be a bit thinner than intended
.I'm hoping to finish thicknessing and get on to shaping the neck this week. I'm at a point now where I think a few minutes with the orbital sander or a light belt sanding will clean things up nicely. I'll get things squared up and then take some measurements to lay out my first set of facets.
Last edited:
Facet carving. Primary facets done and that’s it for the evening. I’ll work out the secondary facets tomorrow.


The crude clamping fixture I whipped up the other day was great for this.

A note on tools, the Shinto rasp that I got off Amazon was great for this task, but if anyone doesn’t have or doesn't want to buy a specialty tool, this coarse bastard file worked just as well.

The crude clamping fixture I whipped up the other day was great for this.
A note on tools, the Shinto rasp that I got off Amazon was great for this task, but if anyone doesn’t have or doesn't want to buy a specialty tool, this coarse bastard file worked just as well.
Last edited:
Yeah a small plane would have been good to really get the facets nice and flat and clean. With what's becoming a signature of my workmanship, my edges are a little rounded overA small block plane works great too.
.
Last edited:
It's been a week and I'm still scratching my head as to the relevance of this cartoon to the quoted post
. I feel like Elaine from Seinfeld, arguing with the cartoonist from the New Yorker as to why his cartoon is funny  .
.
Last edited:
It's been a week and I'm still scratching my head as to the relevance of this cartoon to the quoted post
I couldn't remember why I posted that so I went back to see. It was the bits of green on the knife's blade and your bandaged finger. (Or I assume it was yours, anyway.) Like the blood from the cut was green on the blade? I don't know. I'm a silly person.
As such, I do enjoy Seinfeld and that particular Elaine story is pretty funny.
lol. So obvious now that you point it out!I couldn't remember why I posted that so I went back to see. It was the bits of green on the knife's blade and your bandaged finger. (Or I assume it was yours, anyway.) Like the blood from the cut was green on the blade? I don't know. I'm a silly person.
As such, I do enjoy Seinfeld and that particular Elaine story is pretty funny.
(it was cilantro, by the way)
Last edited:
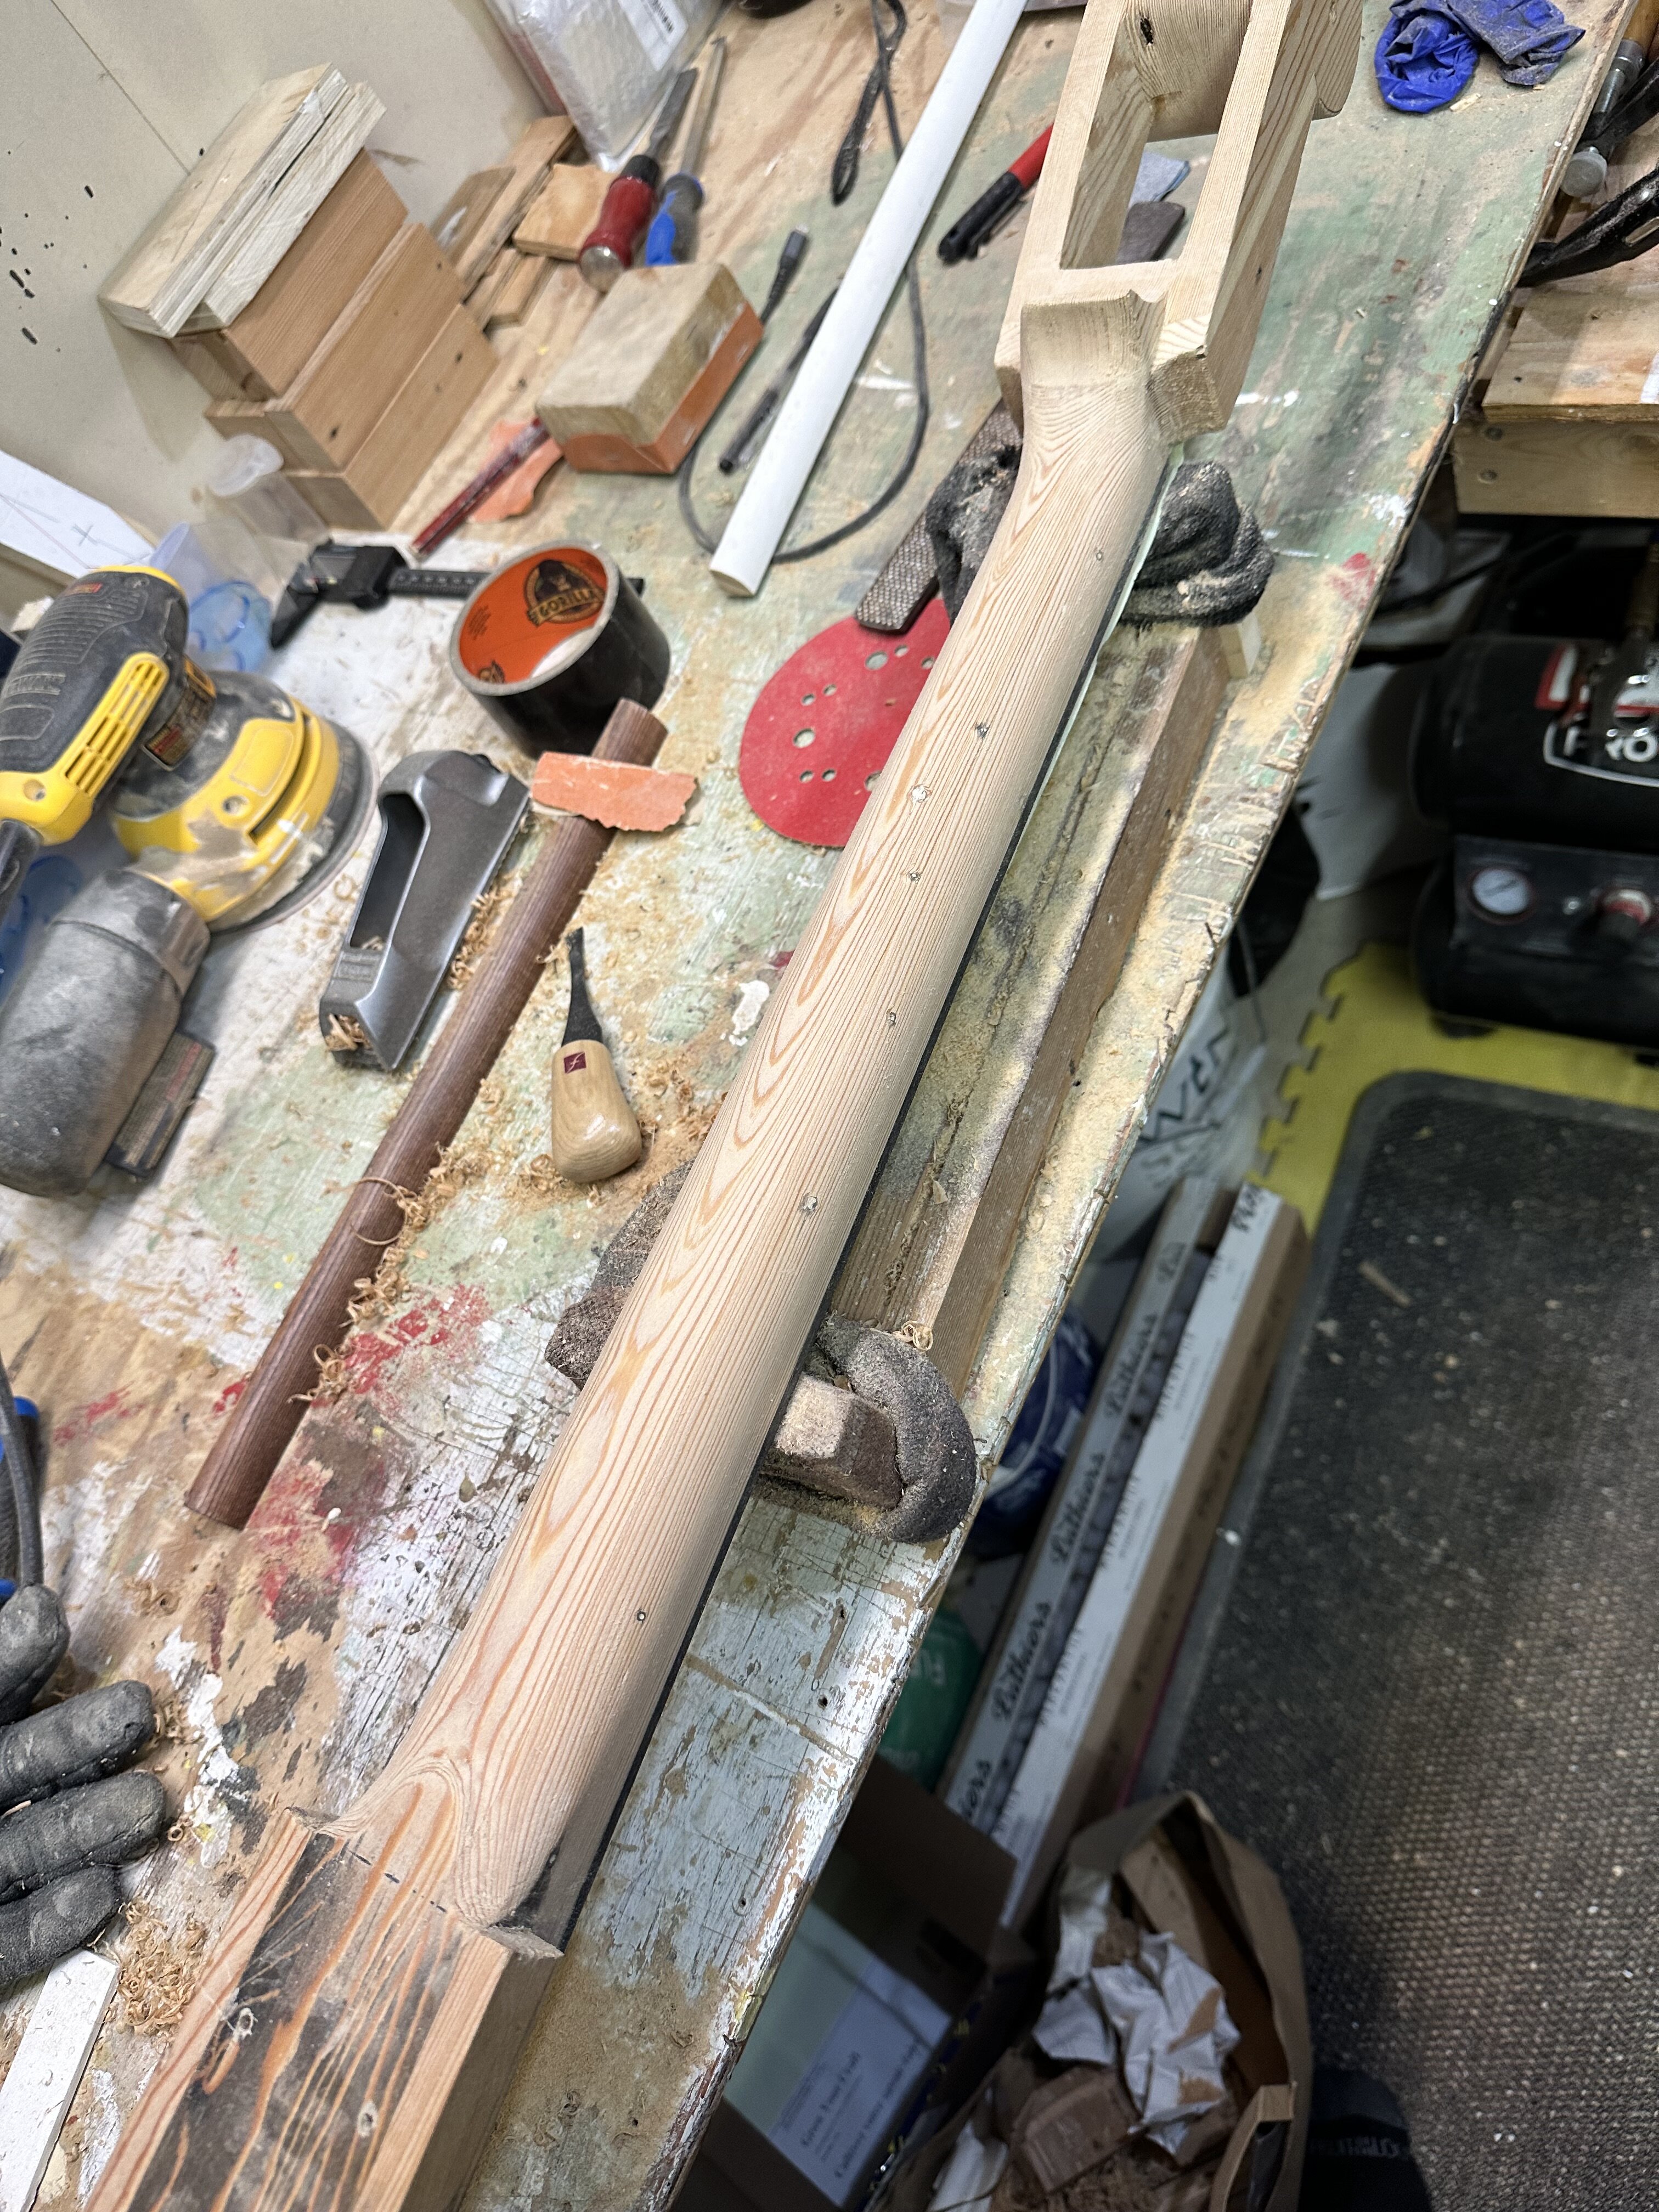
I’ll say I finished* the neck carve last night! Seems like a milestone worth celebrating with a full sized image!
*Pending actually playing it a little to see how it feels in action.
First I measured what I ended up with after the primary facets were done and brought that into AutoCAD. From that I tweaked my curves and figured out where the secondary facets should be, and transferred that back to the work piece.


I decided that the Shinto would be too aggressive for such small business and did it all with the file. I also didn’t take any pictures apparently. I'm shocked at how little time this whole process actually took to go from a rectangular block of wood to a fully carved neck profile. No more than a few hours for a first timer, spread out over two evenings.
Lots of sanding later (80-120g), and it’s starting to feel not-too-lumpy. You can see in the design drawing of the nut end profile above that I had drawn it with a bit more of a V shape which I immediately didn’t like, so I sanded down the peak to more of a softer U shape which feels more comfortable.
As intended, it is thicc! But it feels good in the hand in an upright position. It supports the palm nicely which I’m hoping will result in less hand fatigue than the old electric neck caused.


Next I need to continue shaping the headstock and heel transitions, install the mounting thread anchors in the heel, and start looking at the headstock again… probably shouldn’t have waited this long to test fit the tuners. I'm also going to wipe down the back of the neck and give it a quick sand up to 220g to get a better feel for where the lumps are. Right now it still feels a bit coarse which is distracting in the hand when trying to feel for unevenness.
These old nail holes filled themselves with glue during the initial glueup and actually came out really smooth. Shouldn’t need much touch up actually. The smaller ones were oozing carpenters glue during the glueup of the laminations for the blank, and the larger one with the white infill was a more significant framing nail hole that I filled with some cheap marine epoxy from Canadian Tire, the same stuff I used to glue in the CF reinforcing bars, which I didn't realize cured opaque white when I bought it. I could drill it out and plug it with a dowel but... I don't think I'm going to. Going back to my initial intentions on Page 1, this is supposed to look like it was made from 100 y/o wall studs.

*Pending actually playing it a little to see how it feels in action.
First I measured what I ended up with after the primary facets were done and brought that into AutoCAD. From that I tweaked my curves and figured out where the secondary facets should be, and transferred that back to the work piece.
I decided that the Shinto would be too aggressive for such small business and did it all with the file. I also didn’t take any pictures apparently. I'm shocked at how little time this whole process actually took to go from a rectangular block of wood to a fully carved neck profile. No more than a few hours for a first timer, spread out over two evenings.
Lots of sanding later (80-120g), and it’s starting to feel not-too-lumpy. You can see in the design drawing of the nut end profile above that I had drawn it with a bit more of a V shape which I immediately didn’t like, so I sanded down the peak to more of a softer U shape which feels more comfortable.
As intended, it is thicc! But it feels good in the hand in an upright position. It supports the palm nicely which I’m hoping will result in less hand fatigue than the old electric neck caused.
Next I need to continue shaping the headstock and heel transitions, install the mounting thread anchors in the heel, and start looking at the headstock again… probably shouldn’t have waited this long to test fit the tuners
. I'm also going to wipe down the back of the neck and give it a quick sand up to 220g to get a better feel for where the lumps are. Right now it still feels a bit coarse which is distracting in the hand when trying to feel for unevenness.These old nail holes filled themselves with glue during the initial glueup and actually came out really smooth. Shouldn’t need much touch up actually. The smaller ones were oozing carpenters glue during the glueup of the laminations for the blank, and the larger one with the white infill was a more significant framing nail hole that I filled with some cheap marine epoxy from Canadian Tire, the same stuff I used to glue in the CF reinforcing bars, which I didn't realize cured opaque white when I bought it. I could drill it out and plug it with a dowel but... I don't think I'm going to. Going back to my initial intentions on Page 1, this is supposed to look like it was made from 100 y/o wall studs.
Last edited:

Freekmagnet
Commercial User
I’ll say I finished* the neck carve last night! Seems like a milestone worth celebrating with a full sized image!
*Pending actually playing it a little to see how it feels in action.
View attachment 5144951
First I measured what I ended up with after the primary facets were done and brought that into AutoCAD. From that I tweaked my curves and figured out where the secondary facets should be, and transferred that back to the work piece.
View attachment 5144942 View attachment 5144943
I decided that the Shinto would be too aggressive for such small business and did it all with the file. I also didn’t take any pictures apparently.
Lots of sanding later (65-120g), and it’s starting to feel not-too-lumpy. You can see in the picture of the nut end profile above that I had drawn it with a bit more of a V shape, which turns out I didn’t really like, so I sanded it down to more of a softer U shape which feels more comfortable.
As intended, it is thicc! But it feels good in the hand in an upright position. It supports the palm nicely and I’m hoping will result in less hand fatigue than the old electric neck caused.
View attachment 5144952 View attachment 5144954 View attachment 5144955
Next I need to continue shaping the headstock volute and heel transition. Install the mounting thread anchors in the heel, and start looking at the headstock again… probably shouldn’t have waited this long to test fit the tuners
These old nail holes filled themselves with glue during the initial glueup and actually came out really smooth. Shouldn’t need much touch up actually.
View attachment 5144961
Looks great!
I should mention that I tried the Surform pocket plane that I bought back on Page 3 (and almost forgot about) and I didn't really like it. It was too coarse and did more of a scrape than a slice like a normal plane would do. It would work if that's all you have, but I wouldn't recommend you go out and buy one for this task.A small block plane works great too.
Last edited:


