I picked up a Rickenbacker 4003 bass a few days ago, and it needs some work done to it! I bought a used bass in part so that I could modify it without feeling too much like I was thrashing a new instrument. In this case I was happy to let somebody put the first ding in the finish.
The bass itself is from the 28th week of 2009. Some view this era as Rickenbacker's 'lost weekend', as they were working quickly to try and offset a backlog of orders. Production got a bit boring during this era, with the range of models and finishes reduced to the bare bones. In the case of my bass, the electronics are badly and somewhat illogically soldered and the finish is thin, sticky and hazy in places.
I'm not a purist by any stretch of the imagination. This bass sounds great as-is. The slightly nasal Rickenbacker tone is there, even when you play it unplugged. There is a granite-hard fundamental underneath every note, but that excellent spray of harmonics on top. This bass can be surprisingly bright and brash sounding, or it can produce a deep, fat rumble.
Ultimately I don't see Rickenbacker instruments as sacred objects, and I see no point in defending the indefensible. Parts of this bass demonstrate absolutely top-shelf levels of detail and craftsmanship. Other sections fall short of the mark and could do with being improved.
My bass:

Also my bass:
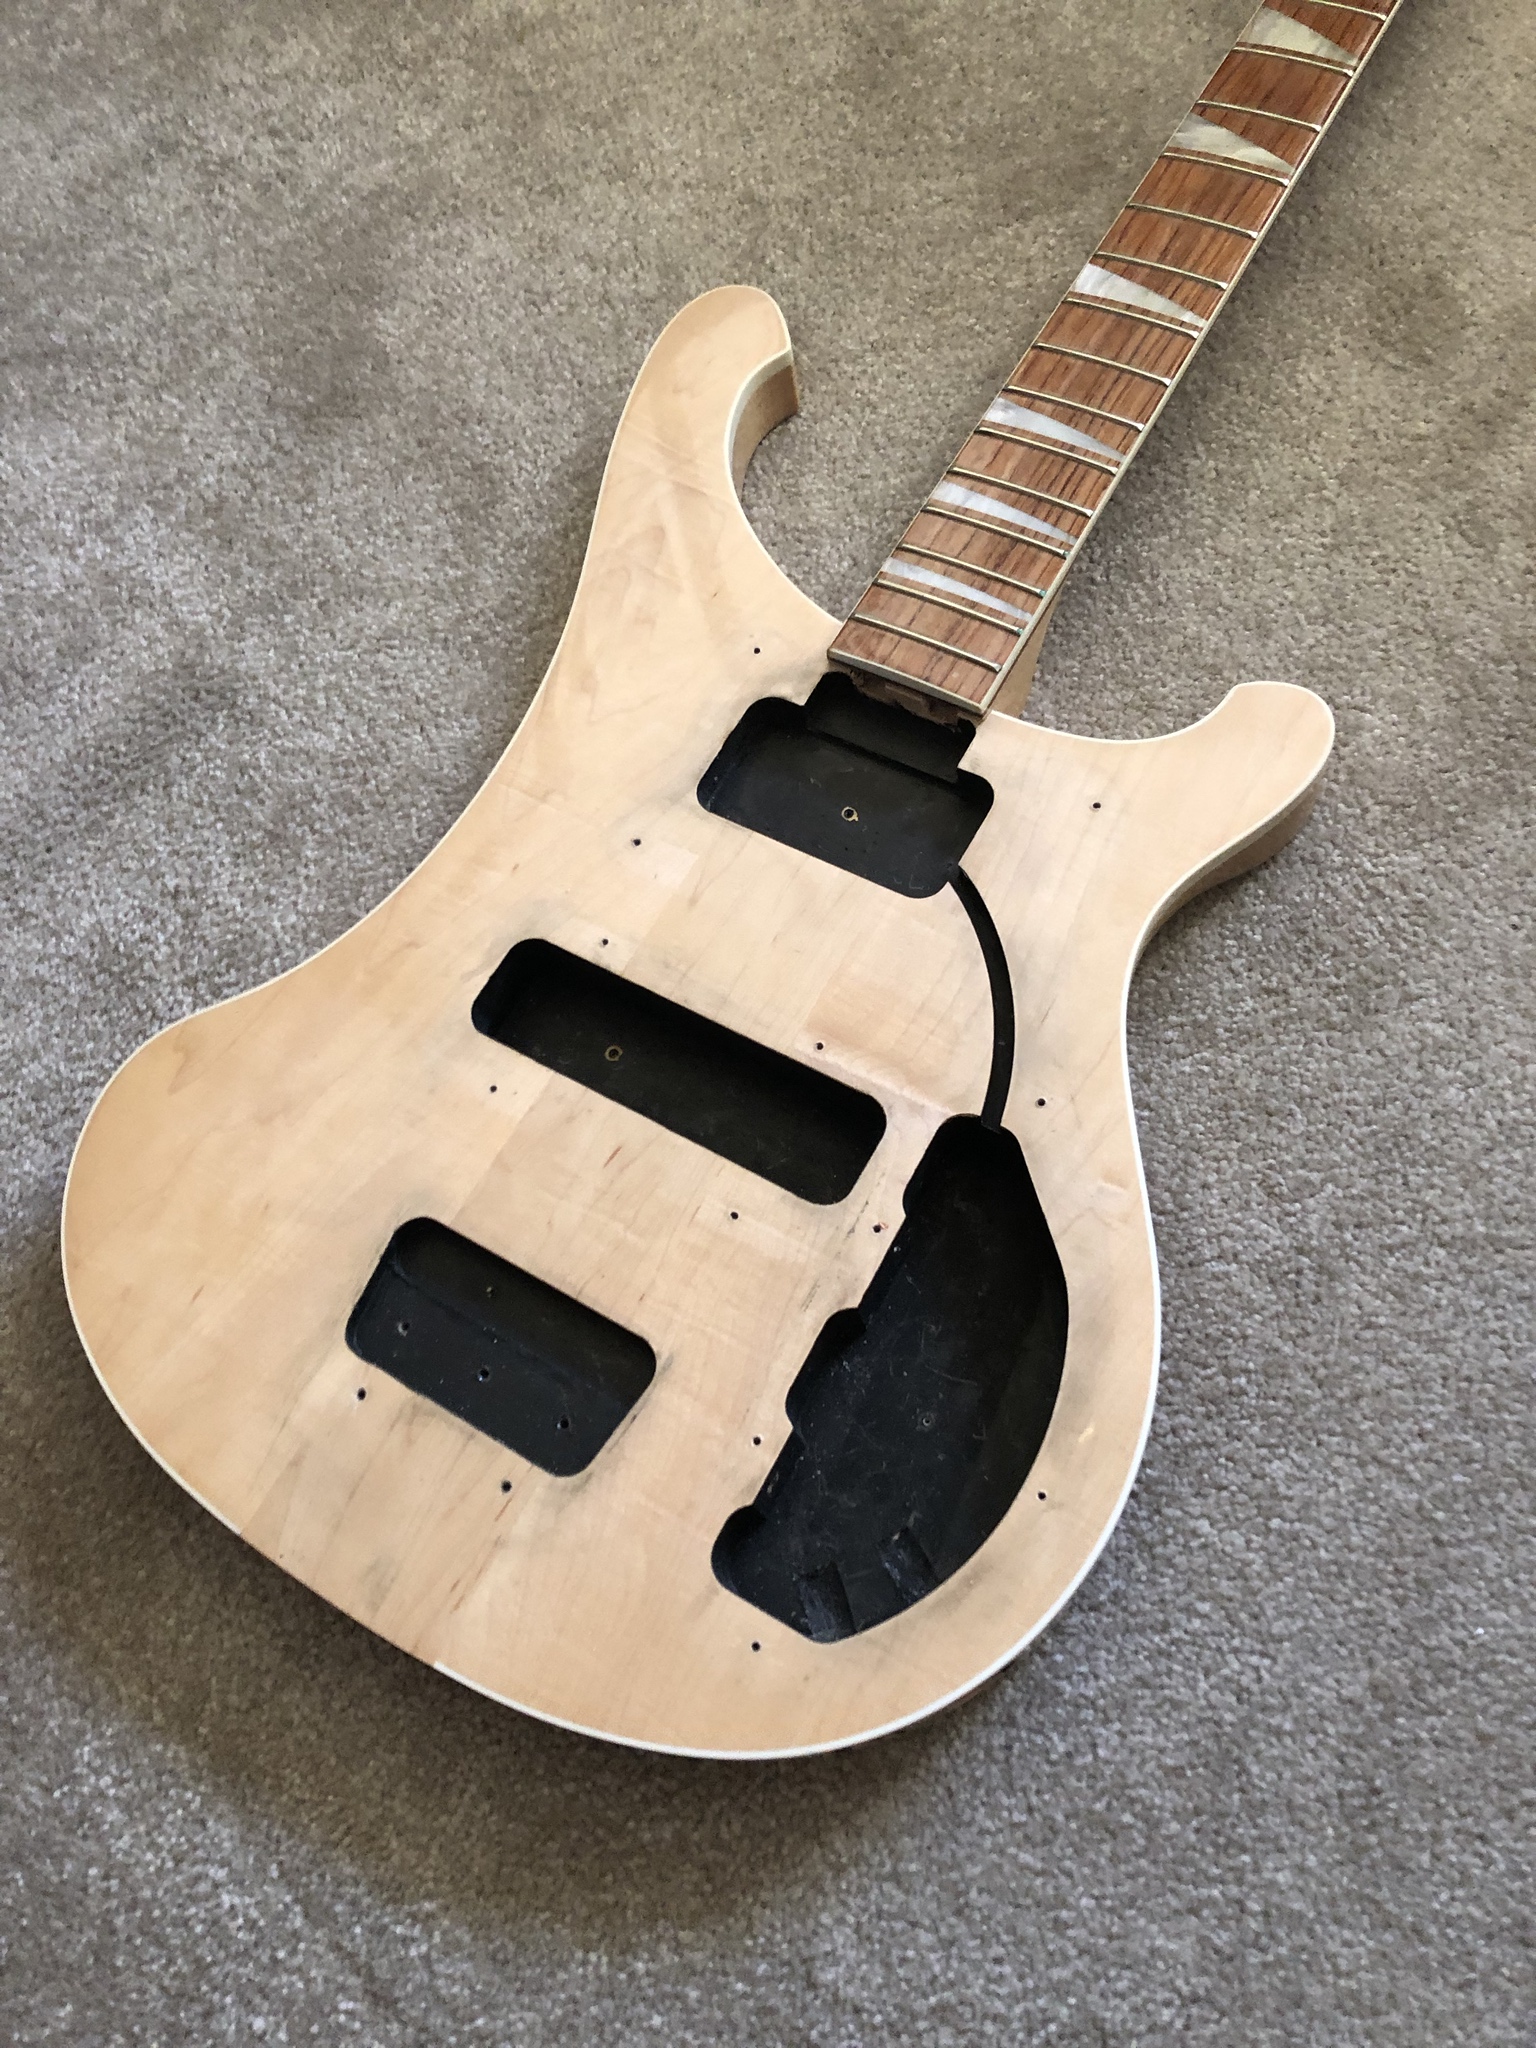
The shielding paint in the cavities is not factory stock. Somebody applied this paint and installed a star-grounding wiring scheme to link the painted sections together.
My first job today was to remove the hump from the pickguard. Attributed by some as a template error, Rickenbackers from this period have a 'double hump' down by the pickup selector switch. Once you see it you can't un-see it.
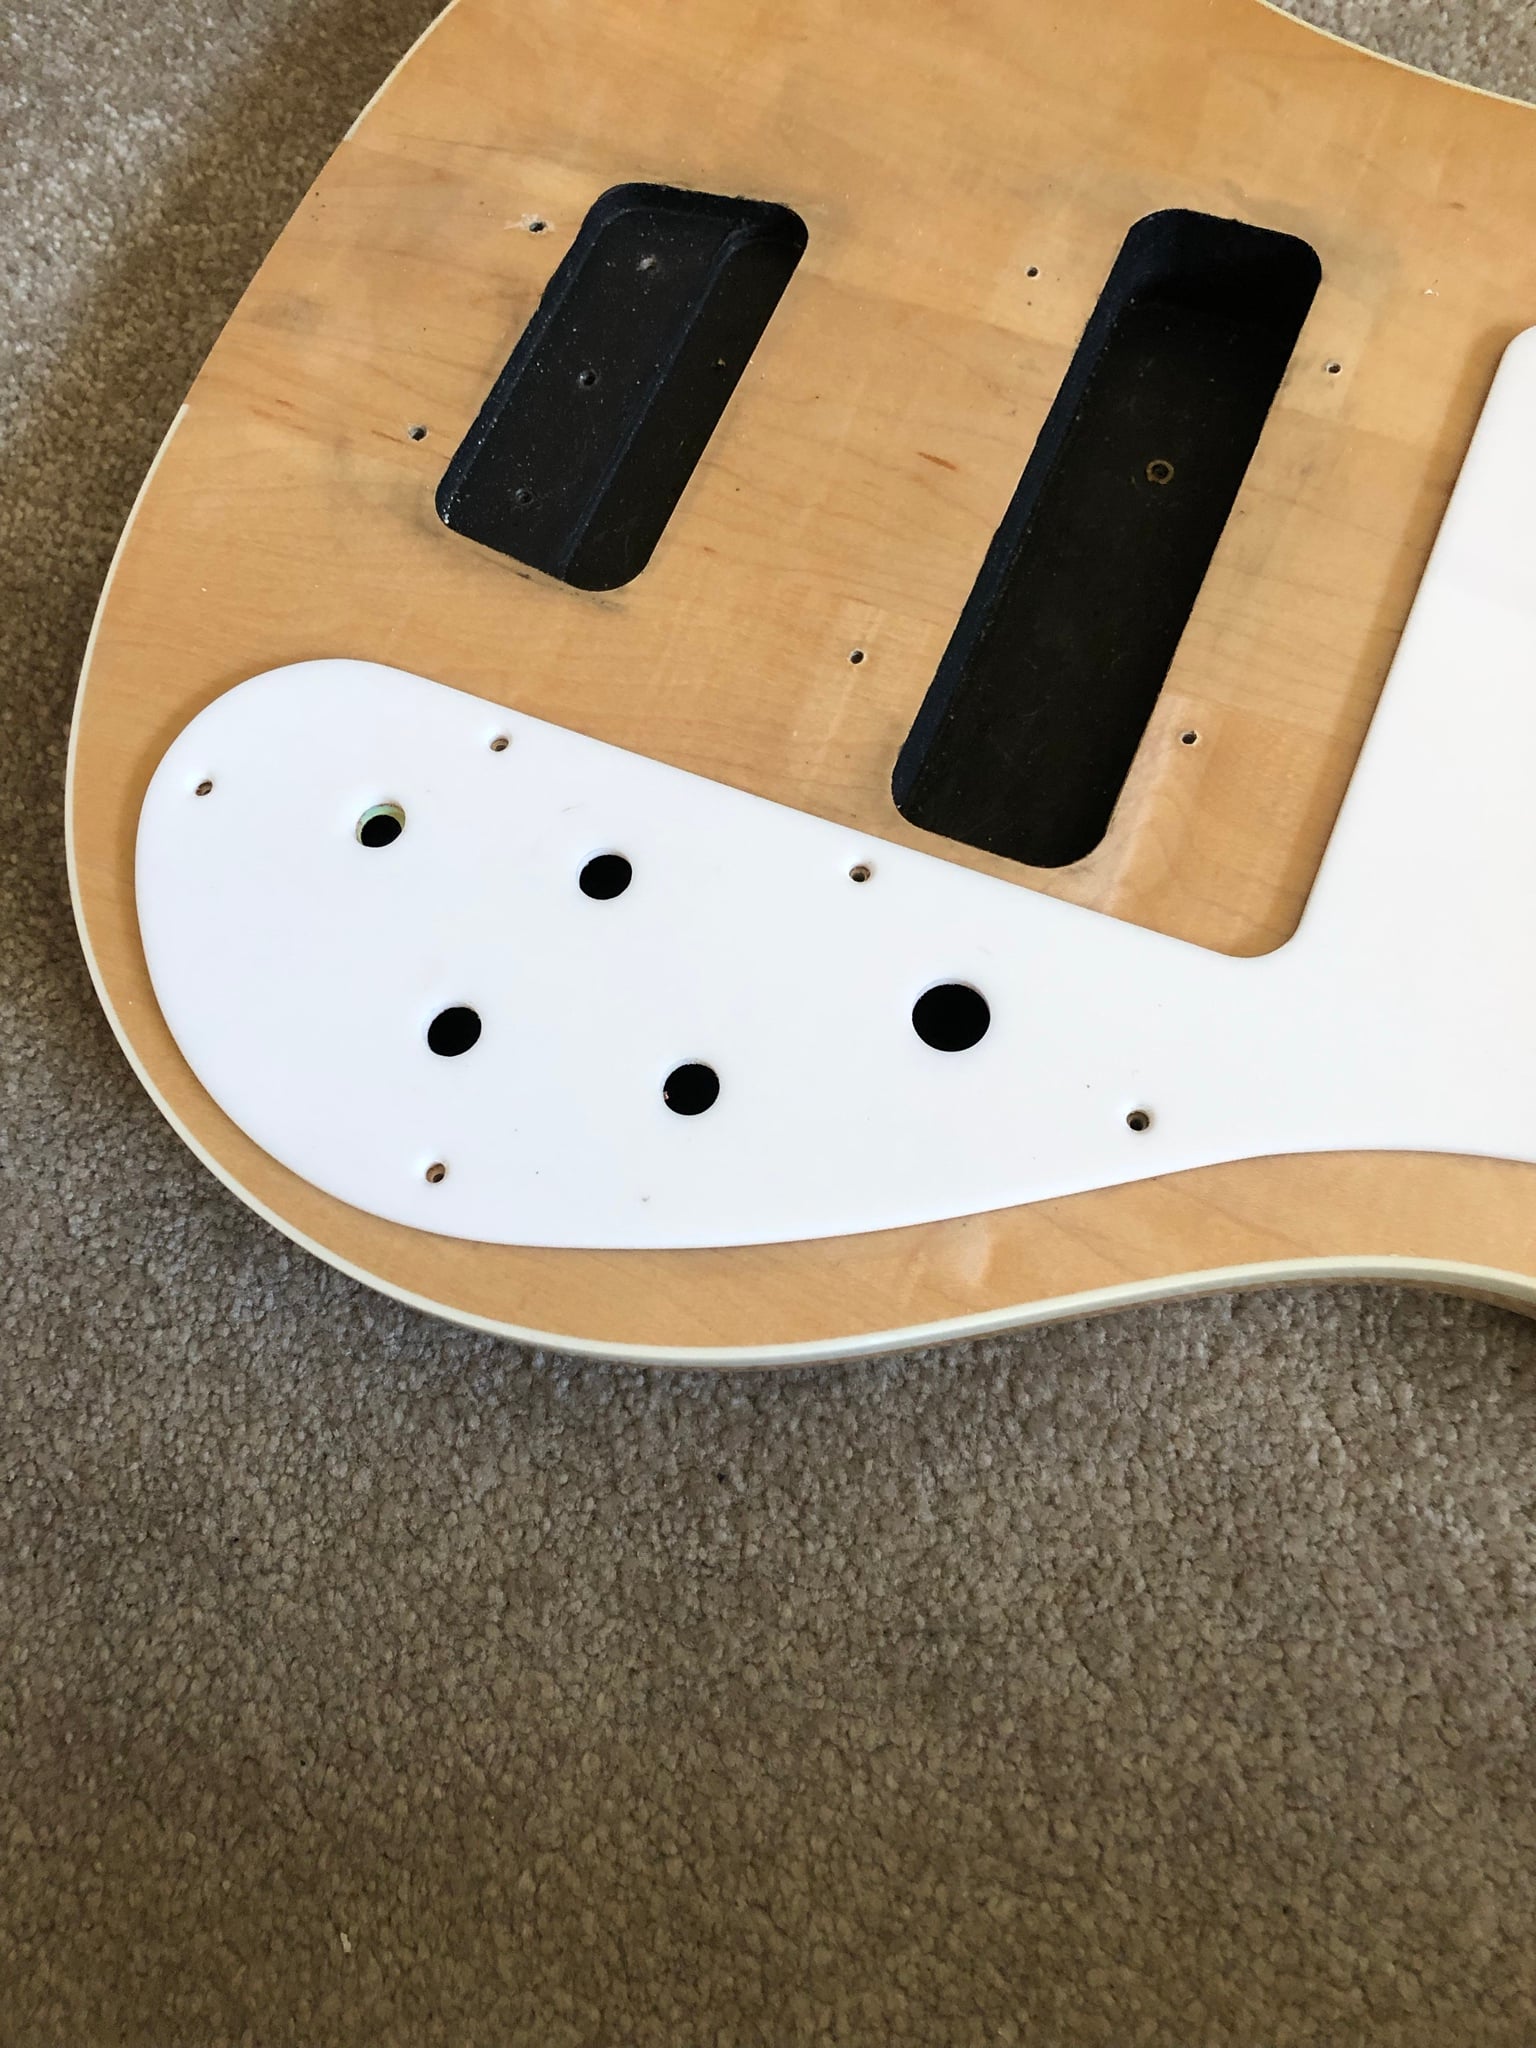
This is my attempt to un-hump the pickguard. I used a rasp, and various grits of sand paper, to smooth this out.
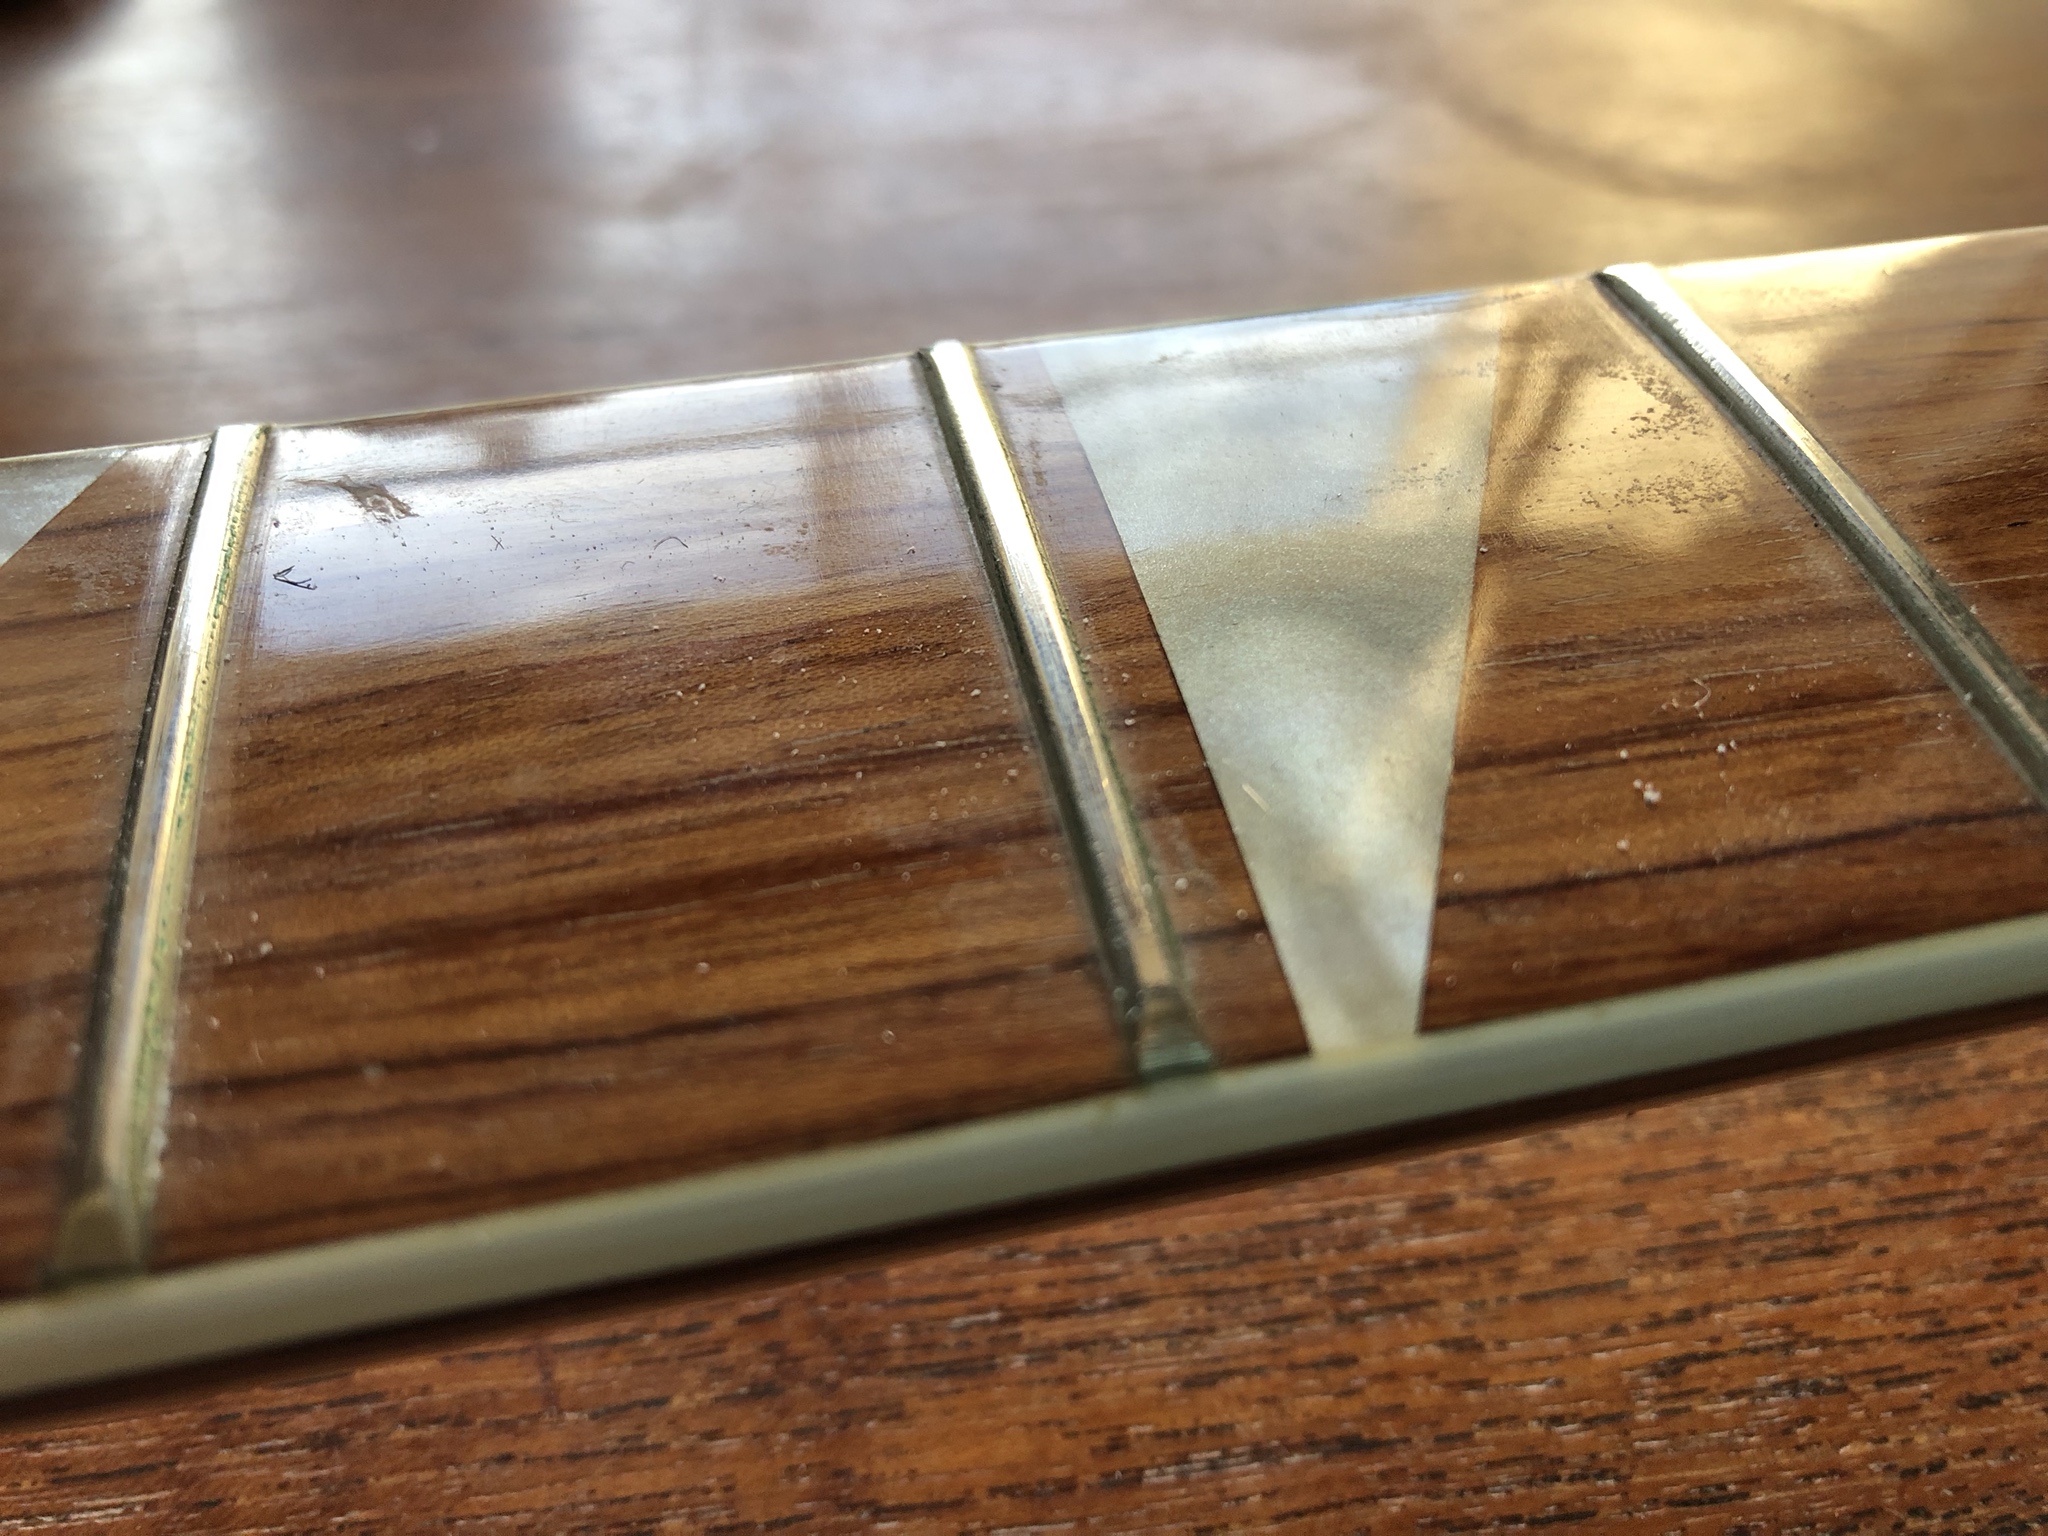
I've also re-crowned the frets and polished them out. There is green marker ink on the upper fret ends, so I reckon somebody has done some work on the frets already. However they left the frets a wee bit rougher than I'm used to. I've also started polishing the fretboard as once I've finished the adjacent fret.
Before:
After:
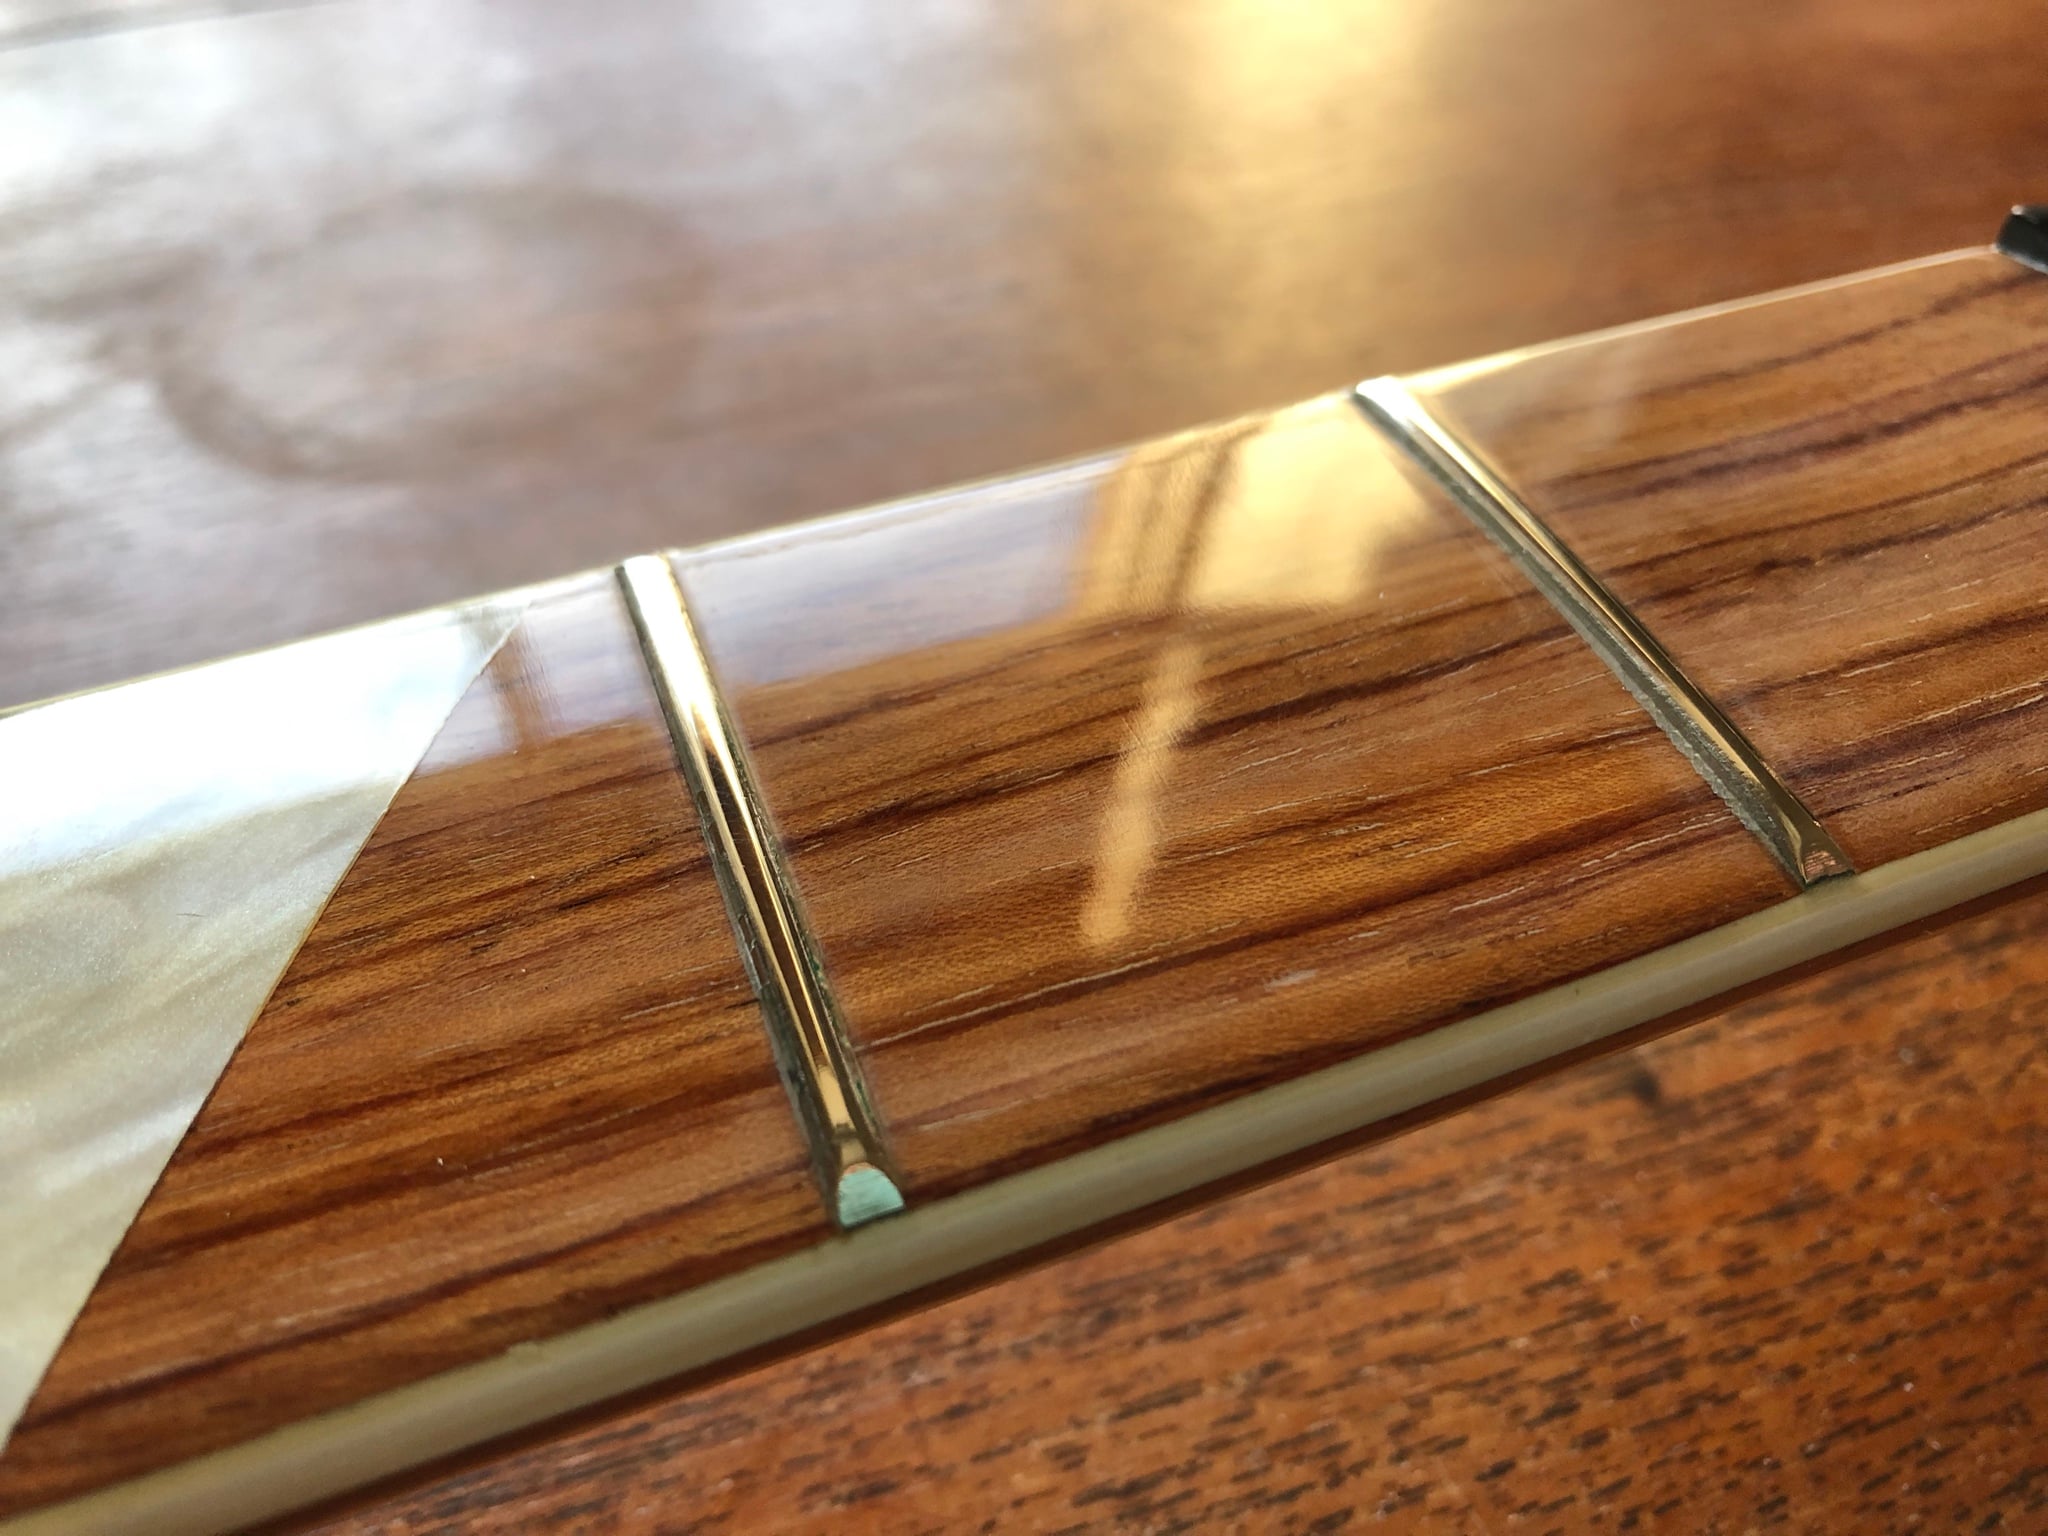
I'm using Poorboy's SSR-1 polishing compound and Poorboy's EX-P finishing wax to make these shine.
I also shaved the top of the nut down. This might not please the purists, but there is no reason for the strings to disappear down to the bottom of deep channels in the nut.
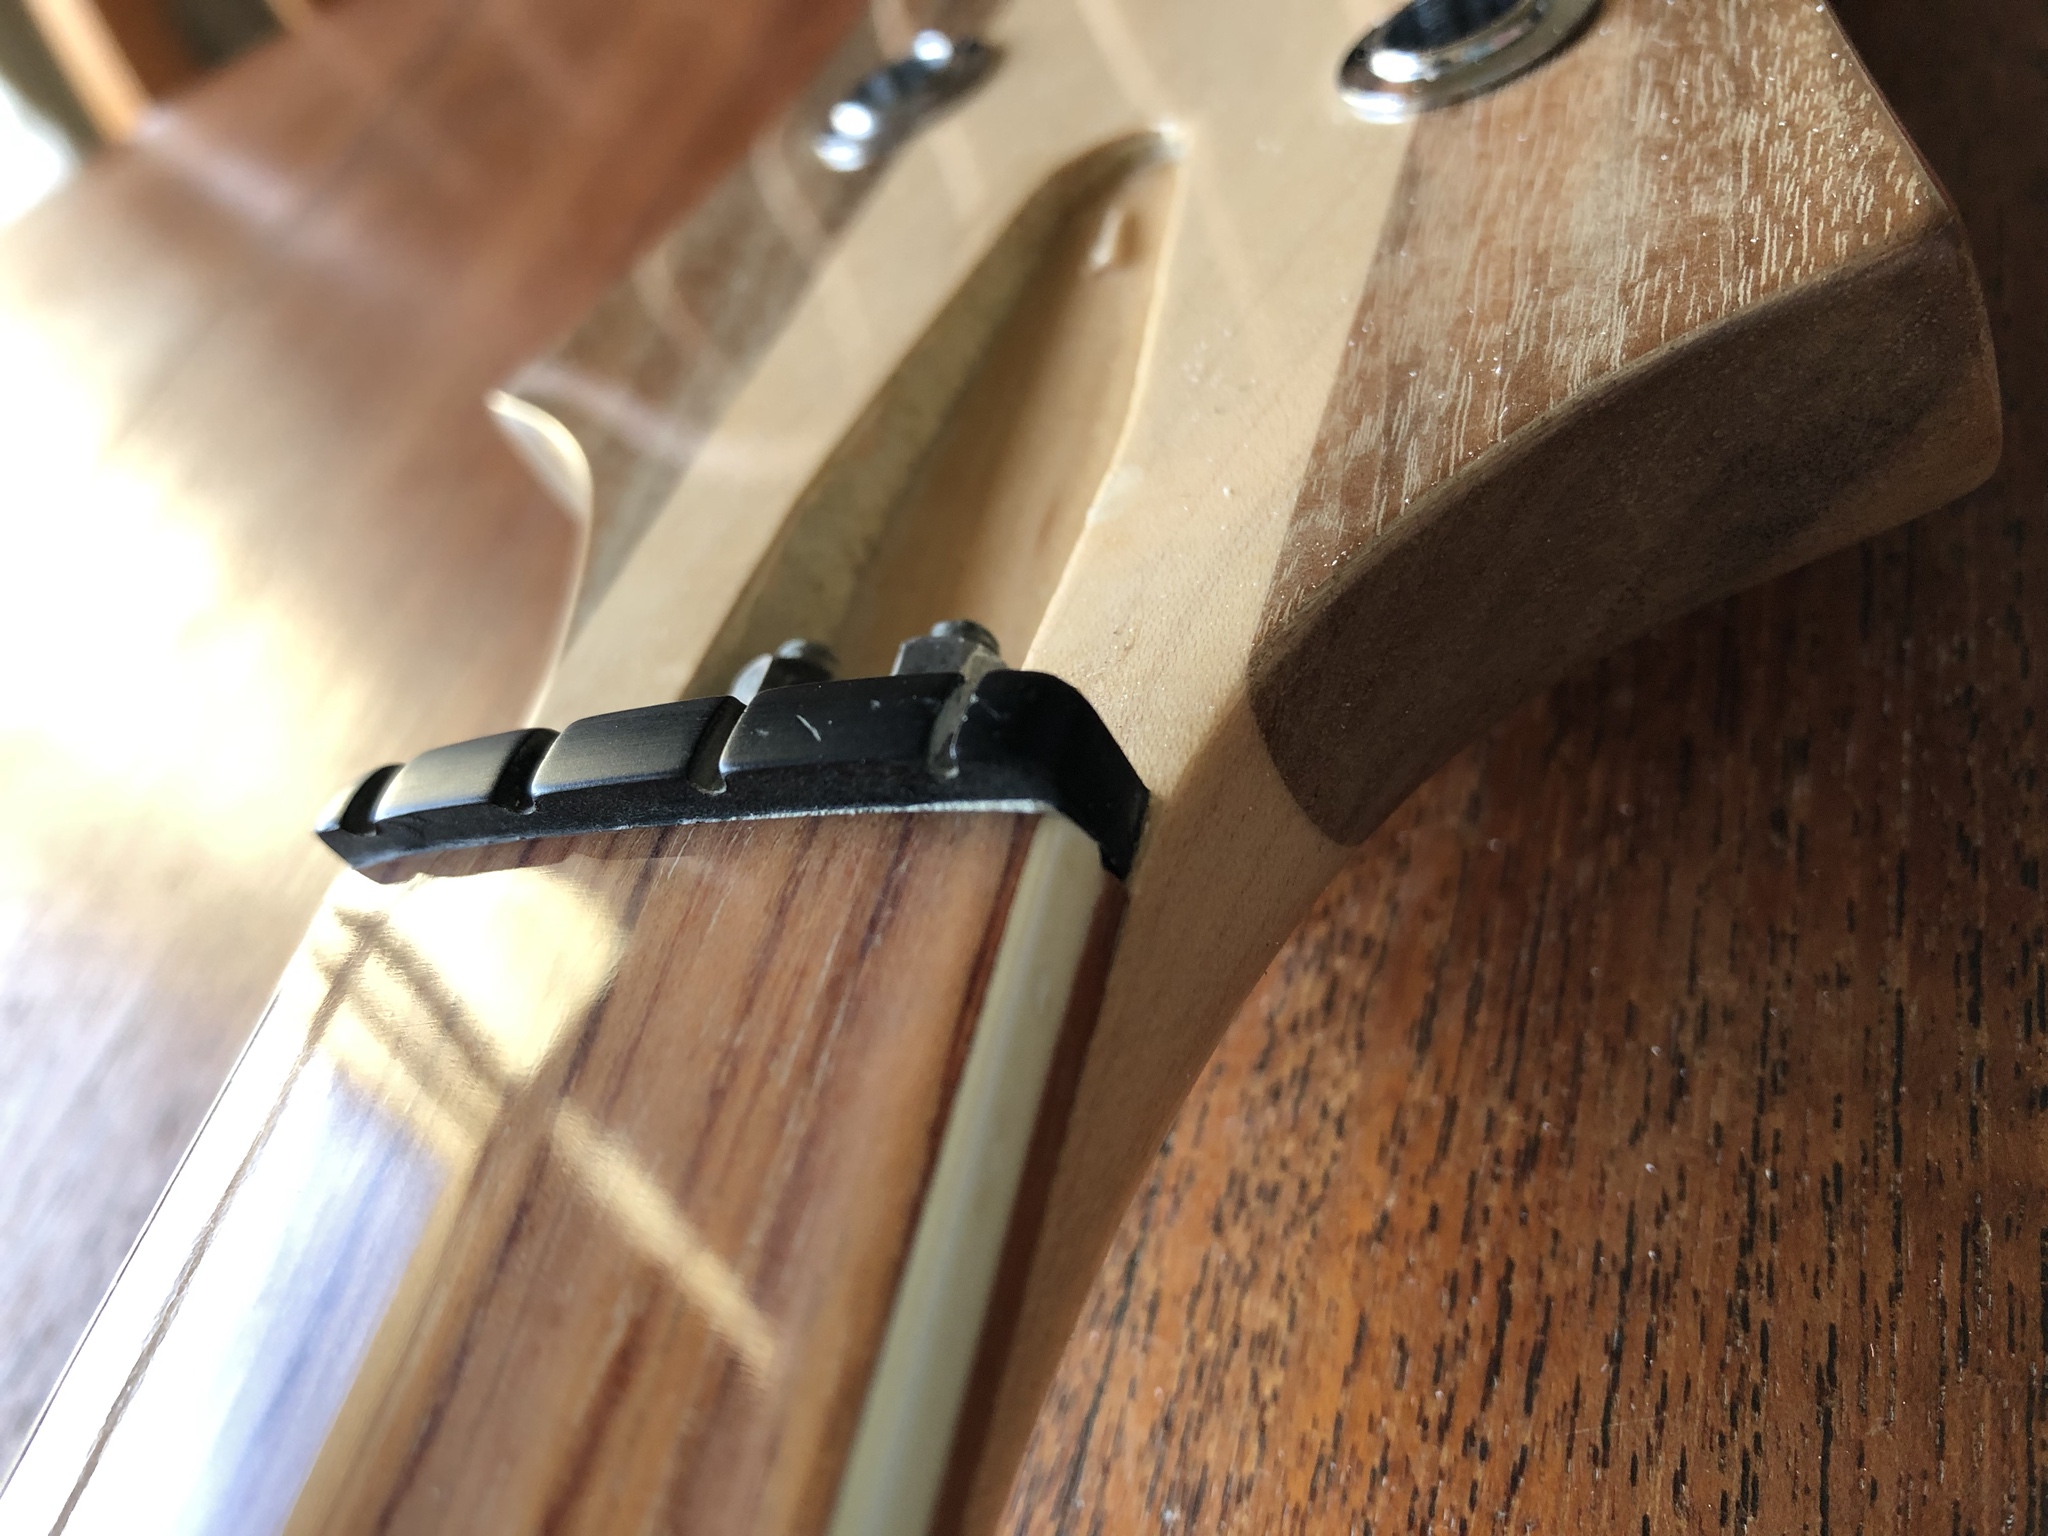
Notice the weird lump of un-routed wood at the end of the truss rod cavity in the headstock and that the binding stops beyond the end of the fretboard, creating a small gap between the nut and the end of the fretboard.
Another issue I have is with the finish on the headstock. It is hazy, cloudy, swirly and soft. The grain is visible quite clearly in the walnut wings, in a way that suggests the finish isn't adhering well to the wood. See the photo above. I can't polish this lacquer further.
I've cut down the bridge height adjuster screws. These are long setscrews that protrude above the top of the bridge. Not too fun to rest your hand on or around! There is no reason for them to be this tall, therefore they aren't any more on mine:
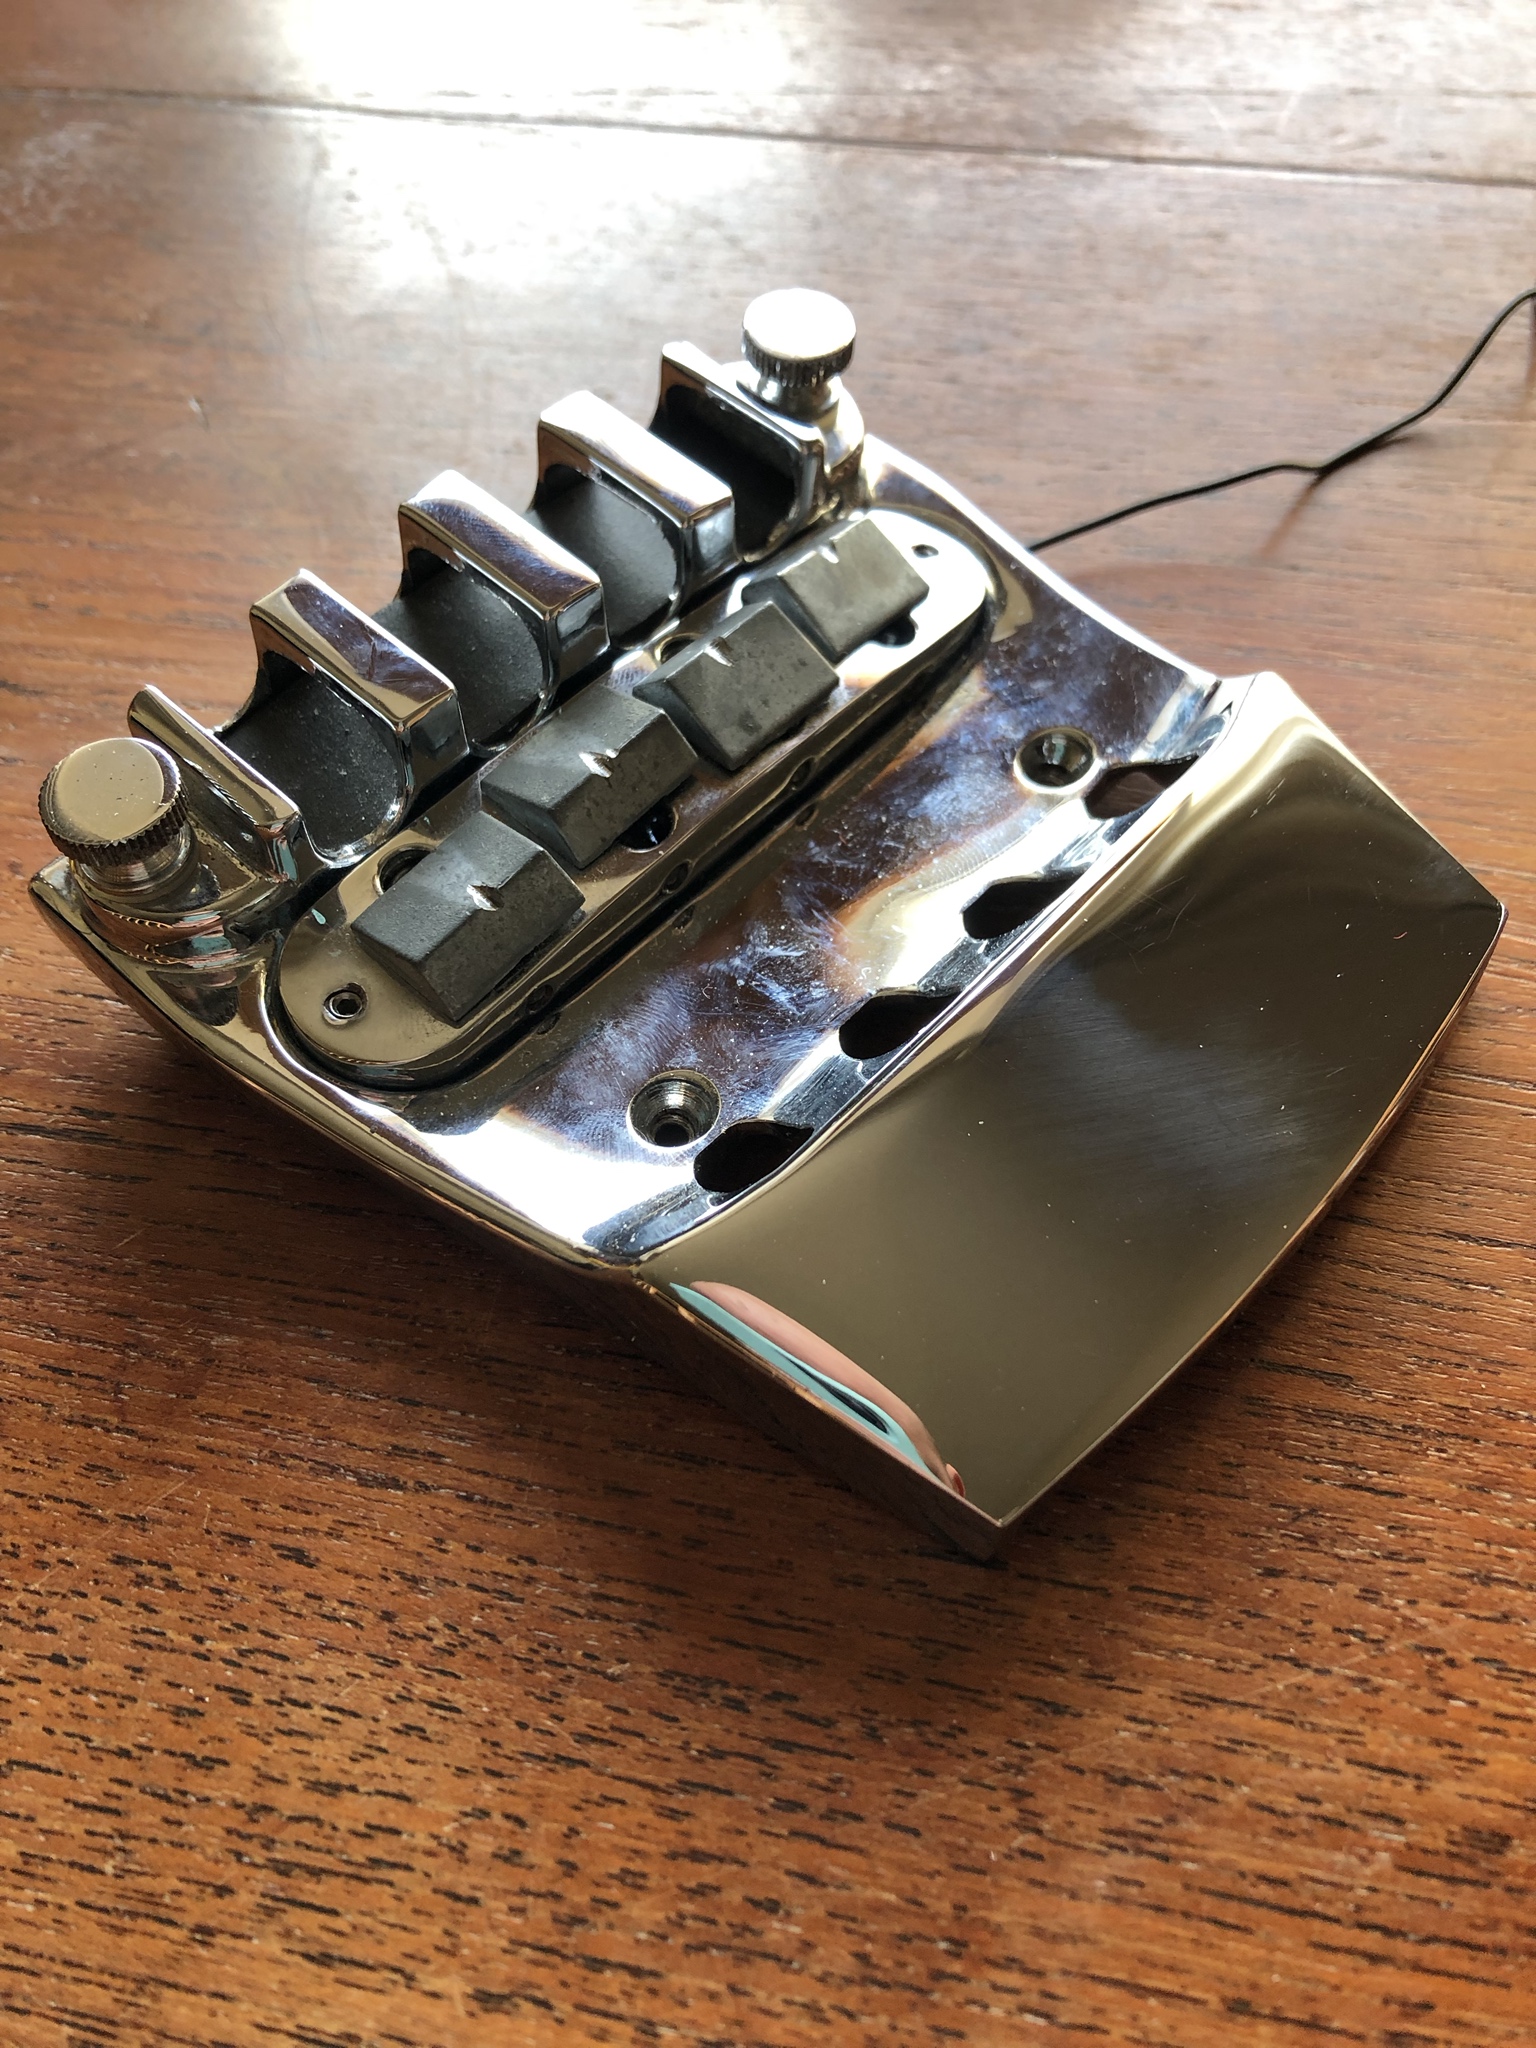
The bridge needs a polish. On mine, the bridge is grounded via a black wire tack-soldered onto the carriage the mute foam sits on. Remove the mute (or the screws that adjust it) and the bridge might not be grounded. This might not be a stock feature on my bass, as the wire was part of the star grounding setup.
When the bass arrived the bridge pickup was loose. The carriage was firmly mounted into the bridge pickup surround, but the pickup coil/bobbin and magnet were rattling around and striking the strings. Not good! I tightened up the pickup assembly, but it came loose again pretty quickly. The problem is that the two screws that thread into the back of the bobbin have been over-tightened before and stripped out the thread in the plastic. Bad news.
The good news is that I was planning to do the RWRP mod to this bass anyway, so I needed to get the bridge pickup in bits one way or another:
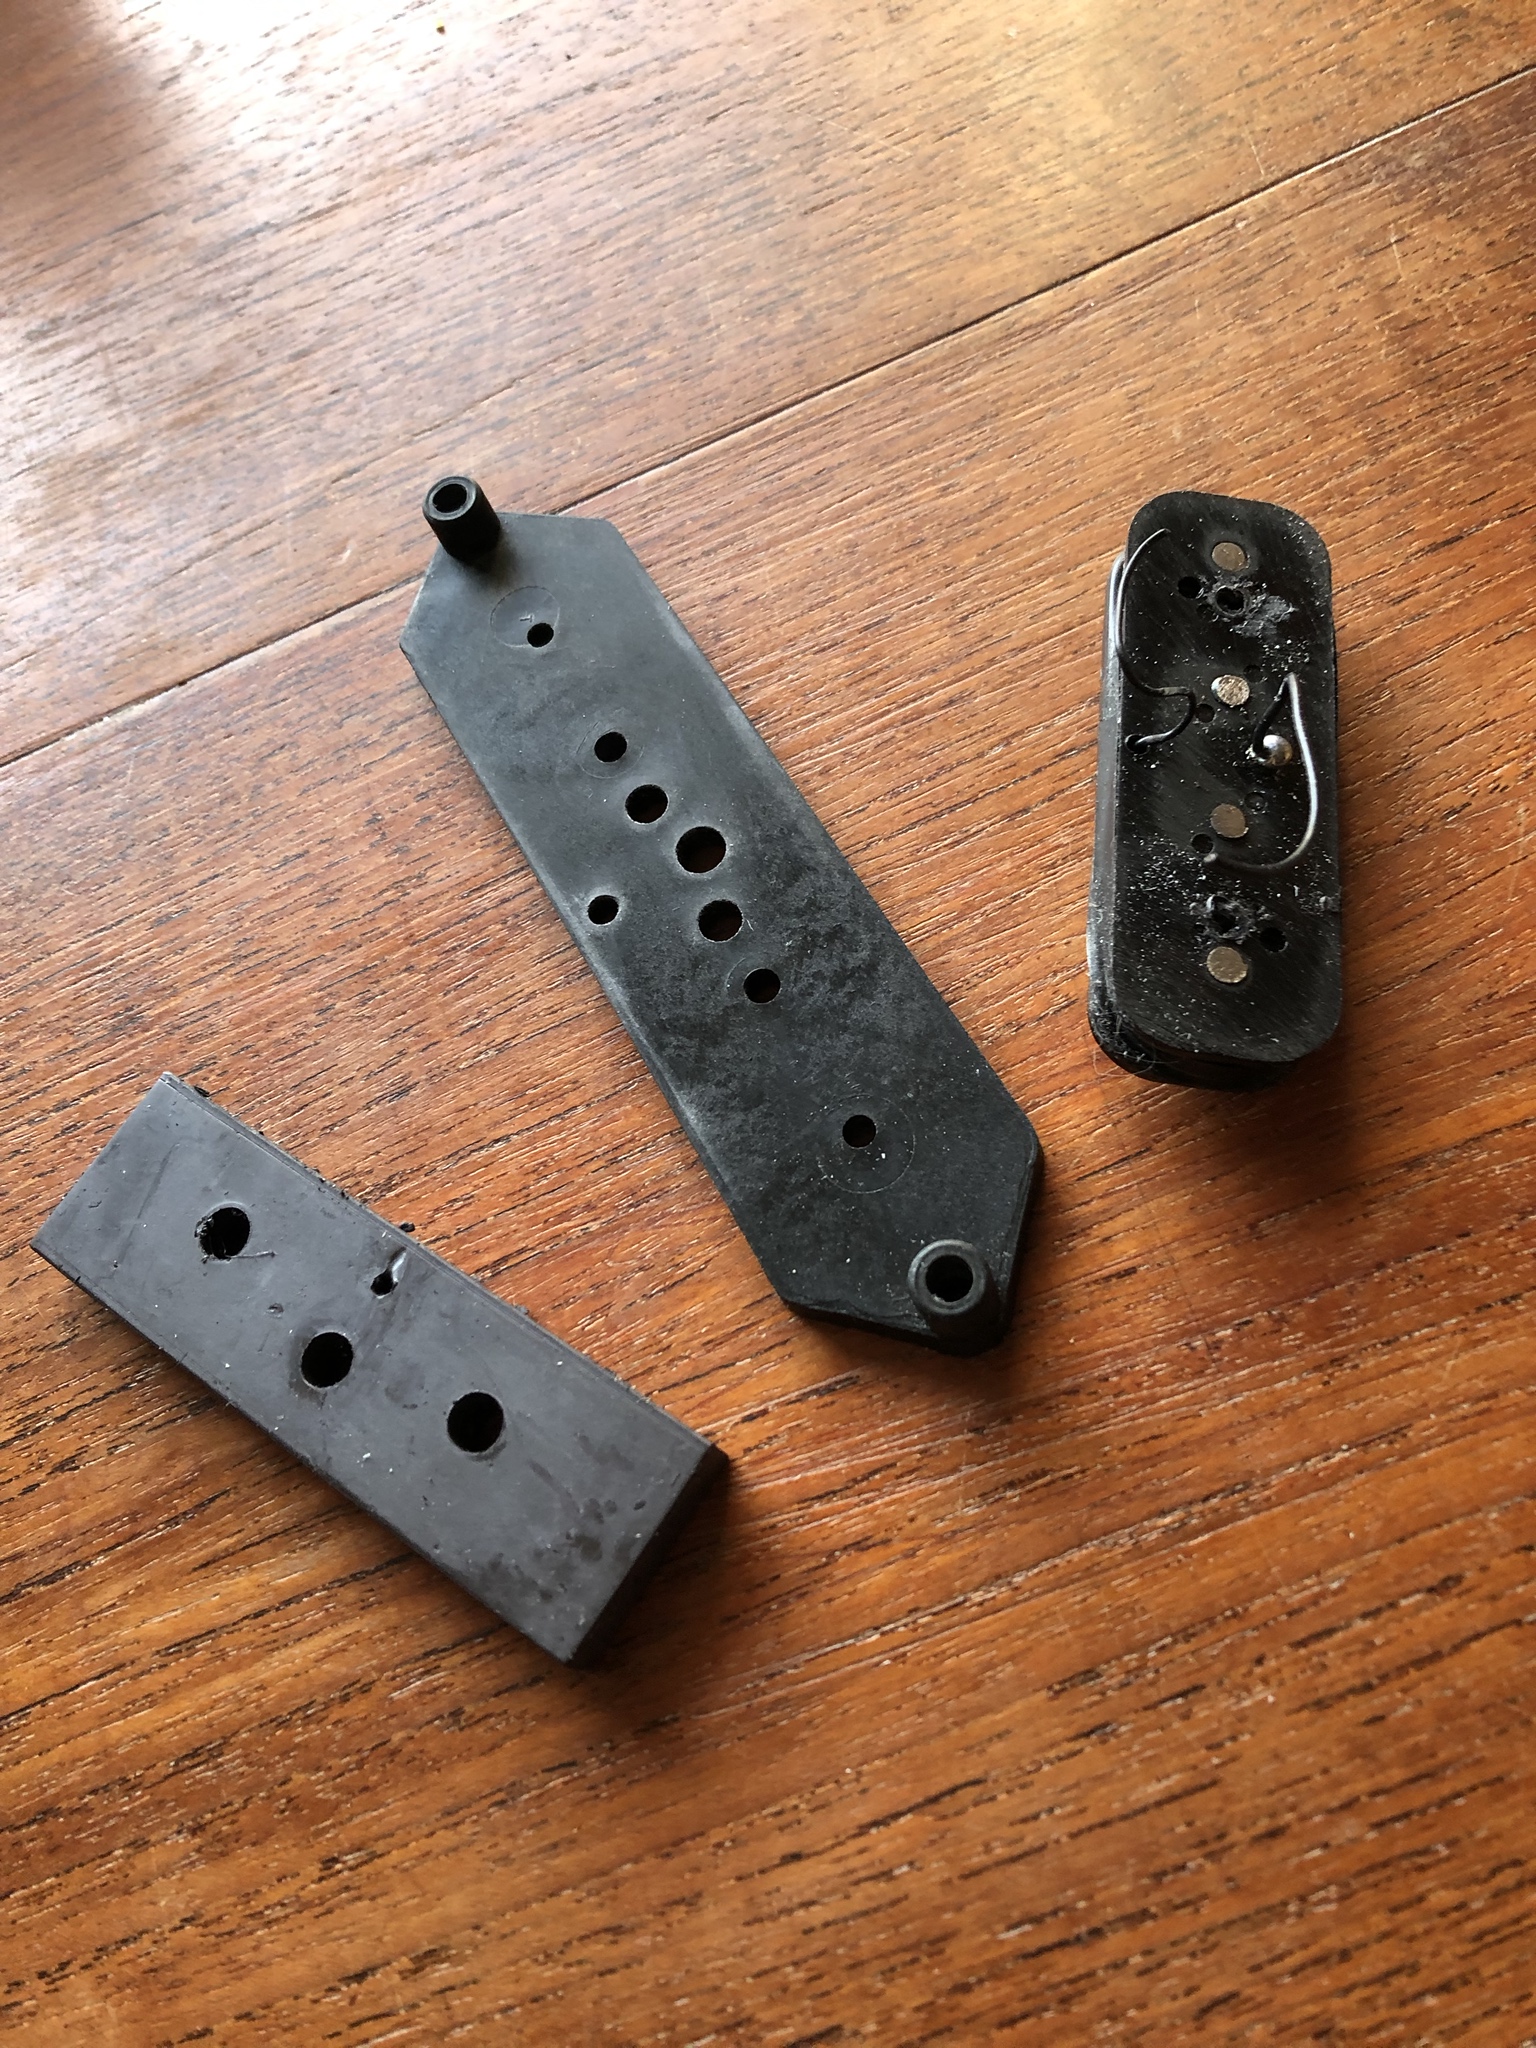
Magnet, carriage and coil/bobbin assembly. Remind me how much these things cost to replace?! This is some janky engineering.
The bass itself is from the 28th week of 2009. Some view this era as Rickenbacker's 'lost weekend', as they were working quickly to try and offset a backlog of orders. Production got a bit boring during this era, with the range of models and finishes reduced to the bare bones. In the case of my bass, the electronics are badly and somewhat illogically soldered and the finish is thin, sticky and hazy in places.
I'm not a purist by any stretch of the imagination. This bass sounds great as-is. The slightly nasal Rickenbacker tone is there, even when you play it unplugged. There is a granite-hard fundamental underneath every note, but that excellent spray of harmonics on top. This bass can be surprisingly bright and brash sounding, or it can produce a deep, fat rumble.
Ultimately I don't see Rickenbacker instruments as sacred objects, and I see no point in defending the indefensible. Parts of this bass demonstrate absolutely top-shelf levels of detail and craftsmanship. Other sections fall short of the mark and could do with being improved.
My bass:
Also my bass:
The shielding paint in the cavities is not factory stock. Somebody applied this paint and installed a star-grounding wiring scheme to link the painted sections together.
My first job today was to remove the hump from the pickguard. Attributed by some as a template error, Rickenbackers from this period have a 'double hump' down by the pickup selector switch. Once you see it you can't un-see it.
This is my attempt to un-hump the pickguard. I used a rasp, and various grits of sand paper, to smooth this out.
I've also re-crowned the frets and polished them out. There is green marker ink on the upper fret ends, so I reckon somebody has done some work on the frets already. However they left the frets a wee bit rougher than I'm used to. I've also started polishing the fretboard as once I've finished the adjacent fret.
Before:
After:
I'm using Poorboy's SSR-1 polishing compound and Poorboy's EX-P finishing wax to make these shine.
I also shaved the top of the nut down. This might not please the purists, but there is no reason for the strings to disappear down to the bottom of deep channels in the nut.
Notice the weird lump of un-routed wood at the end of the truss rod cavity in the headstock and that the binding stops beyond the end of the fretboard, creating a small gap between the nut and the end of the fretboard.
Another issue I have is with the finish on the headstock. It is hazy, cloudy, swirly and soft. The grain is visible quite clearly in the walnut wings, in a way that suggests the finish isn't adhering well to the wood. See the photo above. I can't polish this lacquer further.
I've cut down the bridge height adjuster screws. These are long setscrews that protrude above the top of the bridge. Not too fun to rest your hand on or around! There is no reason for them to be this tall, therefore they aren't any more on mine:
The bridge needs a polish. On mine, the bridge is grounded via a black wire tack-soldered onto the carriage the mute foam sits on. Remove the mute (or the screws that adjust it) and the bridge might not be grounded. This might not be a stock feature on my bass, as the wire was part of the star grounding setup.
When the bass arrived the bridge pickup was loose. The carriage was firmly mounted into the bridge pickup surround, but the pickup coil/bobbin and magnet were rattling around and striking the strings. Not good! I tightened up the pickup assembly, but it came loose again pretty quickly. The problem is that the two screws that thread into the back of the bobbin have been over-tightened before and stripped out the thread in the plastic. Bad news.
The good news is that I was planning to do the RWRP mod to this bass anyway, so I needed to get the bridge pickup in bits one way or another:
Magnet, carriage and coil/bobbin assembly. Remind me how much these things cost to replace?! This is some janky engineering.