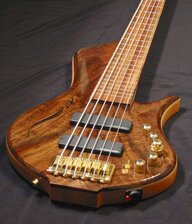
Here's how I do it:
It requires a roll of masking tape, a pencil, (2) accurate steel rules at least 18" long (slightly longer is better) OR (2) straight edges without marks of the same length (aluminum bar, etc.)
The first and most important thing is to establish the center line of the neck. Do this by applying a piece of masking tape down the center and measure to find a center point at the nut and a center point at the big end. Draw a line to connect the points. We'll use this later.
Take the body and neck and put them on a flat surface together. You now need to find the location of the bridge position - both lengthwise (for proper scale) and sideways (for alignment with the neck). With the neck assembled in the pocket, apply 3 strips of tape to the body from the sides of the neck all the way to the end of the body and down the center of the body. We are going to mark the location points on these pieces of tape. Now, lay the straight edges along side of the neck. Push them against the sides of the neck so that they align with the neck's taper. If you are using steel rulers put the 17" mark on the 12th fret and do the same for the other side. Tape the straight edges in place. They will be over the tape you put down on the body but with enough tape showing to make marks for the bridge. Now, at the 0" tick, make a mark on each side of the tape pieces. See what you've got now? These two marks are exactly 17" from the 12th fret (establishing the proper 34" scale) and a guide line drawn between them is perfectly parallel to the 12 fret!
The next thing is to continue the center line. A mark made in the center between the 2 neck lines is the center of the bridge. Make the mark and extende the line you drew on the center of the neck all the way through the bridge location. Now you have a centerline (and 2 sidelines for guides) and a perpendicular mark across the centerline that shows the starting point for your saddles.
I set my saddles up at about 75% of their full extension. I do this because setting the intonation (in about 99% of cases) involves extending the string vibrating length. Once the saddles are set at the same length, lay the bridge on the body using the guidelines for location and squaring. At this point I usually will tape the bridge in place for the next step. Sometimes I've drilled the bridges holes with directly through the bridge while it's taped on the body but my other preferred method is to take a sharp probe and punch the location of the center hole of the mounting system. I'll completely drill that hole and install the one center screw. Then I can re-square the bridge and make another hole for one of the screws on the sides of the bridge. Once that is in, the bridge is square and I can sink the rest of the mounting screws without fear that the bridge will shift during the process.
Hope this helps!