• TalkBass has been independent since 1998. Add your voice.
    Create a free account to reply to discussions, view embedded media, and browse with fewer display ads.
    Join freeLog in
    Want zero display ads or expanded classifieds tools? Compare plans.

Getting first custom made bass built!!

Andy has said that he has carved the neck and is getting ready to radius the fingerboard.... I can't wait to see more pictures. Next he will set the neck and begin the work to join the single cut to the neck and shape the body. I just can't wait! This is the exciting part!!! Where the body becomes one with the neck and the instrument takes shape!
 
New pictures of the build!!!

IMG_1801_zps0099e1bf.jpg


Andy's home workspace

IMG_1807_zps95b0c287.jpg


The home built fret shaper

IMG_1802_zps547d3739.jpg


The neck comes alive!

IMG_1804_zpsfd76fe60.jpg


Cant wait to see this wood pop when finished

IMG_1803_zpse06b1227.jpg


IMG_1805_zpsa17b5177.jpg


IMG_1806_zps2704797c.jpg


His words from over at Luthier's corner:

"Well as noted, I have some pictures as of about 10 minutes ago. The natives (kids) are getting restless so pardon the rushed post. The neck is fretted, but I still need to level and dress the frets, maybe tonight once the kids are sleeping. The truss rod cover is still pretty rough, and just setting in place for now, but I thought that it was a good visual. The first pictures are just the tools I use for fretting including a fret wire bender that I made with some roller blade wheel bearings. Works like a champ, and cost about $5. Anyway, here are the pictures."

I feel like a proud father waiting for my child to be born! Andy is just so gifted... I am lucky that he has allowed me to be a part of his legacy!

Seriously, I hope that he will build my next bass. I am already have a million ideas!

What a gift!!! Thank you Andy!!
 
In all seriousness, you are the one that provided me with the gift. It gets really easy to design in a vaccuum, but ideas may get limited. You allowed me the ability to step outside my own comfort zone and create something that I would never have thought of if it weren't for your input. That is the true gift, some perspective. I cannot wait to glue this neck into place and start carving, carving, carving, and a lot of sanding:rollno: Thanks again
 
Just wanted to pop in before I head off to class. Tomorrow I plan on routing the cavity for the pickup housing and continue with the carving. There is a lot of work with carving this thing. I usually put a round over bit on the router and round over the edges, and then carve the necessary areas. That won't work on this design, just because there are so many angles and curves, and i think that it would jsut end up looking bad, so I am just carving everything by hand. Developing a lot of respect and patience with this burl, its not the easiest to carve but I got the hang of it. Its hard to tell from the pictures, but the bridge is recessed into the body, and the belly carves are taking shape. I will be getting better pictures tomorrow along with more progress. Loving this build.
 
Andy just posted a bunch of new pictures over in the Luthier's corner... I thought I would share...

Andy's words "There has been a good amount of progress since this last post. I was able to get the neck glued in place as well as getting the frets all dressed. I got a good amount of the heel transition carved, but there still is some work to be done along with filling in some more voids in the burl. Some will get carved out as well as routed out, so thats a good thing. I also got the recess routed for the bridge as well as routed the cavity for the pickup housing. I still have to drill the holes for the string through portion of the body and counterbore the ferrules. The control cavity still needs to be routed and more carving will be taking place. I also need to get going on the headstock inlay. By the end of next week it should be all ready for final sanding and prepwork. Here are some of the pictures. Sorry again for the lack of working photos, maybe I will get some when I start on the inlay since that will be done at home. Enjoy"

The pickup Housing:
IMG_1823_zpsf5661313.jpg

IMG_1825_zpsbe4ef980.jpg

The housing allows for different pickup placement for different sounds

Top of pickup cover
IMG_1826_zpsbdfdf92c.jpg

IMG_1827_zpsa5cf7c12.jpg

IMG_1828_zpse115ef30.jpg

IMG_1829_zps1e71e3a4.jpg

IMG_1830_zpsfa8c5d12.jpg

IMG_1831_zps277323c4.jpg

IMG_1832_zps0444e3f5.jpg


She is coming along so nicely... I cant wait now until the finish is applied and then clear-coated...

I just think she will be stunning!!!!

Keep checking in!!!!!:hiding:
 
new progress p0rn!!!

Andy's words:

"I just want to thank everyone again who is watching this build progress, and it is almost coming to an end on the woodworking side I do have a few updates, not as many as I hoped for, but still quite a few. I was able to get the holes drilled for the string through ferrules, and countersunk in order to be flush with the back. The holes were drilled for mounting the pickup housing. I also was able to route for the control cavity and also recess the conklin style input jack. This was the first time that I have messed with this type of jack, so I had to figure out a mounting scheme. This was also an afterthought after the design was finalized, so I had to find the best (flattest) spot to mount it to. I am very pleased with the results. I always liked these jacks, and I am glad that I had a chance to utilize it. I wanted to drill for the strap locks and make the control cover, but I will get that done this week sometime. still need to detach stock input jack. plenty of room for 18V setup.

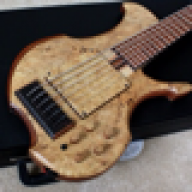
So I got real excited and sealed the pickup housing, since it was all sanded and ready to go. It still needs to be sanded down and built up with finish coats, but I just wanted to show the variance and characteristic of this wood to you guys. I think that it will look awesome once its all topcoated

Here are some pics:

IMG_1843_zps02244d8b.jpg

IMG_1844_zps053a82bc.jpg

IMG_1846_zpsdc7bde58.jpg

IMG_1847_zpsf8347a29.jpg

IMG_1848_zpscb23585a.jpg

IMG_1849_zpscfcaf4b4.jpg

IMG_1850_zpsb55aa8f3.jpg


more to come in a few days!!!!

I hope you are enjoying this build!