
• TalkBass has been independent since 1998. Add your voice.
    Create a free account to reply to discussions, view embedded media, and browse with fewer display ads.
    Join freeLog in
    Want zero display ads or expanded classifieds tools? Compare plans.

It's not a bass but I thought I would share...

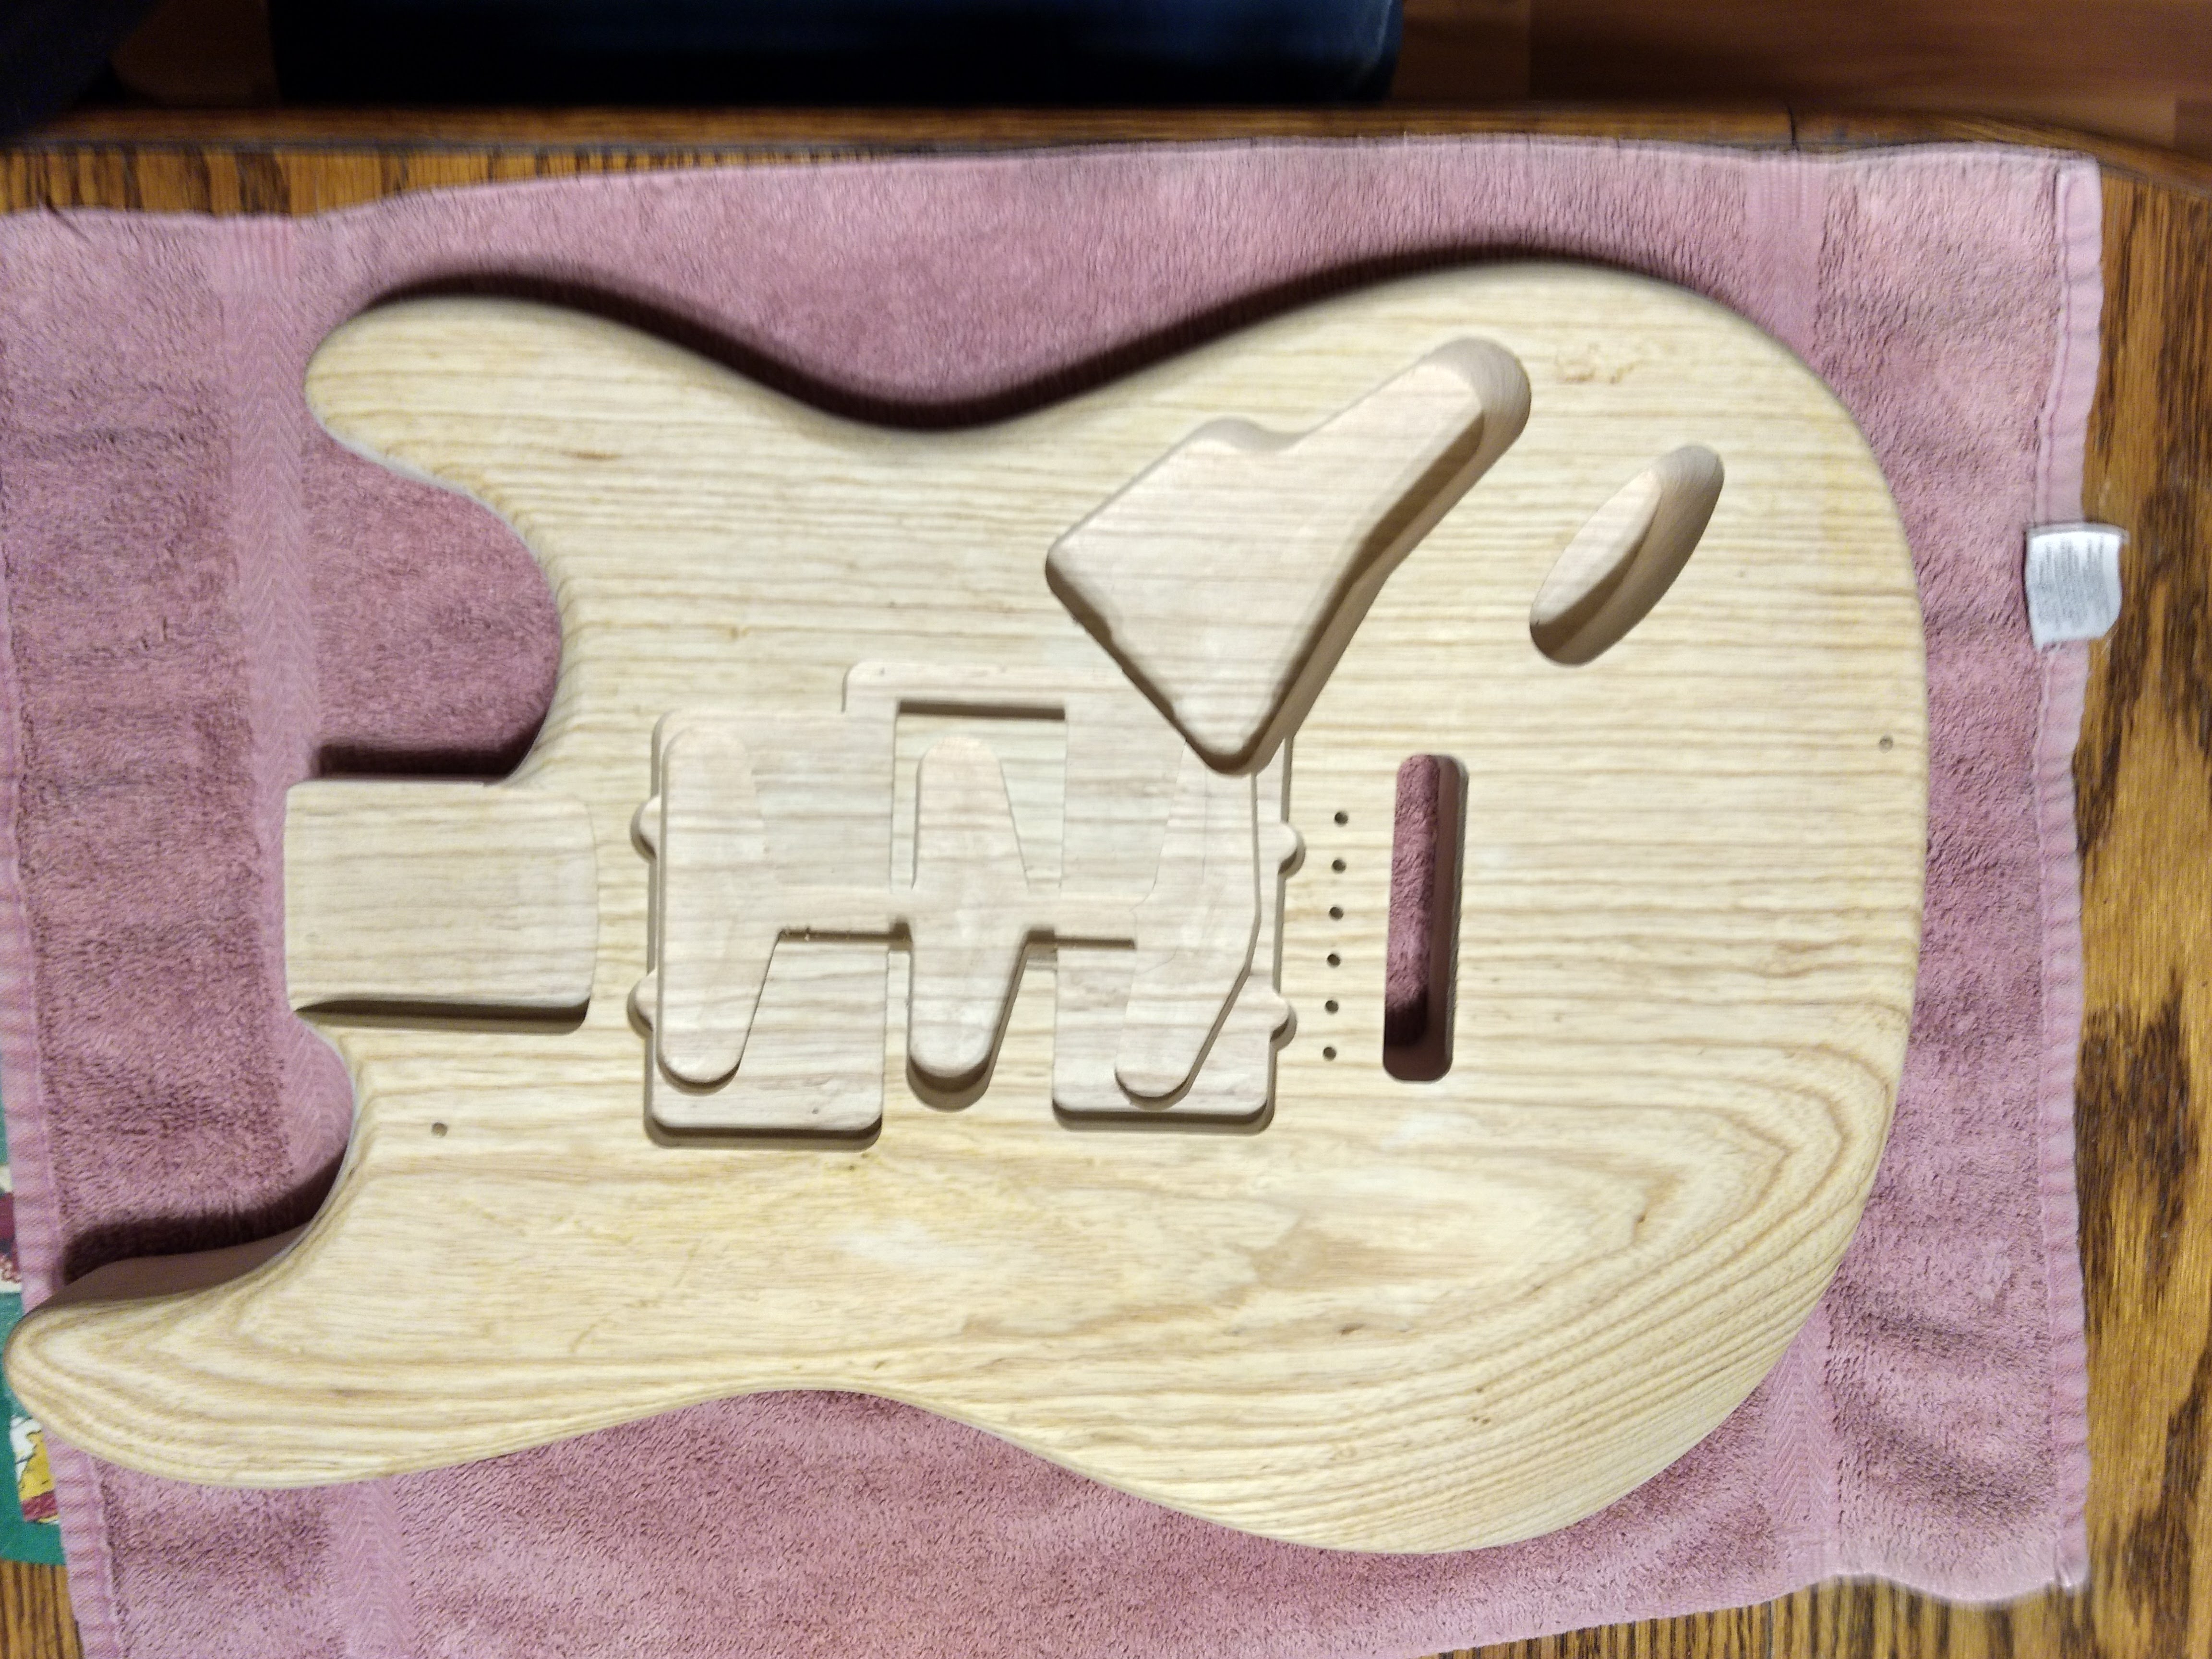
I guess this is ok to post here. I recently acquired a Strat body from a friend. He had gotten about eight bodies from someone who was apparently experimenting at learning how to route guitar bodies. To say the shape was rough would be a massive understatement. The back curve of the body had a gouge about an eighth of an inch deep on the lower part. The edges of the rest of the curves we're stairstepped around the rest if the body as well as the tummy cut and a m cut. I didn't get a photo of the body when I got it but using a belt sander I was able to get it Strat shaped to a certain degree and then got to work with the sandpaper and elbow grease.
IMG_20171209_191925591_HDR.jpg


You can see in the picture the guy got a little router happy with the pickup cavity. It looks like he used a J bass pickup pattern in addition to the Strat style and a humbucker shape. The neck pickup route was too high up on the body and was showing above the pick guard curve so I had to add a bit of scrap wood. I think it will blend in ok once the color is on. The body is a nice one piece ash and really needs to be in a transparent finish but I want some color and not just a clear over it. I'm going to try something like this...

IMG_20171217_214122517.jpg


That was a mock-up from the warmoth site to see what different colors looked like on ash.

Since I haven't done anything like this before I have been watching videos on YouTube to get ideas and have settled on using artist oil paints for the color. It to me seems the most forgiving out of the options I have seen.

Anyway...I had to fill the grain since I want to do a smooth high gloss finish on it. I'm pretty limited in what the local store has to use. For grain filler I used a wood filler by Elmer's. It dries in a natural wood color. It looks like raspberry cake icing when it goes on but dries pretty quick. I would apply it with a spatula and then scrape it off with a plastic scraper and then sand it down til I could start seeing the grain again. I got a very smooth surface but probably should have done this sooner in the process.

Here is where I am right now...
IMG_20180319_215620863.jpg

IMG_20180319_215616141.jpg

The grain isn't quite as pronounced as it was before but I'm happy. I also filled the trem holes and plan on using instead a two point Wilkinson trem. Where I repaired the too large pup cavity can be seen.
Here is the back...

IMG_20180319_215630048.jpg

You can see ehere I tested some dye in the trem cavity when that was the plan. I'll probably paint over it.

So that's where we are. The body contours are no where near what Leo Fender did, but the look pretty good to have been done pretty much totally by hand. I'm hoping to start putting the color on it in the next couple of days. I have all of the parts I need to finish it up. I'm thinking either straight purple or maybe a purple burst.

I hope it is ok to post this here...

BnB
 
For my part, you're welcome to post here.:D I enjoy builds / repairs about piccolo basses.:)

If you want the grain to really stand out similar to the Warmoth picture, you might try some dye or tint in the grain filler. Then, as that fills the grain and pores, it will also color them making them more visible under a translucent finish.
 
  • Like
Reactions: bound'n'blocked
For my part, you're welcome to post here.:D I enjoy builds / repairs about piccolo basses.:)

If you want the grain to really stand out similar to the Warmoth picture, you might try some dye or tint in the grain filler. Then, as that fills the grain and pores, it will also color them making them more visible under a translucent finish.

I have thought about giving the body a very thin wash of the purple dye I have. Maybe water it down considerably before using the artist oils. Im not really sure at this point.

BnB
 
Update...

The artist oil paint didnt work. I'm thinking there are two reasons for this. One is the substance I used for the grain filler. Everywhere it was used made the paint get blotchy. I also think I had too smooth of a surface to work on. I'm thinking that the paint had nothing really to get a grip on.

IMG_20180320_213502420.jpg


I wiped it down with mineral spirits to get as much as I could but a lot of the paint was left behind. I then wiped off as much of the spirits as possible and tried some dye I had. I would barely go on. I'm going to leave it til tomorrow night or the next day try the dye again.

Is there such a thing as too smooth?

BnB
 
My guess would be that the filler won’t take the paint or dye very well, if at all, and the filler is pretty much all over the body now.

I had grabbed something else, but he store guy suggested what I ended up using because, as he said "It takes stain really well and it dries to a natural wood color". Apparently, the stuff I had grabbed dried to a weird pink color or something, which might have looked ok on a purple body.

I'm going to backtrack a bit, and try sanding it with some 220 or 320 to put a little grit back on the body. Honestly, this is the best sanding job I have ever done. I was really proud of how smooth it was. I think I might have just forgotten about roughing up the surface when you are doing a refinish and went too far the other way.

I would hate to, but I can always primer it and paint it a solid color.

EDIT: If you look in the pickup cavities, where I didn't use any filler, you can see what color it would have been...

BnB
 
Another update...

I tried sanding the area underneath where he pick guard would be and part of where the upper horn is with some 220 grit sandpaper until I could feel a but of roughness. I then tried some of the dye in the those areas and while it took the dye a little better than before it still is blotchy with some areas where the filler is stil very light. I suppose I could sand it down considerably and try the dye but u u don't know how f I want to go through all of that trouble at this point. It is very smooth and I am considering just priming and painting.

Here is a picture. The lighter spots mixed in with the purple are areas that just won't take any color...

IMG_20180321_235237679.jpg


BnB
 
Another update...

This I think I can work with...

IMG_20180322_210521074.jpg


I had pretty much decided I was going to just paint the body (I still might) and had already looked at a color. But then I figured what the heck, try one more time...what have I got to lose.

I sanded the whole body pretty vigorously with some 220 grit sandpaper to get the body not so smooth. I gave the top three or so coats if dye. The brand I'm using is Ultra Dye from Hobby Lobby. Some parts got more because of the splotches I was still getting. I laid it on thick and the wiped it down. The sides got a coat or two as well. Only the back is left.

I can't see the grain as well as I had hoped but it is there. This dye is pretty vivid color wise. It doesn't sand very well either so trying to sand some of the grain up probably won't work, but I might try it anyway. Again, what have I got to lose?

Here is s picture with the flash, helps see the color a little better.

IMG_20180322_210527088.jpg


Any comments welcome.

BnB
 
Even another update...

Earlier today I sanded the entire body with 320 grit paper hoping to get out some of the inconsistent spots. The front looks ok to my eyes, but the back has some places that just won't take any dye.

Pics of the front and back after the 320 sanding...
IMG_20180323_222505763.jpg


IMG_20180323_222519444_BURST001.jpg


The lighter spots on the upper part are the issue. I tried sanding down that area a little more but it doesn't really help. I gave the body a few more coats of dye. I think I'm going to stop here. The more I put on the more tacky it gets. I think I'm going to move on to the clear coat. I'm going to use minwax wipe on poly, mixed 50-50 with mineral spirits. I watched a video of a guy using it so that's the plan. I have a rattle can clear coat on standby...

Here is what I am hoping the end result will be.

IMG_20180323_233020049.jpg


BnB
 
As with most things, let the dye dry completely (not tacky anymore) and try your finish in an area that will be covered. Maybe the trem cavity. You want to make sure the mineral spirits or poly are not going to start just pushing the dye around as you wipe them on.

Also, are you planning on drilling pickguard, neck mount, etc holes before you get much further with the finish?
 
  • Like
Reactions: bound'n'blocked
As with most things, let the dye dry completely (not tacky anymore) and try your finish in an area that will be covered. Maybe the trem cavity. You want to make sure the mineral spirits or poly are not going to start just pushing the dye around as you wipe them on.

Also, are you planning on drilling pickguard, neck mount, etc holes before you get much further with the finish?

Matt --
Thanks again for being my voice of reason and keeping me restrained! The finish is on my mind so much I'm starting to forget about all of the little things...kind of "the forest for the trees" thing" I guess.

Neck holes and trem holes are so crucial to good setup that it always makes me uneasy to do. I guess I need to get on with it though. I have to drill at work where we have a drill press.

There is an area on the front under the pickguard I might test. I'm not totally sold on the 50-50 mix idea either. If you look at the picture of the back, on the tummy cut there is an area just along the top that looks different from all the other crappy spots. I think that is where some mineral spirits got away from me when I was trying to clear up the first attempt with the oil paints. I can't get it to take any color, at least not much. That makes me worry about the the spirits/poly mixture. I might just go with a spray.

EDIT: come to think of it, I have to drill the neck holes now... I haven't got any way to hang it if I do a spray clear!

BnB
 
Last edited:
Matt --
Thanks again for being my voice of reason and keeping me restrained! The finish is on my mind so much I'm starting to forget about all of the little things...kind of "the forest for the trees" thing" I guess.

Neck holes and trem holes are so crucial to good setup that it always makes me uneasy to do. I guess I need to get on with it though. I have to drill at work where we have a drill press.

There is an area on the front under the pickguard I might test. I'm not totally sold on the 50-50 mix idea either. If you look at the picture of the back, on the tummy cut there is an area just along the top that looks different from all the other crappy spots. I think that is where some mineral spirits got away from me when I was trying to clear up the first attempt with the oil paints. I can't get it to take any color, at least not much. That makes me worry about the the spirits/poly mixture. I might just go with a spray.

EDIT: come to think of it, I have to drill the neck holes now... I haven't got any way to hang it if I do a spray clear!

BnB
Happy to help.:thumbsup:

Do you have the bridge you're going to use? Not all of those posts have the same spacing. Also, the holes look a little small for threaded inserts but I could be seeing things in that one.
 
  • Like
Reactions: bound'n'blocked