So...backing up a bit... I wanted to share a little point of procedure I used to set the
body/neck angle that works really well.
Since this was to be an exposed neck top...
And because I didn't want the fingerboard sitting totally flat on the neck, where it meets the body....but only a very minimal gap under the very end.
(It makes it easier to get a clean transition when final sanding & finish is applied)
But neither did I want the, well over 1/16 gap it would take to grant proper elevation... and remain a "flat plane neck" to the bridge.
So .... prior to gluing the fb on, I routed the body area of the neck down a tiny bit....about 1/32"
You can kinda see the gap here:
Not the best pic...
It starts back maybe 1/4" under the board.
BUT... I knew that would not be enough depth to have the bridge be in the correct adjustability range after the frets & strings were on.
Sure I drew it out before hand, but a secondary physical double check insures success.
So, after the frets were on....I could then lay a straight edge atop the frets and very accurately visualize exactly what I needed for proper bridge elevation.
And exactly how much body - neck angle I needed.
Creating that angle was easy.... on the boards I typically clamp on to keep the wings flush with the neck during glue up. I just glued a couple shims the appropriate thickness to the one I used at the lower bout area.
I made sure I left the neck blank at the body...thick enough to take the angle.
Then after the wing joints were cured up...
I sanded the neck flush to the wings with a belt sander. Being super careful not to gouge the cocobolo top & back in the process.
Taking this extra step (vs leaving it a "flat" plane instrument) and a couple other things done differently, had the result of this bass having killer action and playability.
So....There's that....


Onward & upward....








 really it is....isn't it?




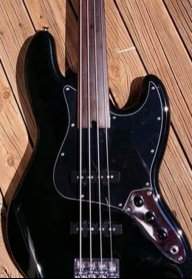

 ....yummy!


