[nice jobQUOTE=Lyle Caldwell;1837634]There have been a lot of questions about shielding and star grounding, so maybe this will help someone.
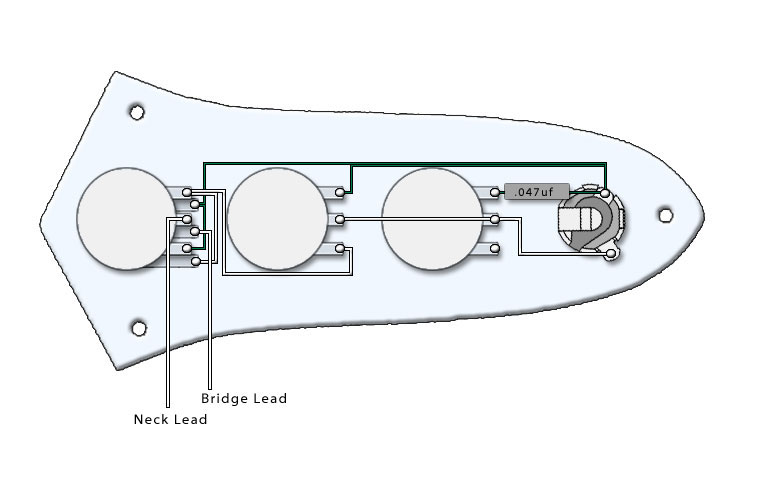
Here's the schematic I came up with to do this with:
First, I took everything out of the cavities and cleaned them to get rid of dust and manufacturing residue. Then I applied copper foil with adhesive backing to the control and pickup cavities. I tack soldered the seams and made sure each piece of foil read 0 ohms potential with every other piece. Then I made copper tubes (wrapped the foil around a screwdriver shaft of the right diameter) that run from cavity to cavity, tack soldered on each end. I also screwed a ground lug to the wall of the control cavity through the copper shielding. See photo:
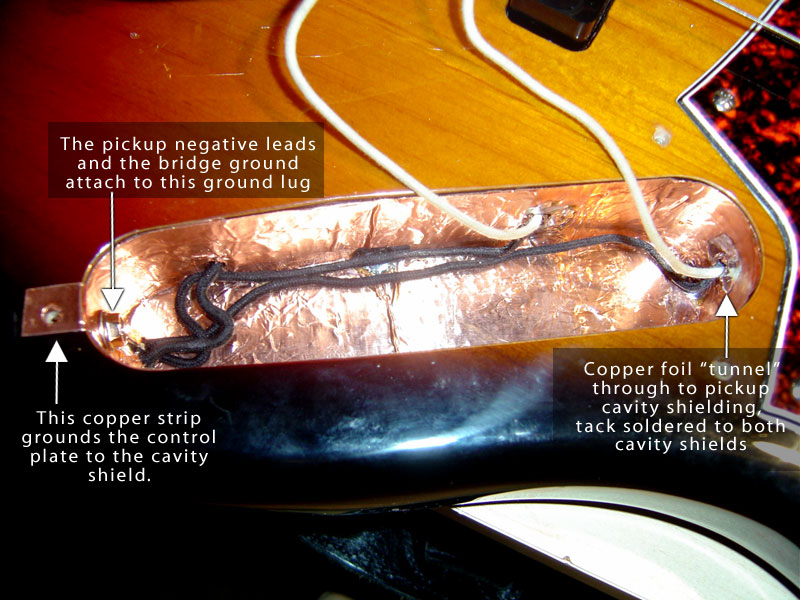
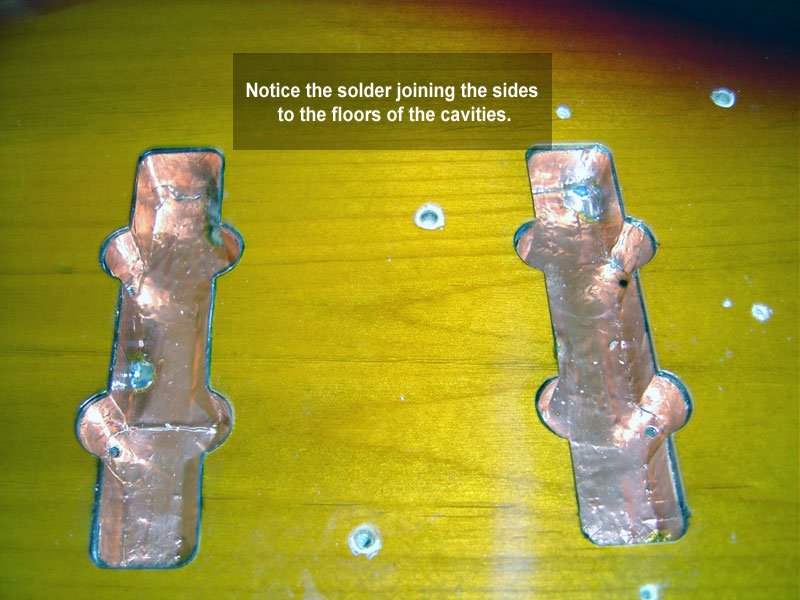
Here's the shielding inside the pickup cavities:
Here's a closeup of the ground lug:

Here's the actual wiring on the pots (reference the schematic above):
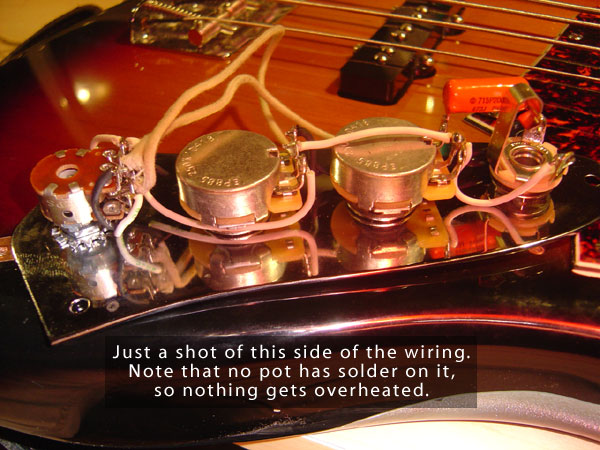
And here is the other side of the wiring:
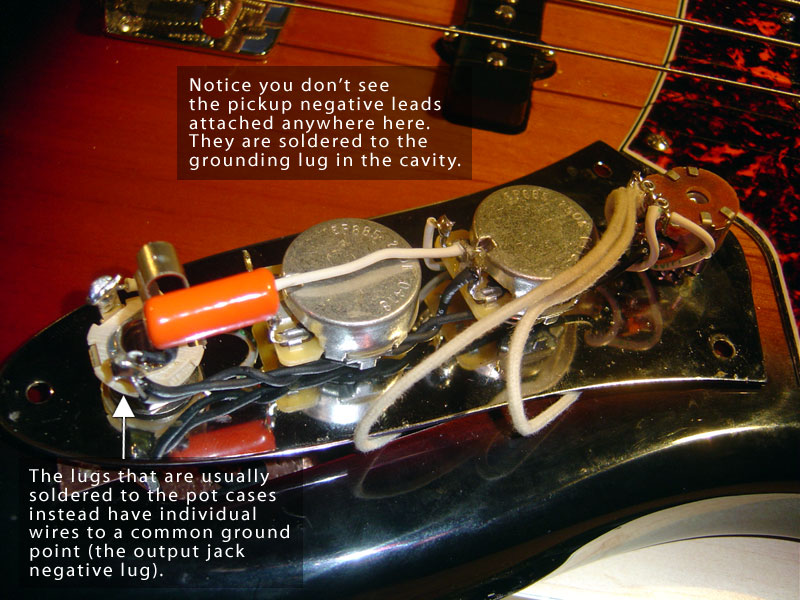
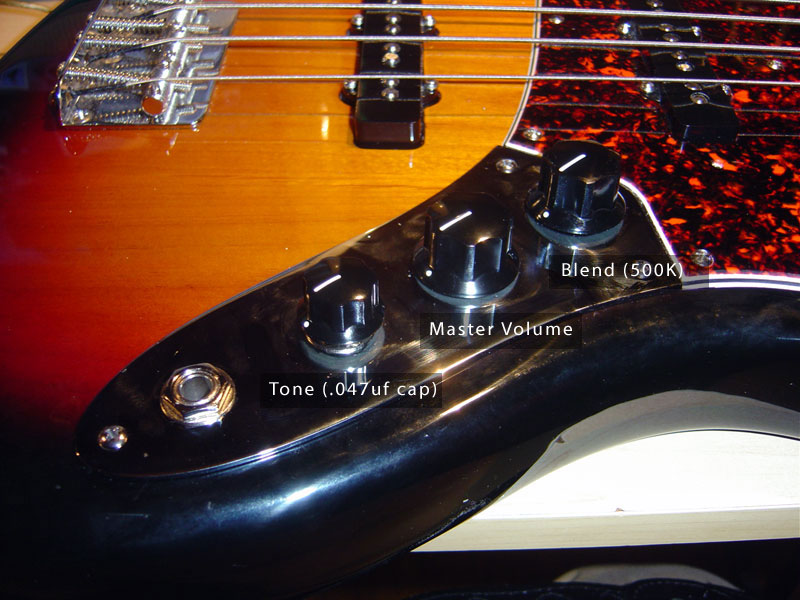
Here's the top side of the control plate:
Now, while there is still single coil hum (reduced, but still there), there is no noise at all when the blend knob is centered, and the bass is quiet even when I'm not touching any grounded metal components (strings, bridge, controls, etc). Soon I will put Sadowsky hum cancelling pickups in and the bass will be dead quiet. I also will be installing a S-1 switch in place of the current volume pot to allow series/parallel switching. I'll post that stuff when I'm done.
But for now, I'm pleased. The bass is much quieter, and the control layout (blend, master volume, master tone) is much easier to work with than the stock 62 RI stacked volumes and tones.
The pickups have much more clarity now without being bright (which I can't explain, really, unless it's the cumulative effects of a lot of little changes, like how the pickups are loaded together in the stock configuration and how the absence of RFI and other environmental noise leads to clarity- who knows?).
The tone control is now also much more musically useful (I changed from the stock cheap ceramic caps to a Sprague 715P .047uf cap- the same value that was on the stock neck tone pot, but this cap, or maybe this schematic, allows for more of the tone to be rolled off if needed, and the "sweep" of the tone pot has a lot more "sweet spots").
Please note that I didn't do the actual soldering with the bass exposed like that. I had towels and scraps of old T shirt to protect the bass surfaces when the soldering gun was out.
[/QUOTE]
Here's the schematic I came up with to do this with:
First, I took everything out of the cavities and cleaned them to get rid of dust and manufacturing residue. Then I applied copper foil with adhesive backing to the control and pickup cavities. I tack soldered the seams and made sure each piece of foil read 0 ohms potential with every other piece. Then I made copper tubes (wrapped the foil around a screwdriver shaft of the right diameter) that run from cavity to cavity, tack soldered on each end. I also screwed a ground lug to the wall of the control cavity through the copper shielding. See photo:
Here's the shielding inside the pickup cavities:
Here's a closeup of the ground lug:
Here's the actual wiring on the pots (reference the schematic above):
And here is the other side of the wiring:
Here's the top side of the control plate:
Now, while there is still single coil hum (reduced, but still there), there is no noise at all when the blend knob is centered, and the bass is quiet even when I'm not touching any grounded metal components (strings, bridge, controls, etc). Soon I will put Sadowsky hum cancelling pickups in and the bass will be dead quiet. I also will be installing a S-1 switch in place of the current volume pot to allow series/parallel switching. I'll post that stuff when I'm done.
But for now, I'm pleased. The bass is much quieter, and the control layout (blend, master volume, master tone) is much easier to work with than the stock 62 RI stacked volumes and tones.
The pickups have much more clarity now without being bright (which I can't explain, really, unless it's the cumulative effects of a lot of little changes, like how the pickups are loaded together in the stock configuration and how the absence of RFI and other environmental noise leads to clarity- who knows?).
The tone control is now also much more musically useful (I changed from the stock cheap ceramic caps to a Sprague 715P .047uf cap- the same value that was on the stock neck tone pot, but this cap, or maybe this schematic, allows for more of the tone to be rolled off if needed, and the "sweep" of the tone pot has a lot more "sweet spots").
Please note that I didn't do the actual soldering with the bass exposed like that. I had towels and scraps of old T shirt to protect the bass surfaces when the soldering gun was out.
[/QUOTE]