• TalkBass has been independent since 1998. Add your voice.
    Create a free account to reply to discussions, view embedded media, and browse with fewer display ads.
    Join freeLog in
    Want zero display ads or expanded classifieds tools? Compare plans.

Laser cutting truss rod covers

Barticus

Supporting Member
Sep 16, 2017
6,931
20,049
Midwest
I finally got back around to this project after several guitar-related woodworking side track projects since the winter break.

I picked up some different varieties of wood from Woodcraft (Bubinga, Zebrawood, Purpleheart, Rosewood, Walnut, Jatoba) and have finally finished my first prototype for one of my Warwicks (replacing the plastic cover). I'm not crazy about the plastic covers on my other basses either, so I plan to replace them all!

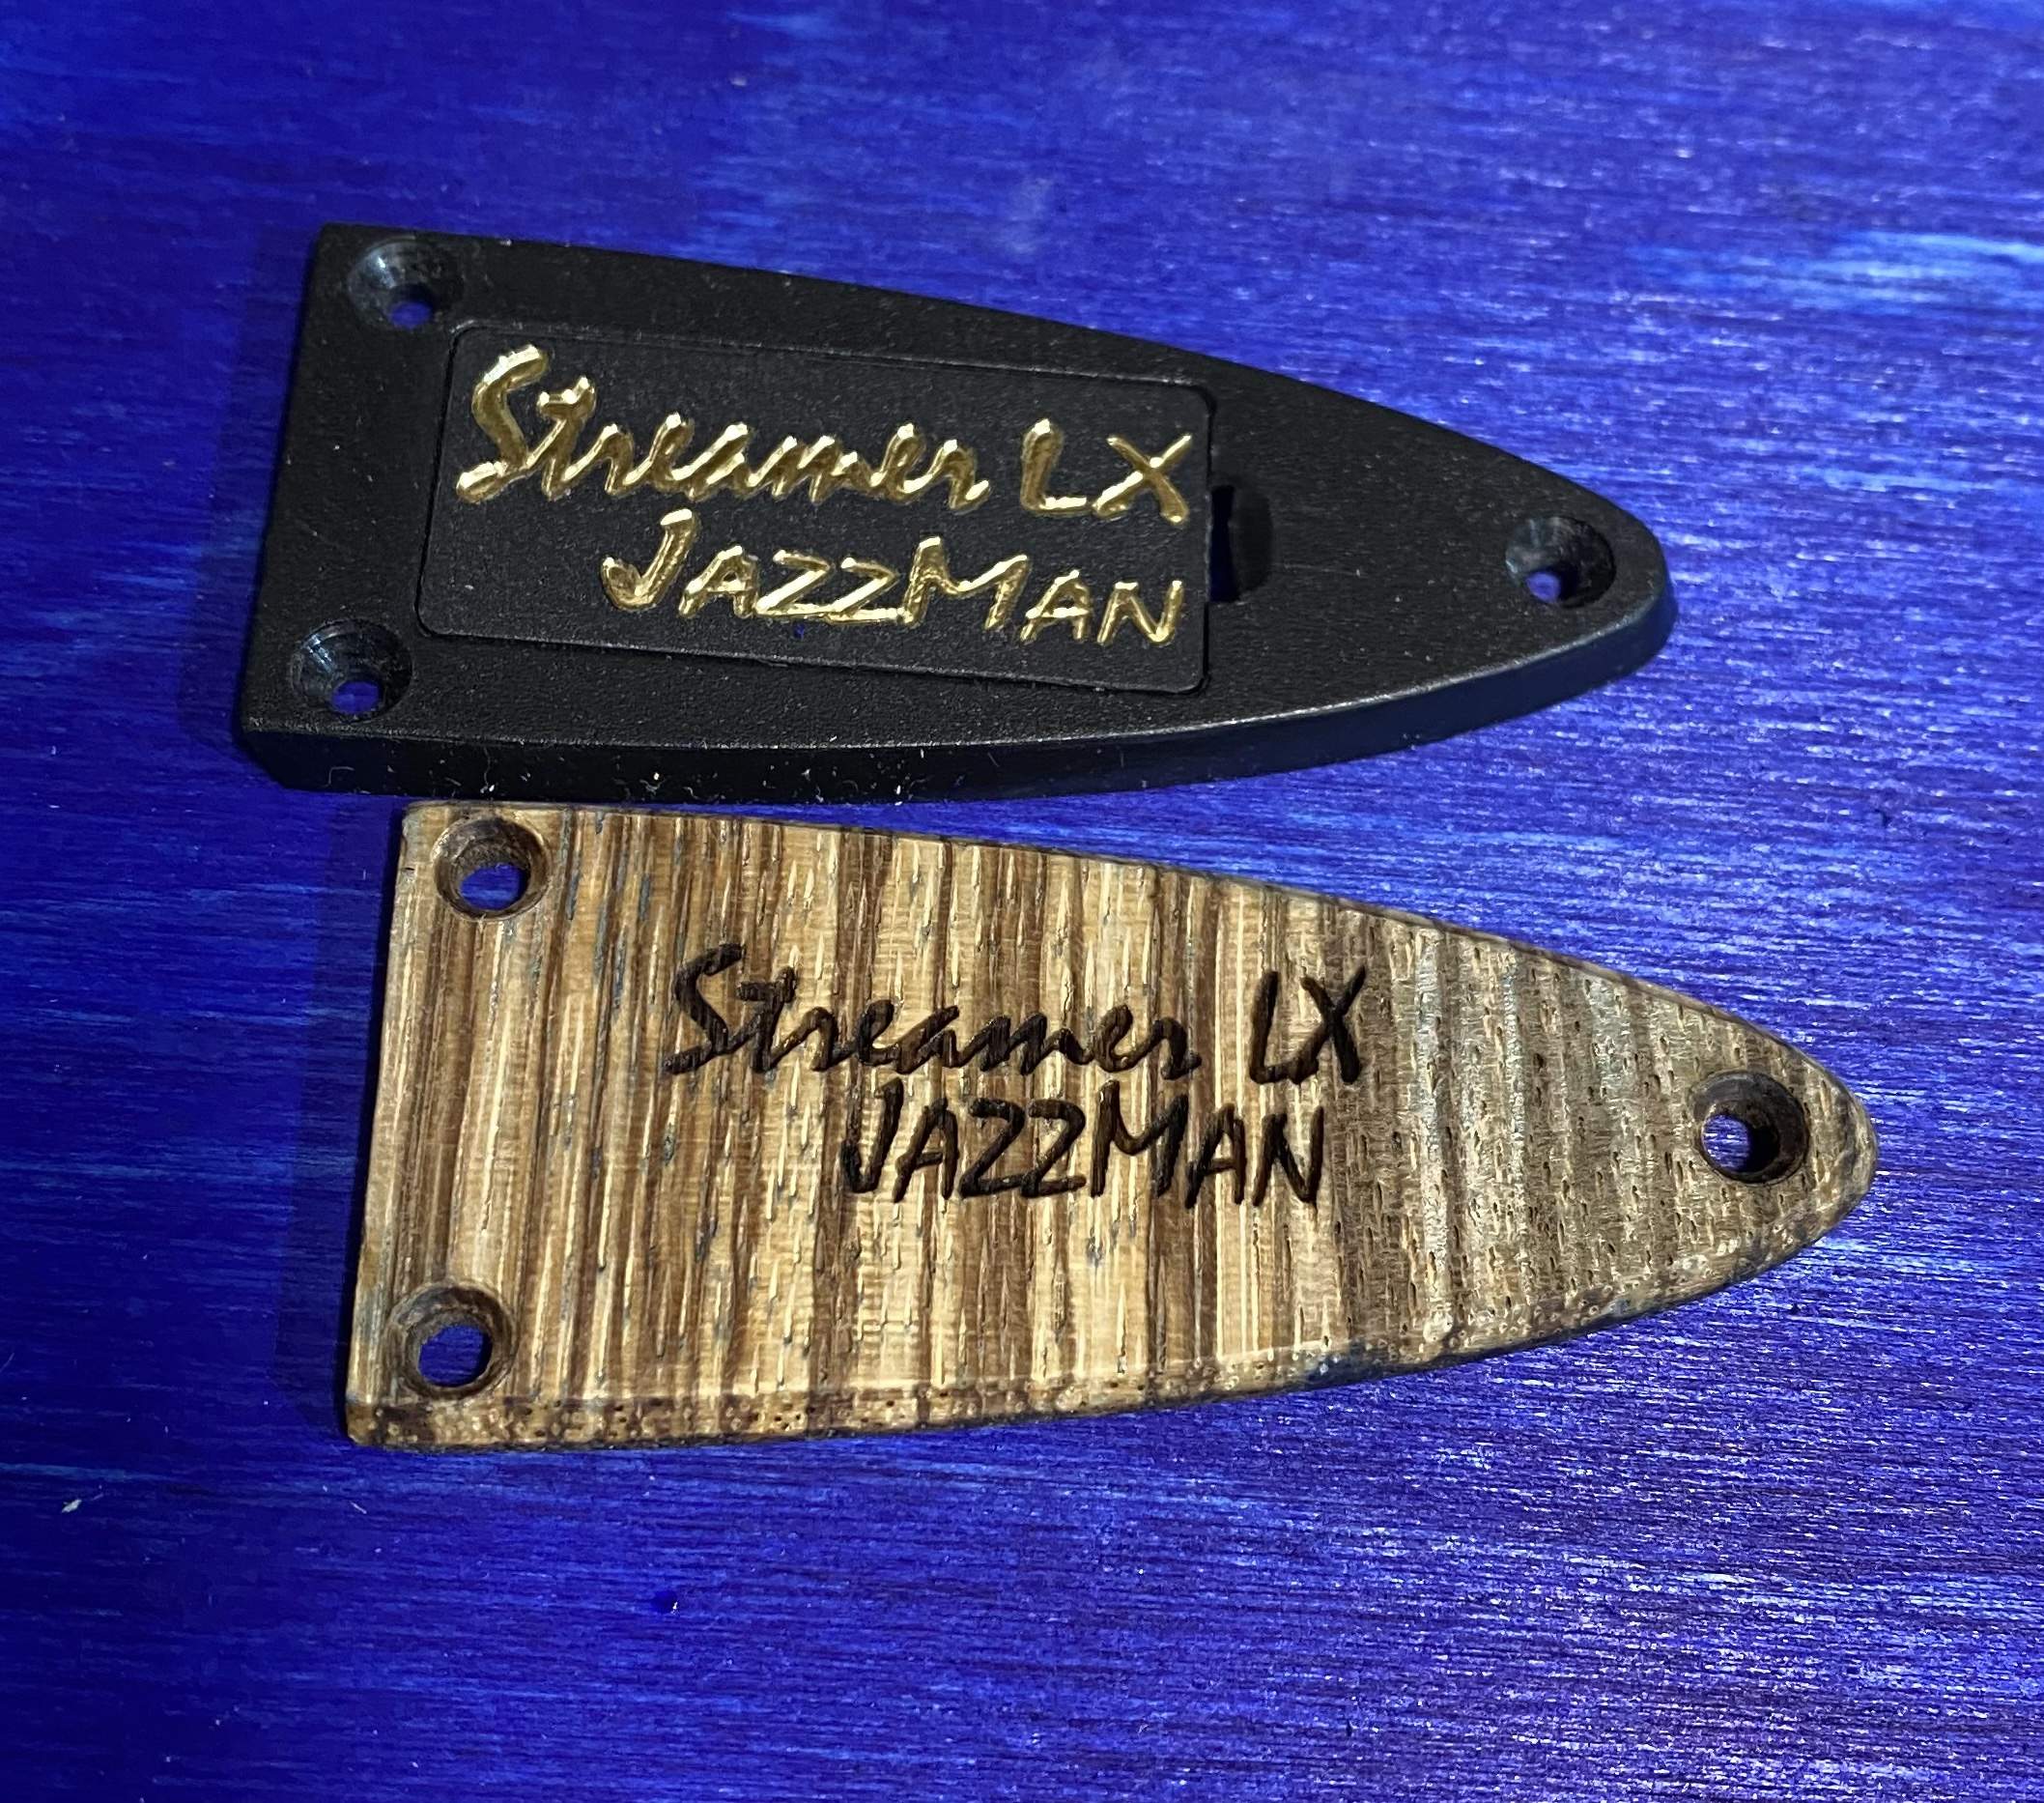
The first full prototype:
  • Used Zebrawood for the Streamer cover
    • Using figured Bubinga as the next one for my Thumb
  • Matched the font of the plastic covers
    • The text is smaller on this one, next one will be larger
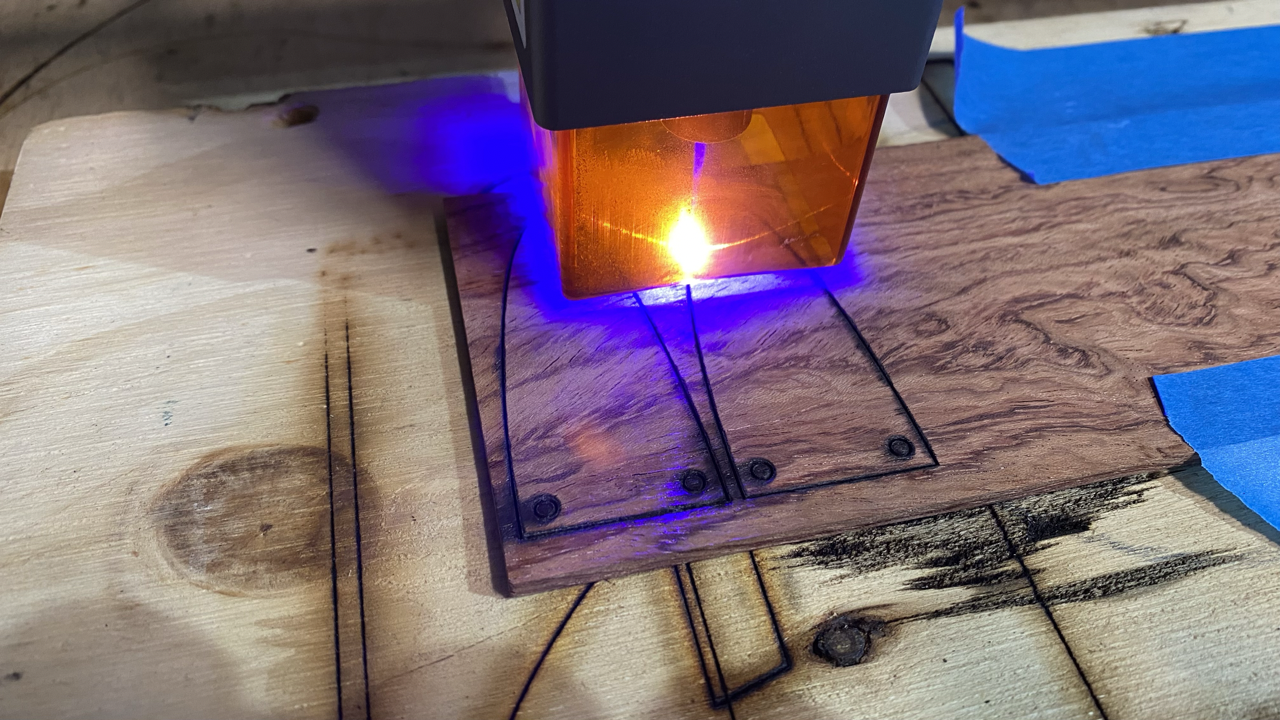
  • Used a 10w diode laser (XTool D1)
    • Using Illustrator to create the SVGs for the vector cuts and PNGs for the rasters
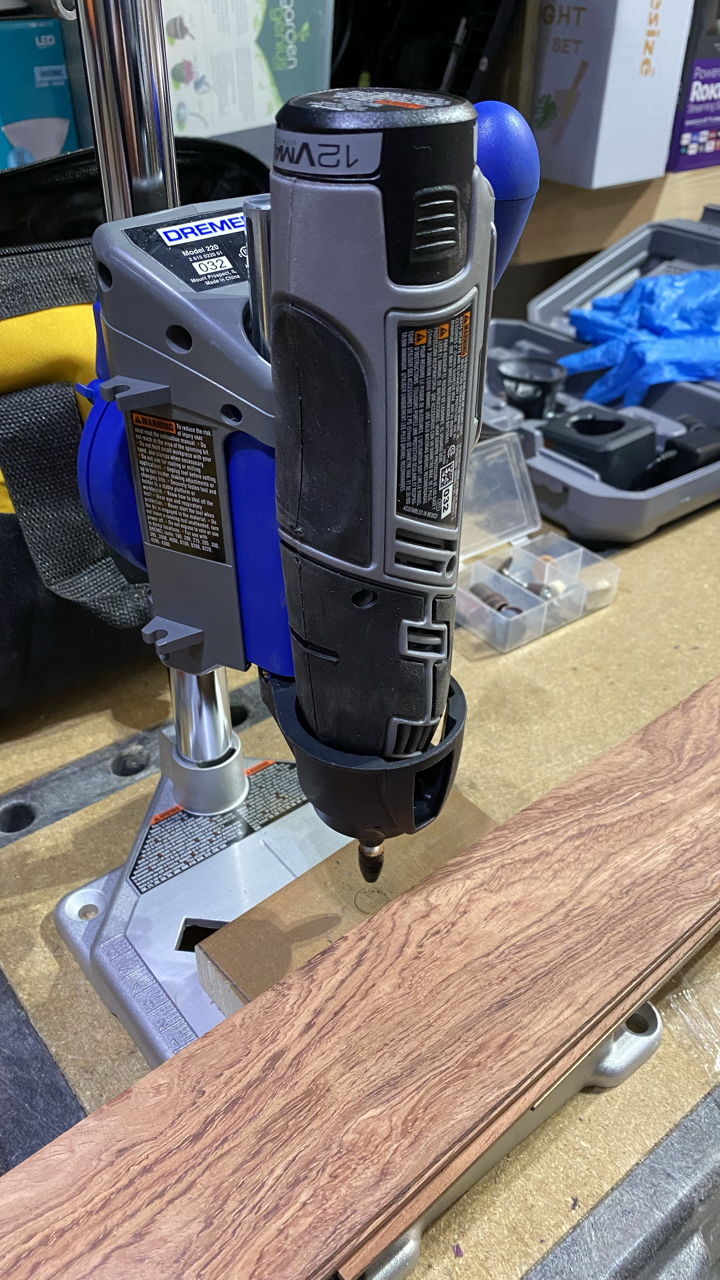
  • Beveled the edges with a Dremmel tabletop drill press attachment
  • Counter sunk the screw holes with a different bit using the Dremmel press
  • No gold paint on the lettering, because I prefer the black :woot:
Now that I'm setup with a repeatable pattern, I have several to do. The cutting takes about 5min, the engraving takes another 4-5min and then the final sanding is taking me about 15min so I'm able to create these pretty quickly :woot:

IMG_7921 Large.png

IMG_7922 Large.png
9517BE87-C494-42CD-A823-0F8908A666A4.jpeg

IMG_7916 Large.png
 
Last edited:
I finally got back around to this project after several guitar-related woodworking side track projects since the winter break.

I picked up some different varieties of wood from Woodcraft (Bubinga, Zebrawood, Purpleheart, Rosewood, Walnut, Jatoba) and have finally finished my first prototype for one of my Warwicks (replacing the plastic cover). I'm not crazy about the plastic covers on my other basses either, so I plan to replace them all!

The first full prototype:
  • Used Zebrawood for the Streamer cover
    • Using figured Bubinga as the next one for my Thumb
  • Matched the font of the plastic covers
    • The text is smaller on this one, next one will be larger
  • Used a 10w diode laser (XTool D1)
    • Using Illustrator to create the SVGs for the vector cuts and PNGs for the rasters
  • Beveled the edges with a Dremmel tabletop drill press attachment
  • Counter sunk the screw holes with a different bit using the Dremmel press
  • No gold paint on the lettering, because I prefer the black :woot:
Now that I'm setup with a repeatable pattern, I have several to do. The cutting takes about 5min, the engraving takes another 4-5min and then the final sanding is taking me about 15min so I'm able to create these pretty quickly :woot:

View attachment 4600117
View attachment 4600118 View attachment 4600119
View attachment 4600130

That's very cool! I wouldn't mind adding a laser machine to my shop someday.

Are you planning to do this as a business? If so, you may want to post something over in the Hardware, Setup & Repair section. Lots of folks over there looking for truss rod covers.

I wonder how the laser would do cutting a thin laminate, such as a thin walnut veneer epoxied onto 1/16" Garolite? Would it cut it? Would it set the epoxy on fire?
 
  • Like
Reactions: Barticus
That's very cool! I wouldn't mind adding a laser machine to my shop someday.

Are you planning to do this as a business? If so, you may want to post something over in the Hardware, Setup & Repair section. Lots of folks over there looking for truss rod covers.

I wonder how the laser would do cutting a thin laminate, such as a thin walnut veneer epoxied onto 1/16" Garolite? Would it cut it? Would it set the epoxy on fire?
I cut through 1/4” birch plywood today without issues. See the image below, that is 2 layers of 1/4’ I cut then glued the blue logo on the other piece.

I’m adding air assist to it this weekend by 3D printing the nozzle and adding a small air pump so I shouldn’t have any problems with burning or melting materials. PM me and I can try a sample for you. I’m helping a buddy out tomorrow with some inlays, I’ll post my results.
0415771F-061D-4204-A84F-46852806B2B5.jpeg
 
Last edited:
The first magnetic prototype is functional and works as I had suspected, the tiny neodymium magnets are very strong and the cover adheres very nicely to heads of the screws. Easy to remove and replace. :thumbsup: The magnets are so strong the little buggers would jump out of the glue in the hole to join the others, so I had to tape them in place until the tightbond hardened. :woot::woot:

The next version I’m working on will have tighter tolerance for the holes and I’ll recess the neodymium magnets since the original screws are not flush to the headstock. Once I have a solid build process I’ll be able to replicate.
89F542EE-B25C-4842-8C6D-CC09808D3C37.jpeg
59F90ADE-0643-4FEF-9D62-4A976DA7AD47.jpeg
A588C5E8-2660-4981-ADFE-669A1C5E2BF1.jpeg
 
These are fantastic! I have a couple of ideas for you - the first is to try making a cover where the grain runs lengthwise instead of crosswise. Most guitars/basses have the grain in the fretboard, body and headstock running parallel to the length of the body from tail to tip and it might make them blend more purposefully.

The second idea is to try CA glue instead of titebond for your magnets. The shrinkage from titebond over time will cause the glue to pull away from the magnet. In addition, it doesn't bond to metals nearly as well as CA glue. I moved away from aliphatic resin and PVA glues to CA for this same reason. :thumbsup:
 
  • Like
Reactions: Barticus
Good ideas, I’ll give the lengthwise grain a whirl tomorrow. Where do I get the CA glue?
Super glue / Crazy glue - the good stuff is FastCap 2P10, but Starbond is good too. Crazy Glue brand is also good but very thin viscosity compared to more modern brands. I've used Gorilla brand quite a few times too - their gel version hardens up in the bottle way to fast to be worth it IMHO. :thumbsup:
 
  • Like
Reactions: Barticus
Super glue / Crazy glue - the good stuff is FastCap 2P10, but Starbond is good too. Crazy Glue brand is also good but very thin viscosity compared to more modern brands. I've used Gorilla brand quite a few times too - their gel version hardens up in the bottle way to fast to be worth it IMHO. :thumbsup:
Ha it’s funny you say that, I’ve bought the gorilla glue several times and I got to use it one or two times and the next time I went back to use it it was all hardened.
 
  • Like
Reactions: Beej