

Enjoy the benefits of a premium membership!
Upgrade Account
-
TalkBass has been independent since 1998. Add your voice.
Create a free account to reply to discussions, view embedded media, and browse with fewer display ads.
Join free Log in
Want zero display ads or expanded classifieds tools? Compare plans.
You are using an out of date browser. It may not display this or other websites correctly.
You should upgrade or use an alternative browser.
You should upgrade or use an alternative browser.
Leafenbacker
- Thread starter mapleglo
- Start date
More options
Who Replied?

hillerup
There are basses, and there are Thunderbirds!
It shouldn't be too bad. The pickup rout should be right over the wire channel, and I enlarged the hole from the channel to the control cavity to 3/8", and then angled the drill as I enlarged it. I'm hoping the pickup wires will find their way into the control cavity by just pushing them through. Of course, that all depends on how much glue made its way into the channel.
If that doesn't work you could alternately do a center route from the neck pickup to the bridge pickup and thread all 3 pickups through the bridge hole, and close the route with a mahogany skunk stribe - This could either be done on the front or backside of the bass, and would still fit with the colour scheme, without messing up the overall look of the bass...

A fishing weight would be small enough, if you buy the lead-shot types. They tend to come in little rotating packs with a lot of different sizes.
You don't need a weight. Just use the old electrician's trick of vacuuming the string through.

Thanks for all the compliments, comments, and suggestions. Even though I'm doing the physical work, I really couldn't have come this far without all the support from this wonderful TalkBass resource.
This is a great idea! If I'm unable to fish the wires through, I think this will be my backup plan.
I took this week off from work, so I'm hoping to have this playing by the end of the week. I have to wait until noon today, before I unclamp the body, to allow for a full 24 hours for the glue to set. Summer has arrived here in Phoenix, and it's already approaching the triple digits by mid afternoon most days, so I don't know how much work I'll get done today. I may be able to at least set up a pickup routing template. Still lots of sanding to be done as well. Updates soon.
If that doesn't work you could alternately do a center route from the neck pickup to the bridge pickup and thread all 3 pickups through the bridge hole, and close the route with a mahogany skunk stribe - This could either be done on the front or backside of the bass, and would still fit with the colour scheme, without messing up the overall look of the bass...
This is a great idea! If I'm unable to fish the wires through, I think this will be my backup plan.
I took this week off from work, so I'm hoping to have this playing by the end of the week. I have to wait until noon today, before I unclamp the body, to allow for a full 24 hours for the glue to set. Summer has arrived here in Phoenix, and it's already approaching the triple digits by mid afternoon most days, so I don't know how much work I'll get done today. I may be able to at least set up a pickup routing template. Still lots of sanding to be done as well. Updates soon.
Just a quick update. I stopped by Lowes and got some Formby's Tung Oil, some low lint rags (for some reason, I can't seem to find lint free rags), and a small tube of silicon to insulate the wire exit holes on the pickups. It should also act as strain relief once it dries. Still have to wait another 3 hours for the glue on the body wings to fully cure.
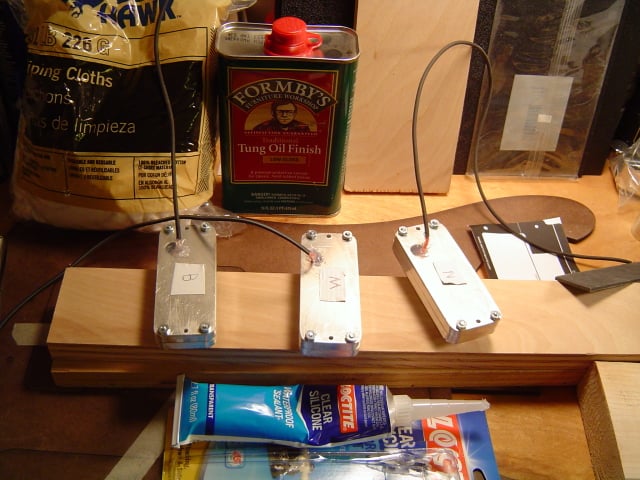



Still have to wait another 3 hours for the glue on the body wings to fully cure.
Longest 3 hours of your entire week.
Longest 3 hours of your entire week.
It did seem to take a little while

I unclamped it, and cut off the bottom portion of the neck protrusion, and started sanding, but it's just darn hot today. I'll be lucky, going forward, to have a couple of hours in the morning to work in my outside workshop. Anyway, I did take a few shots of the work so far.
I'll do some more sanding tomorrow, and start tackling the pickup template.
hillerup
There are basses, and there are Thunderbirds!

Been lurking since day 1 on this build. It's so stinkin' cool! Can't wait to see it come together, keep up the great work!
Amazing work!
Been lurking since day 1 on this build. It's so stinkin' cool! Can't wait to see it come together, keep up the great work!
Thank you both
I got a little more work done today. I rounded over the bottom section of the neck, and the traditional Ric belly cut round over.
Then I started measuring for the pickup locations, and made a routing template.
Once marked, I started hogging out as much material as I could with the drill press.
The "throat" on my drill press is not very deep, which prevented me from getting all the material I wanted to remove, so I did a little more with the regular drill.
Then I clamped the template into place and went at it with the router.
And done.
I went to just over 1/2" in depth - I think that should be enough, but didn't hit the channel that I made in the body wing. So I drilled a little deeper and hit it. I was able to fish the wire through as well.
If it doesn't get too hot today, I'll start working on the bridge rout. If not, I'll start on that tomorrow.
It's really coming along well. Very impressed with your work.
I've been following along, but haven't posted yet. Great build, it's coming out looking fantastic! Can't wait to see (and hopefully hear) the finished product.
Thank you
Since it didn't become to warm yet today, I was able to rout the opening for the tremolo bridge.
Checked for fit, and had to square off the bottom part of the rout, and put a slight round over on that bottom edge.
Drilled the pilot holes for the mounting screws, and screwed the bridge down.
I wanted to string it up to see how close I was in the amount I lowered the surface of the body.
It plays, but the string tension is pulling the bridge almost all the way forward, so much so, that the tremolo arm is pressed against the body. I notice there is a spot for a third spring. I'll have to contact Kahler and see if that is the issue, and if so, if I can get another spring. There's still a lot of work to do, plenty of sanding, mounting the jack plate, setting up the pickup mounting, and a few other things, before I start with the tung oil finish.
hillerup
There are basses, and there are Thunderbirds!
Are you keeping the neck hell as it is, or will you sand it down further to smooth out the transistion to the body?
hillerup
There are basses, and there are Thunderbirds!
It plays, but the string tension is pulling the bridge almost all the way forward, so much so, that the tremolo arm is pressed against the body. I notice there is a spot for a third spring. I'll have to contact Kahler and see if that is the issue, and if so, if I can get another spring. There's still a lot of work to do, plenty of sanding, mounting the jack plate, setting up the pickup mounting, and a few other things, before I start with the tung oil finish.
Not forgetting shielding as well...
Are you keeping the neck hell as it is, or will you sand it down further to smooth out the transistion to the body?
I'll likely sand it smoother a bit.
And in other news, my build has some company, which arrived just moments ago.

I'll likely sand it smoother a bit.
And in other news, my build has some company, which arrived just moments ago.
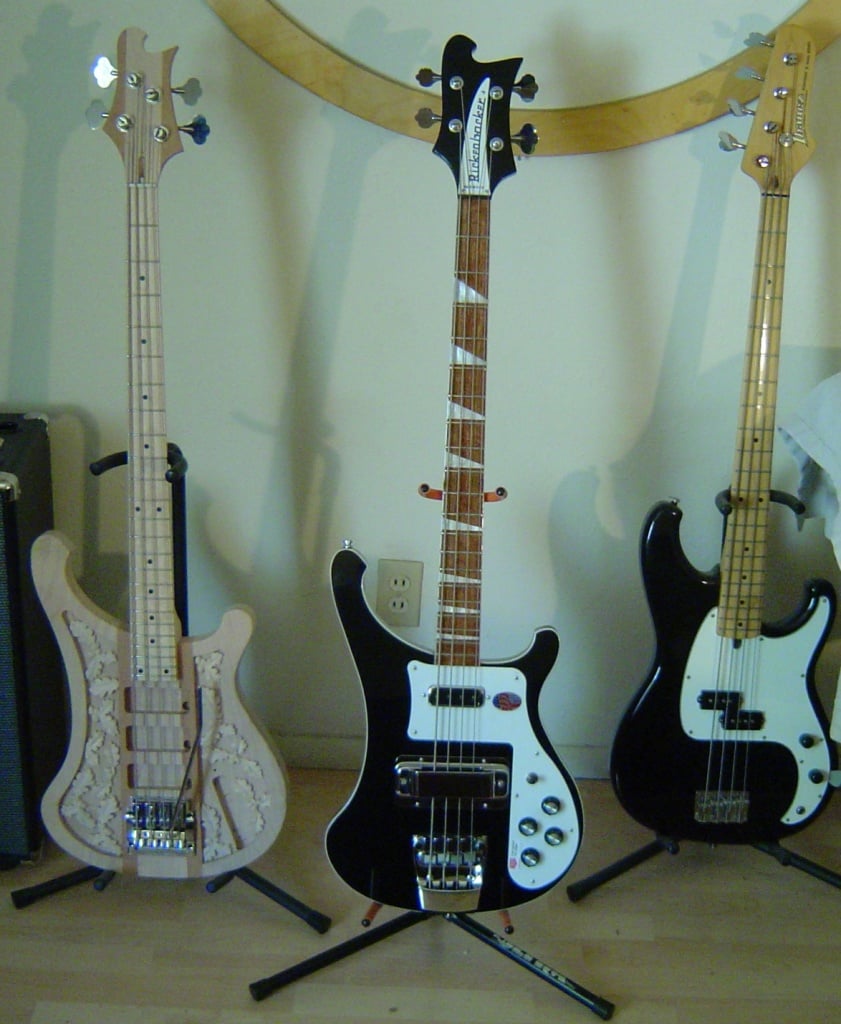
I like yours better.



