• TalkBass has been independent since 1998. Add your voice.
    Create a free account to reply to discussions, view embedded media, and browse with fewer display ads.
    Join freeLog in
    Want zero display ads or expanded classifieds tools? Compare plans.

Magnets & Copper Wire: A Pickup Building Thread

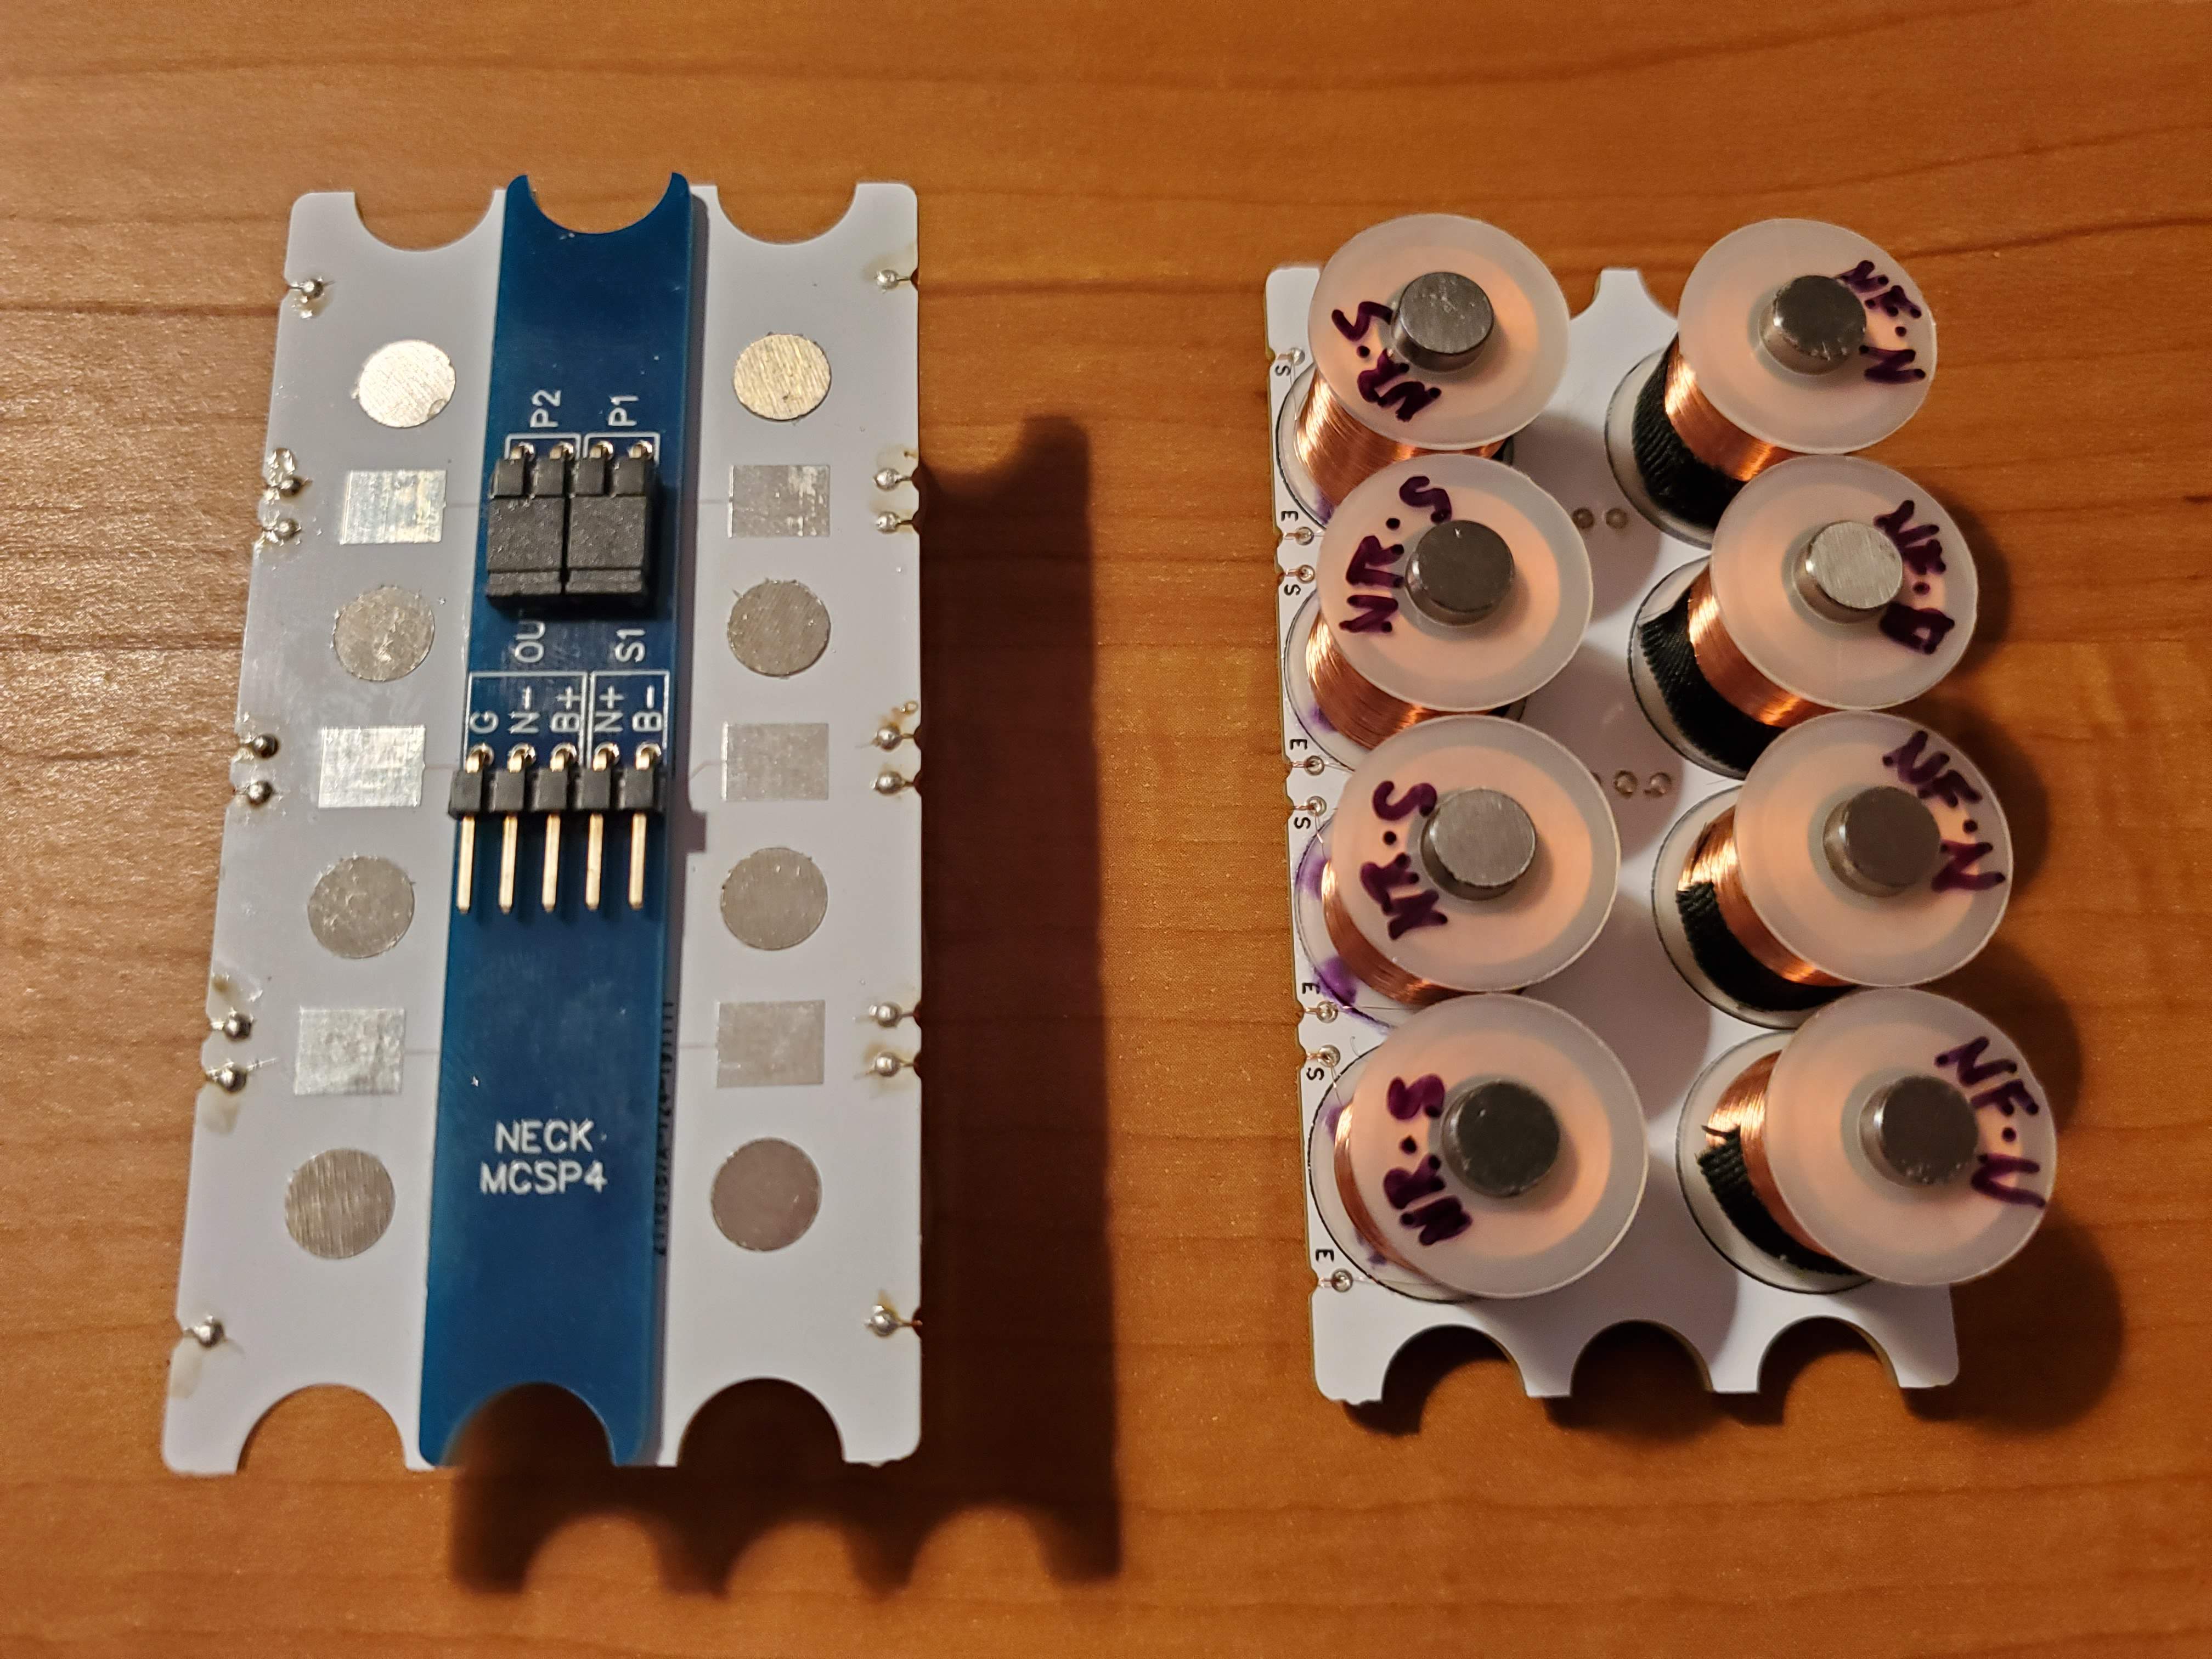
I made another pair of multicoils... this time, with the coils wired differently. Now each row of 4 is wired in series, and using the jumpers, you can have both rows in parallel, or in series with each other.

Should have them potted tonight, and can put up some more sound clips tomorrow.
20191117_211431.jpg
 
I made another pair of multicoils... this time, with the coils wired differently. Now each row of 4 is wired in series, and using the jumpers, you can have both rows in parallel, or in series with each other.

Should have them potted tonight, and can put up some more sound clips tomorrow.

View attachment 3599400
That's brilliant. You could sell DIY kits.
 
I made another pair of multicoils... this time, with the coils wired differently. Now each row of 4 is wired in series, and using the jumpers, you can have both rows in parallel, or in series with each other.

Should have them potted tonight, and can put up some more sound clips tomorrow.

View attachment 3599400

Yes, very nice mechanical work in the way you are designing and building these!

One little detail that worries me though: The way you are terminating the coil wires to the solder pads. It looks like you have the wires nearly tight, stretched down to the solder pads. Don't do that! That's a prime failure point. Any small movement between the board and the bobbin, like shock or thermal expansion, can snap the wire. You need to leave some slack in the wire when you solder it down. Then I usually cover it with a blob of woodworker's glue to protect it.
 
So, @Bruce Johnson pointed me to this thread. I had posted about one of my multi-coil experiments over in the Pickups & Electronics forum, but this here is probably more appropriate.

Bruce, Freek, MPU... you guys do some really cool stuff! Inspiring!


Anyways, here's my latest set of multi-coils:
View attachment 3589853
View attachment 3589855
...

So, for you guys with some molding/casting experience, do you have any tips on how to design a mold master that would be able to make castings with holes in the top to allow pole pieces to show through (like the 3D printed covers I had made)?
 
Yes, very nice mechanical work in the way you are designing and building these!

One little detail that worries me though: The way you are terminating the coil wires to the solder pads. It looks like you have the wires nearly tight, stretched down to the solder pads. Don't do that! That's a prime failure point. Any small movement between the board and the bobbin, like shock or thermal expansion, can snap the wire. You need to leave some slack in the wire when you solder it down. Then I usually cover it with a blob of woodworker's glue to protect it.

Agreed! I need to work out a good method for ensuring there's enough slack (simple, I know). I wasn't too worried with these, since I'm still working out stuff, and I won't be encapsulating them.
 
Agreed! I need to work out a good method for ensuring there's enough slack (simple, I know). I wasn't too worried with these, since I'm still working out stuff, and I won't be encapsulating them.

It could be as simple as placing a little block of something in that space, so the wire has to divert a bit to go around it. Pull the wire down through the hole, solder it, and gently lift the block out.

On my pickups, I terminate the wires by wrapping them around a pin and soldering. I wrap the wire starting about 1/16" up from the base. Then with a fingernail, I push the wraps down and solder. That creates the small amount of slack. These tiny mechanical details make the difference in reliability.
 
It could be as simple as placing a little block of something in that space, so the wire has to divert a bit to go around it. Pull the wire down through the hole, solder it, and gently lift the block out.

On my pickups, I terminate the wires by wrapping them around a pin and soldering. I wrap the wire starting about 1/16" up from the base. Then with a fingernail, I push the wraps down and solder. That creates the small amount of slack. These tiny mechanical details make the difference in reliability.

Funny you should mention that... on some of my earlier attempts at this, I had the little terminals coming up through the solder pads instead, and would wrap the ends around those, like you're describing. Took a little more time, but maybe I'll go back to something like that again.

Like so:
 
I made another pair of multicoils... this time, with the coils wired differently. Now each row of 4 is wired in series, and using the jumpers, you can have both rows in parallel, or in series with each other.

Should have them potted tonight, and can put up some more sound clips tomorrow.

View attachment 3599400

Quick and dirty sound clips...


Rows in parallel, both pickups:
Invalid Link Removed

Rows in parallel, neck pickup only:
[Invalid or Expired Link Removed]

Rows in parallel, bridge pickup only:
[Invalid or Expired Link Removed]


Rows in series, both pickups:
Invalid Link Removed

Rows in series, neck pickup only:
[Invalid or Expired Link Removed]

Rows in series, bridge pickup only:
[Invalid or Expired Link Removed]
 
Quick and dirty sound clips...


Rows in parallel, both pickups:
Invalid Link Removed

Rows in parallel, neck pickup only:
[Invalid or Expired Link Removed]

Rows in parallel, bridge pickup only:
[Invalid or Expired Link Removed]


Rows in series, both pickups:
Invalid Link Removed

Rows in series, neck pickup only:
[Invalid or Expired Link Removed]

Rows in series, bridge pickup only:
[Invalid or Expired Link Removed]


Sounds awesome! I like bridge series, both and neck parallel the most. But really great sounds for all set ups.
 
  • Like
Reactions: slowburnaz
Quick and dirty sound clips...


Rows in parallel, both pickups:
Invalid Link Removed

Rows in parallel, neck pickup only:
[Invalid or Expired Link Removed]

Rows in parallel, bridge pickup only:
[Invalid or Expired Link Removed]


Rows in series, both pickups:
Invalid Link Removed

Rows in series, neck pickup only:
[Invalid or Expired Link Removed]

Rows in series, bridge pickup only:
[Invalid or Expired Link Removed]

Are you planning on turning this into a side business? I wouldn't be surprised if a pickup of this versatility can be something builders would be interested in.
 
  • Like
Reactions: slowburnaz and Beej
Are you planning on turning this into a side business? I wouldn't be surprised if a pickup of this versatility can be something builders would be interested in.

I've thought about it. I'm still thinking I need to come up with a better solution for covers... the 3d printed stuff works just fine for prototyping, I'm just not convinced yet on the finish quality, and the price. My next avenues to look into for that are casting my own or making wood covers, both being a bit labor intensive (the pickups themselves are pretty labor intensive as is).

I had posted on a Facebook group about these pickups, too, and Tony Stoufer, the guy who apparently has done all the pickups and electronics for Alembic for the past 35 years hit me up, and said he might have some suggestions for me cover-wise. Should be interesting to pick his brain.
 
I came across a home brew solution. Buy some insulation foam and shape to the final shape desired. Then, get some two part epoxy and mix it then brush a coat over the form. Let it try then add another coat to buildup the wall thickness. After a few coats, cut out the foam with a X-Acto knife...you may need some other tools to completely scoop out all of the foam. Trimming and sanding may still be required.
 

Latest posts