
Enjoy the benefits of a premium membership!
Upgrade Account
-
TalkBass has been independent since 1998. Add your voice.
Create a free account to reply to discussions, view embedded media, and browse with fewer display ads.
Join free Log in
Want zero display ads or expanded classifieds tools? Compare plans.
You are using an out of date browser. It may not display this or other websites correctly.
You should upgrade or use an alternative browser.
You should upgrade or use an alternative browser.
My IKEA Gorm Pedalboard Build Thread
- Thread starter Armchair Bronco
- Start date
More options
Who Replied?
Yup.
My pedals are pretty big and I figure I'm not done amassing them yet.
If I have one board for instrument level and one for line level then it'll be ideal for signal path and give me enough space.
Right now I have:
EHX Bassballs
Pigtronix Disnortion
EHX Bass MicroSynth
Pigtronix EP-1
Line 6 DL4
I want:
Boss OC-2
EHX Worm + Expression
EBS DynaVerb
Boss GEB-7/EQ-20
ToneHammer/MicrobassII
loop strips
Even if I swap out my DL4 for other delay/loop I still would deal with a lot of real estate...
MXR Carbon Copy and Boss DD-20/RE-20
Boss RC-2 with footswitch for tap-tempo
So not even planning for the future, and with the sweep expression on my EP-1 and the expression from my DL4, that's a lot of real estate.
If I use my old samsonite suitcase to hold the pedalboards I'm going to have to hack the ends off the shelves so they fit...but realistically, I could fit both sides in and fit all my cables and misc. stuff in there.
Nearly every pedal I have needs its own power supply. If I use the DL4's supply with the board then I'm in even rougher shape (oh the life we live to have this sort of thing to complain about).
I'll probably have to build a power box or get a small bag for it all...and remember to label the pedal ends of course - if I can't make that tilt work out.
My pedals are pretty big and I figure I'm not done amassing them yet.
If I have one board for instrument level and one for line level then it'll be ideal for signal path and give me enough space.
Right now I have:
EHX Bassballs
Pigtronix Disnortion
EHX Bass MicroSynth
Pigtronix EP-1
Line 6 DL4
I want:
Boss OC-2
EHX Worm + Expression
EBS DynaVerb
Boss GEB-7/EQ-20
ToneHammer/MicrobassII
loop strips
Even if I swap out my DL4 for other delay/loop I still would deal with a lot of real estate...
MXR Carbon Copy and Boss DD-20/RE-20
Boss RC-2 with footswitch for tap-tempo
So not even planning for the future, and with the sweep expression on my EP-1 and the expression from my DL4, that's a lot of real estate.
If I use my old samsonite suitcase to hold the pedalboards I'm going to have to hack the ends off the shelves so they fit...but realistically, I could fit both sides in and fit all my cables and misc. stuff in there.
Nearly every pedal I have needs its own power supply. If I use the DL4's supply with the board then I'm in even rougher shape (oh the life we live to have this sort of thing to complain about).
I'll probably have to build a power box or get a small bag for it all...and remember to label the pedal ends of course - if I can't make that tilt work out.



Awesome job! I might have to cop this idea and build my own. Plus, I have an old Yamaha keyboard hardcase that would fit one of these boards perfectly. Yes.....


I would love to do this, but it appears you can't buy them from ikea online. Hrmp.
but you can buy 1 x 4 x 4 #1 at just about any local lumber yard for about a $1.50 ea.
 and make it work just as well
Hey,
I'm planning on running down to my local Ikea (30 min drive) sometime soon. I'd be happy to pick a couple sets up for anyone and ship it to you if you want to pay the cost & shipping. PM if you're interested
I'm planning on running down to my local Ikea (30 min drive) sometime soon. I'd be happy to pick a couple sets up for anyone and ship it to you if you want to pay the cost & shipping. PM if you're interested

Yeah, I caught wind of the Gorm phenomenon a little ways back, and I did it. I posted it in the Pedalboard thread. Mine's simpler than yours and black, not orange, but no velcro so that's a plus.
Here's mines: http://www.talkbass.com/forum/showpost.php?p=6950725&postcount=222
Here's mines: http://www.talkbass.com/forum/showpost.php?p=6950725&postcount=222

Just went to Ikea tonight... Go Gorm!! I will be making a variant version of your orange and black one. I need a small board for when I gig with my cover band (which is where I do most of my gigging), in which I only use around 4 pedals. So I will be making the - wait for it... "Micro-Mini Gorm Board" LOL. Post when I do!


The tool box doesn't seem very convenient for someone who plans on turning their pedals on and off during a song, but it looks pretty clean.
The OP's gorm board looks great. I'm going to help the guitar/keyboardist I play with build one of these in the next week or so. I'll be using the OP's board as a reference for construction- very well done!
The OP's gorm board looks great. I'm going to help the guitar/keyboardist I play with build one of these in the next week or so. I'll be using the OP's board as a reference for construction- very well done!
The tool box doesn't seem very convenient for someone who plans on turning their pedals on and off during a song, but it looks pretty clean.
it's actually pretty stable the way it is, & i do use it onstage frequently
altho
i've found a nice small metal toolbox that's a bit lower & longer that i've just picked up to convert
best part, picked it up new < $10.
hahaha

Very cool pedal board. You said you got rid of the tap tempo foot switch. I guess you're using it for your looper. There is a guy on the gear page that makes mini tap tempo switches. I just got one. It's about as long as the first two knuckles on my index finger, about 3/4 inch wide, and a little taller than a pack of cigarettes. It was only $26 and he built it when I ordered it, and I got it in two days. Here's a link to the thread on here, with a link to TGP site. You have to sign up for the site, but it's got some cool stuff in it. He will do all sorts of stuff. http://www.talkbass.com/forum/showthread.php?t=540478
Ok, so I have build a couple of Gorm boards now, so I thought I would add some pics of the process. Many kudos to the OP and the guys who had such a brilliant idea!
base gorm:
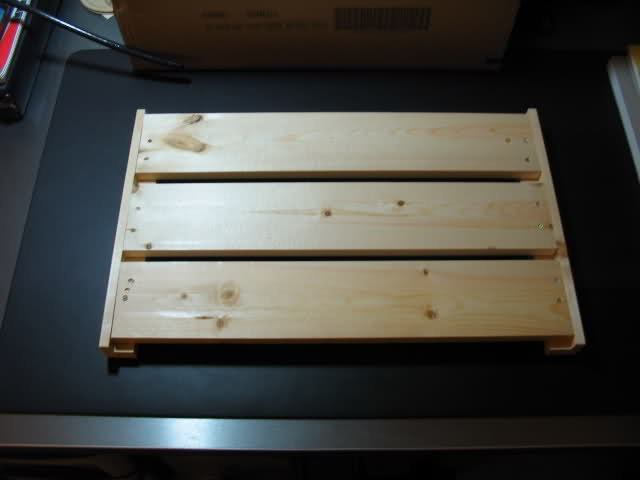
I took 2 of the boards and removed them. When you move the outside board to the edge and then re-center the middle board, you end up with slots large enough for cable heads. No drilling!
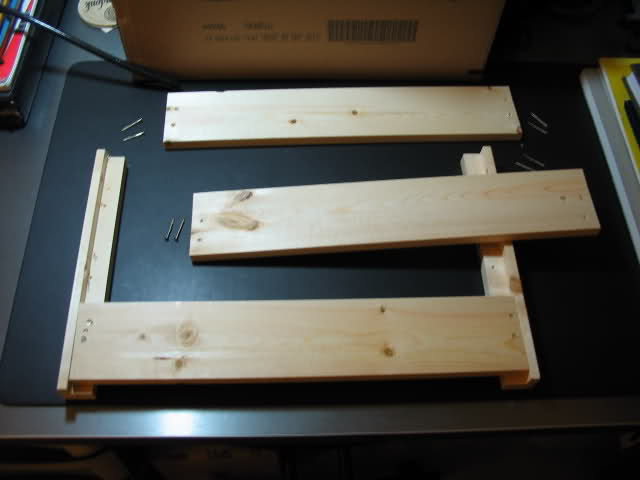
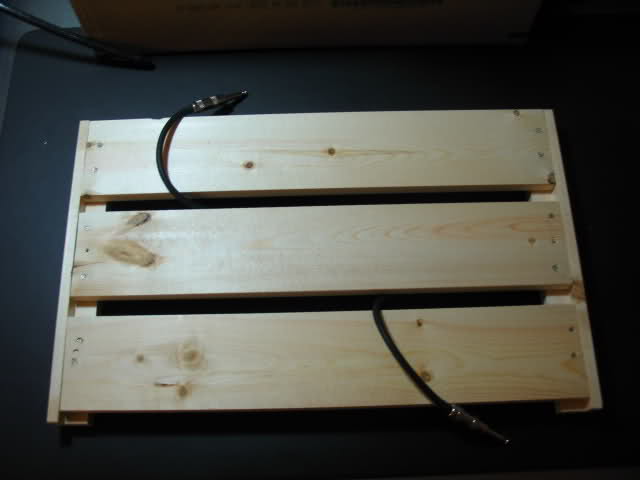
Since the nails used to hold it together don't especially enjoy being removed and then put back I reinforced everything with wood screws. The wood is soft enough that you can force it to countersink itself.
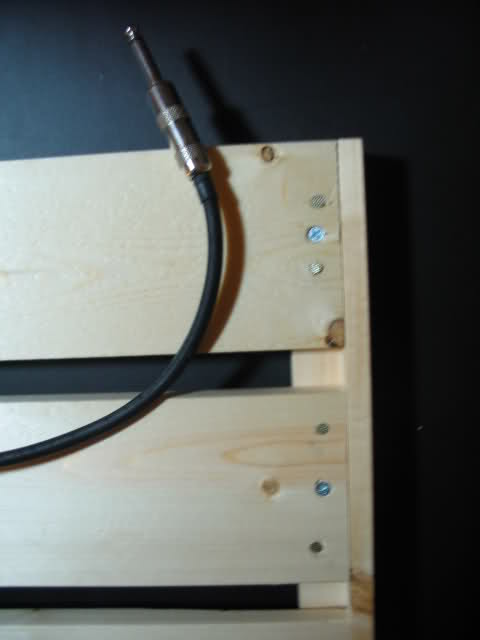
Don't worry too much about damaging the wood - it will mostly end up being covered by paint and velcro.
Primed, sanded and ready to paint:
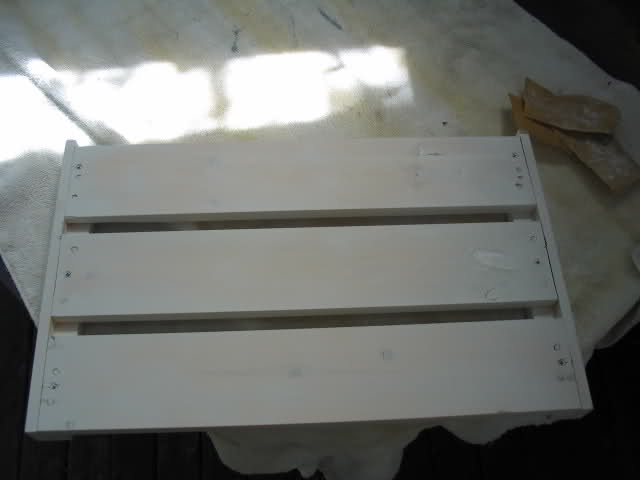
Painted and with hardware for final assembly:
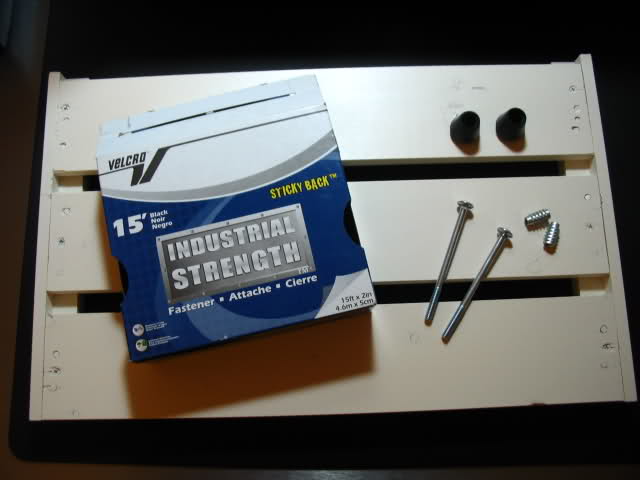
I used threaded inserts to mount the legs to the back of the board. I have an old keyboard case that will fit this board perfectly, so I have to have removable legs. I found the inserts, "legs", and rubber feet at Home depot for < $5. The most expensive part of this project is the velcro, but 1 package had enough velcro to complete 1 large and 1 small Gorm board. Another thing: Using the rubber ends on the legs like that means that you can't crack the wood when screwing the legs in because when you hit bottom, the knob will turn, but the screw won't.
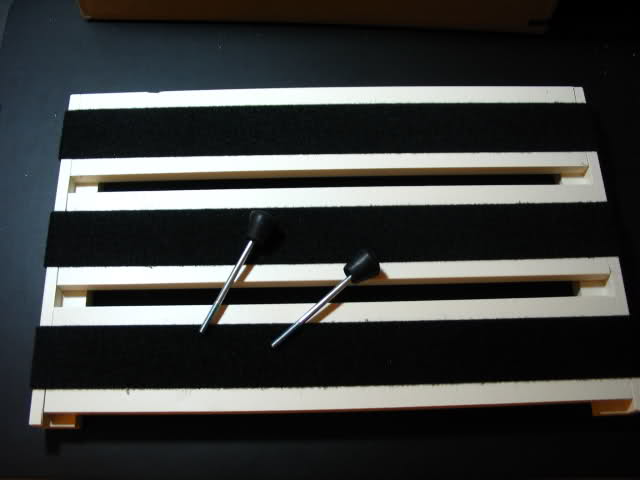
From below:
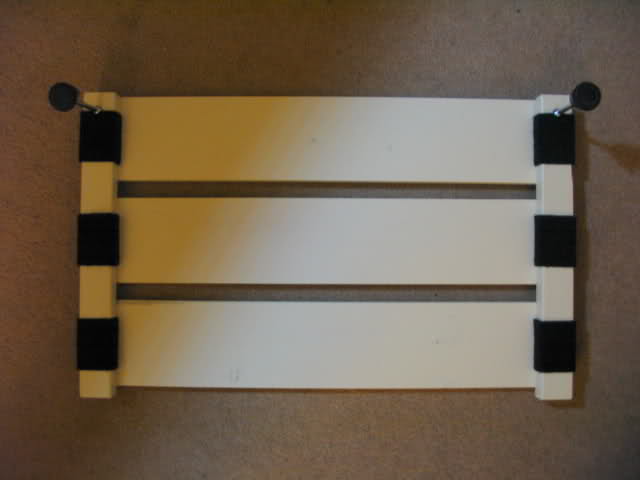
Completed Gorm:

Hope this helps! What a great way to save some dough and still end up with a sturdy, fully-functional pedalboard!
Pics of the board with pedals will be up shortly in the "show your board" thread.

base gorm:
I took 2 of the boards and removed them. When you move the outside board to the edge and then re-center the middle board, you end up with slots large enough for cable heads. No drilling!
Since the nails used to hold it together don't especially enjoy being removed and then put back I reinforced everything with wood screws. The wood is soft enough that you can force it to countersink itself.
Don't worry too much about damaging the wood - it will mostly end up being covered by paint and velcro.
Primed, sanded and ready to paint:
Painted and with hardware for final assembly:
I used threaded inserts to mount the legs to the back of the board. I have an old keyboard case that will fit this board perfectly, so I have to have removable legs. I found the inserts, "legs", and rubber feet at Home depot for < $5. The most expensive part of this project is the velcro, but 1 package had enough velcro to complete 1 large and 1 small Gorm board. Another thing: Using the rubber ends on the legs like that means that you can't crack the wood when screwing the legs in because when you hit bottom, the knob will turn, but the screw won't.
From below:
Completed Gorm:
Hope this helps! What a great way to save some dough and still end up with a sturdy, fully-functional pedalboard!
Pics of the board with pedals will be up shortly in the "show your board" thread.
Great thread. I put two of these (large and small) together for the guitarist/keyboardist I play with last week. He's going to stain and velcro it, and put the feet on this weekend- Ill post pics of it when it's all done- they're very close in size to the PtPro and Pt2 respectively. 

Instead of drilling holes along the edge of the wood or moving it, I just filed the gaps to be wider. Took a while but it got the job done. I'll be painting it before I head to Guitar Center to pick up some cables tomorrow.
Filled in the cracks and dings with wood sealer, sanded it down, sprayed it black, velcroed it, (finally) and put some rubber feet on it. I'll post pics if I can find a real digital camera.


