• TalkBass has been independent since 1998. Add your voice.
    Create a free account to reply to discussions, view embedded media, and browse with fewer display ads.
    Join freeLog in
    Want zero display ads or expanded classifieds tools? Compare plans.

Neck Carving Techniques

What is your preferred neck shape?

  • V Shape

    Votes: 2 6.9%
  • D Shape

    Votes: 12 41.4%
  • U Shape

    Votes: 3 10.3%
  • C Shape

    Votes: 12 41.4%

  • Total voters
    29
I'm trying to practice and get better at every aspect of my woodworking and my most inconsistent part (at least to me) is the neck carve. Do any of you have any tips/techniques
that you would like to share on how to hand carve the different neck shapes?

My two main areas of concern are getting a consistent shape down the entire neck and properly carving where the neck flows into the headstock.
 
if you ever decide to CNC...

volute-solved.jpg
 
Yes, it's tricky to accurately create and reproduce the shape of the back of a guitar/bass neck. When you look close, really good feeling necks are more complicated than simple V's, C's, U's etc. Necks aren't just a simple radius, or a part of a cylinder, or even a part of a cone. They are a 3-D shape, with radiuses that change around the neck, and along the length of the neck. And then there's the transitions at the headstock and the heel.

So, the question is how do you define, measure, layout, and repeatably carve to that shape? Without getting into 3-D Laser Scanning, Graphic Modeling, CNC Machining, Nano-Particle Beams, and all that other new-fangled computer stuff?

Those of us who still shape necks the old-fangled way have developed our own methods of layout and measurement. There are many different ways to get there. My favorite is what I call the 5-facet method.

Basically, I layout and shape the neck in a sequence of angled bevels (or facets). I define these bevels, their angle and width, in simple layouts of the cross section at the 1st and 12th positions; sometimes others. The neck starts rectangular, cut to width and depth (plan) measurements. The layout lines for the bevels are measured and drawn as distance off to the side of the centerline on the back, and distance up from the fingerboard glue line on the side. I draw and cut the primary bevels first, then draw and cut the secondary bevels. This leaves the neck as 5 facets, with the center facet flat, right down the middle. The facets taper in width and twist slightly as they go down the neck. At the transitions, they curve and taper into points.

This brings the neck quite close to the final shape. I make sure all the facets are straight (no lumps or waves) the right width and angle, and symmetrical side to side (if it's a symmetrical profile). Only after all that is right, do I carefully round off the small ridges between the facets. This brings the neck to the final shape.

It's a repeatable process. Using this layout method, I can hand shape necks years apart, and have them measure and feel the same. I have notes, little cardboard gauges, and custom aluminum straightedges as my layout guides. It doesn't take as long as it sounds.

I'm sure that my description above is confusing. Here's a link to a set of old pages showing my process for making Series IV Scroll Bass necks. The 5-facet process starts on Page 8. There are a couple of good pictures of how I lay out and cut the bevels.

http://www.xstrange.com/Building/Buildingneck1.html
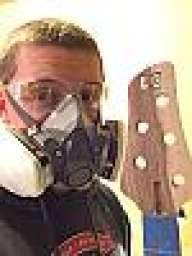
 
I haven't tried this yet, but I'm going to on the next one. Invalid Link Removed

Very interesting! In essence, that's how I do accurate edge radii with hand tools.

Personally, when working on a new style of instrument, I shape each neck to an approximate profile, then string up the guitar and continue to play and carve. I try to get a player or two over as well, and we will spend a pleasant afternoon with them trying the neck again and again as I shape it for them. Eventually, something emerges that we all like.

I've made my own templates of such necks and then apply them as I work on similar types of instrument. Normally, I do 5 or so for each neck profile, carefully labelled (i.e. "LPJR-style 5th fret" and so forth).
 
  • Like
Reactions: lbridenstine
I haven't tried this yet, but I'm going to on the next one. Invalid Link Removed

I'm sure that my description above is confusing. Here's a link to a set of old pages showing my process for making Series IV Scroll Bass necks. The 5-facet process starts on Page 8. There are a couple of good pictures of how I lay out and cut the bevels.

http://www.xstrange.com/Building/Buildingneck1.html
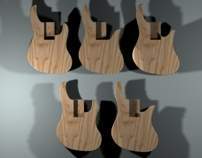
Definitely going to have to try both of those. I've been using this example so far:


Maybe I just need a little more practice and patience. Most of my issue is that I'm getting more of a consistent D shape but want a C.
 
Definitely going to have to try both of those. I've been using this example so far:


Maybe I just need a little more practice and patience. Most of my issue is that I'm getting more of a consistent D shape but want a C.


That's where I got my neck-carving method from as well, and I've been pretty happy with my results.
If you are getting a thicker D-shape (with a flatter back) than you'd like, I'd guess you should make a more aggressive first pair of facets, cutting them closer to the center line and closer to the fingerboard.
The good news is that you can get to a C-shape from a D-shape with some further carving.
 
The first one I did, I used a spokeshave, and it was fast and fun. I tried the spokeshave on my second neck, and it was a disaster. That's when I discovered that a spokeshave is not a wonderful tool if the wood's grain is not very straight, or if it changes direction. I still like to use the spokeshave when I'm using quarter or rift-sawn lumber for the neck, but for laminated or flatsawn boards, I use a rasp and do it just like the esteemed Mr. Fletcher in the videos above.

I use these tools:
38_carving_1_zps06d7051a.jpg


I start with the giant honking farrier's rasp, and it removes material really fast. Then I switch to some small Stewmac Japanese dragon rasps, and then to a mill file. I have a Shinto saw rasp, but I hate it. I can't control it for anything.

I go for a C shape on fretless basses and a D shape on fretted ones.
 
Good rasps are crazy expensive! I use snap-in Microplanes (and sandpaper) with a few different blades for the whole process.
An advantage to the snap-in ones is that you can flip the blade to work on either the push stroke or the pull stroke.

Link Removed
 
I use a razor sharp drawknife and a similar method to the one which Bruce uses. The drawknife takes practice to use correctly but once you have got the hang of it, it's very useful as can take off anything from a shaving you can see through to great whacking chunks! There are areas where you can't get the drawknife into, for these I mainly use a microplane.
 
Last edited:
"v shaped" is my preference but people are different and you have to adjust to what someone else likes as well.. As far as shaping, i take the bulk off with a 4.5" angle grinder with a flap disk and shape with Microplanes. I never liked using a spokeshave myself, I tried it, put the tool in a drawer where it still is today... The planes level easily and have different coarseness.
 
Pdx
Where did you get the micro plane holder and blades? I have a half-round micro plane blade I tried to use freehand, bent it of course. I have a bunch of old rasps kicking around, none fine enough for neck carving. Ditto on the sticker shock for a good rasp! This will be my first neck carve, so fast stock removal is not what I want. I intend to practice on a sacrificial poplar mockup before touching my rock maple.
 
I personally use a 3/4" roundover. It achieves a D shaped neck with minimal effort, and the shape can easily be fine tuned for softer curves on the edges if desired. I love the fact that there are so many ways to rasp this cat.
 
Pdx
Where did you get the micro plane holder and blades? I have a half-round micro plane blade I tried to use freehand, bent it of course. I have a bunch of old rasps kicking around, none fine enough for neck carving. Ditto on the sticker shock for a good rasp! This will be my first neck carve, so fast stock removal is not what I want. I intend to practice on a sacrificial poplar mockup before touching my rock maple.

Stewmac's dragon rasps are pretty good tools to have. I have the large coarse and small fine rasps and they get the job done without taking too much off.

Invalid Link Removed
 
Pdx
Where did you get the micro plane holder and blades? I have a half-round micro plane blade I tried to use freehand, bent it of course. I have a bunch of old rasps kicking around, none fine enough for neck carving. Ditto on the sticker shock for a good rasp! This will be my first neck carve, so fast stock removal is not what I want. I intend to practice on a sacrificial poplar mockup before touching my rock maple.

I think I got the Microplane ones from Amazon, but I can also get them from my local woodworker supply. The handle with a flat coarse blade costs something like $13, and additional blades (I use a flat fine and a rounded fine) costs about $10 each. A pair of StewMac Dragon files set you back nearly $100!

Plus, with the Microplanes you can also grate some parmesan and zest a lemon!

Don't worry too much about the neck carving. Check for straightness of the back once in a while with a ruler, and leave some material to allow for a bunch of sanding (both to shape and smooth). I've done five necks this far, and they have all turned out well, even the very first one I tried.
 
While I can't speak for his lemon zesting skill, Mathias does indeed carve a nice neck! I've played two of his basses and they are quite nice!

Woodcrafters is where you got the microplanes, eh?

Edit: my reading skills in the morning... Amazon!