Thanks Guys I got the answers I needed.I really dont want to take either of the pices to bare wood. I Just was wondering if there is a way to make nitro cell look good with out a full job? Might sound rookie, but that was all I was concerned with.

Enjoy the benefits of a premium membership!
Upgrade Account
-
TalkBass has been independent since 1998. Add your voice.
Create a free account to reply to discussions, view embedded media, and browse with fewer display ads.
Join free Log in
Want zero display ads or expanded classifieds tools? Compare plans.
You are using an out of date browser. It may not display this or other websites correctly.
You should upgrade or use an alternative browser.
You should upgrade or use an alternative browser.
Nitro-Cell Lacquer Finish Schedule/Tutorial
- Thread starter LedBelli Bass
- Start date
More options
Who Replied?that looks sweet. choosing a finish is hard. i was going to use tru, but now i need to put in some thought... how much did the finishing supplies (minus the reuseable things like a spray gun) cost? on maple, does it leave it close to white, or really yellow it out? (i hate yellow tinted maple:scowl does it help show of figurings in the wood? mine has a top that is flamed maple and quilted cherry, and i want that to show through really nicely. does it bring out the deep reds of bloodwood? i imagine it would not be good for a fingerboard. does it finish well on ash?
does it help show of figurings in the wood? mine has a top that is flamed maple and quilted cherry, and i want that to show through really nicely. does it bring out the deep reds of bloodwood? i imagine it would not be good for a fingerboard. does it finish well on ash?
that looks sweet. choosing a finish is hard. i was going to use tru, but now i need to put in some thought... how much did the finishing supplies (minus the reuseable things like a spray gun) cost? on maple, does it leave it close to white, or really yellow it out? (i hate yellow tinted maple:scowl
Hi Jordan, I went and looked at your build thread. My advice for your build would be to stick with a natural oil/wax type finish. I think you would be much happier with that in the long run. Nitro-cell lacquer will "color" over time, which I understand you to say that you wish to avoid. Also, a natural oil or wax finish will allow your maple to stay lighter longer (although over time all maple will tend to color, that's just the way it is . . . )
As for the cost of my nitro finish, not counting reusable items, around $75.00 to $100.00, and that leaves me with lacquer left over for the next build.
Thanks Guys I got the answers I needed.I really dont want to take either of the pices to bare wood. I Just was wondering if there is a way to make nitro cell look good with out a full job? Might sound rookie, but that was all I was concerned with.
There is a way to do this Kong. Contact Stew-Mac's tech help people and they can give you very good advice on how to make the repair.
However, I agree with the post about the value of the vintage neck . . . I would leave it alone if it's original.
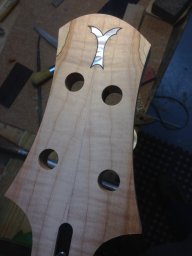
I've never seen an oil that was less yellow than lacquer, which is already somewhat tinted in my opinion. Try a water-based lacquer - they are the opposite of yellow (in fact somewhat blue-ish, but this will go away in time). Some automotive catalyzed polyurethanes are very clear as well.
Nitro lacquer and water-based lacquer both can "burn-in" to them selves, which also means they are susceptible to things like plasticizer migration (setting your bass on that tacky 80's vinyl couch will leave your finish tacky as well) and strong solvents, like high-proof alcohol and other things not commonly found at bars.
Nitro lacquer and water-based lacquer both can "burn-in" to them selves, which also means they are susceptible to things like plasticizer migration (setting your bass on that tacky 80's vinyl couch will leave your finish tacky as well) and strong solvents, like high-proof alcohol and other things not commonly found at bars.
This is a pure, unadulterated bump!
Lots of newer builders since this was first put up, so here it is again!
I'll probably bump this every 3 months (unless I'm violating some policy I don't know about!!! ), just for the newer guys who come on.
Lots of newer builders since this was first put up, so here it is again!
I'll probably bump this every 3 months (unless I'm violating some policy I don't know about!!!
), just for the newer guys who come on.I am not trying to put a negative spin on spray finishes but here's MHO about spraying nitro lacquer. The real expense w/spraying lacquer is that if you are going to do it on a larger scale (more than an occasional bass) and do it right you need a lot of equipment (gun, compressor, exhaust fans, exhaust stack, dust filters, etc) and space for a spray booth/drying area. If you stick with local fire codes you will need specific explosion proof lighting and exhaust fans and in some cases a sprinkler system. Liability insurance may be necessary since spraying lacquer is very combustible stuff. You also need to dispose of the waste (excess finish, excess thinner from cleaning equipment) responsibly since it is toxic - again assuming non water based nitrocellulose lacquers. Nitro is a beautiful finish but it is a big commitment.
I am not trying to put a negative spin on spray finishes but here's MHO about spraying nitro lacquer. The real expense w/spraying lacquer is that if you are going to do it on a larger scale (more than an occasional bass) and do it right you need a lot of equipment (gun, compressor, exhaust fans, exhaust stack, dust filters, etc) and space for a spray booth/drying area. If you stick with local fire codes you will need specific explosion proof lighting and exhaust fans and in some cases a sprinkler system. Liability insurance may be necessary since spraying lacquer is very combustible stuff. You also need to dispose of the waste (excess finish, excess thinner from cleaning equipment) responsibly since it is toxic - again assuming non water based nitrocellulose lacquers. Nitro is a beautiful finish but it is a big commitment.
Very true . . .

can you talk about how you hold or mount your guitar while spraying?
I had thought about hanging it with a coathanger through one of the tuner holes but I read that the wide surfaces should be level while spraying. Any ideas or pics of your set up would be appreciated.
by the way, thanks for the tutorial it is just what I have been looking for. I am planning on a non wax shellac followed by Behlrens vinyl sealer and guitar lacquer.
I had thought about hanging it with a coathanger through one of the tuner holes but I read that the wide surfaces should be level while spraying. Any ideas or pics of your set up would be appreciated.
by the way, thanks for the tutorial it is just what I have been looking for. I am planning on a non wax shellac followed by Behlrens vinyl sealer and guitar lacquer.
Hi, thanks!
I simply hung this instrument up by a tuner hole and sprayed it hanging. I'm aware of some's preference to spray the broad surfaces laying flat, but I've never done it that way. I presume for heavy coats that would be necessary. But for the coats of McFadden's that I use it's not necessary. Lots of thinner coats followed by lots of rubbing . . .
Hope that helps!
I simply hung this instrument up by a tuner hole and sprayed it hanging. I'm aware of some's preference to spray the broad surfaces laying flat, but I've never done it that way. I presume for heavy coats that would be necessary. But for the coats of McFadden's that I use it's not necessary. Lots of thinner coats followed by lots of rubbing . . .
Hope that helps!
can you talk about how you hold or mount your guitar while spraying?
I had thought about hanging it with a coathanger through one of the tuner holes but I read that the wide surfaces should be level while spraying. Any ideas or pics of your set up would be appreciated.
by the way, thanks for the tutorial it is just what I have been looking for. I am planning on a non wax shellac followed by Behlrens vinyl sealer and guitar lacquer.
coming from when i did custom car paint, if you have to spray it flat, your putting to much paint/clear on. Coats should be just "medium wet" ( i know that sounds goofy, but hey, I didnt make up the term ).
I havent sprayed nitro, but it sounds like a very similar process.
that does help alot, it will be much easier, and I will make sure to shoot super thin layers.Hi, thanks!
I simply hung this instrument up by a tuner hole and sprayed it hanging. I'm aware of some's preference to spray the broad surfaces laying flat, but I've never done it that way. I presume for heavy coats that would be necessary. But for the coats of McFadden's that I use it's not necessary. Lots of thinner coats followed by lots of rubbing . . .
Hope that helps!
Another question:
Does it make sense to do shellac under the vinyl? Or is it a mistake? or reduntant?
Behlrens instruction (and your tutorial) says the vinyl sealer is "required" for proper lacquer adhesion.
But my friend who is advising me, (and has built a few dozen guitars) is providing me with some high quality shellac, (that should coax some might pretty flmae out of my bass) and he says he doen't know about using the vinyl with the shellac, and thinks it may be redundant or may cause problems.
So under the nitro lacquer would you suggest:
shellac under vinyl?
vinyl under shelac?
or only one or the other?
I rally want to take advantage of the quality shellac, and I had been planning on shellac, then vinyl, then lacquer, but now I am confused. I have a few days before I am ready to start finishing. Right now I am sanding out the 220 and drilling/routing for hardware.
that does help alot, it will be much easier, and I will make sure to shoot super thin layers.
Another question:
Does it make sense to do shellac under the vinyl? Or is it a mistake? or reduntant?
Behlrens instruction (and your tutorial) says the vinyl sealer is "required" for proper lacquer adhesion.
But my friend who is advising me, (and has built a few dozen guitars) is providing me with some high quality shellac, (that should coax some might pretty flmae out of my bass) and he says he doen't know about using the vinyl with the shellac, and thinks it may be redundant or may cause problems.
So under the nitro lacquer would you suggest:
shellac under vinyl?
vinyl under shelac?
or only one or the other?
I rally want to take advantage of the quality shellac, and I had been planning on shellac, then vinyl, then lacquer, but now I am confused. I have a few days before I am ready to start finishing. Right now I am sanding out the 220 and drilling/routing for hardware.
If it were me I would stick with the manufacturer's recommendations, i.e., vinyl sealer alone, then the finish. This is also what McFadden's recommends.
I know that shellac is kind of a universal sealer, but if you're looking to be on the safe side then I would use the vinyl sealer alone.
BTW, your lacquer coats don't need to be "super" thin, but just enough to avoid running (and even then you can sand a run out).
Good luck!
It is a month or so further down the road then I had expected but I am finally ready to start shooting the lacquer. Which has led me to a couple more questions.
What do you do about closing of the pickup and control cavities, truss rod access hole, and screw holes?
Do you spray with the control cavity in place?
I have put chopstick ends and toothpicks in the screw holes.
I have used painters tape in the fingerboard and in the pickup cavities, even though it just covers the bottom of the pickup cavities. Do I need to keep the lacquer of the sides of the pickup cavities.
My control cavity cover is tight enough that is is very snug in place even with out screws so I was planning on leaving it in place when I spray, but I am a little concerned that the lacquer would cement the cover in place. Could I wax the inside edge of the cover? Or make sure to run an exacto around the cover seam after spraying?
And as far as the truss rod access hole I rolled tape around a piece of wood to fill the hole, it would still let some spray in the edges of the hole that will have to be cleaned. Should I completely seal the access hole or can a little laquer be cleaned out afterward?
What do you do about closing of the pickup and control cavities, truss rod access hole, and screw holes?
Do you spray with the control cavity in place?
I have put chopstick ends and toothpicks in the screw holes.
I have used painters tape in the fingerboard and in the pickup cavities, even though it just covers the bottom of the pickup cavities. Do I need to keep the lacquer of the sides of the pickup cavities.
My control cavity cover is tight enough that is is very snug in place even with out screws so I was planning on leaving it in place when I spray, but I am a little concerned that the lacquer would cement the cover in place. Could I wax the inside edge of the cover? Or make sure to run an exacto around the cover seam after spraying?
And as far as the truss rod access hole I rolled tape around a piece of wood to fill the hole, it would still let some spray in the edges of the hole that will have to be cleaned. Should I completely seal the access hole or can a little laquer be cleaned out afterward?
i personaly use some sort of finish inside the pickup cavities.
I just think of it this way, the finish is not only for beuty, but to keep the elements out of the wood. One open spot is were in the future ( very distant ) a crack will most likey occour.
I just think of it this way, the finish is not only for beuty, but to keep the elements out of the wood. One open spot is were in the future ( very distant ) a crack will most likey occour.
i personaly use some sort of finish inside the pickup cavities.
I just think of it this way, the finish is not only for beuty, but to keep the elements out of the wood. One open spot is were in the future ( very distant ) a crack will most likey occour.
That makes sense. So just a couple toothpicks to keep the screw holes from getting filled?
4. Shoot 3 coats McFadden' clear nitro-cellulous lacquer 1-2 hours between shoots.
Wait 24 hours.
Sand/level with 220 or so. STAY AWAY FROM ANY/ALL EDGES. DO NOT SAND THROUGH THE FINISH. JUST A LIGHT LEVELING AT THIS STEP IS ALL THAT IS NEEDED.
Can I wait more than 24 hours between "rounds"? There are two days that the shop I work in isn't open.
Thanks so much,
Loren

24 Hours means over night. If it was minimum 24 hours you would be starting 4 hours later every day.
I think the question was "can I wait 2 or 3 or more days between "rounds" (of 3 coats).
My question is,
"If I spray one coat today, and then cannot spray another coat until tommorrow or the next day, would this be okay?"
"Would I scuff sand the surface before shooting a coat on another day, or every 3 coats?"
or
"Should I put off spraying until I have 3 or 4 continous days?"
(PS please answers from experience only. I hate trying to make decisions based on people guesses. thanks.
I think the question was "can I wait 2 or 3 or more days between "rounds" (of 3 coats).
My question is,
"If I spray one coat today, and then cannot spray another coat until tommorrow or the next day, would this be okay?"
"Would I scuff sand the surface before shooting a coat on another day, or every 3 coats?"
or
"Should I put off spraying until I have 3 or 4 continous days?"
(PS please answers from experience only. I hate trying to make decisions based on people guesses.
thanks.mikeyswood
Inactive
You are worrying too much. A day is the recommended time based on ~70 degrees and ~30% humidity. Hotter/dryer will allow for shorter times and cooler/wetter will require more time. Too much humidity will screw you.
The solvents in lacquer allow it to blend with previous coats. I only sand to maintain level. You can go years in between coats; just make sure there is no dust on it.
The solvents in lacquer allow it to blend with previous coats. I only sand to maintain level. You can go years in between coats; just make sure there is no dust on it.


