• TalkBass has been independent since 1998. Add your voice.
    Create a free account to reply to discussions, view embedded media, and browse with fewer display ads.
    Join freeLog in
    Want zero display ads or expanded classifieds tools? Compare plans.

Peavey T-40 Replacement neck construction (long thread + pics)

Hey guys. So a bit of back story about this project...

I snagged this 1979 T-40 for $200 on Craig's List a few months back. Dabbled with it at the dude's house, seemed, okay, and figured that $200 was a steal for this (including OHSC). Took it to band practice, tuned it up, and played through some songs. Absolutely loved the sound - insanely versatile.

Took it home and decided to take a look at the action - seemed a bit high. I sighted the neck, and WOW....the neck was curved from frets 1-4. Took off the truss rod cover, and the rod is completely slack. Uh oh. Did some reading about the construction of these, and realized that the problem lay within an inherent design flaw.

T-40's were one of the first CNC'd basses - and THE first CNC'd bass made by Peavey, AFAIK. Instead of a neck laminate (or even one-piece neck, a la Lakland) with a fretboard on top, they took two pieces of maple and routed the truss rod slot down the middle - thus making the fretboard an integral part of the neck. That's problem 1.

Problem 2: this center joint puts the truss rod's tension DIRECTLY on a (thin) glue joint. over 30+ years, that glue joint may start to give out and crack. That's precisely what happened to mine. I don't know if this is a common problem or not, but it essentially made it unable to be played. Time to make a neck!

I decided to do a 5-piece laminate for the replacement neck - 4 pieces of maple with a thin mahogany veneer down the middle. Size specs are (obviously) exactly the same. I'm installing a double-action truss rod (which I've done in every guitar neck that I've built - I see no reason not to). It'll have vintage-size medium nickel Jescar frets (FW 43080), a curly maple fretboard, and black side inlays. I am not sure yet if I'm going to do dots on the fretboard or not. The original peavey hardware will go onto the replacement neck as well. I have a Silhouette machine that I use for decals that I'll use for the "Peavey T-40" and paint the pinstripe line. Sherwood LOVOC nitro over everything when it's said and done.

Another advantage to this replacement neck aside from stability will be threaded inserts - the wood screws on the original were nearly stripped out. Threaded inserts are the way to go, IMO. I'll keep the neck angle adjustment screw as well, but probably install a new socket screw in place of the old one (also a bit rough looking).

Enough talking - onto pics! I resawed and planed the fretboard wood last night, and I'm getting the inserts and installing them tonight after work. Pics to follow.

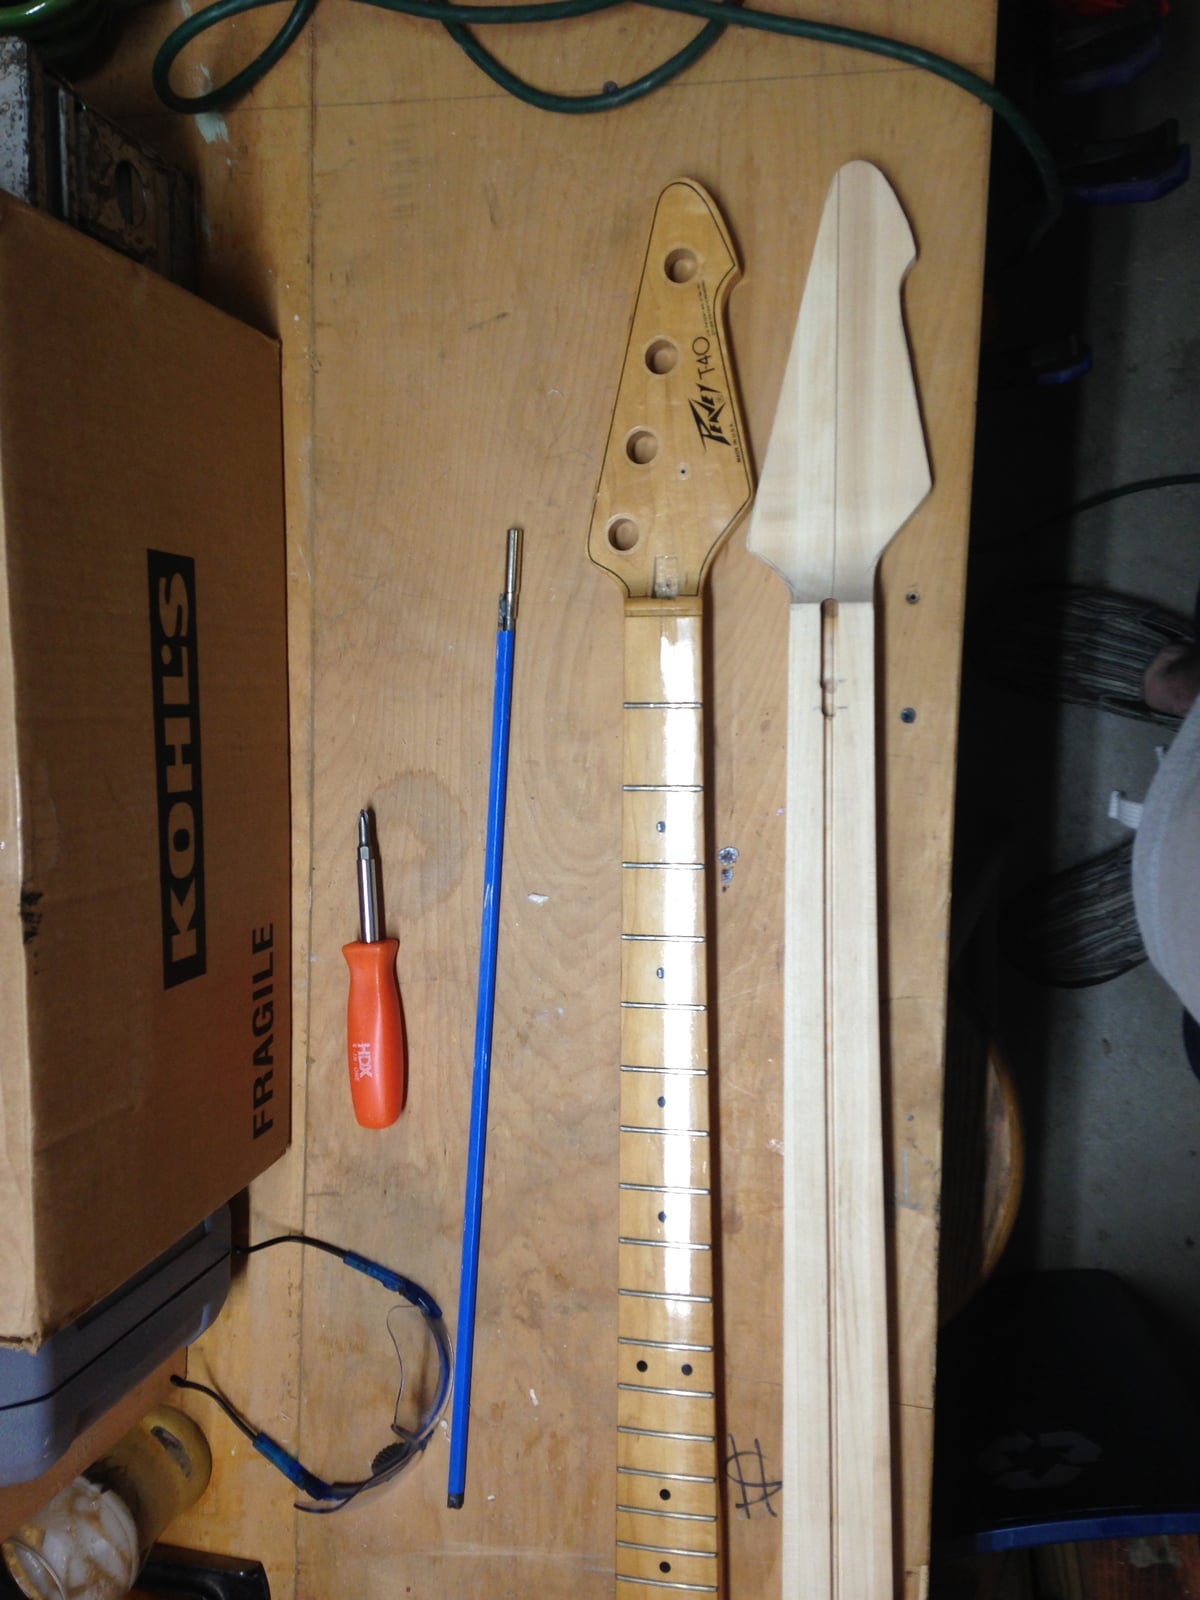
Replacement neck & the original. You can kind of see the crack in the middle at the first fret.

pXYCVnN.jpg


Headstock shaped.

zT6EbwS.jpg


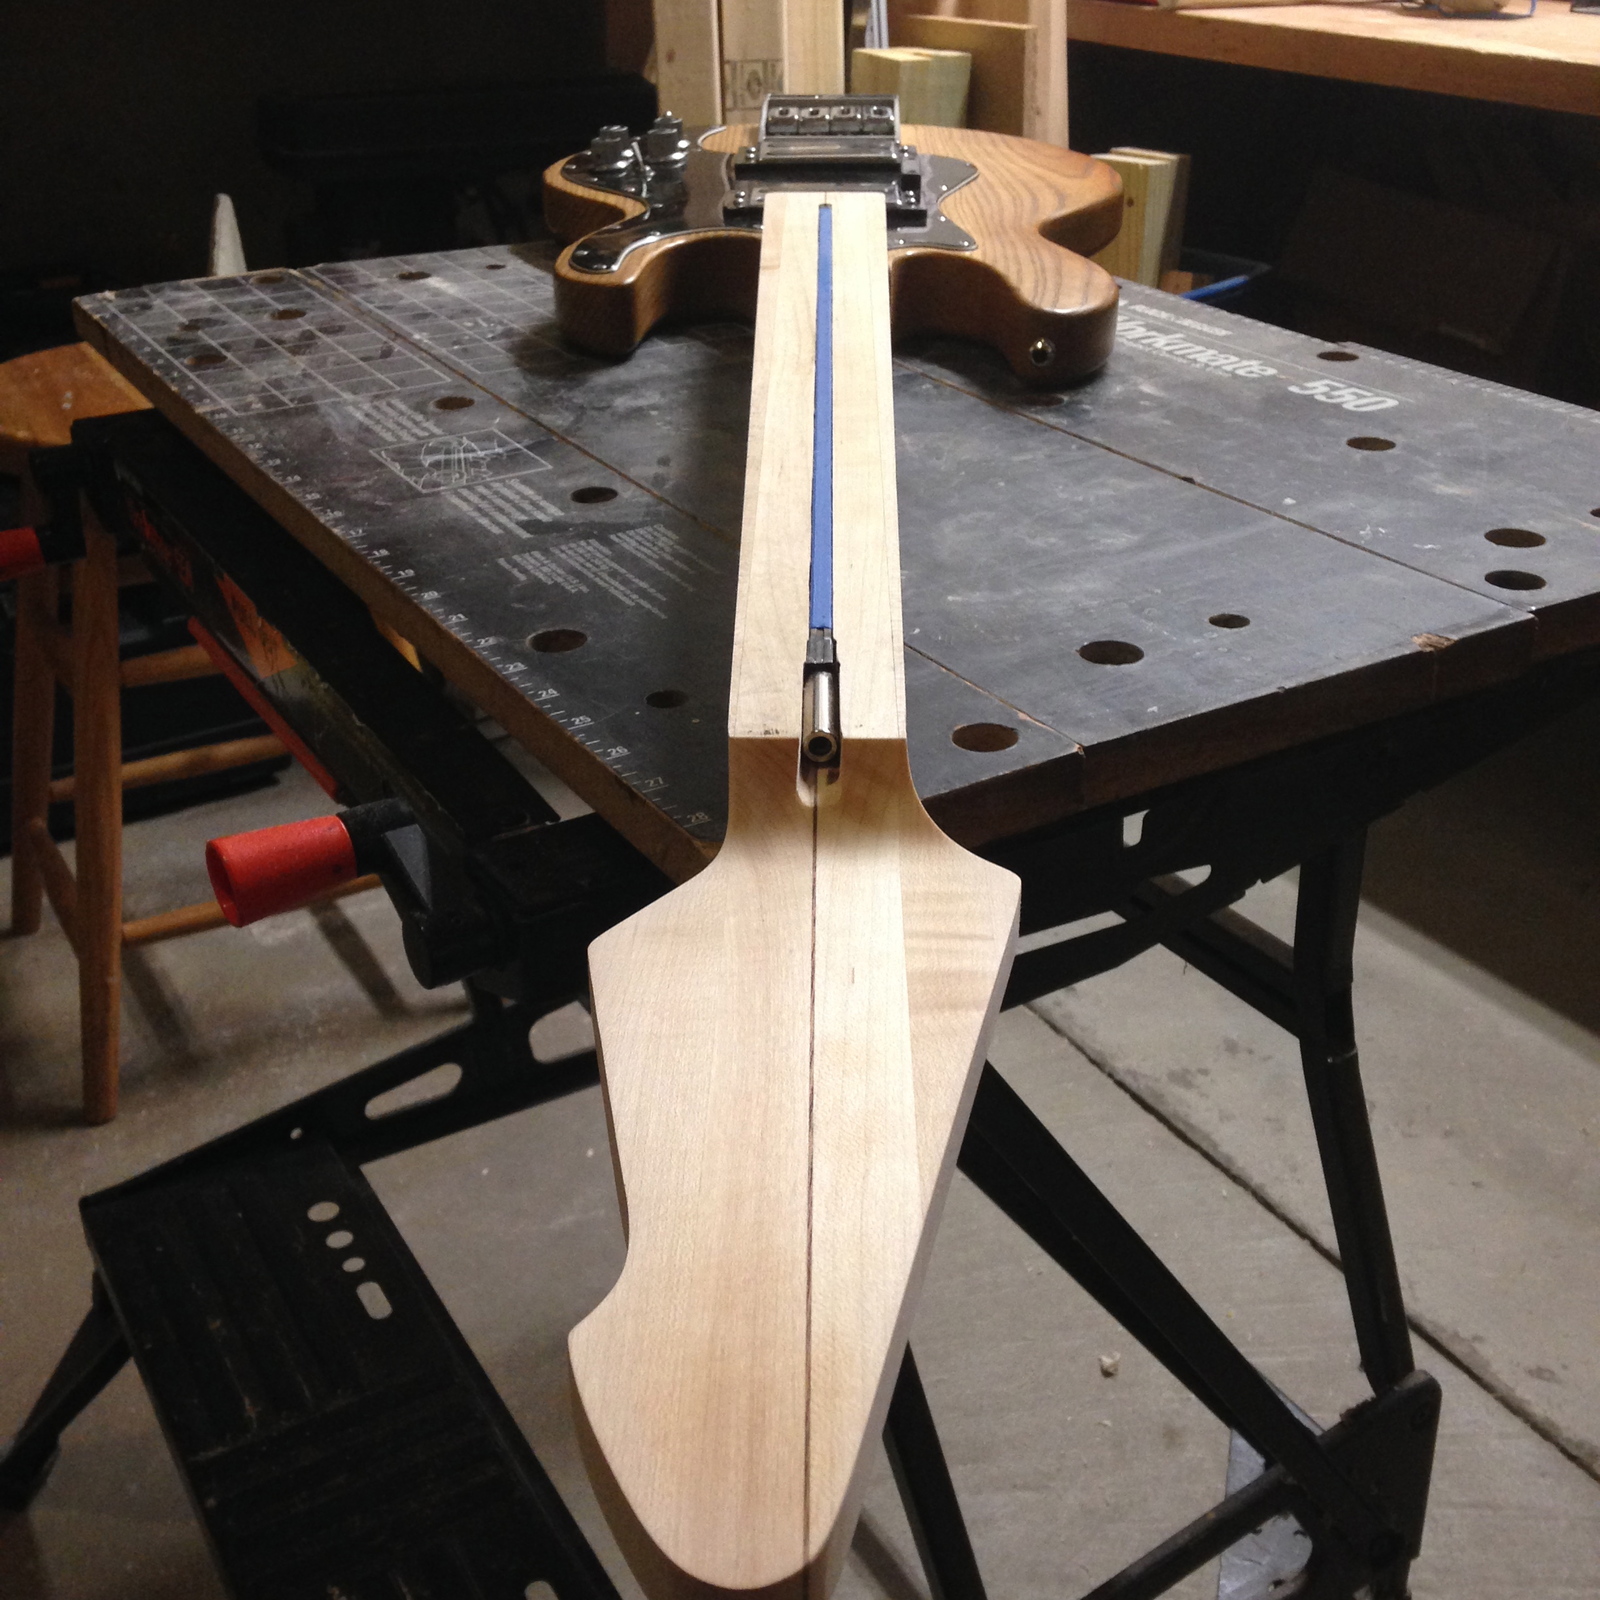
Nice, snug fit!

JMg6Acy.jpg


OoD4eZo.jpg


I will post more pics as I progress more. I'm looking forward to being able to play this baby again!
 
Cool restoration! I remember the T-40's back in the day. Kind of heavy, but really versatile electronics. They were not considered anything special when they first came out, as I remember it, interesting to see how time has proven them to be a great bass, and now highly desirable. Sub'd
 
My T-40 has a very slight twist that makes the action higher on the treble side around the 14/15th fret to the body.
Still plays great and sounds great, I got no business there anyway.

Good to know since I have a few of the MIA 80's Peaveys. Can't wait to see finished pics.
 
Last edited:
If you think radiusing a fretboard is the worst thing, wait til you start fretting, that is the longest thing ever. Cause it's not just installing frets, it's doing virtually everything in regards of it: leveling them all, filing the ends flush with the board, giving them a slight bevel, crowning, etc. Impatience kicks in a great deal.

But enough venting :D it looks good :P
 
If you think radiusing a fretboard is the worst thing, wait til you start fretting, that is the longest thing ever. Cause it's not just installing frets, it's doing virtually everything in regards of it: leveling them all, filing the ends flush with the board, giving them a slight bevel, crowning, etc. Impatience kicks in a great deal.

But enough venting :D it looks good :p

Ha! I'm aware! I've done tons of fretting...not my favorite part, but I don't mind being meticulous. It at least gives me something to do. I feel like when I'm radiusing a fretboard it's just mindless back and forth and my arm ends up hurting!
 
  • Like
Reactions: ThaCoast
Well, after a long/busy week, I finally got around to getting the fret slots cut. There was a *minimal* issue, and I have yet to figure out how to remedy this...

I use the Ekips FretFind website, and I have noticed that when I print the templates at 100%, my scale length (once you line the papers up and tape it and all of that) is always just slightly shorter than need be...print it at 101%, and they're too long.

This peavey is 34", and the template ended up reading about 16 15/16" at fret 12, making it (overall) about 33 7/8" scale. Not a huge problem, just slide the saddles forward a bit (I also use 55-110's in Drop D, so that will help), but this is something that I'll either have to keep in mind or invest into a few fret slotting templates (acrylic or likewise). I am thinking the latter, and it would also make cutting the slots easier and faster!

Anyway, it turned out just fine. I'm opting to only do two marker dots at fret 12 and keep the rest of the fretboard clear.

I also traced my guidelines for carving it. Once I take off some thickness with the bandsaw it will be down to 28mm heel depth (original spec), though the neck will be slightly thicker than the original due to me installing a double action truss rod. Not a big problem.

m8oqGB2.jpg


m6spQ3T.jpg
 
Callan,
I'm pestering everybody who's in the process of neck carve: How much wood are you leaving between bottom of trussrod and back of neck? The only figure I've seen repeated on this is 3/16" minimum. Neck is looking good, curious to see how you carve it. Facet method, templates, or do you just go by feel?
 
I leave a minimum of 3/16", I based that on a Carvin neck which is a thin neck. I measured the depth of the truss rod channel then the thickness of the neck minus the fretboard and it seems to be 3/16". On my latest bass (in my avatar) after having no tension on the truss rod for weeks and it being fine, it suddenly started bowing forward when it got humid. I had to crank down on the truss rod, I was glad that there was 3/16" holding that truss rod.
 
  • Like
Reactions: Gilmourisgod
Exactly what you've heard and what Jisch said - 3/16". In the past I've done 1/8" minimum, but that was using steel stiffening rods as well, so I was more comfortable with the thinner neck.

As far as carving, I use a combination of rasps, a spokeshave, and some sanders (belt, palm, and OSS). More of a feel than anything, though I am working on a jig to use large roundover bits to take off the bulk of the material, though I have yet to actually do this. I keep a contour gauge handy as well and check progress as I go. I personally love carving necks by hand!
 
  • Like
Reactions: Gilmourisgod
Neck carve is easily the most daunting task for noobs like me, particularly as my build is neck-through. Only one chance to get it right! 3/16" clearance under my double-action rod will leave me with about 15/16" neck thickness at the first fret because I have a 3/8" thick Rickenbacker style fingerboard. I may be able to shave the FB 1/16" to get me down to my target of 7/8". Would you mind posting some incremental shots of your neck carve?
 
So I had a pretty productive weekend. Got dots installed, sanded the fretboard to 1000 grit, got the frets in and done (well, except leveling/recrowning...that'll come after it's lacquered), and started carving it. I said that I would try to document the carving process (at least how I do it), so here we go.

I start by rasping out the volute and the heel to where I'm pretty satisfied with the shape of both of them. This gives me a nice plane to go on between the two where I use my spokeshave to take off the bulk of the material, then a fine rasp to give some contouring and to rid the neck of the spokeshave draw marks.

I have found that the $18 Stanley spokeshave from Home Depot works surprisingly well after a good initial setup/sharpening/flattening. I don't have money to drop a few hundred $$$ on a nice Lie Nielsen or something similar, and for my purposes this works just fine. Sharp blades are EVERYTHING.

Started the heel rasping...

V6ZFpvY.jpg


The heel carve was actually a bit high up on the neck, in reality, so I lowered it - rasps again.

ArAFuYr.jpg


Repeat this process on the volute end and begin to shape it with the spokeshave...

CSgkkJ5.jpg


I should add in here that I DID use my R.O.S.S. to help with the volute end, though the bulk of the shaping was done with two different rasps.

Once the spokeshave gets to where I can shape the rest with a rasp, I go from there...

j64rf4k.jpg


A few notes that I might add...

- Spokeshaves CAN, especially in woods like maple, cause tear-out. In my case, I had some because of the reversed grain directions in the laminates.

- Rasps can leave very deep gouges if you aren't careful.

- To know what the minimum thickness is, I take the overall center line thickness (28 mm) and subtract the depth of my truss rod cavity (5mm), then add at least 2mm to that (5+2 = 7), then subtract that from my initial neck thickness, thus leaving me with a MINIMUM thickness of 21 mm along the center line and about 1/8" on either side. When I carve the center, I'll keep checking with calipers that I have not exceeded 21 mm.

- If you do not have a constant center line, i.e. a mahogany veneer going down the midline, DRAW ONE! You will thank yourself later.

- Continually check your work. You're taking away more wood than you think.

That's that for now - hopefully I'll finish up carving it this week, get it sanded to 600 and lacquer it this coming weekend.

Also, here's the fretboard (because why not?).

jSA5YVL.jpg
 
Hey guys, sorry about the lack of updates. Life happens!

Here's the progress - essentially done except the logo/pinstripe and lacquer! This thing turned out great and is done to essentially the original Peavey's specs, save the thickness of the neck (slightly thicker to accommodate the double action truss rod). Heel measures 28mm, which was original, and the first fret is 21mm (original is 19.5mm thick, IIRC).

Carving is all about patience, measuring, checking straightness (make sure you have no divots/bumps), and carving some more. The feeler gauge that I use is like $10 at big box stores and a tremendous aid in the entire process. I can't imagine doing necks without one.

Attached to the body with rough shaping:
QtN4eqY.jpg


Check profile around fret 3 - still needs a lot taken off on the treble side and on the back, a wee bit on the bass side:
ujbd8NP.jpg


5th fret, take some off on the treble and middle:
mE6oXTV.jpg


Around 7/8, lots of shaping to be done still:
0Lg5wUy.jpg


12th, looking solid:
dIJOxKS.jpg


Nearly finished - sanded up to 220:
PcBaqLk.jpg


Done!
jl8HgUv.jpg


And the front:
fJ88Emw.jpg


The entire process took me about 4-5 nights. Feel is important and I let me brain tell me what to do as well as the feeler gauge. It's important (to me) to periodically bolt it on and throw some old strings on it and play it a bit to see just how it feels, then shade areas that need some work and continue to work them until they feel (and look) right.

All in all I am thrilled with how the profile and fretboard turned out and I cannot wait to get this thing back in playing order!
 
Cool project, and of particular interest to me, as I may have to tackle the exact same thing myself at some point. Snagged a T-40 off the 'Bay a couple of years ago. I love the look, I love the sound, and it is far from unplayable, but, there is a definite bow in the neck that the local shop couldn't completely get rid of.
 

Latest posts