

Enjoy the benefits of a premium membership!
Upgrade Account
-
TalkBass has been independent since 1998. Add your voice.
Create a free account to reply to discussions, view embedded media, and browse with fewer display ads.
Join free Log in
Want zero display ads or expanded classifieds tools? Compare plans.
You are using an out of date browser. It may not display this or other websites correctly.
You should upgrade or use an alternative browser.
You should upgrade or use an alternative browser.
Portable Sub-Short scale; take 2
- Thread starter MovinTarget
- Start date
More options
Who Replied?

you're a bad rama jama, MT!looking forward to watching this take shape!

Just don't expect this to happen quickly lol!

- Apr 18, 2008
- 16,007
- 1
- 31,705
- Disclosures
- I'm highly opinionated and extremely self-assured

Just don't expect this to happen quickly lol!
 you take your own sweet time, my brother! it'll be a 'GAS' for me in any case!

- Apr 18, 2008
- 16,007
- 1
- 31,705
- Disclosures
- I'm highly opinionated and extremely self-assured
Please be careful.
Remove most of what needs to be removed with a Forstner bit. Use a drill press if you have one, otherwise a hand drill works too.
Just use the router to clean up the last final bit.
Remove most of what needs to be removed with a Forstner bit. Use a drill press if you have one, otherwise a hand drill works too.
Just use the router to clean up the last final bit.
Yeah, don't have a drill press, but I have a plan moving forward... instead of trashing the entire piece, I'll cut it to the width of the squared heel. I didn't want the any lateral force to be pushing exclusively on a glue joint, but it'll probably be okay...
Vacuum board saves the day!
One of the advantages to having the pocket squared I can shave the sides off and just make a pocket by glueing sides on...
So by increasing the height of my planing rails, I do just that!
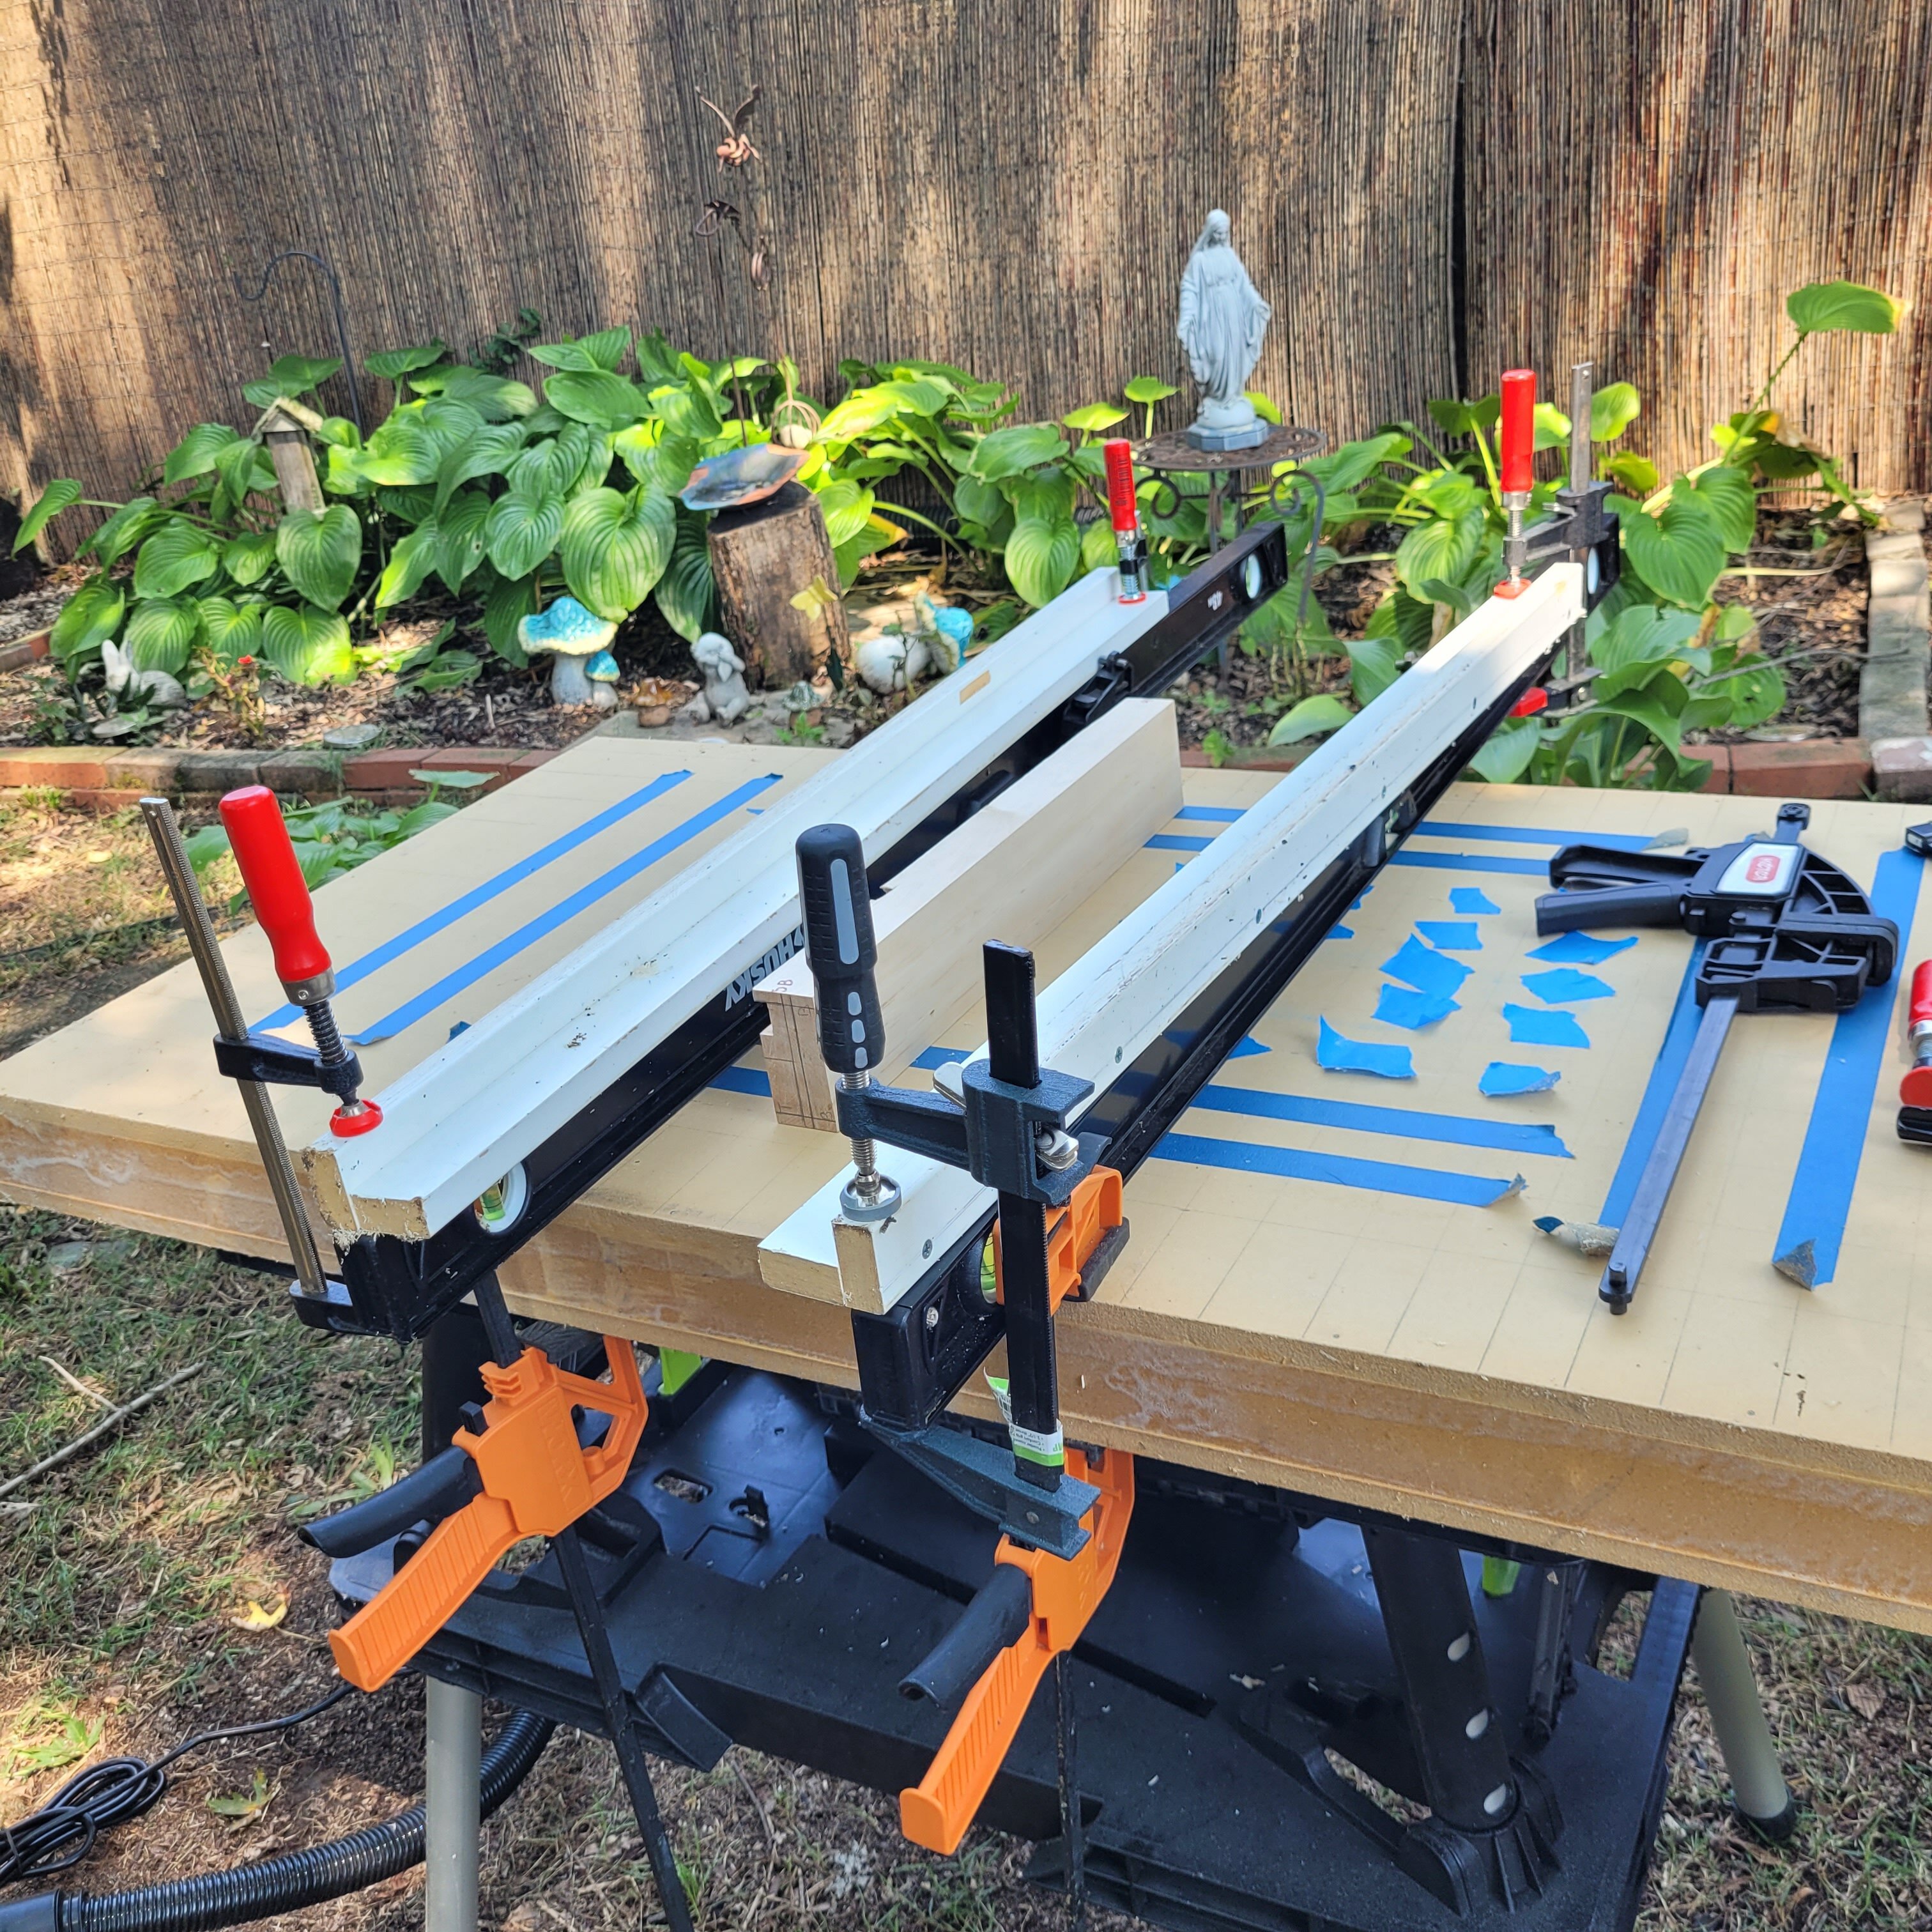
@ctmullins, it is sturdier than it looks, I swear!
(You can NEVER own too many clamps!!!)
So now that the ruined sides of pocket removed, the core is the same width as the squared heel:
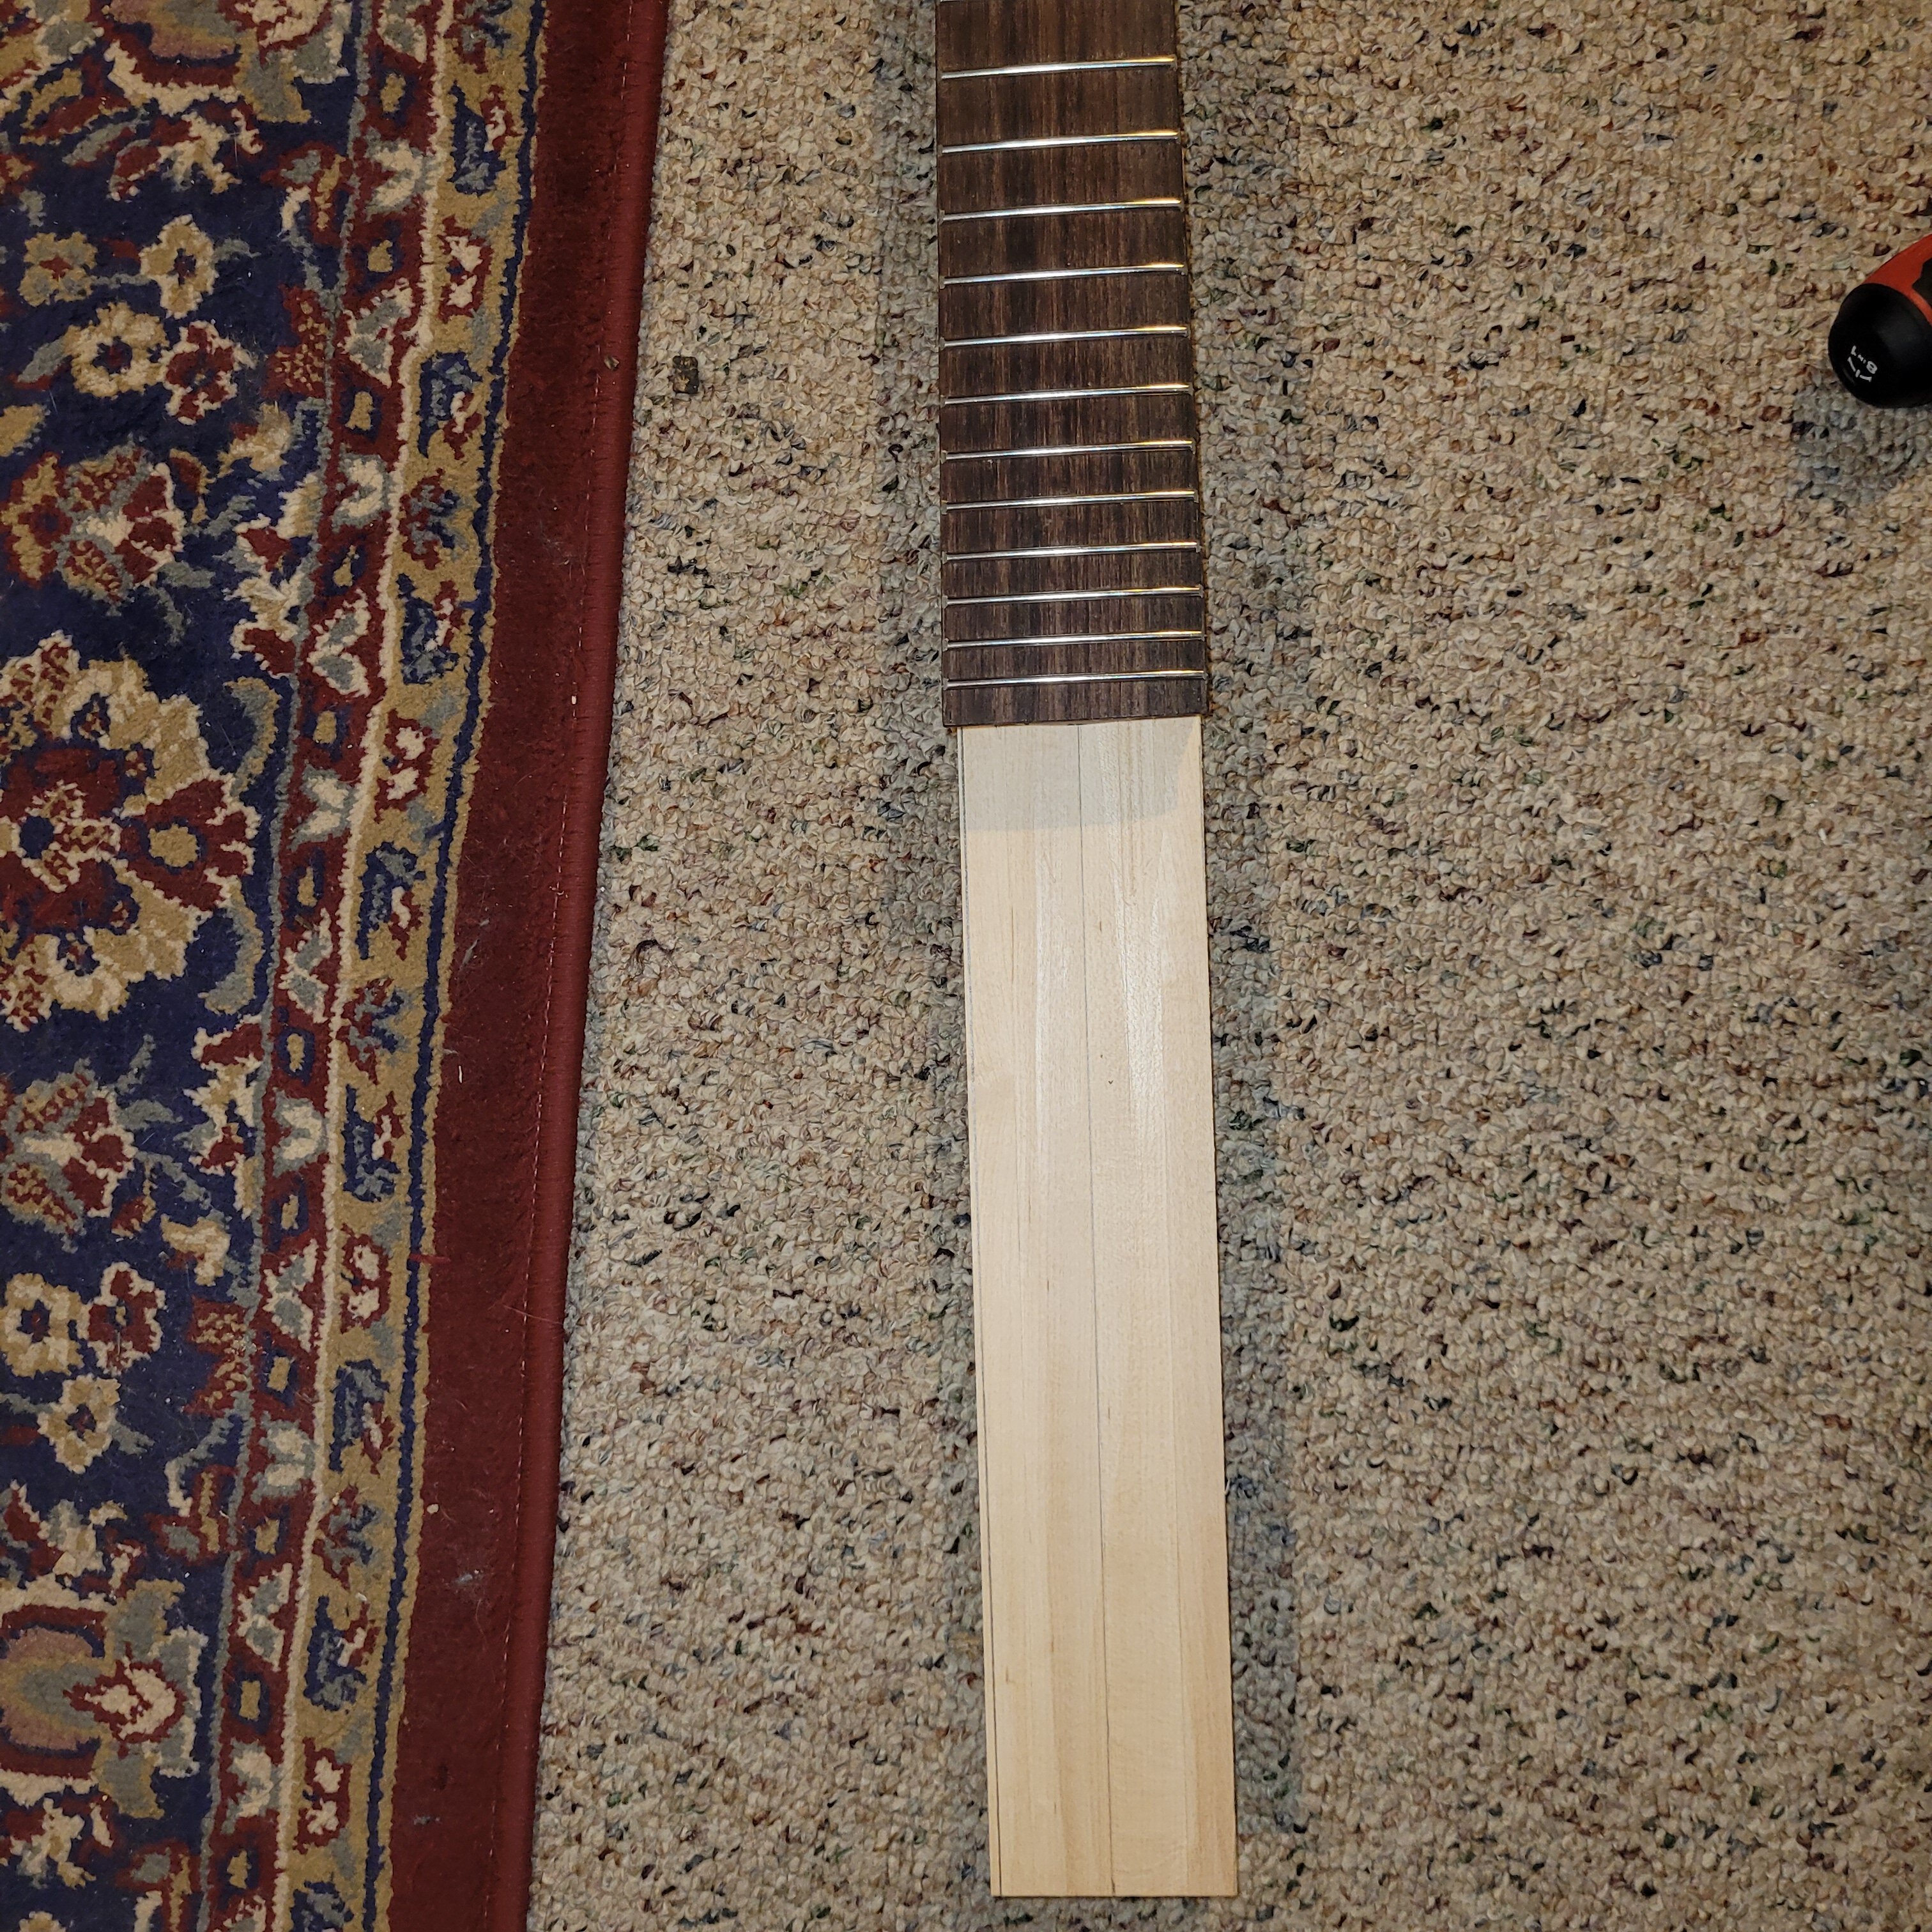
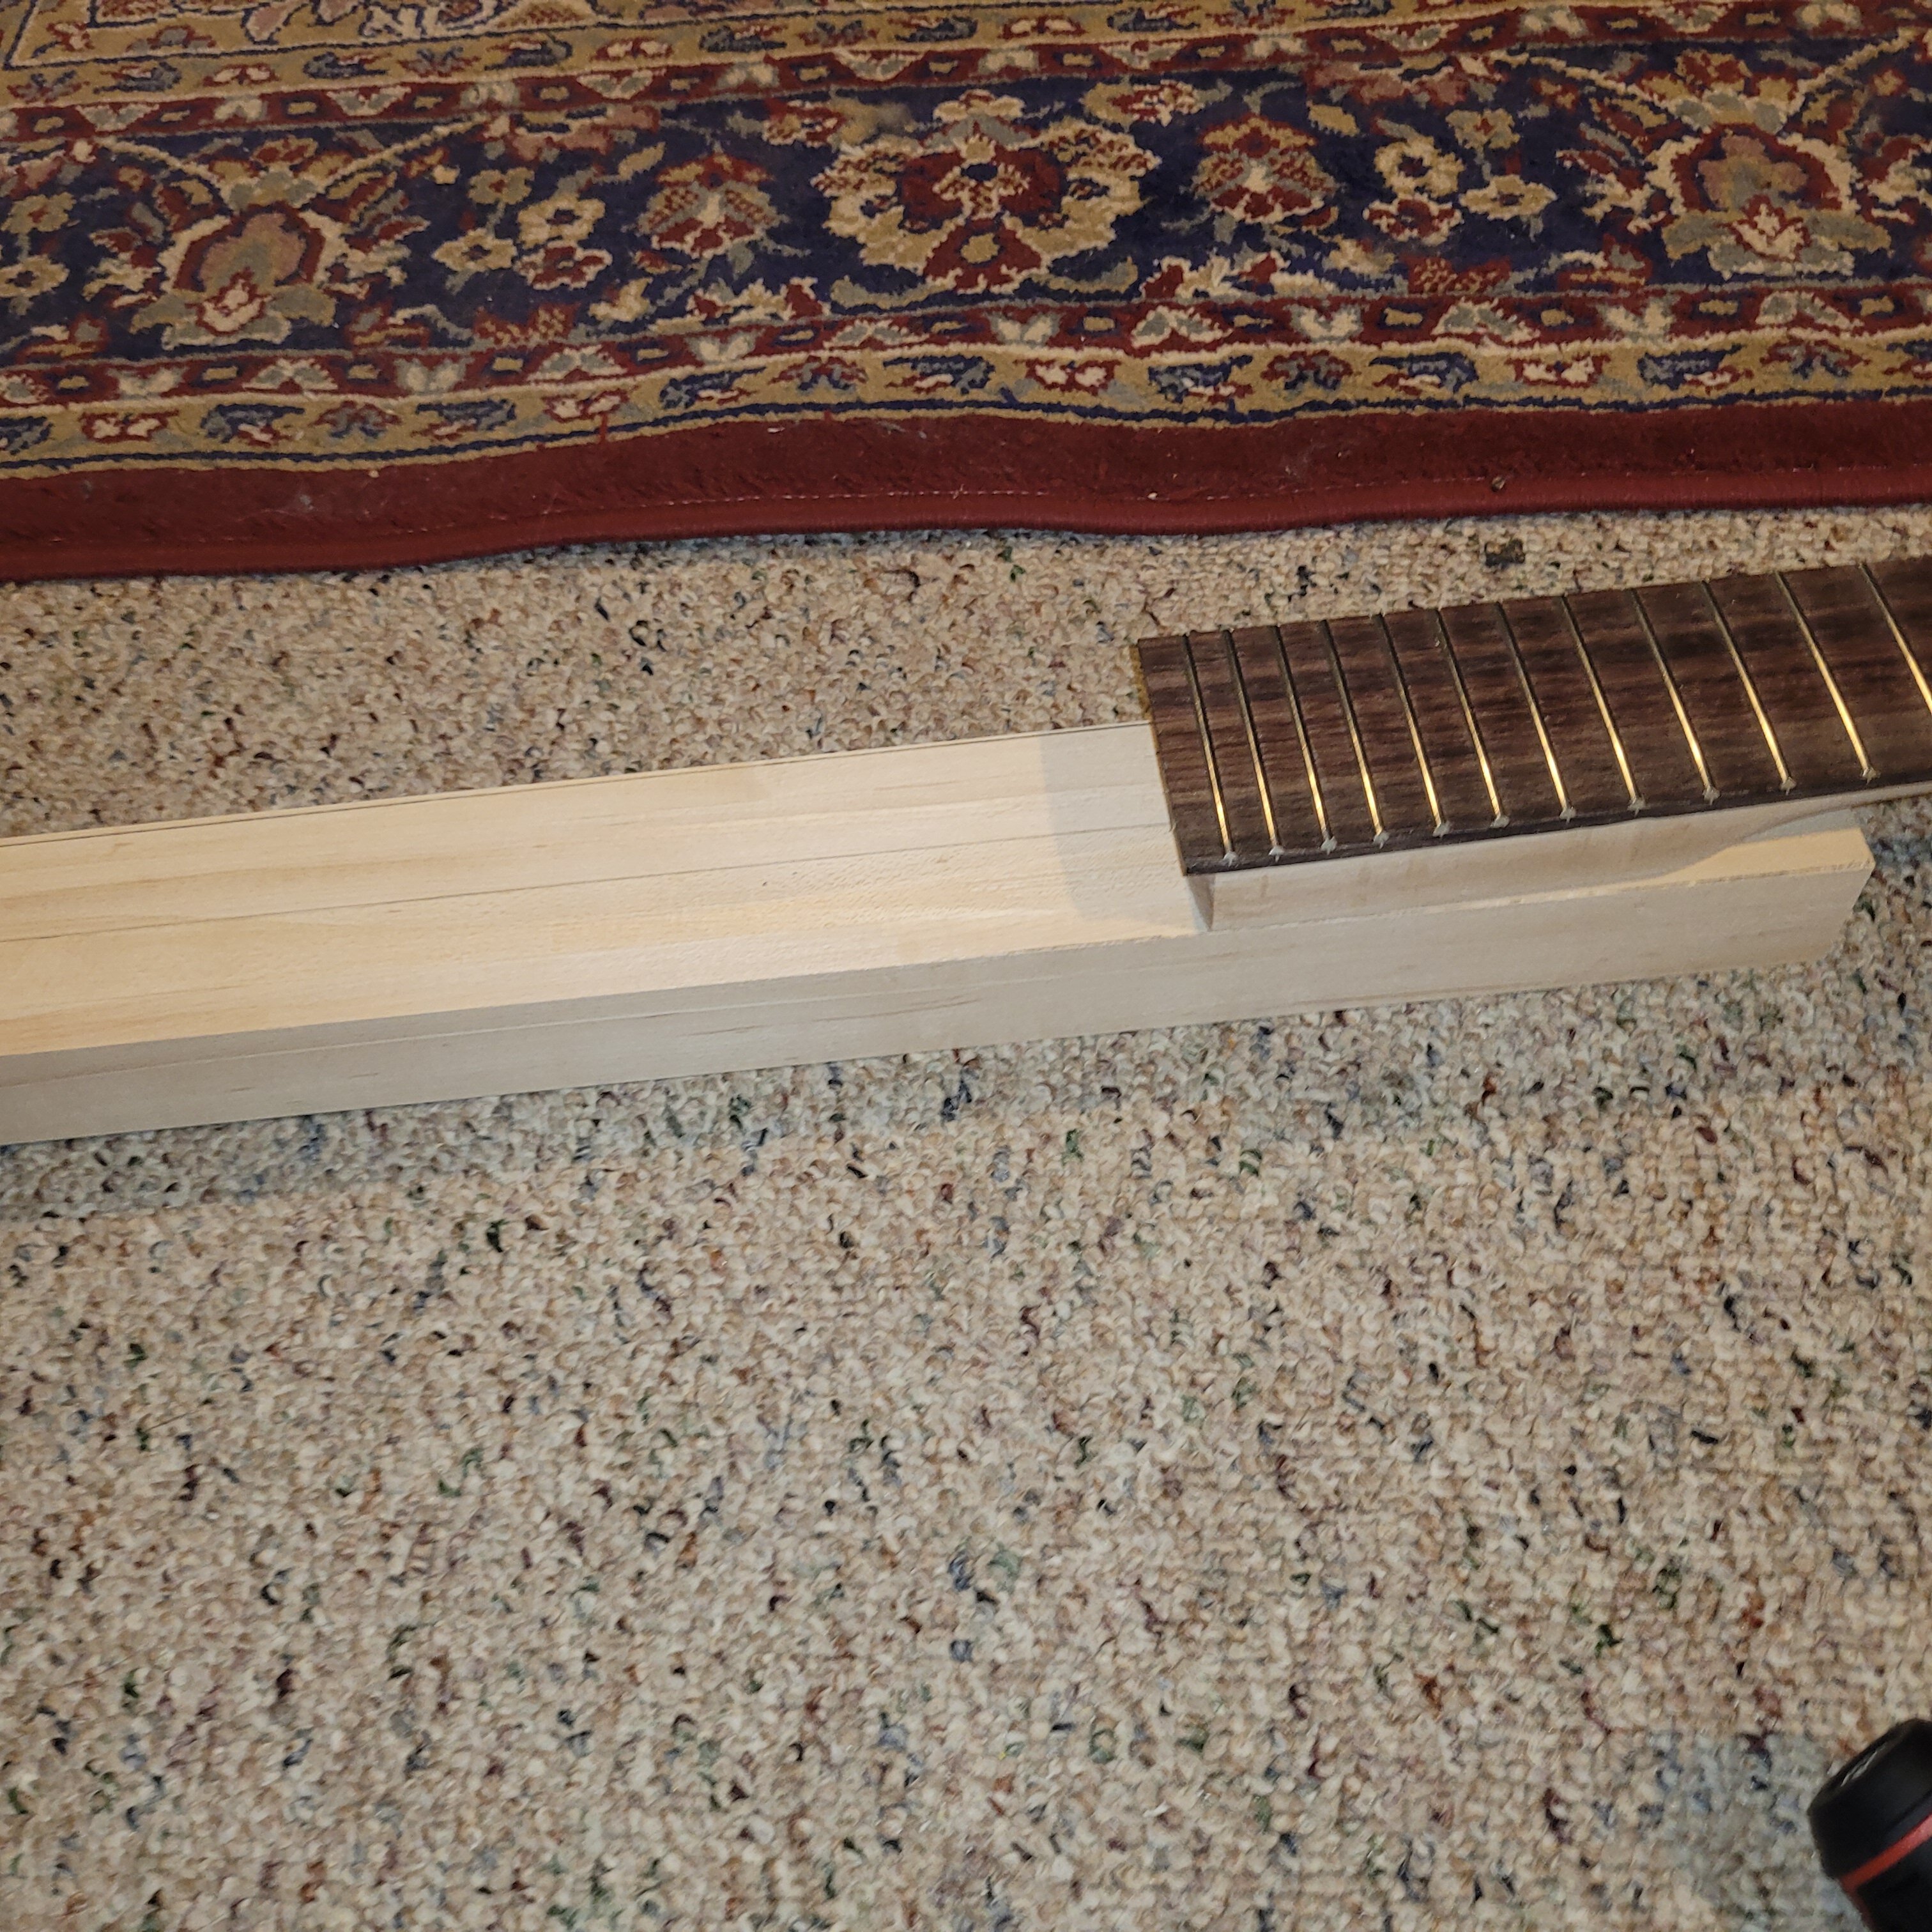
Now I'll go back and thickness plane the floor of the pocket out and then proceed as planned. Crisis averted!
you may have noticed how "deep" I have the heel set in the pics, this is planned so I can make the underside of the pocket taper into the neck. I hate the flat neck block where the neck meets the pocket...
One of the advantages to having the pocket squared I can shave the sides off and just make a pocket by glueing sides on...
So by increasing the height of my planing rails, I do just that!
@ctmullins, it is sturdier than it looks, I swear!
(You can NEVER own too many clamps!!!)
So now that the ruined sides of pocket removed, the core is the same width as the squared heel:
Now I'll go back and thickness plane the floor of the pocket out and then proceed as planned. Crisis averted!
you may have noticed how "deep" I have the heel set in the pics, this is planned so I can make the underside of the pocket taper into the neck. I hate the flat neck block where the neck meets the pocket...
Last edited:

Started cutting the pocket down, now that the ruined sides have been removed.
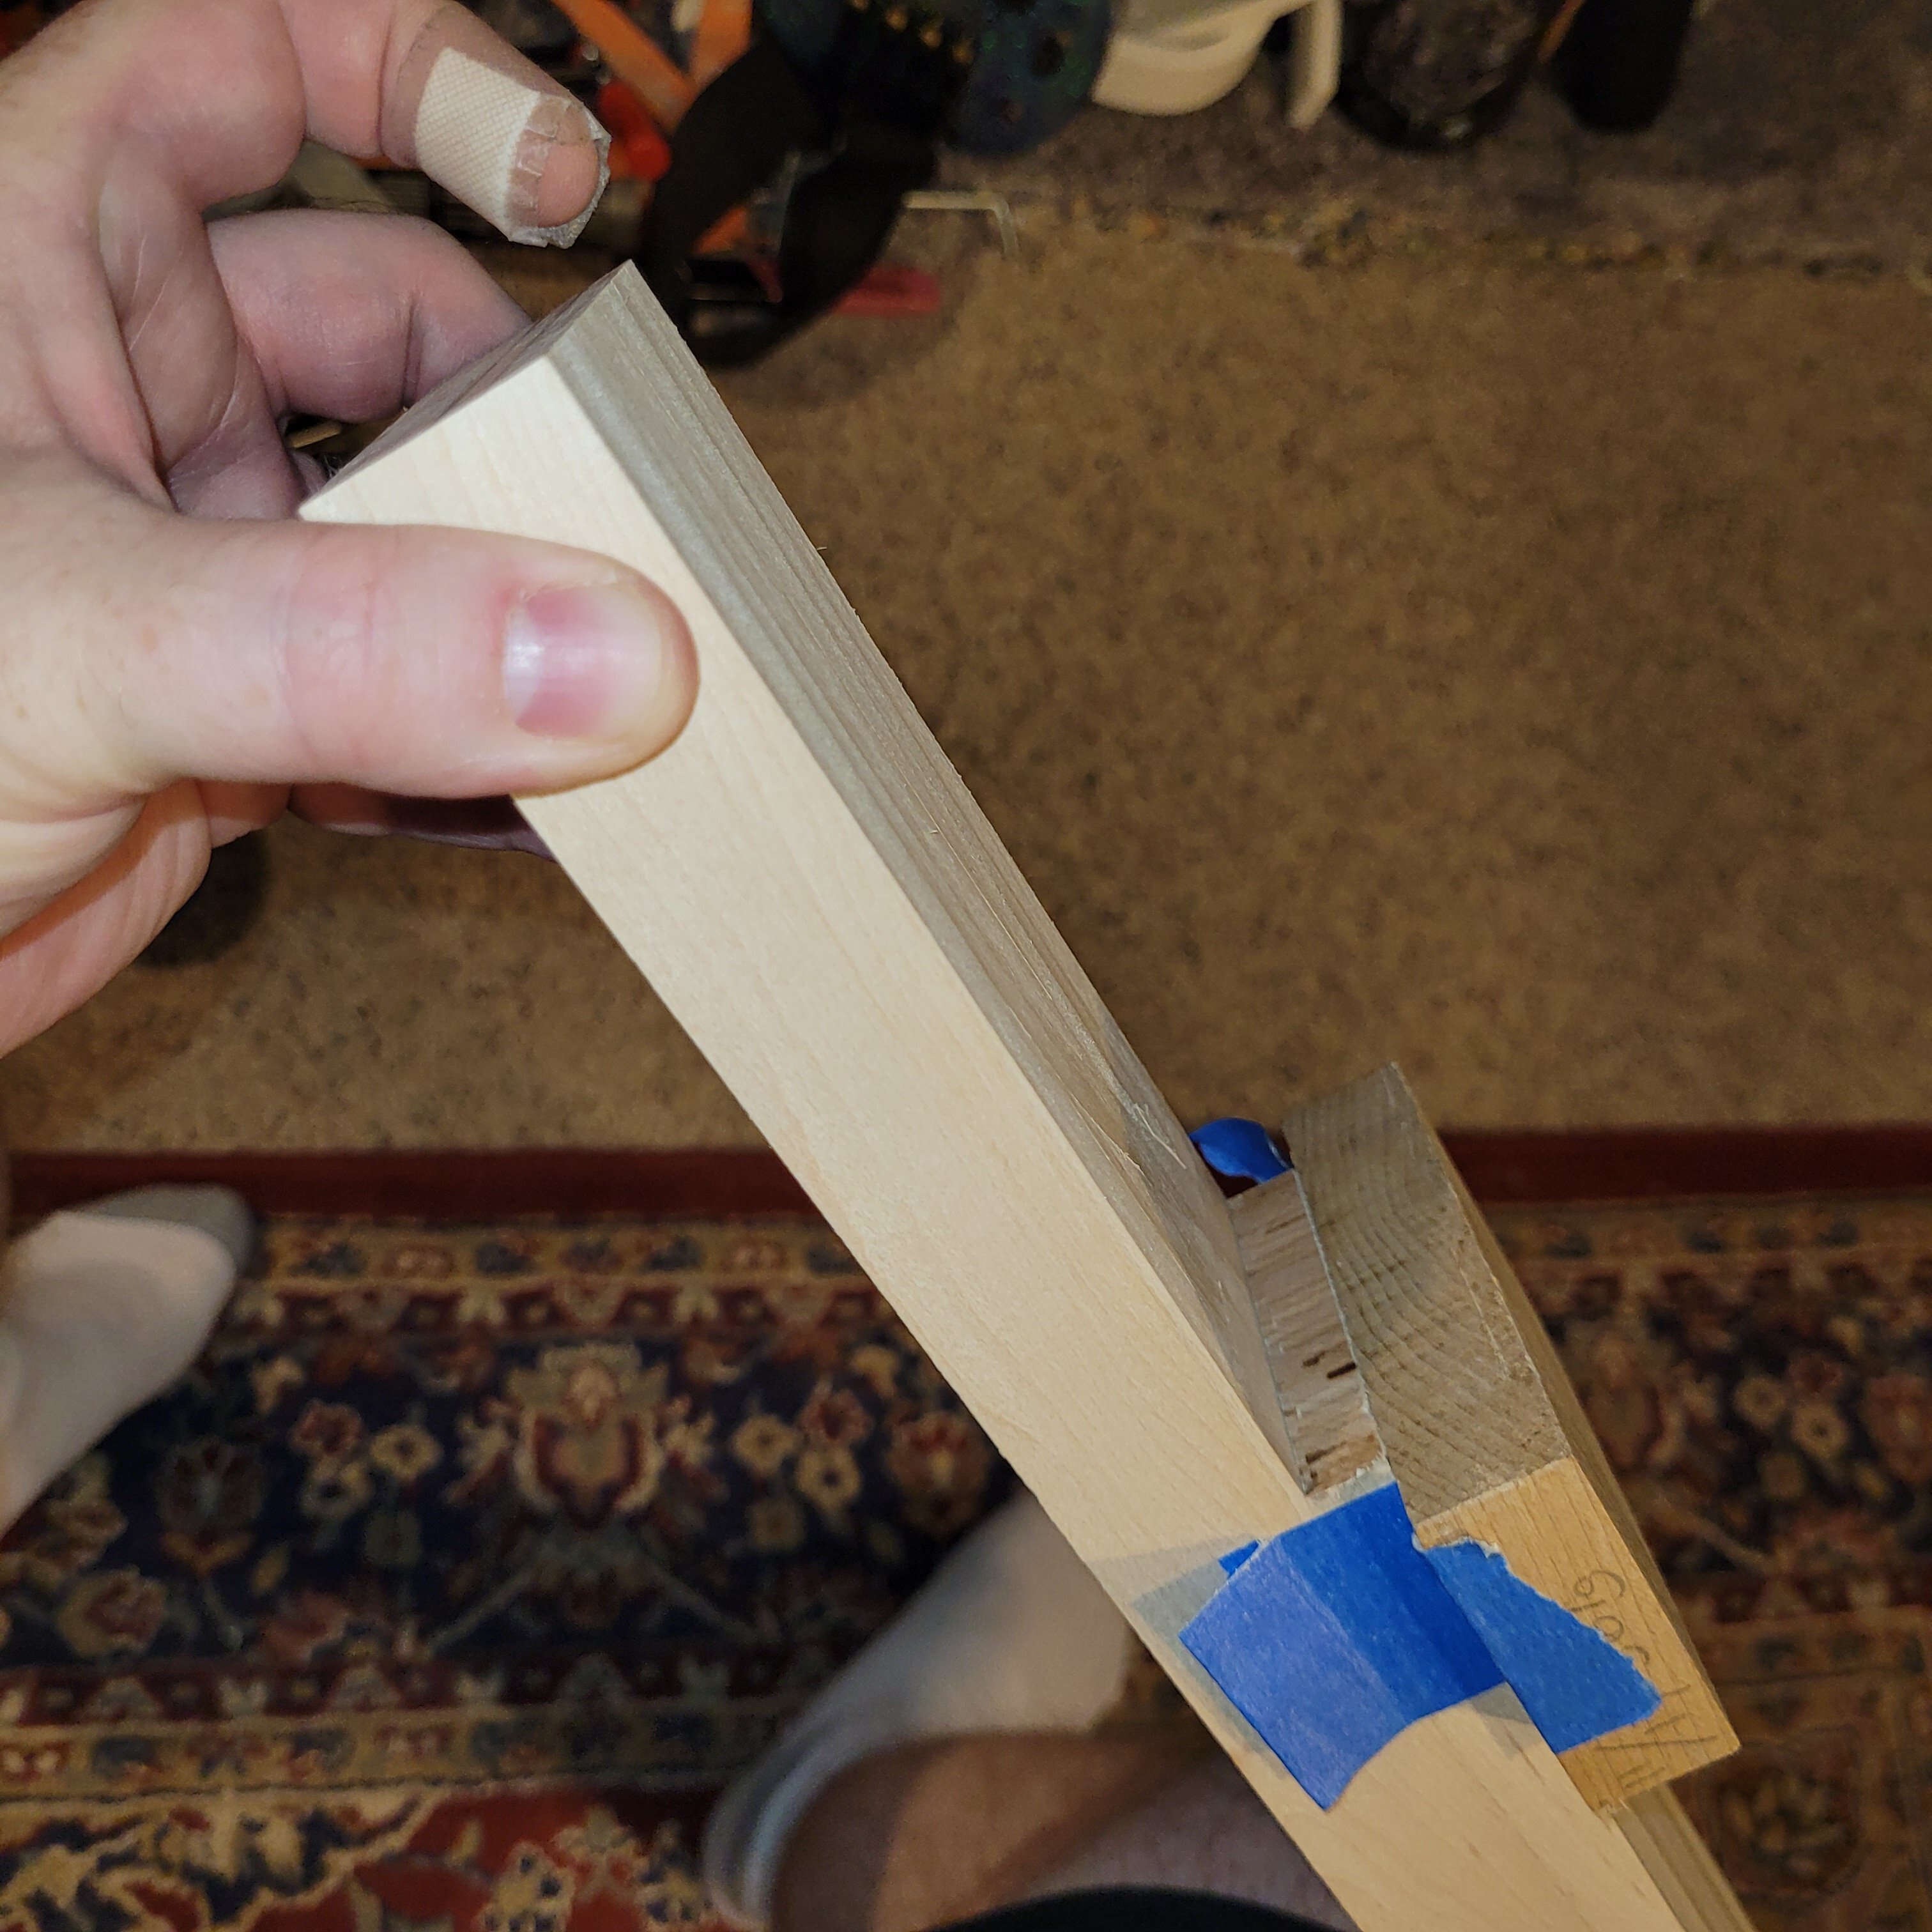
I used the vacuum board to hold the piece in place, the CA glue/painters tape trick to set the straight backing and then routed with a flush-trim bit as deep as it would go....
Ran out of time today but now that I have it started I can pop off the backing you see here and get lower with the flush trim bit, to the appropriate depth.
I might try and round the pocket heel a little too so there isn't that gap (that no one will see when assembled)

Once that's done, I can glue the sides of the pocket on and the 6m depth channel for the Z Clip...
I used the vacuum board to hold the piece in place, the CA glue/painters tape trick to set the straight backing and then routed with a flush-trim bit as deep as it would go....
Ran out of time today but now that I have it started I can pop off the backing you see here and get lower with the flush trim bit, to the appropriate depth.
I might try and round the pocket heel a little too so there isn't that gap (that no one will see when assembled)
Once that's done, I can glue the sides of the pocket on and the 6m depth channel for the Z Clip...

I love watching how different builders deal with different problems. There's more than one way to skin a cat!
I can't read that out loud here in the house or our 4 cats will get VERY nervous!!!I love watching how different builders deal with different problems. There's more than one way to skin a cat!
Business trips and Covid are behind me! With a lil inspiration watchin' @Barticus make progress on his build got me inspired to back on the horse.
This next step is kind of the lynchpin for this whole cleat-joint thang so I tried to go slow, marking off the ideal screw points for the cleats on the master block. I oriented the joint closer to the headstock so that there is plenty of heel surface to push against the pocket to counteract string pull. Basically I want there to be no lever action once the Zclips are interlocked.
Before I can recess the clip on the heel, I have to get holes drilled so I can make sure I have it all lined up. So I drilled pilots in the Master Block to guide the pilots going into the heel and the back of the neck (2 holes each).
Then I can line up the block and use the painters tape/CA Glue trick to lock it in place on each:
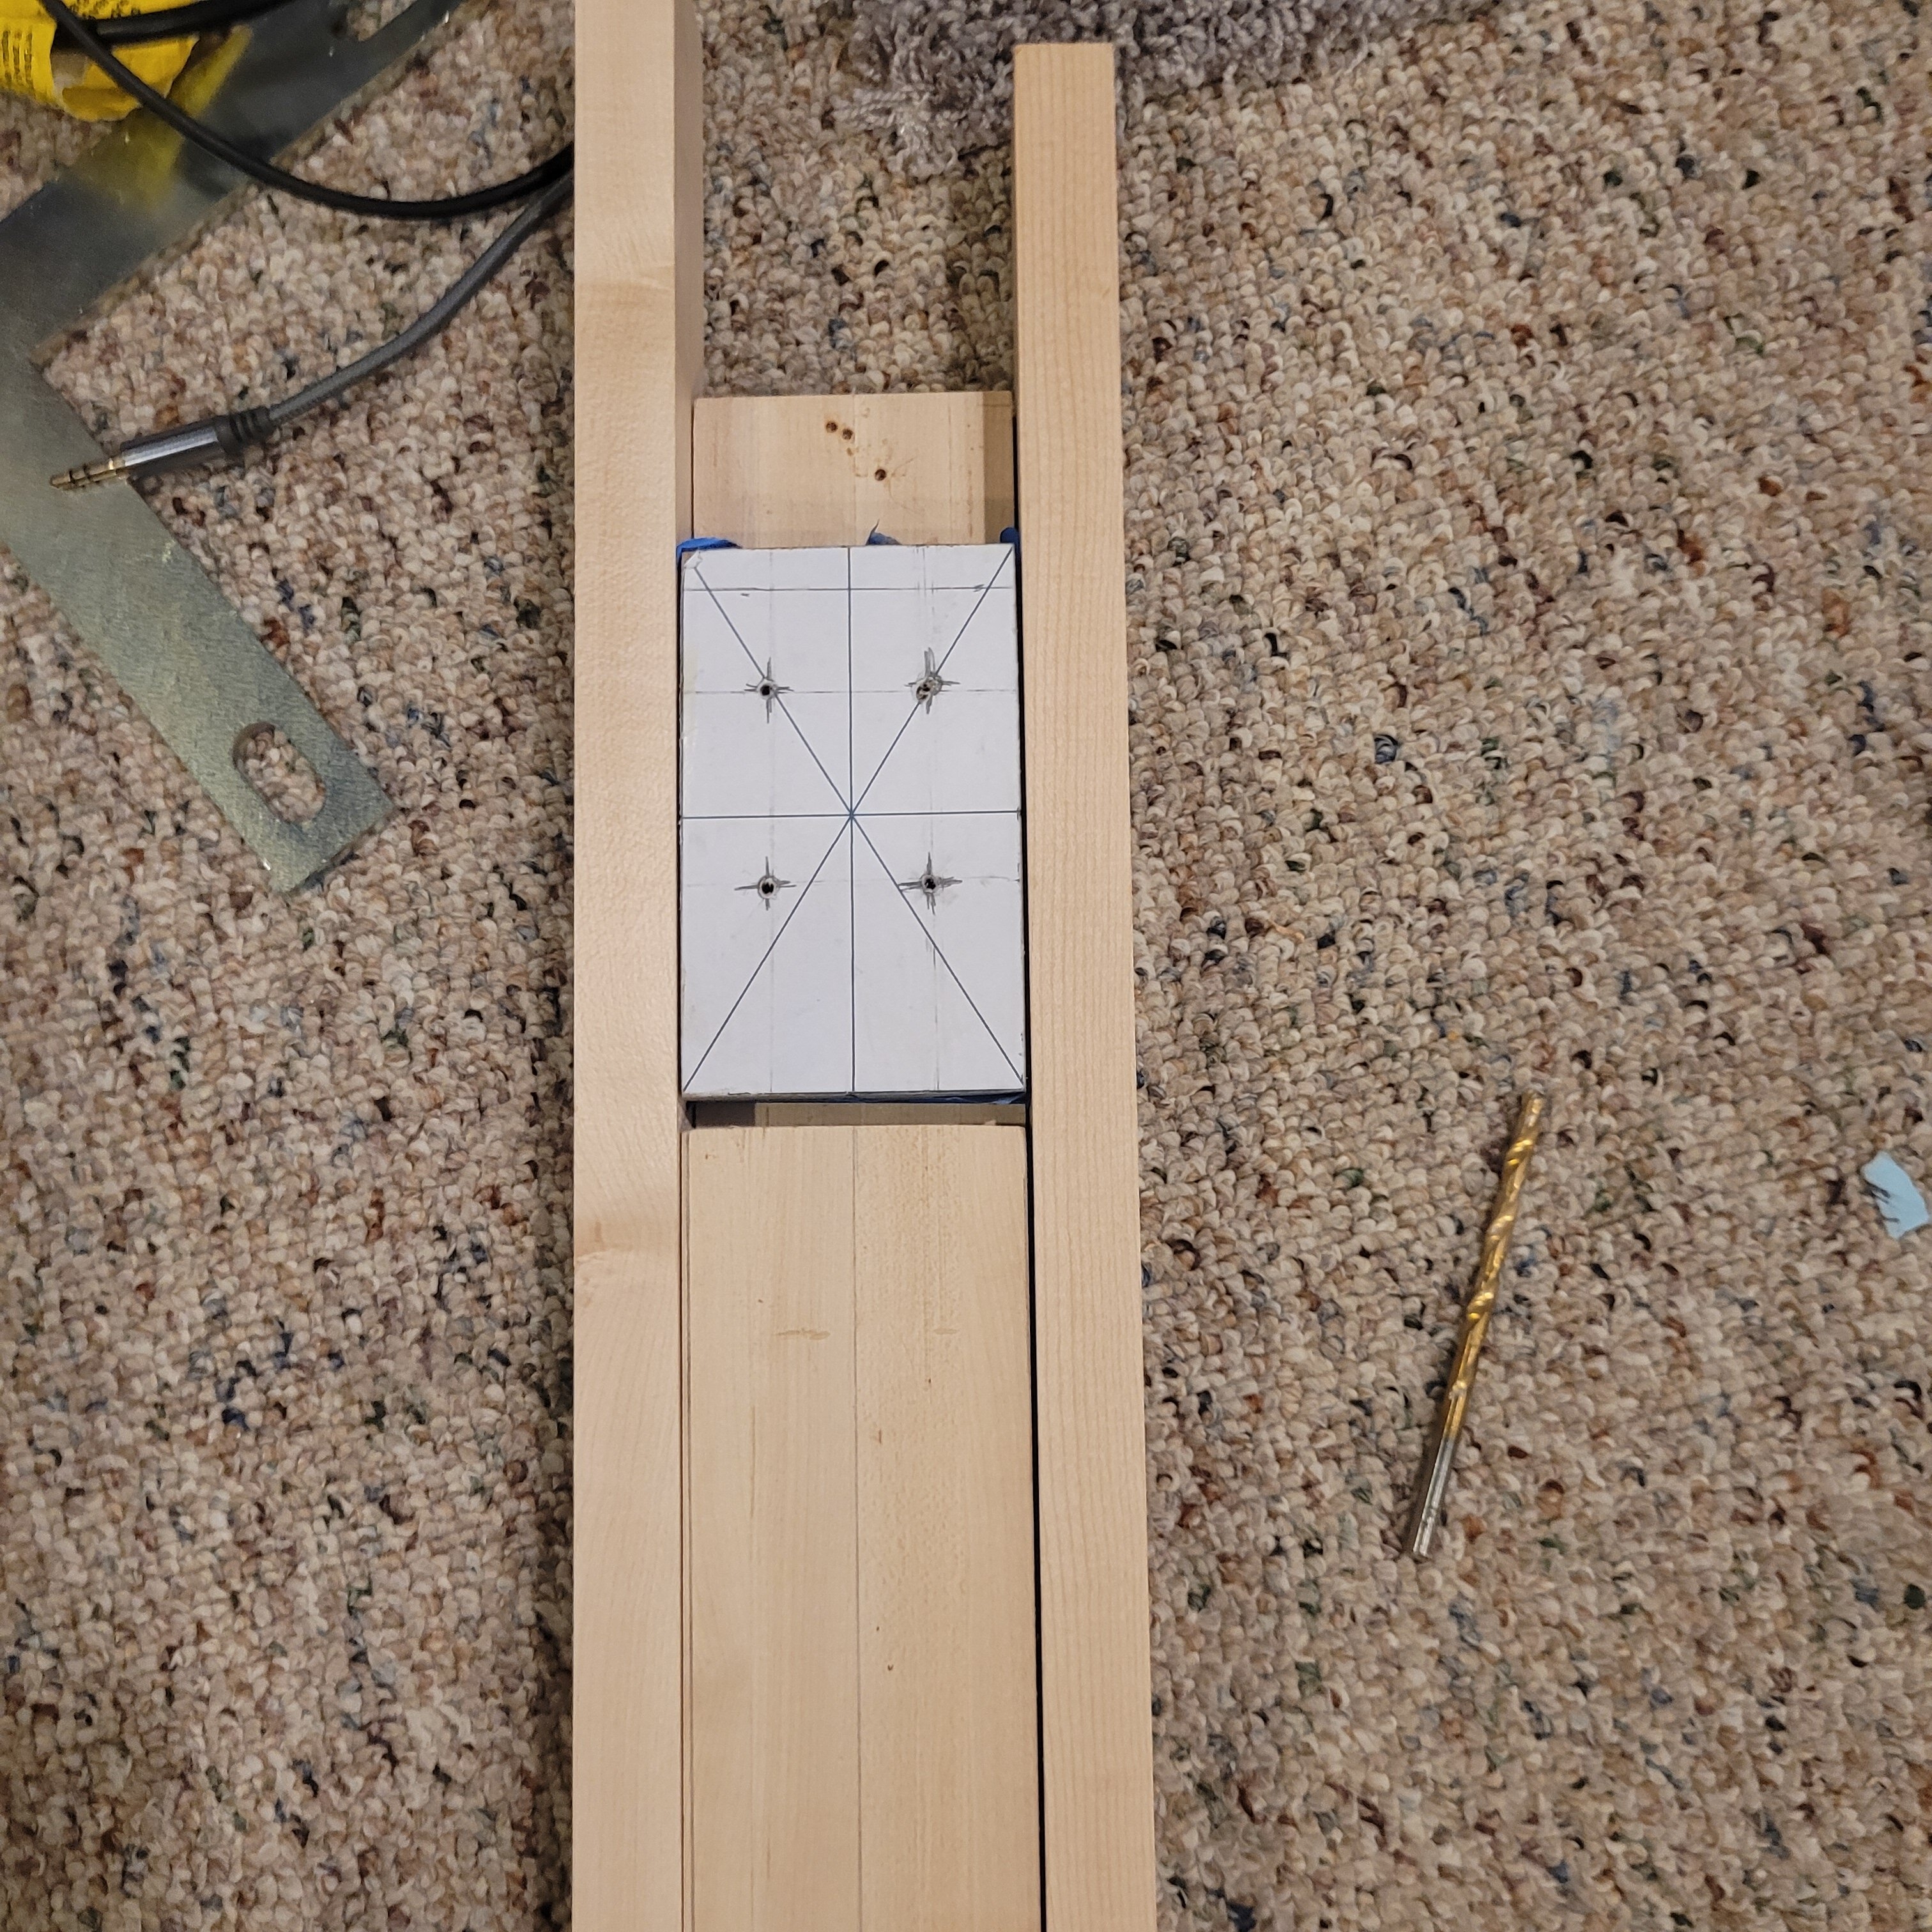
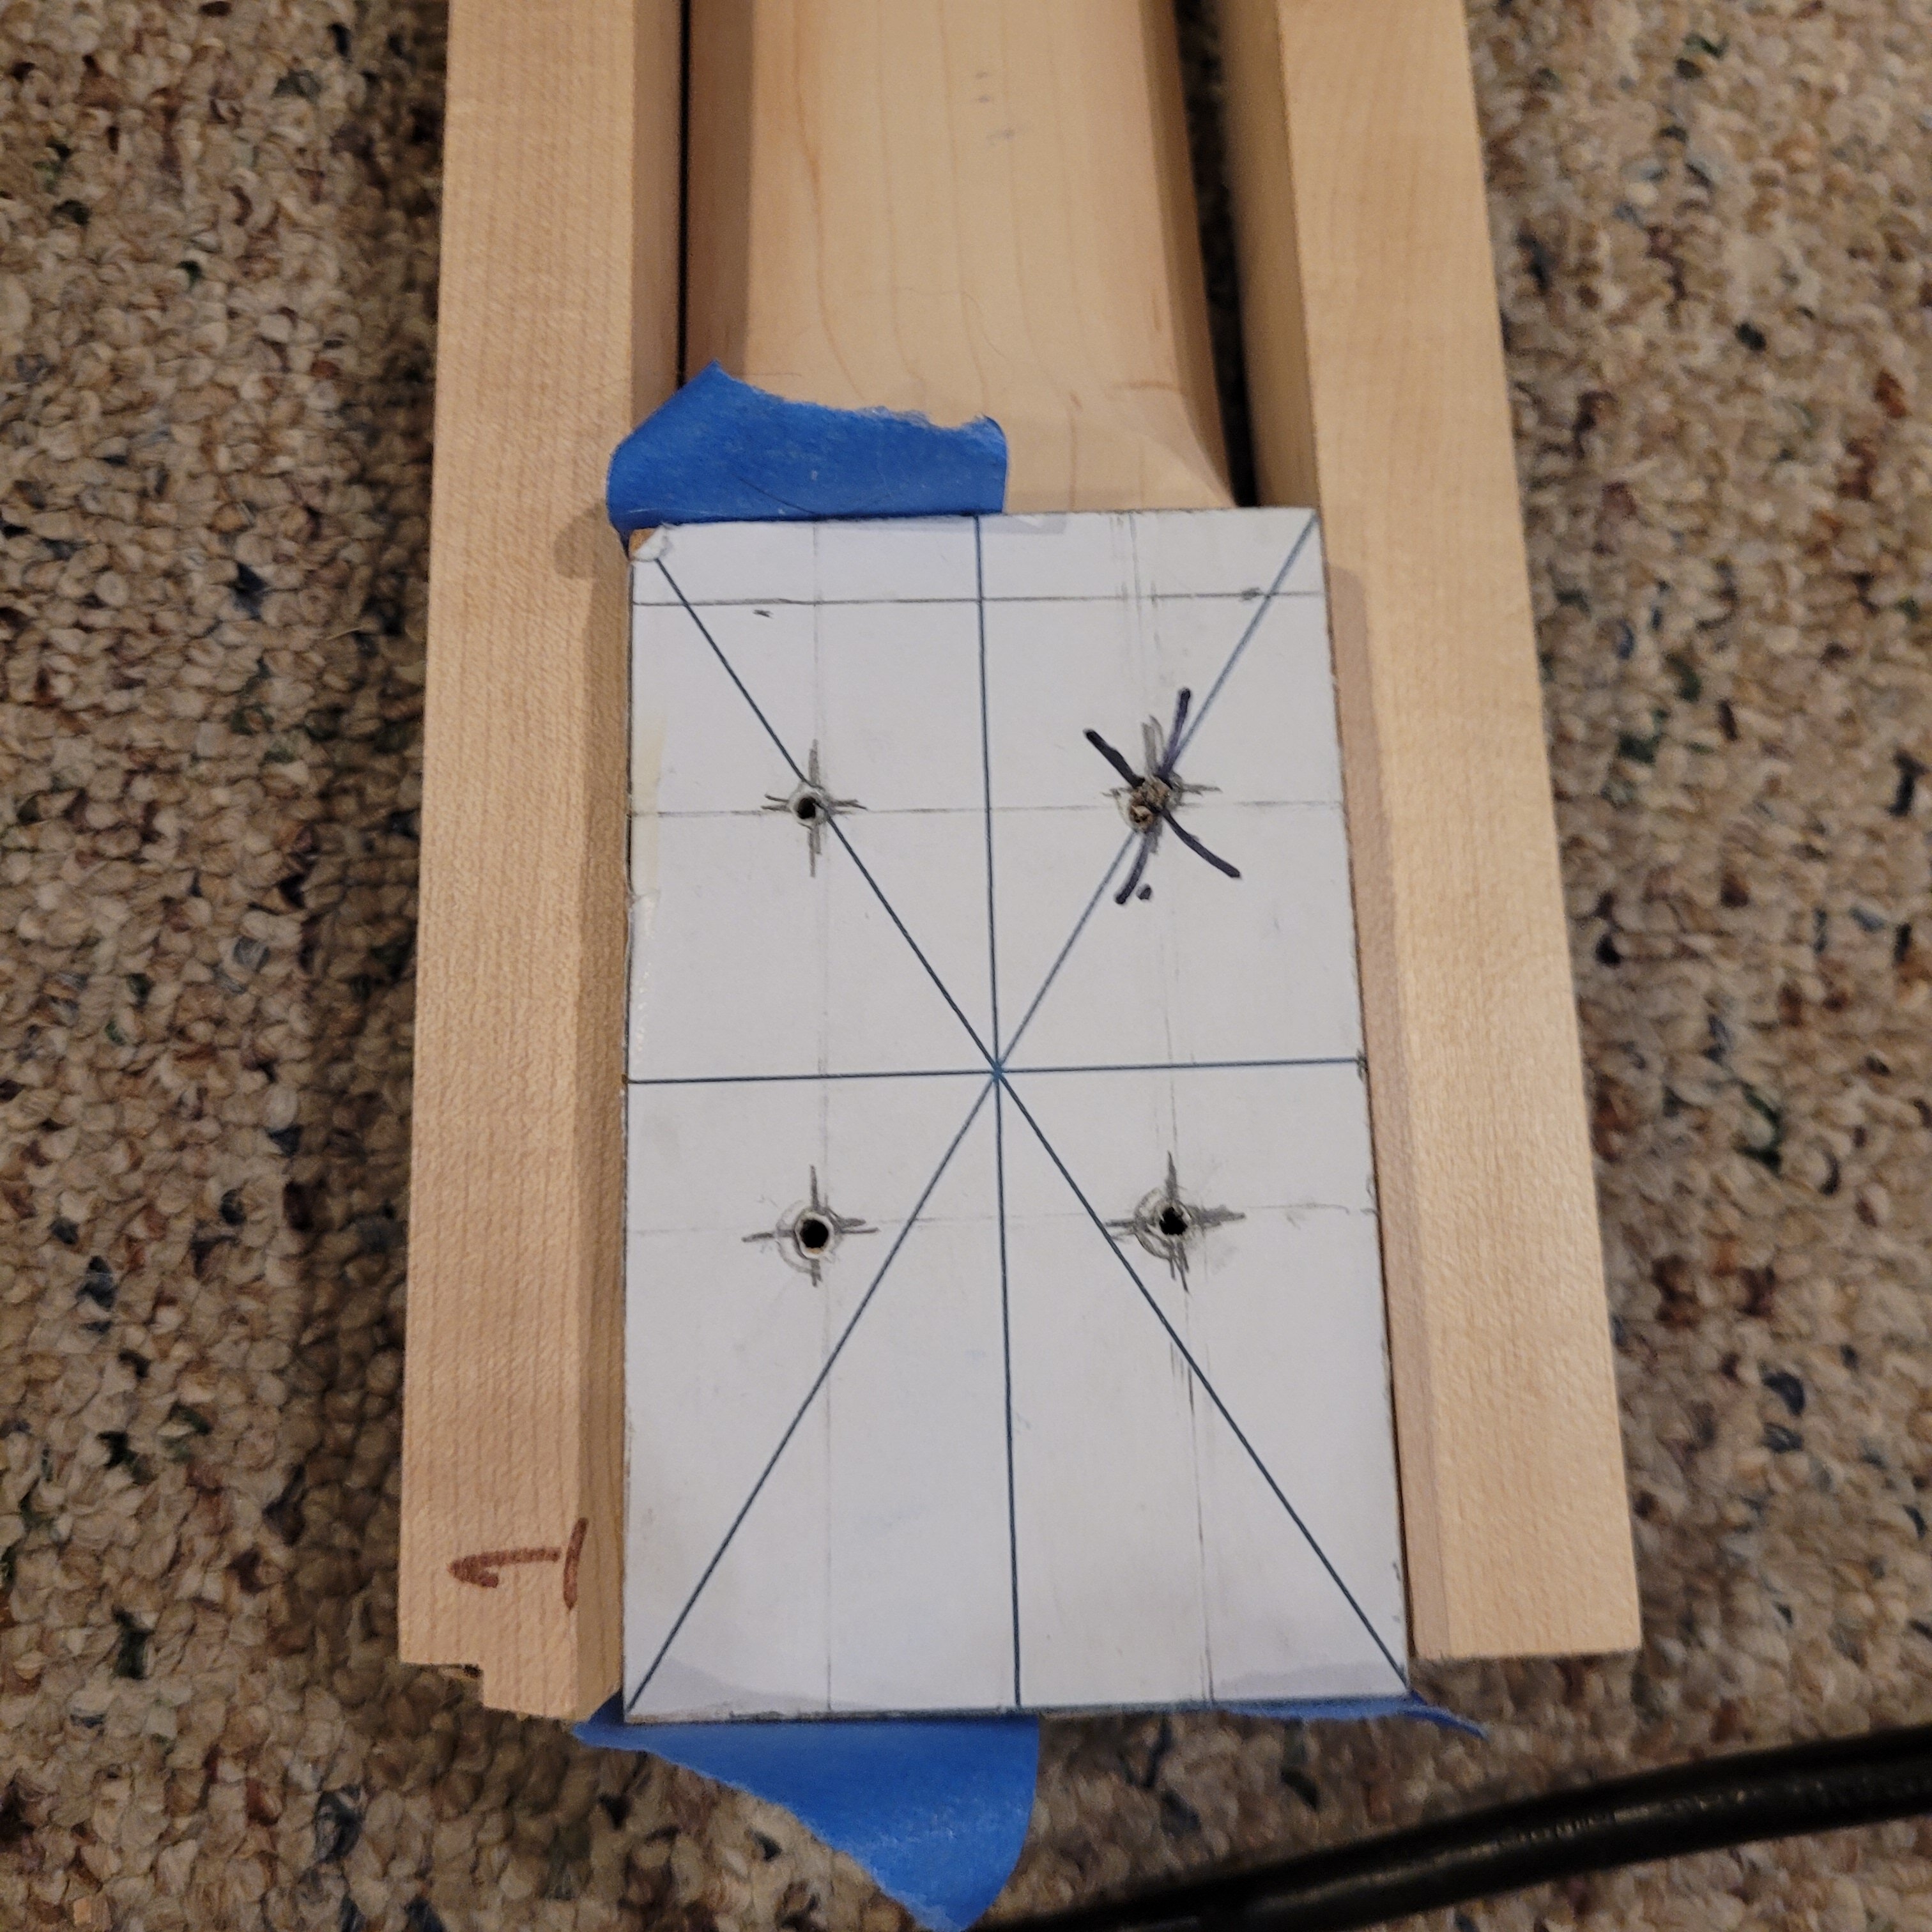
Wood on the side is helping me make sure the master block is going on straight. One pilot hole was off, and I can't really redrill it (too close to the correct location, so I'll have to line that up after I get the on side screwed in... Fun...
I know this is kinda boring but its leading up to the moment o' truth!!!!
This next step is kind of the lynchpin for this whole cleat-joint thang so I tried to go slow, marking off the ideal screw points for the cleats on the master block. I oriented the joint closer to the headstock so that there is plenty of heel surface to push against the pocket to counteract string pull. Basically I want there to be no lever action once the Zclips are interlocked.
Before I can recess the clip on the heel, I have to get holes drilled so I can make sure I have it all lined up. So I drilled pilots in the Master Block to guide the pilots going into the heel and the back of the neck (2 holes each).
Then I can line up the block and use the painters tape/CA Glue trick to lock it in place on each:
Wood on the side is helping me make sure the master block is going on straight. One pilot hole was off, and I can't really redrill it (too close to the correct location, so I'll have to line that up after I get the on side screwed in... Fun...
I know this is kinda boring but its leading up to the moment o' truth!!!!

Two comments.
The hole that's too close to the right location - plug it (if need be, drill it out bigger and plug it) then put the hole in the right place. A broadly applicable technique more frequently seen on misplaced tuner holes, but it works widely.
The "alternate method of routing the neck pocket" - how much were you taking per pass? It appears to casual inspection like "way too much in one pass" but perhaps I'm misinterpreting the photos.
The hole that's too close to the right location - plug it (if need be, drill it out bigger and plug it) then put the hole in the right place. A broadly applicable technique more frequently seen on misplaced tuner holes, but it works widely.
The "alternate method of routing the neck pocket" - how much were you taking per pass? It appears to casual inspection like "way too much in one pass" but perhaps I'm misinterpreting the photos.
Pilot holes are with my smallest bit, I don't know what I could have plugged with. My concern is that even if I plugged just the openings with something like epoxy or liquid wood the bit would shift to the path of least resistance somewhere inside and get askew.Two comments.
The hole that's too close to the right location - plug it (if need be, drill it out bigger and plug it) then put the hole in the right place. A broadly applicable technique more frequently seen on misplaced tuner holes, but it works widely.
The "alternate method of routing the neck pocket" - how much were you taking per pass? It appears to casual inspection like "way too much in one pass" but perhaps I'm misinterpreting the photos.
The "alternative method" being where it got away from me? I don't think it was more than a few mm... The bigger issue may have been the size of the bit head and the cut type, grabby and twisting the piece as it spun... perhaps if I had set up the guides tighter so the piece couldn't spin, only move one direction, it would have worked better... and/or used my smallest bit...
As stated, drill it out larger and then glue in a (unstated, wooden) plug if it's too small to plug as is.Pilot holes are with my smallest bit, I don't know what I could have plugged with. My concern is that even if I plugged just the openings with something like epoxy or liquid wood the bit would shift to the path of least resistance somewhere inside and get askew.
I had already glued the master block onto the neck so i drill the good pilot and used a square and the cleat to mark the other hole...
After CAREFUL spotting I got a clead pilot and finished mounting the cleat:
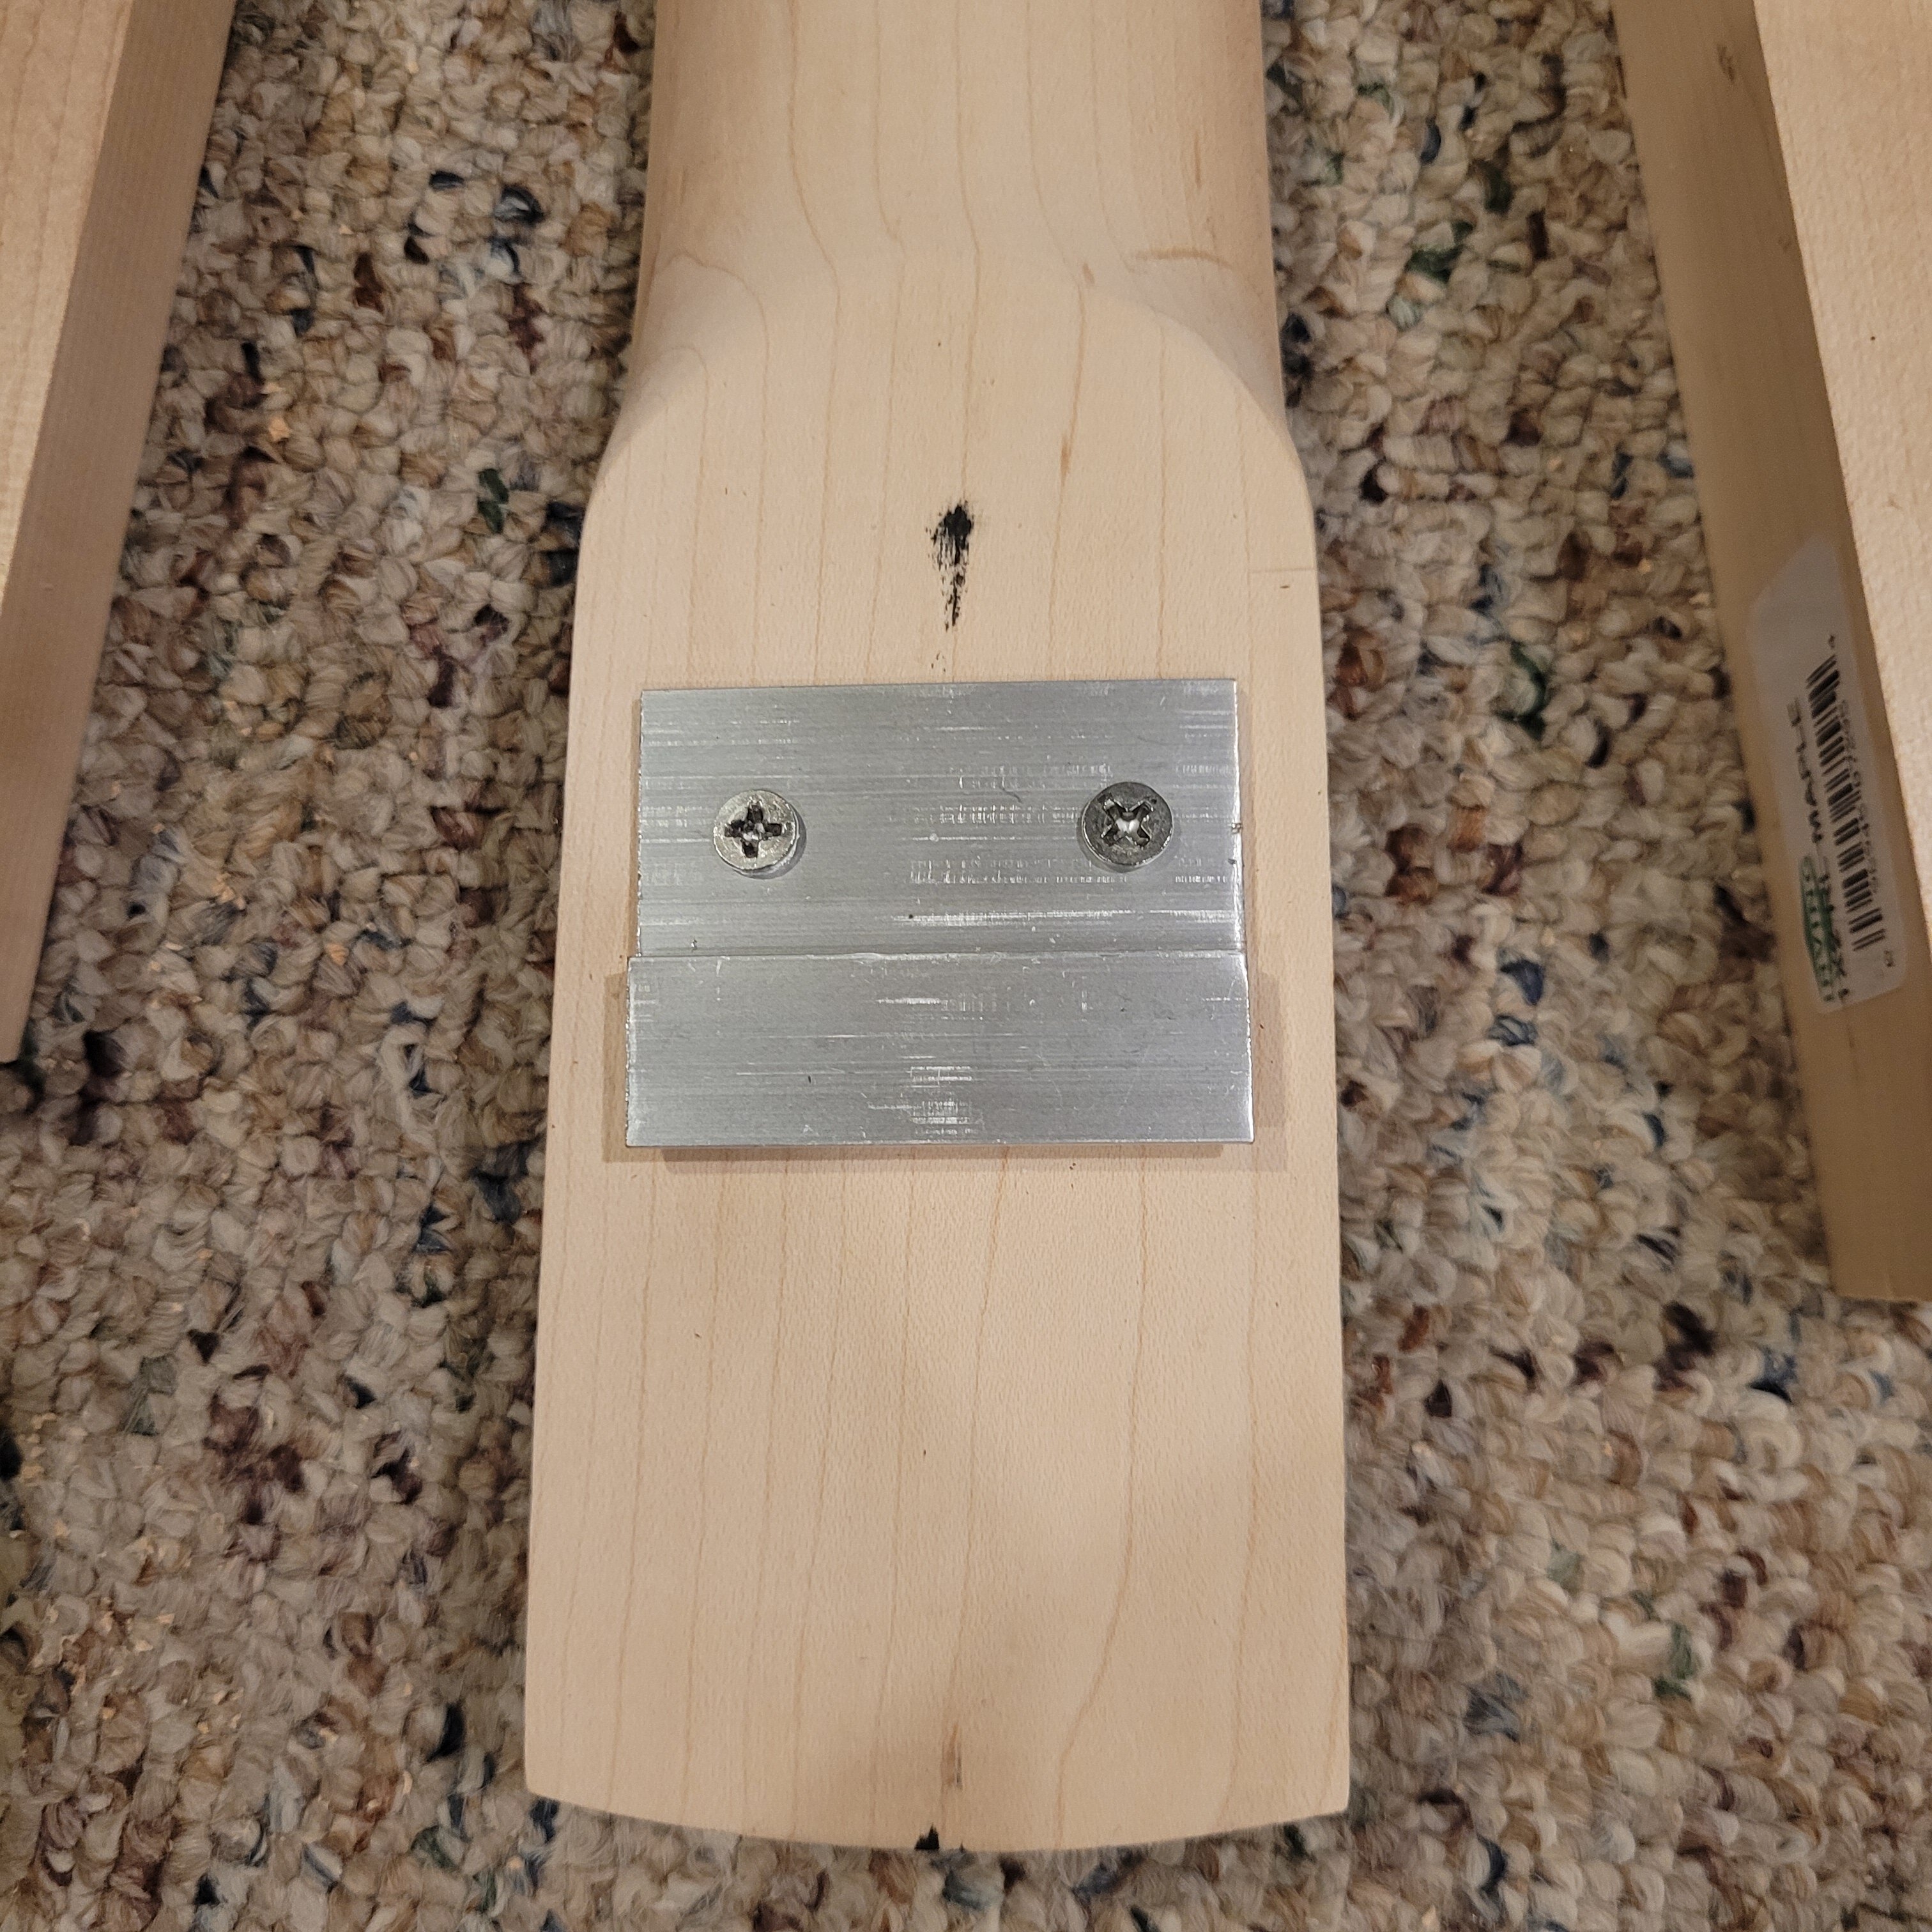
I can't mount the pocket cleat yet as the screws are a few mm too long and would poke through... augh so close!
After CAREFUL spotting I got a clead pilot and finished mounting the cleat:
I can't mount the pocket cleat yet as the screws are a few mm too long and would poke through... augh so close!
Hmmm I think I'm going to have to pivot on the recess for the pocket cleat, reason being that the "floor" of the pocket is already at about .82" thickness and the recess would be another .25" (6mm). This means a large portion of the pocket would be barely over 1/2" thick and that seems a bit risky...
The alternative would be to built a hardwood 6mm riser around the cleat, and then a bit more of the 6mm veneer on the body surface to offset the height increase of the neck...
Oh the joys of figuring these things out as you go! But that why I wanted to document it, so if I ever come back to this idea I can do it better the next time around!
The alternative would be to built a hardwood 6mm riser around the cleat, and then a bit more of the 6mm veneer on the body surface to offset the height increase of the neck...
Oh the joys of figuring these things out as you go! But that why I wanted to document it, so if I ever come back to this idea I can do it better the next time around!

That sounds like my kind of build - based on the Unswerving Plan Of The Day. 

Won't the cleat add strength to the pocket floor? Your goal I'm assuming is to have the neck flush with the pocket floor when assembled. I think 1/2" o' wood and the (aluminum? steel?) cleat would be fine.Hmmm I think I'm going to have to pivot on the recess for the pocket cleat, reason being that the "floor" of the pocket is already at about .82" thickness and the recess would be another .25" (6mm). This means a large portion of the pocket would be barely over 1/2" thick and that seems a bit risky...
The alternative would be to built a hardwood 6mm riser around the cleat, and then a bit more of the 6mm veneer on the body surface to offset the height increase of the neck...
Oh the joys of figuring these things out as you go! But that why I wanted to document it, so if I ever come back to this idea I can do it better the next time around!


