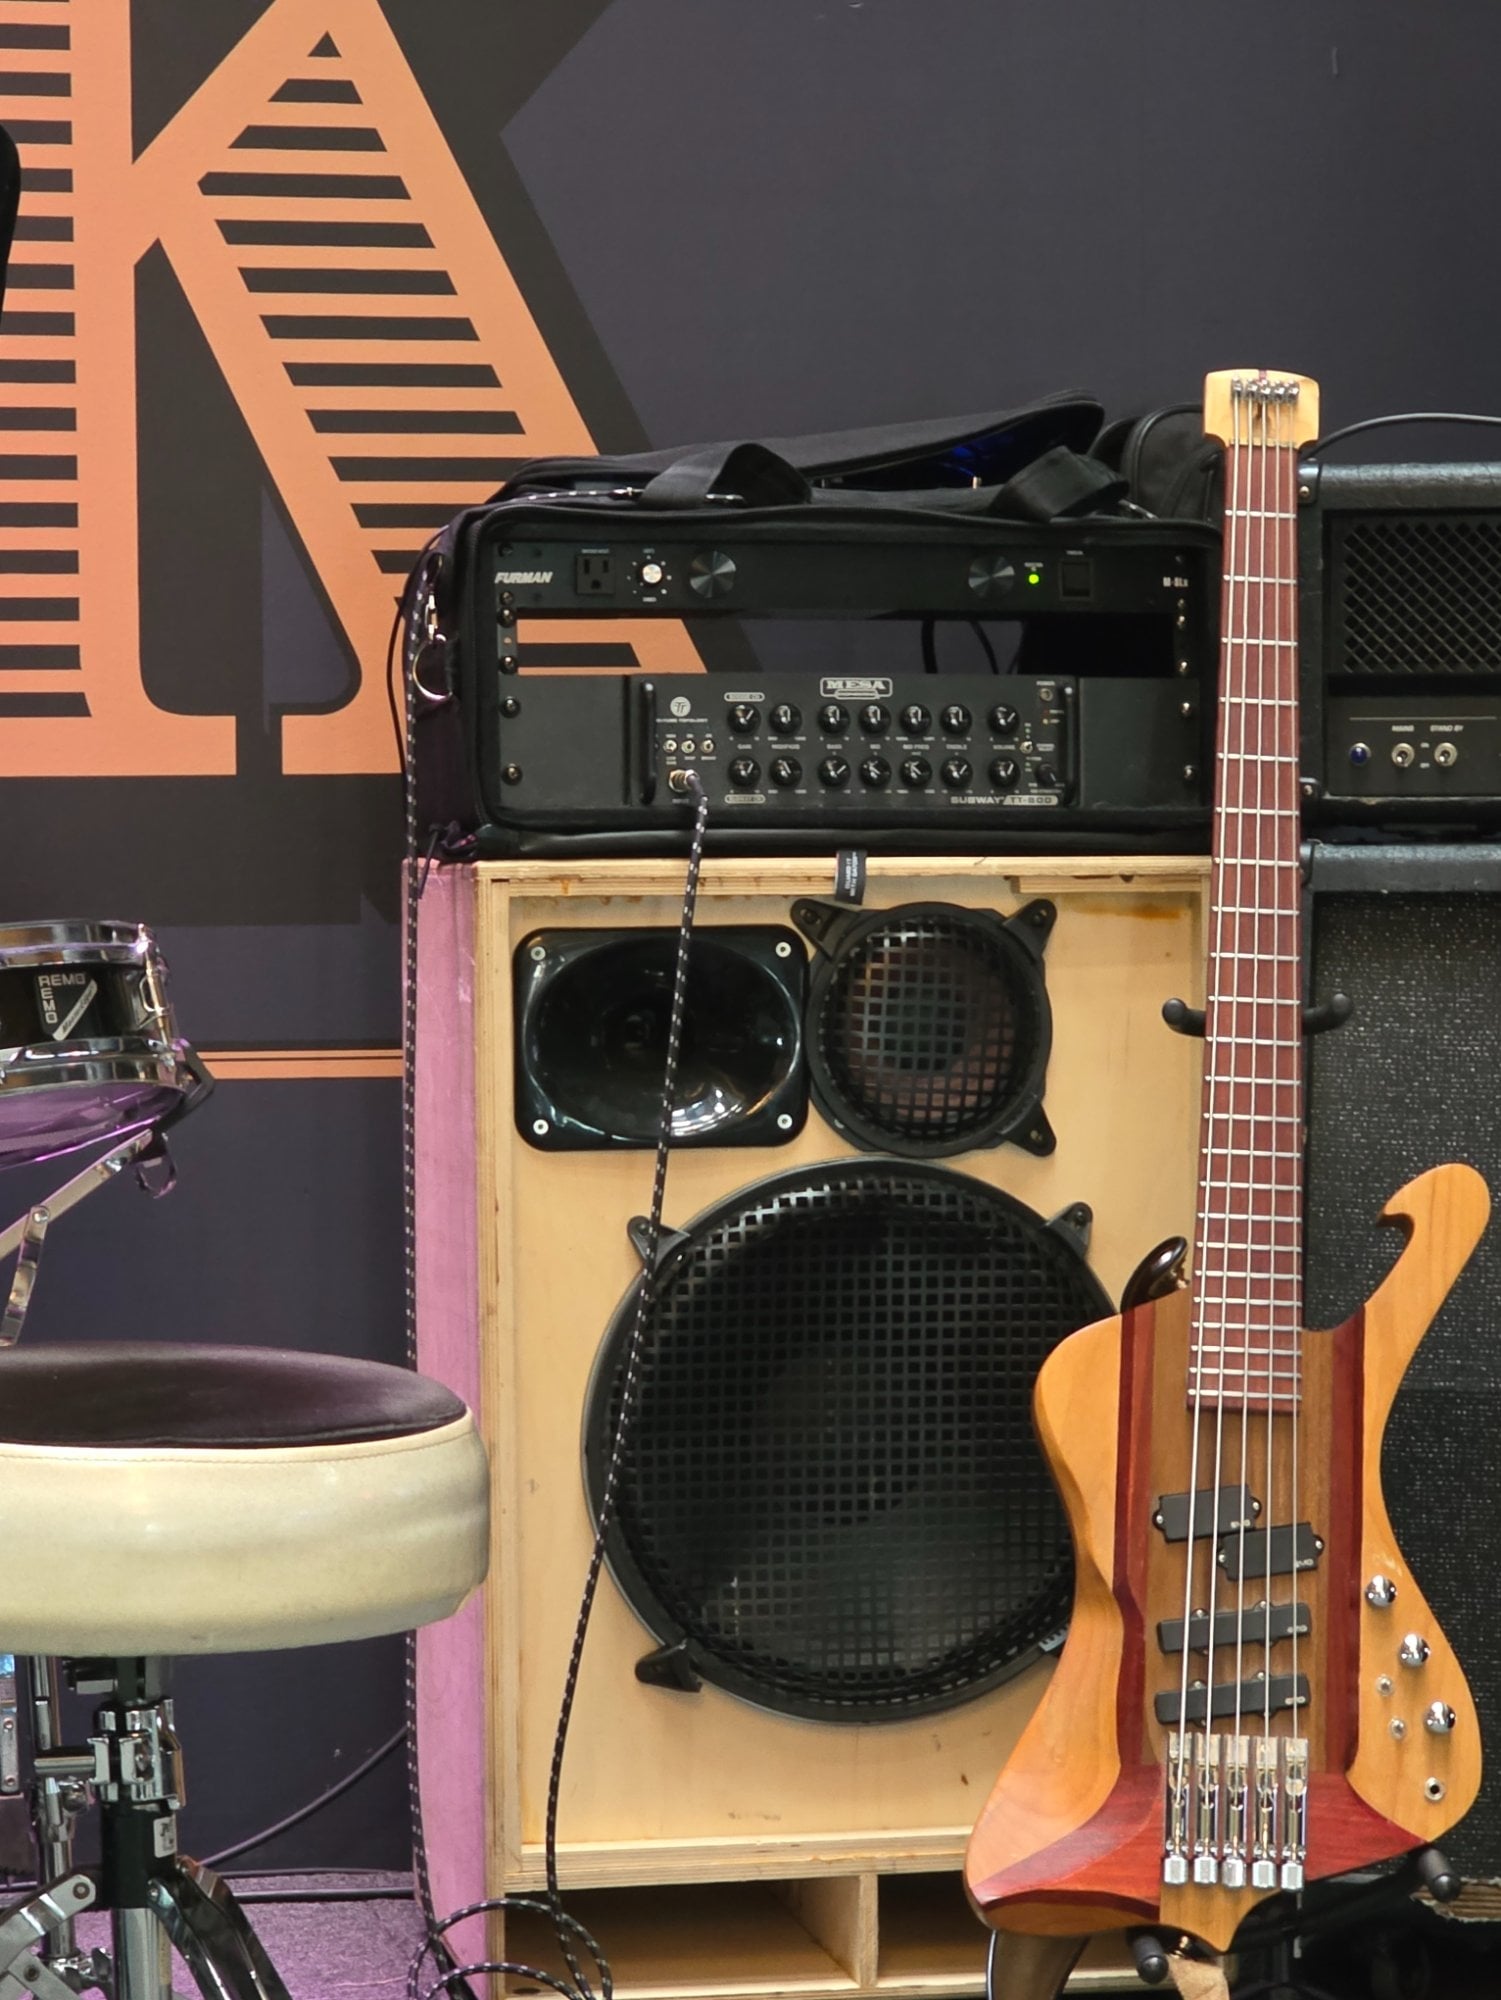
First and foremost: I want to thank all the fine folks here on Talkbass. There's over 25 years worth of information on this site and it is absolutely invaluable, and there's no way I would be as comfortable doing my projects if it didn't exist. If I had any questions this was the first place I would go and nine times out of ten, it was already answered somewhere. You guys are awesome.
Let me begin with the nerdy stuff.
Materials and hardware:
- Maple neck/Padauk fretboard, (primarily specced from my Ibanez SR2405W)
- 34" scale
- 23 stainless steel frets (we'll talk about that later)
- 12" radius
- 45mm at the nut, 74mm at the 24th
- 18mm string spacing
- Alder/Walnut/Padauk body
- ABM hardware
- Locking Headpieces: I had issues with them from pretty much the beginning. They had little positioning nubs that sheared off quite literally by my first few string changes. With that said, I recently got in touch with them and they helped me out no questions asked. They are moving to a new two-screw design which eliminates this issue. I have absolutely no hesitation working with them again, however, current US policy on German purchases makes Customs quite a significant added expense.
- Bridge: I have some issues turning the knobs, but it's never been that much of a concern for me since they holds tune remarkably well. I added nylon washers, which help, but ultimately want to use thrust bearings instead. Haven't gotten around to it yet.
- Nut: ABM6250. The individually adjustable string slots were appealing to me since I don't have tooling for nuts.
- EMG pickups
- Two b-stock J5 pickups, and a b-stock P6 pickup. Originally, I was thinking about finding MEC J pickups before I made the choice to add the P pickup into the mix. The pickups function perfectly.
- Warwick BEC2 preamp (found on Reverb)
- 18 volt
- Wanted some cost savings against buying a brand new market preamp. It really worked out because I was kind of into Warwicks at the time.
What would I do differently?
- Make the truss rod a heel-end adjust. There isn't enough room for seasonal adjustments, so I need to detune the A string completely for clearance. This basically makes any on-the-fly adjustment impossible. I've contemplated rebuilding the neck in the future, but since my neck pockets are custom (no templates) it'd need careful planning.
- Stagger the tuners. Not enough room for the B and E strings to intonate, but it isn't super noticeable. I may modify this later to introduce a 1/4" stagger from B to G.
Alright, so, original design concept.
The cool thing about this is, like everything, I was in a specific headspace and a different point in my life when I made the decision to go for this project. The keen-eyed among you likely have already noticed four things:
- It's headless.
- The body's a cross between a Thunderbird and an Iceman.
- It has a pickup configuration similar to a Thumb 5.
- It's headless.
There's a reason behind each of my choices.
- I chose the Iceman and Thunderbird specifically to tribute my favorite band growing up. System of a Down inspired me to begin playing guitar and was extremely impactful in the first few years of my teens.
- I chose a headless because Icemans are notorious for headstock dive, and I didn't have a headless yet. I also was hoping that the offset shape would help with balance too.
- I'm a Martinie fan, and Mudvayne was doing their first reunion shows right as I was designing this. I went to their fourth show in nearly 15 years, and was inspired enough to add it as a design element.
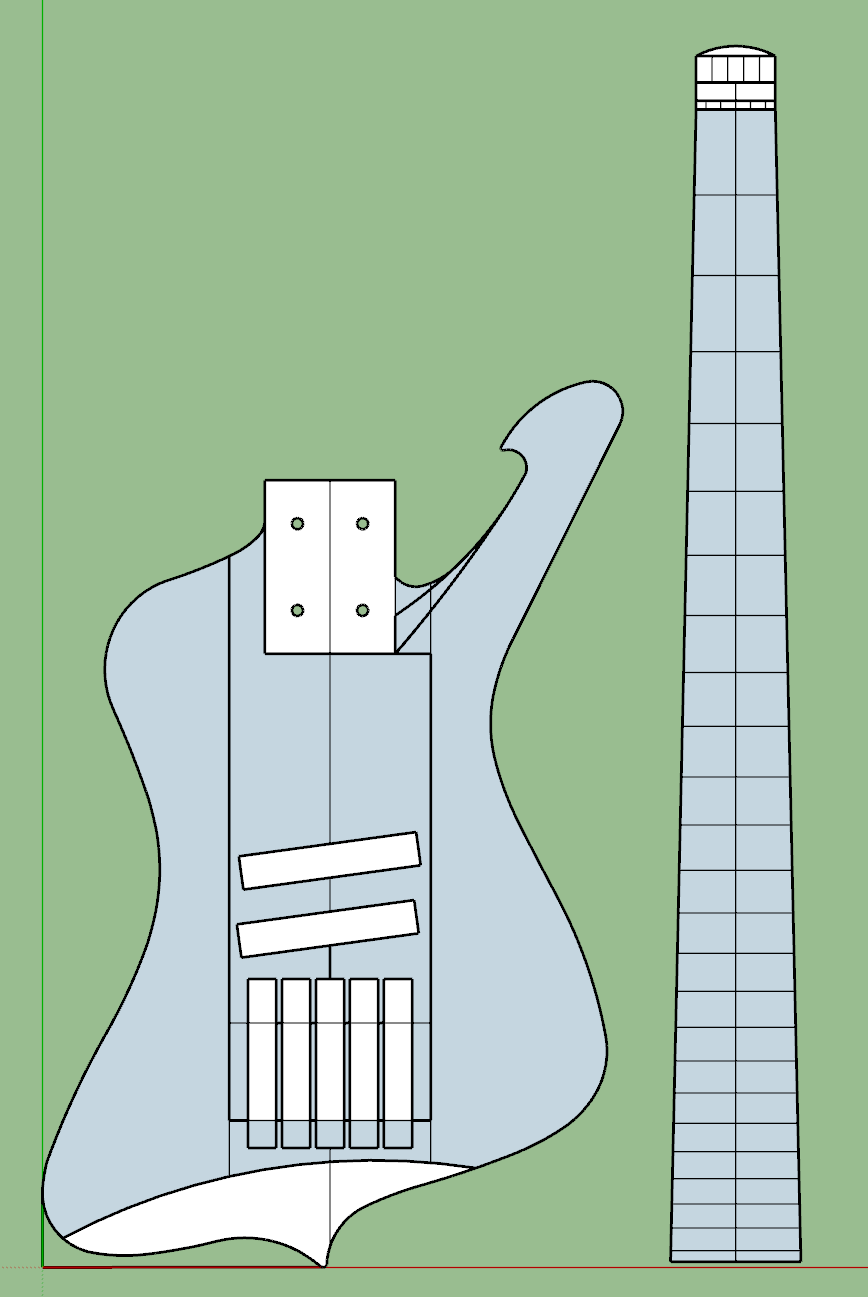
This wood was purchased at Conejo Hardwoods in Agoura Hills, CA, late October 2021. I try to look for wood vendors whenever I travel somewhere away from my local area, and they happened to be nearby. It was a great shop, helpful staff, and great prices when I went. I picked up enough wood (maybe 30 board feet or so) for my next several guitars. You'll see some of that walnut later if I do this type of log for my current build.
For the glue-up, not much to say. I have access to a jointer. I cut the board, joined two edges, carefully sanded them further to get a seamless join, then glued with Titebond II.
Afterwards, I scraped the glue, planed the body blank, and traced my SketchUp template.
In SketchUp, I print my design 1:1 onto several sheets of paper and then tape them together.
I cut the body out with a bandsaw, and then shaped it with a spindle sander to my line. That's my favorite part of this whole process. It's very cathartic. After shaping, I use a drum sander to bring the body down to final thickness. I think this was 1.5" before any additions.
I sanded into some shakes, so I sealed them with superglue. I think this was needed, but I probably didn't clean up the best after because this is visible through the finish. The clamp was because the shake at the tip of the horn was actually all the way through the top.
Here's another picture of the body.
I then glued a walnut "ledge" that some Thunderbirds have. This was something like a quarter inch thick.
Here I started preparing the neck. I resawed a piece of my padauk to 1/4" and a maple board to 3/4".
Truss rod channel routed. I used a dado machine for this. Now, I prefer to use a router so that I can control where the route starts and stops. I put a walnut plug at the heel end and later a padauk plug at the head.
The fretboard lines have been lasered in. If you look here, the 24th fret is too close to the edge. I briefly debate trying to fret it anyway, and see what happens. I then figure that a 23 fret bass is a little different and roll with it, reasoning that the shorter neck might also aid against any possible dive.
Truss rod taped and ready for glue. I usually leave the tape in there. Don't remember if I took it off after spreading the glue.
Clamps, clamps, and more clamps! I'm sure there are easier ways to do this and still get a great joint.
Here's the neck roughed in and fret slots cut. Next, I carefully tape it to a known straight edge and run it across a table router to get final widths.
The table router had a
small depression in the center that made me catch on both passes. There is a very, very small divot on the left headstock end and right heel end that isn't noticeable, unless you know it's there and feel for it. Otherwise, the neck spec is accurate to about a half millimeter.
I was originally planning to have the neck be totally headless, but I decided that it'd be easier to keep shoulders so that I can hang it on my guitar stands and on the wall if I so choose in the future.
I add in 45 degree edges to the ledge, made from padauk. Upon further measurement, I realize that I need to set the neck further down the body than I thought and needed another inch or two to have make the scale, so I add some decorative thing to the bottom. Here on, you can see a few on-the-fly changes to the original design.
Working on neck alignment and a visual of where the tuners are going to go.
I create and print 1:1 scale drill templates using SketchUp. They are very easy to make so long as your hardware manufacturer provides accurate drawings.
My jigs for neck routing. I just find a few scraps with known straight edges, and align the neck to the body center. Route goes 5/8" deep.
I tape the sides with 2 layers of painter's tape to add some thickness and ensure a tight pocket. Then, some hand chisels to square the pocket where the router bit can't go.
Neck route complete. You can pick it up by the neck and jiggle it around without any screws.
Started on fretting. This is one of my weaknesses because I haven't had much practice.
I tried hammering, and they weren't totally staying in, likely because I didn't radius the wire enough.
On the body, you can also see that I've drilled screw holes for the tuners.
You may be able to see the top left corner of the neck pocket looks like there's a hole in it. Well, there is. While routing I didn't tighten the bit enough and it slipped from the collet and scared the hell out of me. I didn't repair it, opting instead to leave it as a grave reminder.
I press and superglue the frets in. Sort of wish I didn't because I will likely need to do a refret in a year or two because I lost a LOT of material during trial and error while learning to level.
Lines drawn for body shaping. If you look at the bridge, you'll see that I made a cutout in the padauk to fit my hand to tune. If I ever get to it, I'd like to make it about 3/4" deeper than it currently is. It's a little uncomfortable to tune, but again, thankfully, I don't need to tune all that often.
Completed the majority of the body shaping. I was trying to go for something that didn't look machined.
Screwed the hardware in and played it for the first time.
You can see faint outlines of where the pickups will go.
Took it back apart and used a forstner to remove material before I route.
PSA: Make templates of your templates.
Neck in and first two pickups routed. At this point I started to think it felt a little naked with only the two jazz pickups.
I took another router to the tuner pocket to try to deepen it. At this point, I thought it'd be fine, but didn't try it.
Here you can better see the boo-boo I made in the neck pocket.
Let's talk electronics.
At this point, I decided to commit, and added the precision pickup. I also finalized my electronic plan and drilled holes for the potentiometers and switches. You can find a thread I made here on TB while I was reverse-engineering this preamp to figure out how I could make it work in this configuration, and how to implement the switching how I was looking to.
Here is the scheme:
VOL/B/T/JACK
Sw1: P only/on/off
Sw2: J1 on/both/j2 on
With those two switches, I'm able to select any of all seven combinations that these pickups could be in.
Here's the preamp itself before I start wiring it into the battery box and pickups.
Here's once I get everything wired up. Yes, it's a ratsnest. Yes, it works absolutely as intended.
Here it is together, pre-finish.
Ripped it back apart for finish. I could have sanded some of the harder-to-reach corners a lot better than I did.
Bonus photo: I happened to be finishing my fEARful build at around the same time - I learned a lot about electronics that month.
Let's talk finish. This was pretty simple - I used Tru-Oil. If I remember correctly, I sanded the entire body down to 400 grit and applied a very heavy base coat. I had difficulty getting it to absorb into the endgrain, but eventually it started building up. I think I did 4-5 coats total on both the neck and body.
Before and after of the first coat:
And that's it! I'm planning to work on some sound demos, but I hope you guys liked it!