• TalkBass has been independent since 1998. Add your voice.
    Create a free account to reply to discussions, view embedded media, and browse with fewer display ads.
    Join freeLog in
    Want zero display ads or expanded classifieds tools? Compare plans.

Double Bass progress pic: top arch

Here's what's happening on the top. I couldn't resist starting to carve out the back, staying well away from edge, as the linings aren't installed and the blocks aren't shaped yet to give me my inside outline.

I've got the edge pretty well refined and almost ready to purfle (after a bunch more practice). I just got the stew-mac dremel routing base today. I ordered that imediatly after practicing cutting and picking out the channel by hand on maple and spruce. Talk about tedious...

I've been looking at archings for awhile now trying to figure out what I was going to do, but until I started carving there were so many things I didn't even know to look for. Some basses I look at "bubble up" right from the edge of the fluting. Mine is a more gradual arch, trying to maintain a "cylinder" down the middle as opposed to a figure-8 shape. This is what my mentor does with his violin arching and I sure hope it works well for bass. I like the look better myself.

 
Nice progress ...

The low angle light is very revealing, and very useful for that purpose!

Don't forget to allow enough length in the top to cover the ebony strip along the side of the neck, if you intend to put one. I trimmed my top too far too early, and so I had to find a tricky way to make it look neat.
 
Thanks for asking Matthew. I've had to do a bit of travel which knocked me out of the groove a bit, but just today I had the back wood resawn and I'm soaking some hide glue as I plane the join for the wings. I was going to use tightbond and a tape clamping technique that a guy showed me, but I wasn't happy with the results I was getting. So now I'm going to try the rubbed joint approach. I'm a little worried about bending at the break with hide glue, but I'll deal with it. I've been practicing my purfling routing and corner cutting, and I'm procrastinating cutting into my top. I still need to bend and install the linings. The fingerboard should get here tomorrow, and I need to think about cutting the neck mortice. I've lost a bit of my previous confidence and swagger...
 
The hide glue will hold just fine. Even if you soften the break point with water, its only one point where the glue will soften. Make sure you make a neat kerf where you need to bend. I just cut a purfling channel and left about 2.5mm thickness at the bend, then glued the brace in place to stabilise the thing.
 
Arnold, are you sure it expands?

I have a friend who used hide glue to produce obscure glass for a home-improvement project-- he brushed it onto the heavy plate-glass, and as the glue cooled and dried, it contracted, and pulled the surface of the glass completely off, leaving a surface reminiscent of a flaked obsidian arrowhead. (He put the glass in a heavy padded envelope or this could have been hazardous...)

Are you just saying it expands temporarily? And then contracts?

Chet
 
In my experience, hide-glued joints that are not clamped end up looking crappy and tend to fall apart. That's all.
In no way am I disagreeing with Arnold, but in my limited experience with rubbed joints, I've been really happy with the look. Pretty much invisible glue lines. That's on the top and on the two back wings I'd glued before I read Arnold's post. Whether or not they will hold up I have no idea. I'm amazed at the strength of the joint with hide glue though. After I read Arnold's comments I tried to snap apart one of the wings and I could tell that I was going to break the wood, not the joint. I had used fairly thin glue on the top joint and was worried that it wouldn't be strong enough, but later read that you need a pretty thin glue for a rubbed joint to work well. One of my attempts on a wing bore that out, as the glue was thicker and it didn't "suck" together like I expected. I took it apart before it dried, re-joined it and glued it with thinner glue and it worked like a charm. Again, this is not advice, just my very limited experience.
 
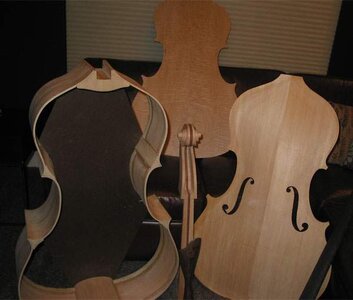
Here's a new pic of the parts as they are. I'm smelling the barn now. I'm going to cut the braces for the back tomorrow. There were enough sitka off-cuts from the top for the upper and lower braces and bass bar, but for the middle (sound post) brace, I was thinking of using douglas fir. Would this be a good application for it?

OK Matthew, more pics please.
 

Attachments

  • parts_pic.jpg
    parts_pic.jpg
    24.8 KB · Views: 98