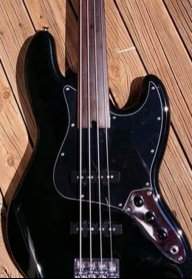
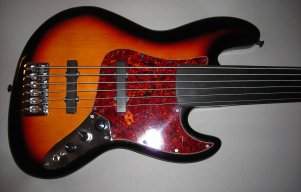
Jerks!...In the picture they are, but not on the actual body I received

TalkBass has been independent since 1998. Add your voice.
Create a free account to reply to discussions, view embedded media, and browse with fewer display ads.
Join free Log in
Want zero display ads or expanded classifieds tools? Compare plans.
Jerks!...In the picture they are, but not on the actual body I received

Nice tool collection you got there! The only two things I see missing are a drillpress and a router, off camera maybe? You could use the Mortiser as a drill press, but the vertical capacity is pretty limited. With the addition of a drill press or one of the hand-drill attachments, you have everything you need to build just about any bass. A lot of people on TB have produced amazing work with far less, just hand tools in some cases, working off a kitchen table or corner of their apartment. The ROSS spindle-sanders come in very handy for fairing curved templates, but you can use a drill-press sanding drum instead. The most important thing is the DESIRE to build something, which is what gets you through the inevitable eff-ups. Again, if you really want some great advice, check out Luthier's Corner.


Very cool! I just recently retrieved all of my old wood working tools from 8 years of a hostage/storage crisis (long story that ended well) and converted my basement (bass-ment ?) into a wood shop. I haven't built a guitar or bass for almost 30 years, and even then I was much more observer than actual luthier. I probably forgot more than I learned back then, so I'm looking for an easy way to ease back into it and learn as I go. The kit idea the OP posted might be the perfect starting point for me.
Here's the shop... still getting it set up. I have about 20 hand planes to sharpen now too
View attachment 1117474 View attachment 1117475 View attachment 1117476

Harbor Freight makes some grade-A crap, particularly some of the motorized hand tools, but I've read some good reviews of their spindle sander, which I've seen sold under several brand names, different color plastic, etc, but it's the same tool. I want one, but can't justify the $$ at the moment. I've been making do with a "Robosander", which is a sanding drum with a bearing guide wheel as a template follower. Chucked into a drill press, it's slow, but eliminates the risk of tearout inherent to most template router bits. A couple other things you will really need are an accurate straightedge, which can just be a good quality level if you have one. A cheap digital dial micrometer is pretty handy too, a lot of work in .001" when you get to things like leveling frets. It's easy to get sucked into the rabbit-hole of "needing" pro level tools, I'm guilty of that. It doesn't have to be an expensive hobby if you have an open mind about re-purposing stuff you already have.Thanks!
I do have 3 routers... the table with one mounted is tucked on the top of the rack in the left corner of the shop. There's a small drill press also, but it's good enough for anything I may need to do (on the floor between the jointer and planer).
I would like an oscillating spindle sander. That's probably the next thing I will pick up.
And the desire is there, but the time gets a little trickier. Any endeavor is going to take a long time between work, wife and kids, practicing, and gigging. This is going to mostly be a weekend warrior project.
And thanks for the advice; I will be reading through the Luthier's Corner in great detail.



I just had this problem recently installing some Nordie Big Men pickups - it didn't occur to me that the old pickup screw holes wouldn't be deep enough for the new screws - even though the pickups themselves are quite a bit deeper than standard MM pickups - so yeah, stripped out the screw heads and had to buy new screws.Great advice in this thread. I would like to add one: NEVER trust a pilot hole, especially those for the tuner screws. Don't be surprised when a pilot hole turns out half as deep as you would expect. In hard maple this definitely wrecks your screws. So, always check the pilot holes. I'm just saying.


It's easy to get sucked into the rabbit-hole of "needing" pro level tools,
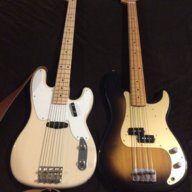
Yes. As I put it in rather lengthy terms it is the relationship of the bridge both horizontally (to establish where the strings lie over the board) and vertically (to establish the scale length so the notes are in tune). Fortunately the travel of the saddles gives some leeway in the latter. It looks like his tuner holes are already drilled which I hadn't noticed.Just my 2 cents worth. You can assemble the whole bass, every last screw/nut whatever, but position and install the bridge last. I believe this is how the majority of guitars are done. Good luck and lets see the result.
Yes. As I put it in rather lengthy terms it is the relationship of the bridge both horizontally (to establish where the strings lie over the board) and vertically (to establish the scale length so the notes are in tune). Fortunately the travel of the saddles gives some leeway in the latter. It looks like his tuner holes are already drilled which I hadn't noticed.

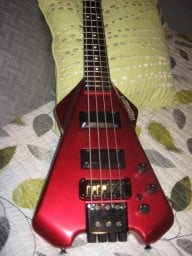
I love the vibe with those cutouts! Echoes of old Ampegs!Take your time, and enjoy!
I bought a kit exactly like the one in your pic (OP) and had a blast building it.
I have some basic hand tools, but bout a handheld coping saw to cut the headstock. It was a godsend.
I have some basic woodworking know how, but never built an instrument before. Got lots of help here on TB, from some of the folks that have already responded to you.
Her is what I ended up with:
View attachment 1117788
If I could do it, you can do it.

He's got two different photos there. One with, and what sounds like his one without. Once one understands the vertical and horizontal comments I made, it's probably better not to have the bridge holes drilled because they didn't likely put the neck on and make the bridge position from there.I don't know if the picture is like the kit he actually got or not, but it seems the bridge screw holes are already drilled in the picture anyway. That simplifies things a lot as trying to correctly place a bridge can be quite the mental exercise to get the proper range on saddles for intonation.
Edit: When I did a LEs Paul kit the headstock shaping was probably the hardest thing (other than getting a nice smooth finish on the flamed maple body) While is is possible to saw one out by hand, I'd recommend finding someone with a jig saw or band saw to help get that part done. I mean you can run the headstock through so you don't violate your rules or anything, but things will go MUCH better if that is done with a power saw and someone to give you a bit of instruction first. Once sawed then it's sandpaper and elbow grease.
Before my trip to the Chicago Music Exchange, I was contemplating building a P bass from Warmoth parts. I've gotten comfortable over the past few years working on guitars, setting them up, and doing some light soldering work that I felt relatively comfortable building a bass from parts, but I wanted a test run, due to the high initial cost.
So, I decided to take a “dry run” on one of those DIY kits you see on Reverb/eBay/anywhere else. For the thrifty price of $100 plus shipping, I got my hands on this:
View attachment 1116663
(Closest picture I could find, when I made the purchase it had a Fender shaped headstock)
Features:
Kit includes all parts to build a complete, playable electric bass.
The switch control plate is installed with metal knobs and pots and wires, no needing other installation.
The body is made of basswood, while the neck is constructed from maple, and the fingerboard is made of rosewood, exquisite workmanship.
The holes are delicately and perfectly cut, fits for the accessories well.
The wood with smooth surface for easy painting.
(direct copy + paste of the description given)
From there, things got… complicated. For one, the body came without any holes drilled for the pickguard, bridge, or neck. The neck itself had a paddle headstock instead of the fender shape the kit promised. I have no tools, and no knowledge of woodworking. And here's where it gets fun. With only my existing knowledge of maintaining my own instruments, my wits, and my wallet, I decided to put this baby together. No hands-on help allowed. Google, mercifully, is allowed, but every cut, twist, and chop would be by my own hand.
My Objectives:
1 - Shape the headstock
2 - Paint and finish the body/neck
3 - Correctly place the neck, pickguard, and bridge
4 - Wire electronics properly (no grounding/shielding issues)
5 - Play a gig with the bass.
What follows is meant to entertain you, not instruct. I will stress this over and over, I don't know what I'm doing. I am not going to (purposefully) ruin the kit, I aim to finish with a playable backup bass for my Nash.
Enjoy.
Thanks! That's exactly what I was going for. I also cut the body to mimic the Ampeg scroll bass.I love the vibe with those cutouts! Echoes of old Ampegs!