• TalkBass has been independent since 1998. Add your voice.
    Create a free account to reply to discussions, view embedded media, and browse with fewer display ads.
    Join freeLog in
    Want zero display ads or expanded classifieds tools? Compare plans.

Reshaping and finishing a maple neck w skunk strip and binding

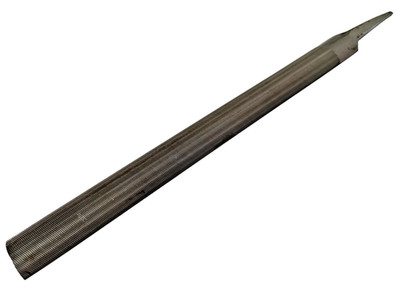
I found the bastard cut at HD https://www.homedepot.com/p/Crescen...ard-Cut-Half-Round-Wood-Rasp-21878N/205218182 but I can't find the smooth cut anywhere. Is it also called something else?

That's a Rasp, not a File. Not what you want to get started.


As an eBay Associate, TalkBass may earn a commission from qualifying purchases.
  • Like
Reactions: Stagelab
This neck is a C and I'd like to reshape it into a D. I drafted steps based on some more research I did, mainly watching videos. Can I get a sanity check?
  • File the back of the neck along the skunk strip with flat side of bastard file until center is about 0.5mm larger than your target depth. The rest will be sanded off later.
    • Repeat previous step with smooth cut file.
  • Create two distinct facets on each shoulder for the D shape with flat side of bastard file: one at roughly 60 degrees (closer to the binding) and one at 30 degrees (closer to the center flat).
    • Repeat previous step with smooth cut file.
  • Use wood block with 80 grit to level sand the center
  • Use wood block with 120 grit to blend the new flat sides into the center. Focus pressure on the "peaks" where the facets meet.
  • Sand where the binding meets the edges of the neck with a block and 320 at a 45 degree angle to remove any ridge that's formed.
  • Shoeshine with 120 from the nut end to the heel to round off the corners and blend the facets into a smooth curve. Use shorter, more localized strokes on the shoulders to maintain the D shape.
  • Repeat the previous step with 150, 180, and 220.
  • Wipe the neck with a damp cloth, dry and dewhisker with 220.
  • Shoeshine with 320.
  • Dewhisker with 400
  • Wipe neck with naphtha to verify all finish has been removed before applying new finish—still deciding on which finish I'll go with.
I don't want to remove the serial number from the back of the headstock so while I like the suggestion to remove the finish from the back, I'm going to leave the headstock be and try to feather the file and sandpaper to ease the transition line.

As for the heel, I'm planning to sand w/ 80 grit to remove the finish off the back and sides of the neck to just passed where the body meets the neck so that transition line is hidden when the bass is assembled. Then repeat with 120, 150, 180 and 220.
I realized my last post was very long and I don't expect anyone to read through all of it. The big question I'm hoping to get answered is, to reshape the neck from a C to a D, should I create two facets on each shoulder, one at 60 degrees (closer to the binding) and one at 30 degrees (closer to the center flat)?
 
I realized my last post was very long and I don't expect anyone to read through all of it. The big question I'm hoping to get answered is, to reshape the neck from a C to a D, should I create two facets on each shoulder, one at 60 degrees (closer to the binding) and one at 30 degrees (closer to the center flat)?

I read through your post, but I didn't comment because I'm confused by what you are trying to do. I think you are over-thinking it.

The way most of us gauge neck shapes, a C shape is smaller around than a D shape, particularly on the sides. A D is bigger in cross-sectional area than a C. To go from a C to a D, you'd have to add wood, not file wood off.

So what are you really trying to do? You want the neck to feel smaller around, while keeping the same width, right? Forget the idea of a D Shape. That's not the geometry you want. What you really want is a smaller C shape, shallower in depth, but the same width. Still keeping the fully rounded C shape. That will reduce the overall circumference of the neck, which will make it feel smaller.

To do that, first file a flat stripe down the back of the neck, parallel to the fingerboard. Reduce the depth of the neck, watching carefully with calipers. Measure from the fingerboard surface to the back, at the 1st and the 12th. Go slowly, don't get over-enthusiastic. Start by taking off 1/16". Even a 1/16" off the depth will make the neck feel noticeably smaller around.

Filing off 1/16" from the depth will make a flat stripe about 3/8"-1/2" wide. File the flat stripe so it's the same width down the length of the neck from the 1st to the 12th. Don't start rounding it off yet; keep it flat, parallel to the fingerboard. Make that flat stripe straight and even, no lumps or dips. Check it with a short straightedge if you like.

When the flat stripe looks good and true, draw a pencil line down the middle of it. Now you can start rounding it off, blending the two sides down about halfway down the sides of the shape. And not touching the pencil line in the center. No need to do it in facets at angles; just a gentle rounded blend.

Put your hand around it and see how it feels. Is that as small as you want it, or do you want to go smaller?

If you want to go smaller, repeat the whole process. File another flat stripe, taking off another 1/16". Get the stripe straight and true, draw the pencil line, round it off.

That's the process for reshaping a C shape neck to make it feel smaller.
 
  • Like
Reactions: Beej
I read through your post, but I didn't comment because I'm confused by what you are trying to do. I think you are over-thinking it.

The way most of us gauge neck shapes, a C shape is smaller around than a D shape, particularly on the sides. A D is bigger in cross-sectional area than a C. To go from a C to a D, you'd have to add wood, not file wood off.

So what are you really trying to do? You want the neck to feel smaller around, while keeping the same width, right? Forget the idea of a D Shape. That's not the geometry you want. What you really want is a smaller C shape, shallower in depth, but the same width. Still keeping the fully rounded C shape. That will reduce the overall circumference of the neck, which will make it feel smaller.

To do that, first file a flat stripe down the back of the neck, parallel to the fingerboard. Reduce the depth of the neck, watching carefully with calipers. Measure from the fingerboard surface to the back, at the 1st and the 12th. Go slowly, don't get over-enthusiastic. Start by taking off 1/16". Even a 1/16" off the depth will make the neck feel noticeably smaller around.

Filing off 1/16" from the depth will make a flat stripe about 3/8"-1/2" wide. File the flat stripe so it's the same width down the length of the neck from the 1st to the 12th. Don't start rounding it off yet; keep it flat, parallel to the fingerboard. Make that flat stripe straight and even, no lumps or dips. Check it with a short straightedge if you like.

When the flat stripe looks good and true, draw a pencil line down the middle of it. Now you can start rounding it off, blending the two sides down about halfway down the sides of the shape. And not touching the pencil line in the center. No need to do it in facets at angles; just a gentle rounded blend.

Put your hand around it and see how it feels. Is that as small as you want it, or do you want to go smaller?

If you want to go smaller, repeat the whole process. File another flat stripe, taking off another 1/16". Get the stripe straight and true, draw the pencil line, round it off.

That's the process for reshaping a C shape neck to make it feel smaller.
Got it. I have this other neck I really like with a flat center. It feels very slim. I thought it was a D but it’s probably a very slim C.

Should I be filing the center with the bastard and then the smooth file until it’s flat, and then use the bastard followed by the smooth file on the sides?

So if no facets, should I just angle the file to follow the existing curvature when I file the sides? I’ve only seen filing examples using facets. Most of the tutorials out there are for shaping a neck, not reshaping an already finished neck.
 
Should I be filing the center with the bastard and then the smooth file until it’s flat, and then use the bastard followed by the smooth file on the sides?

Yes, use the Bastard file first to shape the wood, because it cuts the wood faster. Then go over it with the Smooth file to refine the shape and remove the tooth marks from the Bastard file. Then 180 sandpaper on a block removes the tooth marks from the Smooth file. And 220 paper removes the 180 scratches, etc. That's the sequence.
So if no facets, should I just angle the file to follow the existing curvature when I file the sides? I’ve only seen filing examples using facets.

When doing the blending, push the file in a curved path, following the contour that you are trying to shape it to.

The purpose of the facets is to establish guidelines to keep the shape defined and consistent down the length of the neck. For a light reshaping, like you are doing, the single facet is all that's needed. The straight flat strip down the center.

When shaping a new neck from a rectangular blank, we use five or more facets to set the guidelines and define the shape.
 
  • Like
Reactions: Stagelab
I got the files in the mail and started carving the center line of the back of the neck. How long should it take to reduce the neck depth from 21mm to 19.5mm at fret 1? Reason I ask is the double cut file is removing much less material than I expected. At my current rate it could be a while.
 
Last edited:
I got the files in the mail and started carving the center line of the back of the neck. How long should it take to reduce the neck depth from 21mm to 19.5mm at fret 1? Reason I ask is the double cut file is removing much less material than I expected. At my current rate it could be a while.

Using a file, you have to apply some horsepower to it, to get it to cut.

If you hold the file in one hand and the neck in the other and lightly rub them together, it'll cut about like 220 sandpaper. And take about that long.

Instead, clamp the neck down to your workbench and hold the file with both hands, one on the handle and one on the tip. Push down and forward on the file, using your whole upper body. Make the teeth dig in and peel away some wood. Working like that, a Bastard file will take off a mm of maple in about 2 strokes.

Practice on some scrap wood, to get a feel for how hard you need to push to get the file teeth to cut. It's not that much force, but it's more than lightly rubbing.
 
Last edited:
  • Like
Reactions: Beej
Using a file, you have to apply some horsepower to it, to get it to cut.

If you hold the file in one hand and the neck in the other and lightly rub them together, it'll cut about like 220 sandpaper. And take about that long.

Instead, clamp the neck down to your workbench and hold the file with both hands, one on the handle and one on the tip. Push down and forward on the file, using your whole upper body. Make the teeth dig in and peel away some wood. Working like that, a Bastard file will take off a mm of maple in about 2 strokes.

Practice on some scrap wood, to get a feel for how hard you need to push to get the file teeth to cut. It's not that much force, but it's more than lightly rubbing.
1mm in 2 strokes with the Nicholson double cut bastard half round? Wow.

I have clamps here and am filing with both hands. Definitely using my body weight to generate downward force. I wonder what I'm doing wrong. My technique is like this guy's at about 1min into the video.

I also tried draw filing from the other end of the neck but it wasn't any more effective.

I'm cleaning my file every 5-6 strokes, too.

Can bastard files be sharpened?
 
1mm in 2 strokes with the Nicholson double cut bastard half round? Wow.

I have clamps here and am filing with both hands. Definitely using my body weight to generate downward force. I wonder what I'm doing wrong. My technique is like this guy's at about 1min into the video.

I also tried draw filing from the other end of the neck but it wasn't any more effective.

I'm cleaning my file every 5-6 strokes, too.

Can bastard files be sharpened?


That's a good video overall; well explained. But where he's showing the filing at about 1 min is called Draw Filing technique. That's where you slide the file sideways at an angle, to take a finer and smoother cut. Do that after you've taken off most of the wood. I didn't see him showing any rough cutting with the file.

For the first rough cut passes, push the file in a straight path down its length, through most of the length of the file. Not sliding it sideways at an angle. That will take off 1 mm in 2 strokes. Try it on some scrap wood, to get a feel for it.

A new Nicholson file can be used daily cutting hardwood for many years before it gets dull. There's no way you should need to sharpen it. Many of my most-used woodworking files are 30 years old, and still going strong.
 
That's a good video overall; well explained. But where he's showing the filing at about 1 min is called Draw Filing technique. That's where you slide the file sideways at an angle, to take a finer and smoother cut. Do that after you've taken off most of the wood. I didn't see him showing any rough cutting with the file.

For the first rough cut passes, push the file in a straight path down its length, through most of the length of the file. Not sliding it sideways at an angle. That will take off 1 mm in 2 strokes. Try it on some scrap wood, to get a feel for it.

A new Nicholson file can be used daily cutting hardwood for many years before it gets dull. There's no way you should need to sharpen it. Many of my most-used woodworking files are 30 years old, and still going strong.
Like this guy does at 9min45sec in?

 
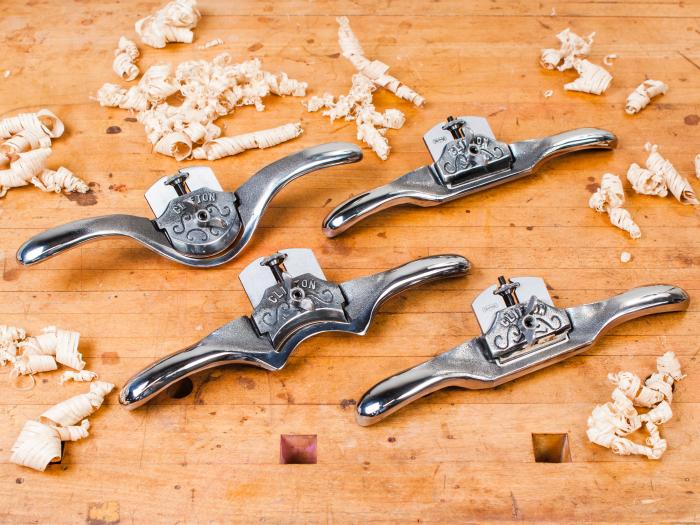
Another option worth considering, how about a nice spoke shave for roughing necks?
I've had good success with that technique, I think it provides a little more control than just hand filing.
The one your looking for is on the bottom left, can't remember if that's concave, I think it is. The convex one above it and the straight blades are useful in places as well. These pictured are crazy expensive, more reasonable version are available,

The biggest trick with Spokeshaves is you really need to pay attention to grain orientations.
EE-SH6356_R_big.jpg
 
  • Like
Reactions: Stagelab
To my surprise, I have a big structural problem now, and it might expand across the neck.

The skunk stripe at fret 7-8 has some cracks and the walnut is lifted. What’s left of the strip there is extremely thin. I had no idea I was in dangerous territory when I finished smoothing the neck curvature this morning. The stripe is intact everywhere else along the neck at least for now.

Is this the best way to repair this? I loosened the truss rod already.

- wick thin ca glue into the cracks of the strip around fret 7-8
- clamp and let cure
- sand with 220 to level surface, then 320, 400.

Should I do anything to try reinforcing the rest of the skunk stripe?

If the neck bulges under string tension and is toast, I’ll use it to practice fret work, and maybe hang it on my wall as decoration.
 
Last edited:
It may sound nuts, but I'd personally crank the rod a bit to see what happens to the neck. If it bulges or cracks, there's your answer, and it would eventually happen anyway, you're just speeding up the process. If it survives and works fine, then you're probably good to go and can just repair the spots by wicking in thinned glue or CA.

It seems odd that you'd get only one spot along the back in the middle of the neck if it has a double-acting trussrod. That problem sounds more consistent with a single-acting traditional style rod. Are you 100% sure it's a DADR?

An old school rod requires a slightly thicker neck than you can get with the modern low profile DADRs. I like to work in mm for the size of the unit. A standard fingerboard on a Fender style is 1/4" or 6.25mm. After shaping and sanding, it usually ends up about 6mm thick or sometimes a tad thinner, say 5.75mm. A typical low profile DADR rod is 10mm thick. So if you subtract 16mm from your overall 21, you have around 5mm of thickness to work with when it comes to shaving the back. You can really only remove about 2.5mm before you start getting into 'too thin' territory. 1/8" is a little over 3mm.

How much do you think you removed? And secondly, was it removed evenly along the length or is it possible that more was removed in the 7th fret area?

Sorry you're dealing with this. Most of us who have built necks have gone through to the truss rod at least once while shaping. I've done it a couple of times for sure, and the first time it ruined a neck I had put MANY hours into... I feel your pain dude. :(
 
Last edited:
It may sound nuts, but I'd personally crank the rod a bit to see what happens to the neck. If it bulges or cracks, there's your answer, and it would eventually happen anyway, you're just speeding up the process. If it survives and works fine, then you're probably good to go and can just repair the spots by wicking in thinned glue or CA.

It seems odd that you'd get only one spot along the back in the middle of the neck if it has a double-acting trussrod. That problem sounds more consistent with a single-acting traditional style rod. Are you 100% sure it's a DADR?

An old school rod requires a slightly thicker neck than you can get with the modern low profile DADRs. I like to work in mm for the size of the unit. A standard fingerboard on a Fender style is 1/2" or 6.25mm. After shaping and sanding, it usually ends up about 6mm thick or sometimes a tad thinner, say 5.75mm. A typical low profile DADR rod is 10mm thick. So if you subtract 16mm from your overall 21, you have around 5mm of thickness to work with when it comes to shaving the back. You can really only remove about 2.5mm before you start getting into 'too thin' territory. 1/8" is a little over 3mm.

How much do you think you removed? And secondly, was it removed evenly along the length or is it possible that more was removed in the 7th fret area?

Sorry you're dealing with this. Most of us who have built necks have gone through to the truss rod at least once while shaping. I've done it a couple of times for sure, and the first time it ruined a neck I had put MANY hours into... I feel your pain dude. :(
I was mistaken before. It’s actually a single-action truss rod.

I filed the center evenly but I accidentally created a slight dip in the walnut this morning while blending the area. That dip is where the walnut is detached.

Here’s a pic of the neck now. I’d applied some CA glue earlier but then realized it wasn’t thin enough. I’ll have ultra thin glue coming tomorrow. Pretty sure the blue is the truss rod.

I think I removed about 2.5mm. I love the profile I made.

I hear you about just cranking the truss rod. I’ll probably do that.
 

Attachments

  • IMG_0749.jpeg
    IMG_0749.jpeg
    1.3 MB · Views: 9
Last edited:
It may sound nuts, but I'd personally crank the rod a bit to see what happens to the neck. If it bulges or cracks, there's your answer, and it would eventually happen anyway, you're just speeding up the process. If it survives and works fine, then you're probably good to go and can just repair the spots by wicking in thinned glue or CA.

It seems odd that you'd get only one spot along the back in the middle of the neck if it has a double-acting trussrod. That problem sounds more consistent with a single-acting traditional style rod. Are you 100% sure it's a DADR?

An old school rod requires a slightly thicker neck than you can get with the modern low profile DADRs. I like to work in mm for the size of the unit. A standard fingerboard on a Fender style is 1/4" or 6.25mm. After shaping and sanding, it usually ends up about 6mm thick or sometimes a tad thinner, say 5.75mm. A typical low profile DADR rod is 10mm thick. So if you subtract 16mm from your overall 21, you have around 5mm of thickness to work with when it comes to shaving the back. You can really only remove about 2.5mm before you start getting into 'too thin' territory. 1/8" is a little over 3mm.

How much do you think you removed? And secondly, was it removed evenly along the length or is it possible that more was removed in the 7th fret area?

Sorry you're dealing with this. Most of us who have built necks have gone through to the truss rod at least once while shaping. I've done it a couple of times for sure, and the first time it ruined a neck I had put MANY hours into... I feel your pain dude. :(
I decided to glue the area before tightening the rod. It’s good practice doing this, if nothing else.

After I wick the glue into the cracks, should I clamp it? How do I know when I’ve applied enough glue? When I see it start to sit on the surface?
 
A general note about SASR Fender-style truss rods: When you tighten the rod, it's pushing inward in the center of the neck, not pushing outward against the skunk stripe. Using the truss rod to flatten out a forward-bowed neck shouldn't hurt the skunk stripe, even a thinned-down one. And a SASR rod doesn't push in the reverse direction.

However, if you loosen the nut of a SASR truss rod a couple of turns and rap on the nut with a punch and a hammer, that's an easy way to knock the skunk stripe out of the neck. I've done it a few times, intentionally, when I wanted to remove it for some reason.