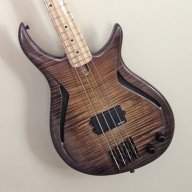
Okay guys,
I am tired, but, I have obligations here. So, I will begin with the big stuff for yesterday. I had a doctor's appointment, after lunch, so I only have one small thing. i finished smoothing out the control cavity, and Kris ( the head electric instructor) demonstrated the use of a rabbeting bit. With this bit, you can use the opening as the template, and route a channel larger than the opening. For this application, I would be making a lip for my control cavity cover to rest on and be screwed into.
Here you go!
I used a block of wood, taped inside the cavity, for balancing the router base. This is the lesson I learned from my mistake(s).
As you can see,
there are no mistakes!
After turning off the router, I breathed a sigh of relief...
That was really all I had time for yesterday, so I will move on with today. Neck carving!!!!
The first part of the process involved using a chamfer bit, to remove the majority of the maple from the sides of the neck blank.
The next part involved using a spindle sander at both ends of the neck. sanding down to the approximate final thickness. .900 at the heel, and .825 at the nut. From there, we start carving, connecting the two thicknesses. I did not get many pictures of the process, as I was busy. I did, however, get a couple of group shots of people at work.
Here is Michael at the spindle sander,
and Michael right after I told him that I took his picture...
Here is a shot of Anna, Trevor, and Colton, working on their respective necks.
and here's when Michael got the camera....yikes.
Shop assistant Matt Vestal checking out my work. He is also a bass player and builder. His stuff is really cool.
yours truly...sanding out the tool marks and creating the feel that I want...
and I didn't realize how close Michael got...
After a few hours of work... I have a neck!
Here are a few shots in the clamps...
And here are some on the body...
and for those of you who wanted a Stingray headstock....
There you go!
After I finished with the carving, I started to work on the vertical strips on my acoustic. The strip is glued into a cutout from the kerfing, and it helps prevent big cracks in the sides.
Here, you see the kerfing notched out,
and here is the material for the vertical strips. I still need to cut them, but that will be tomorrow.
As I said, I am pretty wiped out. i could stay up longer, but I would want coffee and cigs, and the doctor told me to cut back on both of them, and they may be partly to blame for the large blood clot in my right leg. So, I think I will go to bed soon. Thanks again for watching, and sorry for the delay yesterday. Hopefully, I made up for it today...
Thumpin_P