
You could run a stripe of that CF down the center of the body, like a continuous fingerboard. Maybe even inlay it?I considered doing a full top, in .060 but that was pricey, potentially more than 5A quilt. This material would have been cheaper, but decided finger board is the way to go, machining/sanding will be a little challenging.
I have some book-matched flamed maple that I think I’m going to use for the top instead.

Enjoy the benefits of a premium membership!
Upgrade Account
-
TalkBass has been independent since 1998. Add your voice.
Create a free account to reply to discussions, view embedded media, and browse with fewer display ads.
Join free Log in
Want zero display ads or expanded classifieds tools? Compare plans.
You are using an out of date browser. It may not display this or other websites correctly.
You should upgrade or use an alternative browser.
You should upgrade or use an alternative browser.
SBO 2022 Geköpft fretless
- Thread starter Barticus
- Start date
More options
Who Replied?

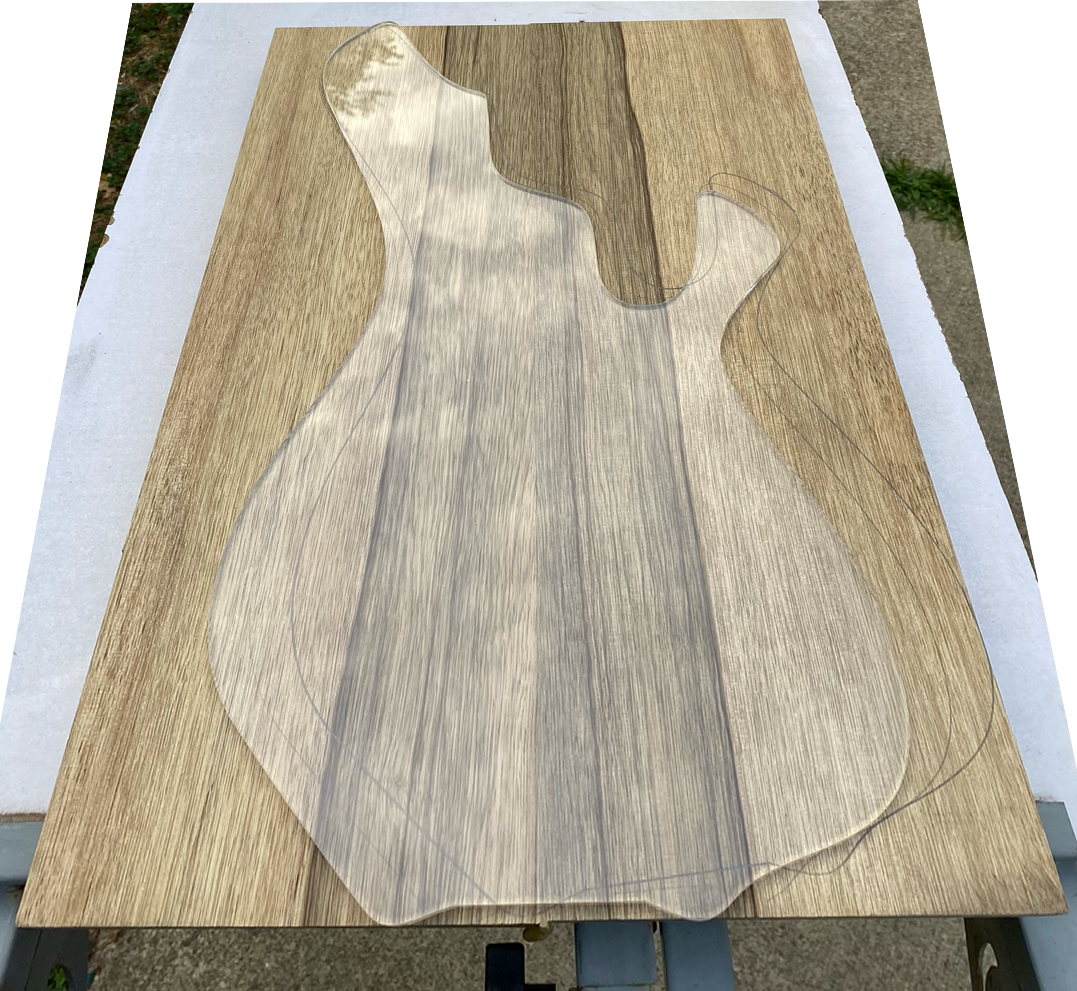
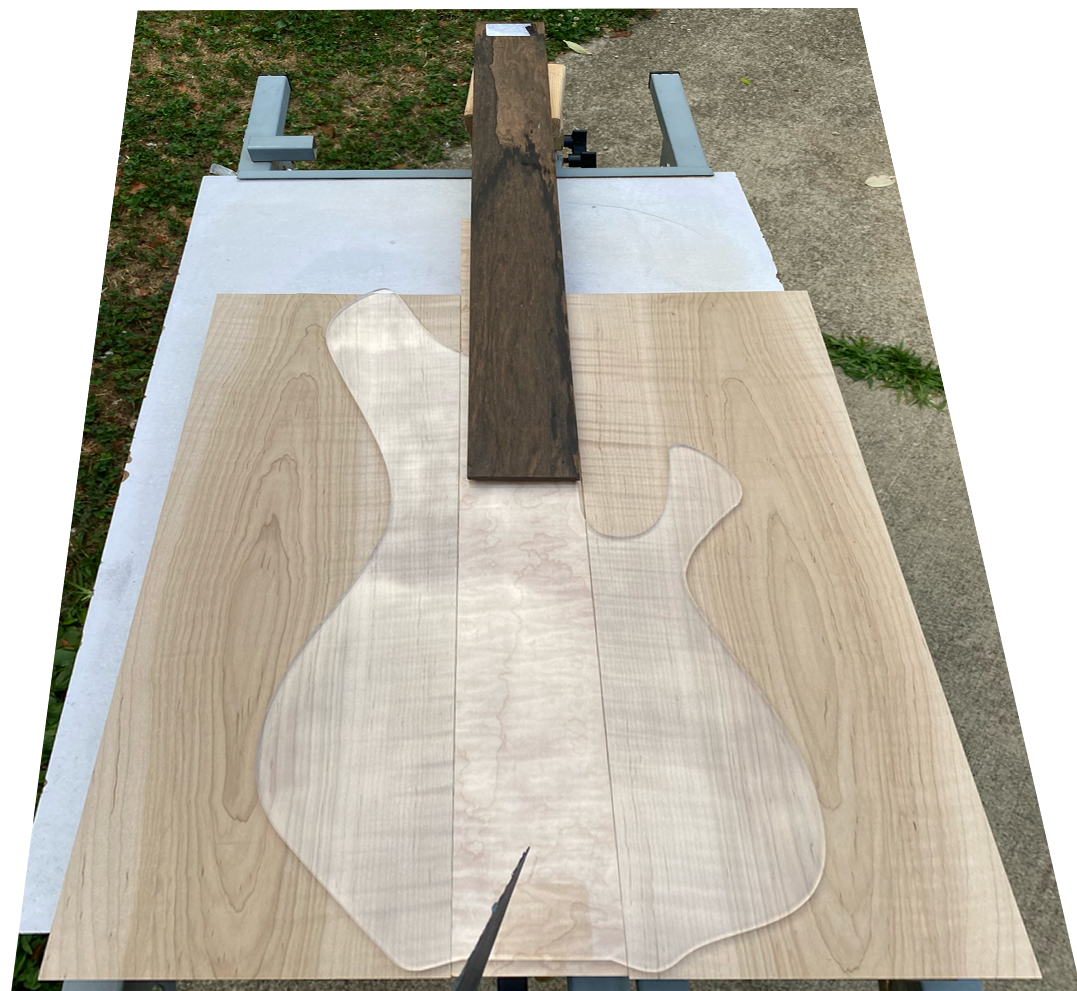
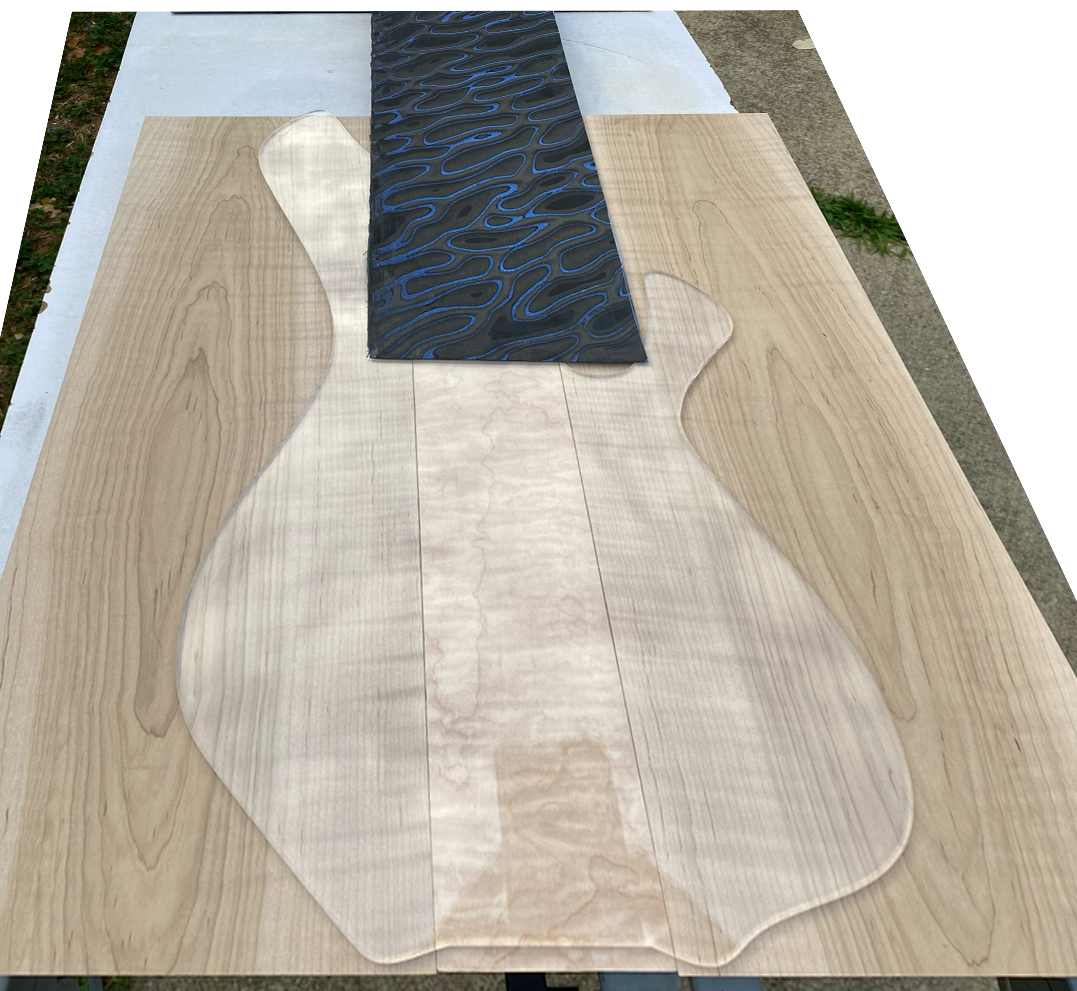
My plan, for now, is to do a set neck on the black limba body (image 1) with a strip of figured maple down the middle and some book-matched flamed maple caps (image 2) and the figured CF finger board (image 3).
I’ll trans-tint the middle figured maple in ocean blue and the flamed caps in a wine’ish purple. I’ll likely lightly tint the black limba in blue as well. All with a matte finish.
I’ll trans-tint the middle figured maple in ocean blue and the flamed caps in a wine’ish purple. I’ll likely lightly tint the black limba in blue as well. All with a matte finish.
Last edited:


Christmas in July?
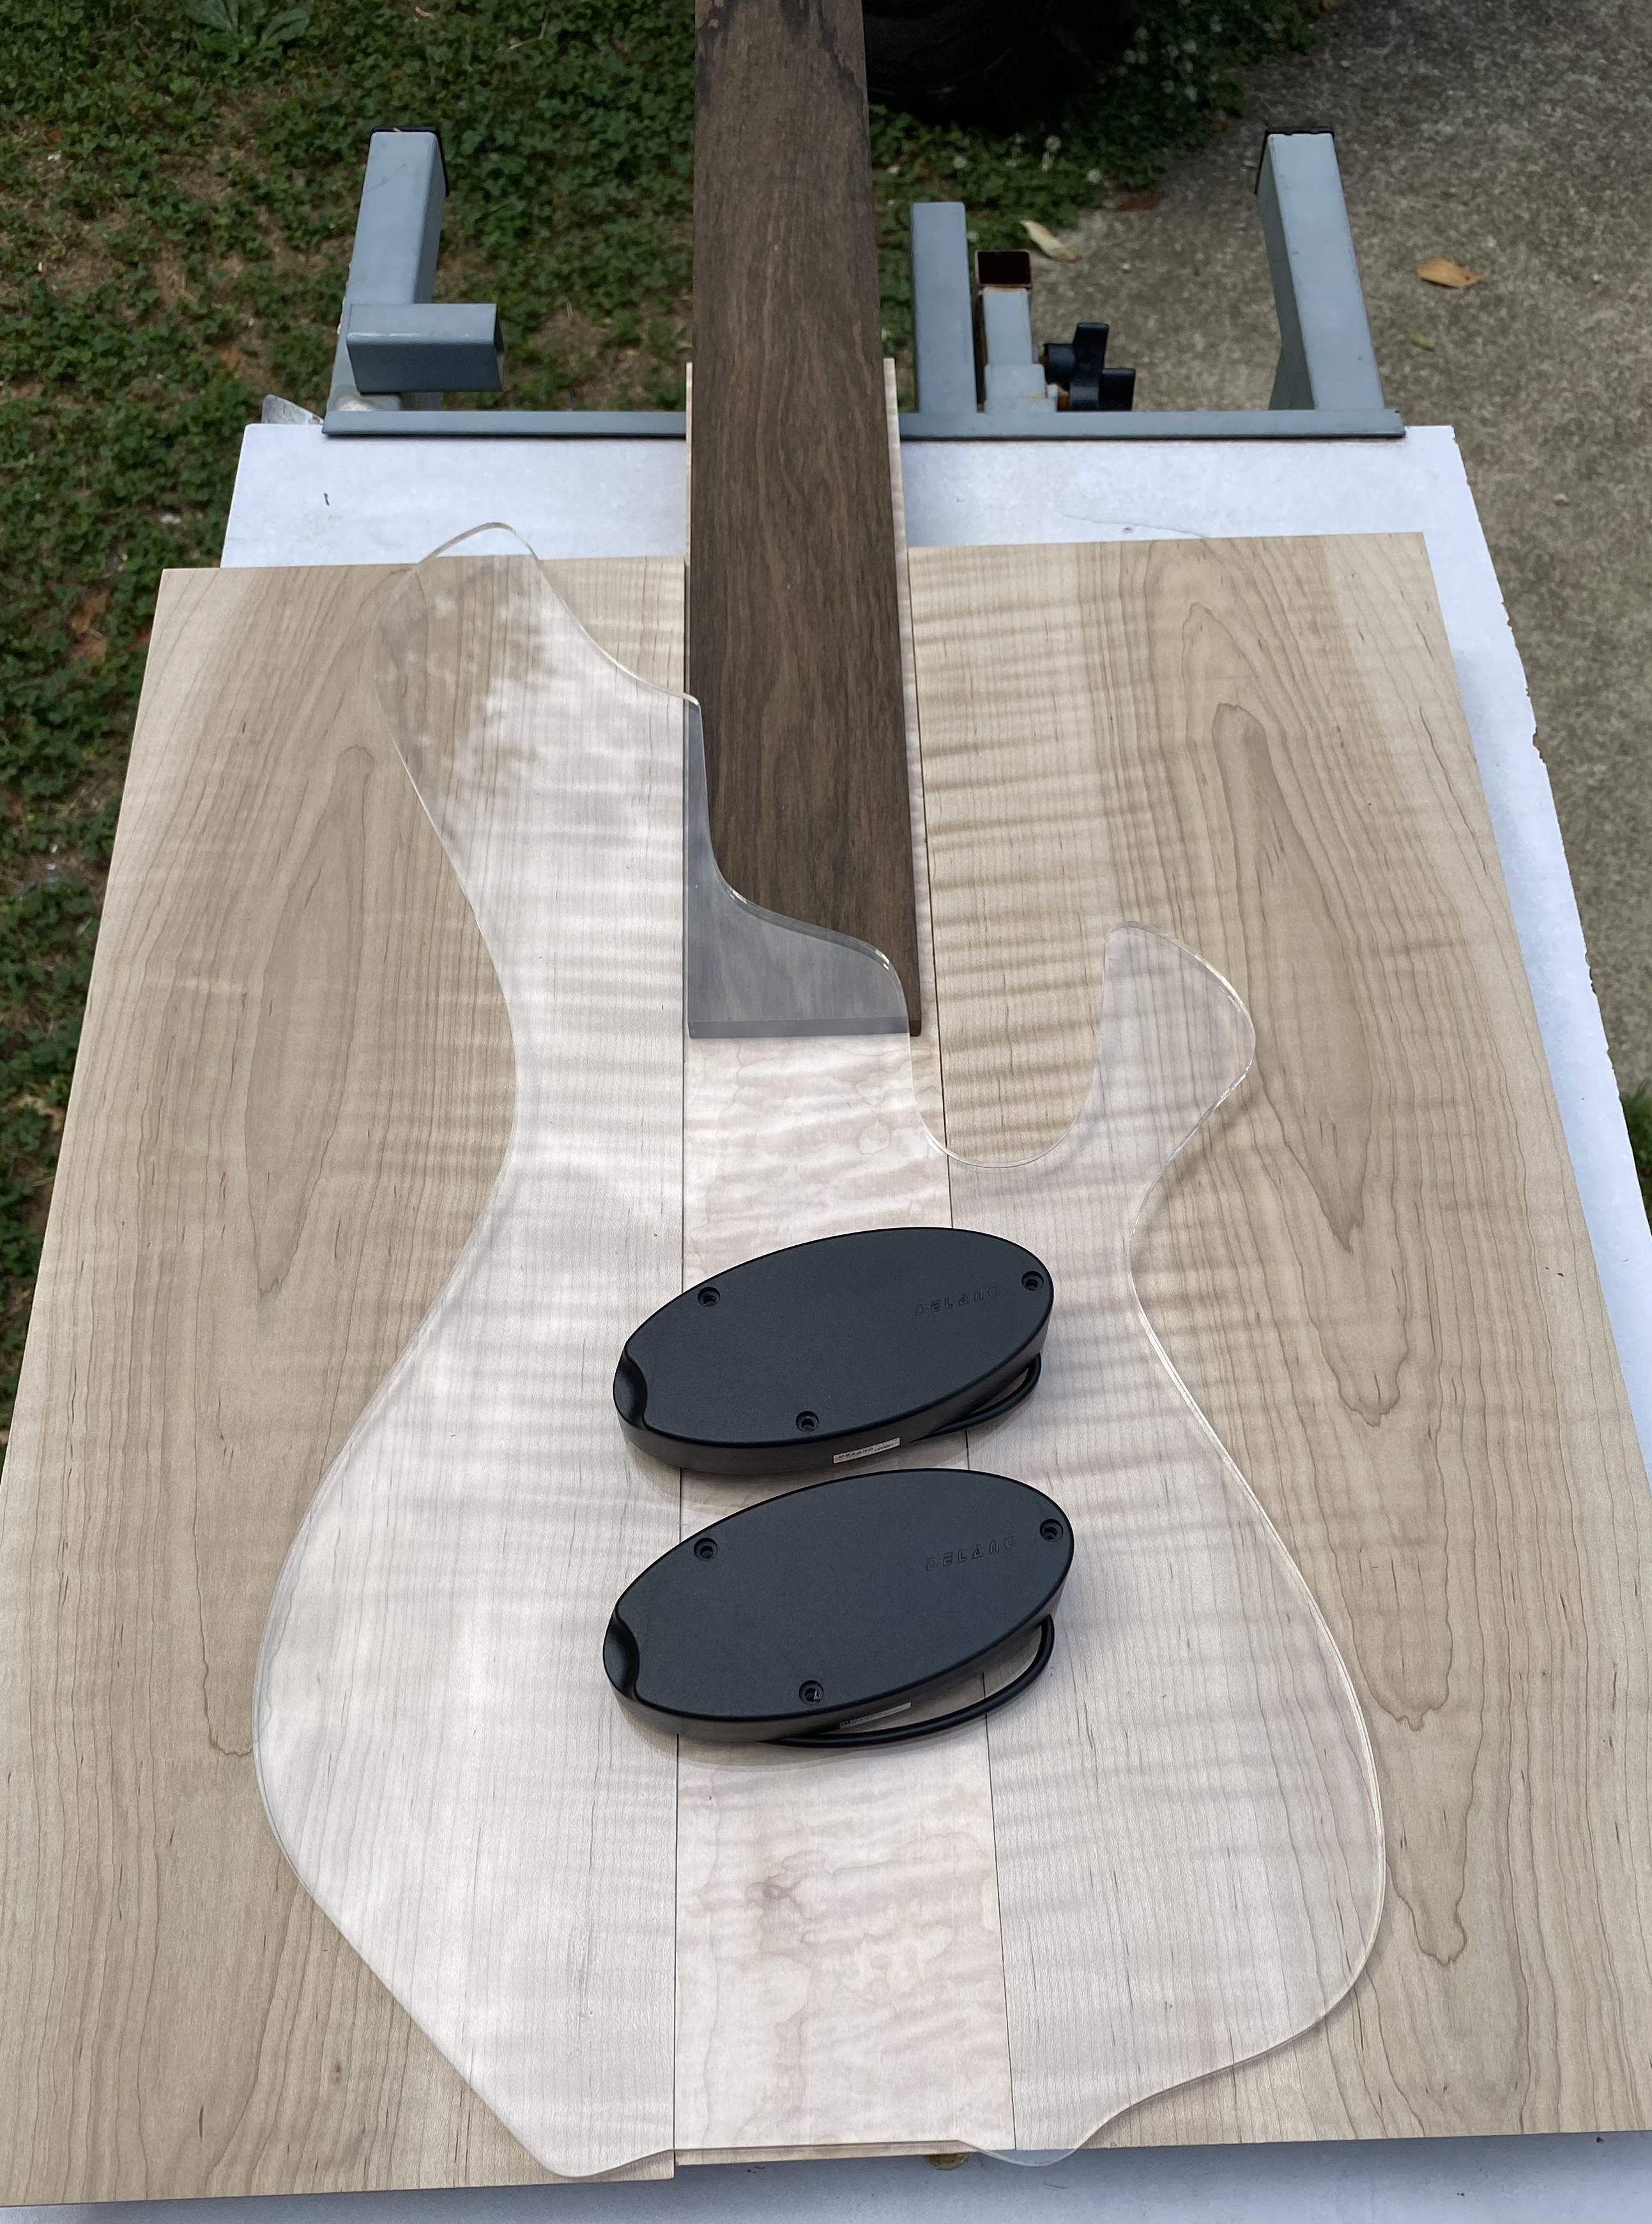
Man these things are big!
Then again, the body is really small
Man these things are big!
Then again, the body is really small

Those are huge.
It would be a shame to use both and cover up that much wood.
If necessary I could find a place for the extra for the WBO, so you won’t be tempted.
It would be a shame to use both and cover up that much wood.
If necessary I could find a place for the extra for the WBO, so you won’t be tempted.
My bodies are small, only 10.5” tall, so makes the pickups look extra large but it will function as a nice finger rampThose are huge.
It would be a shame to use both and cover up that much wood.
If necessary I could find a place for the extra for the WBO, so you won’t be tempted.

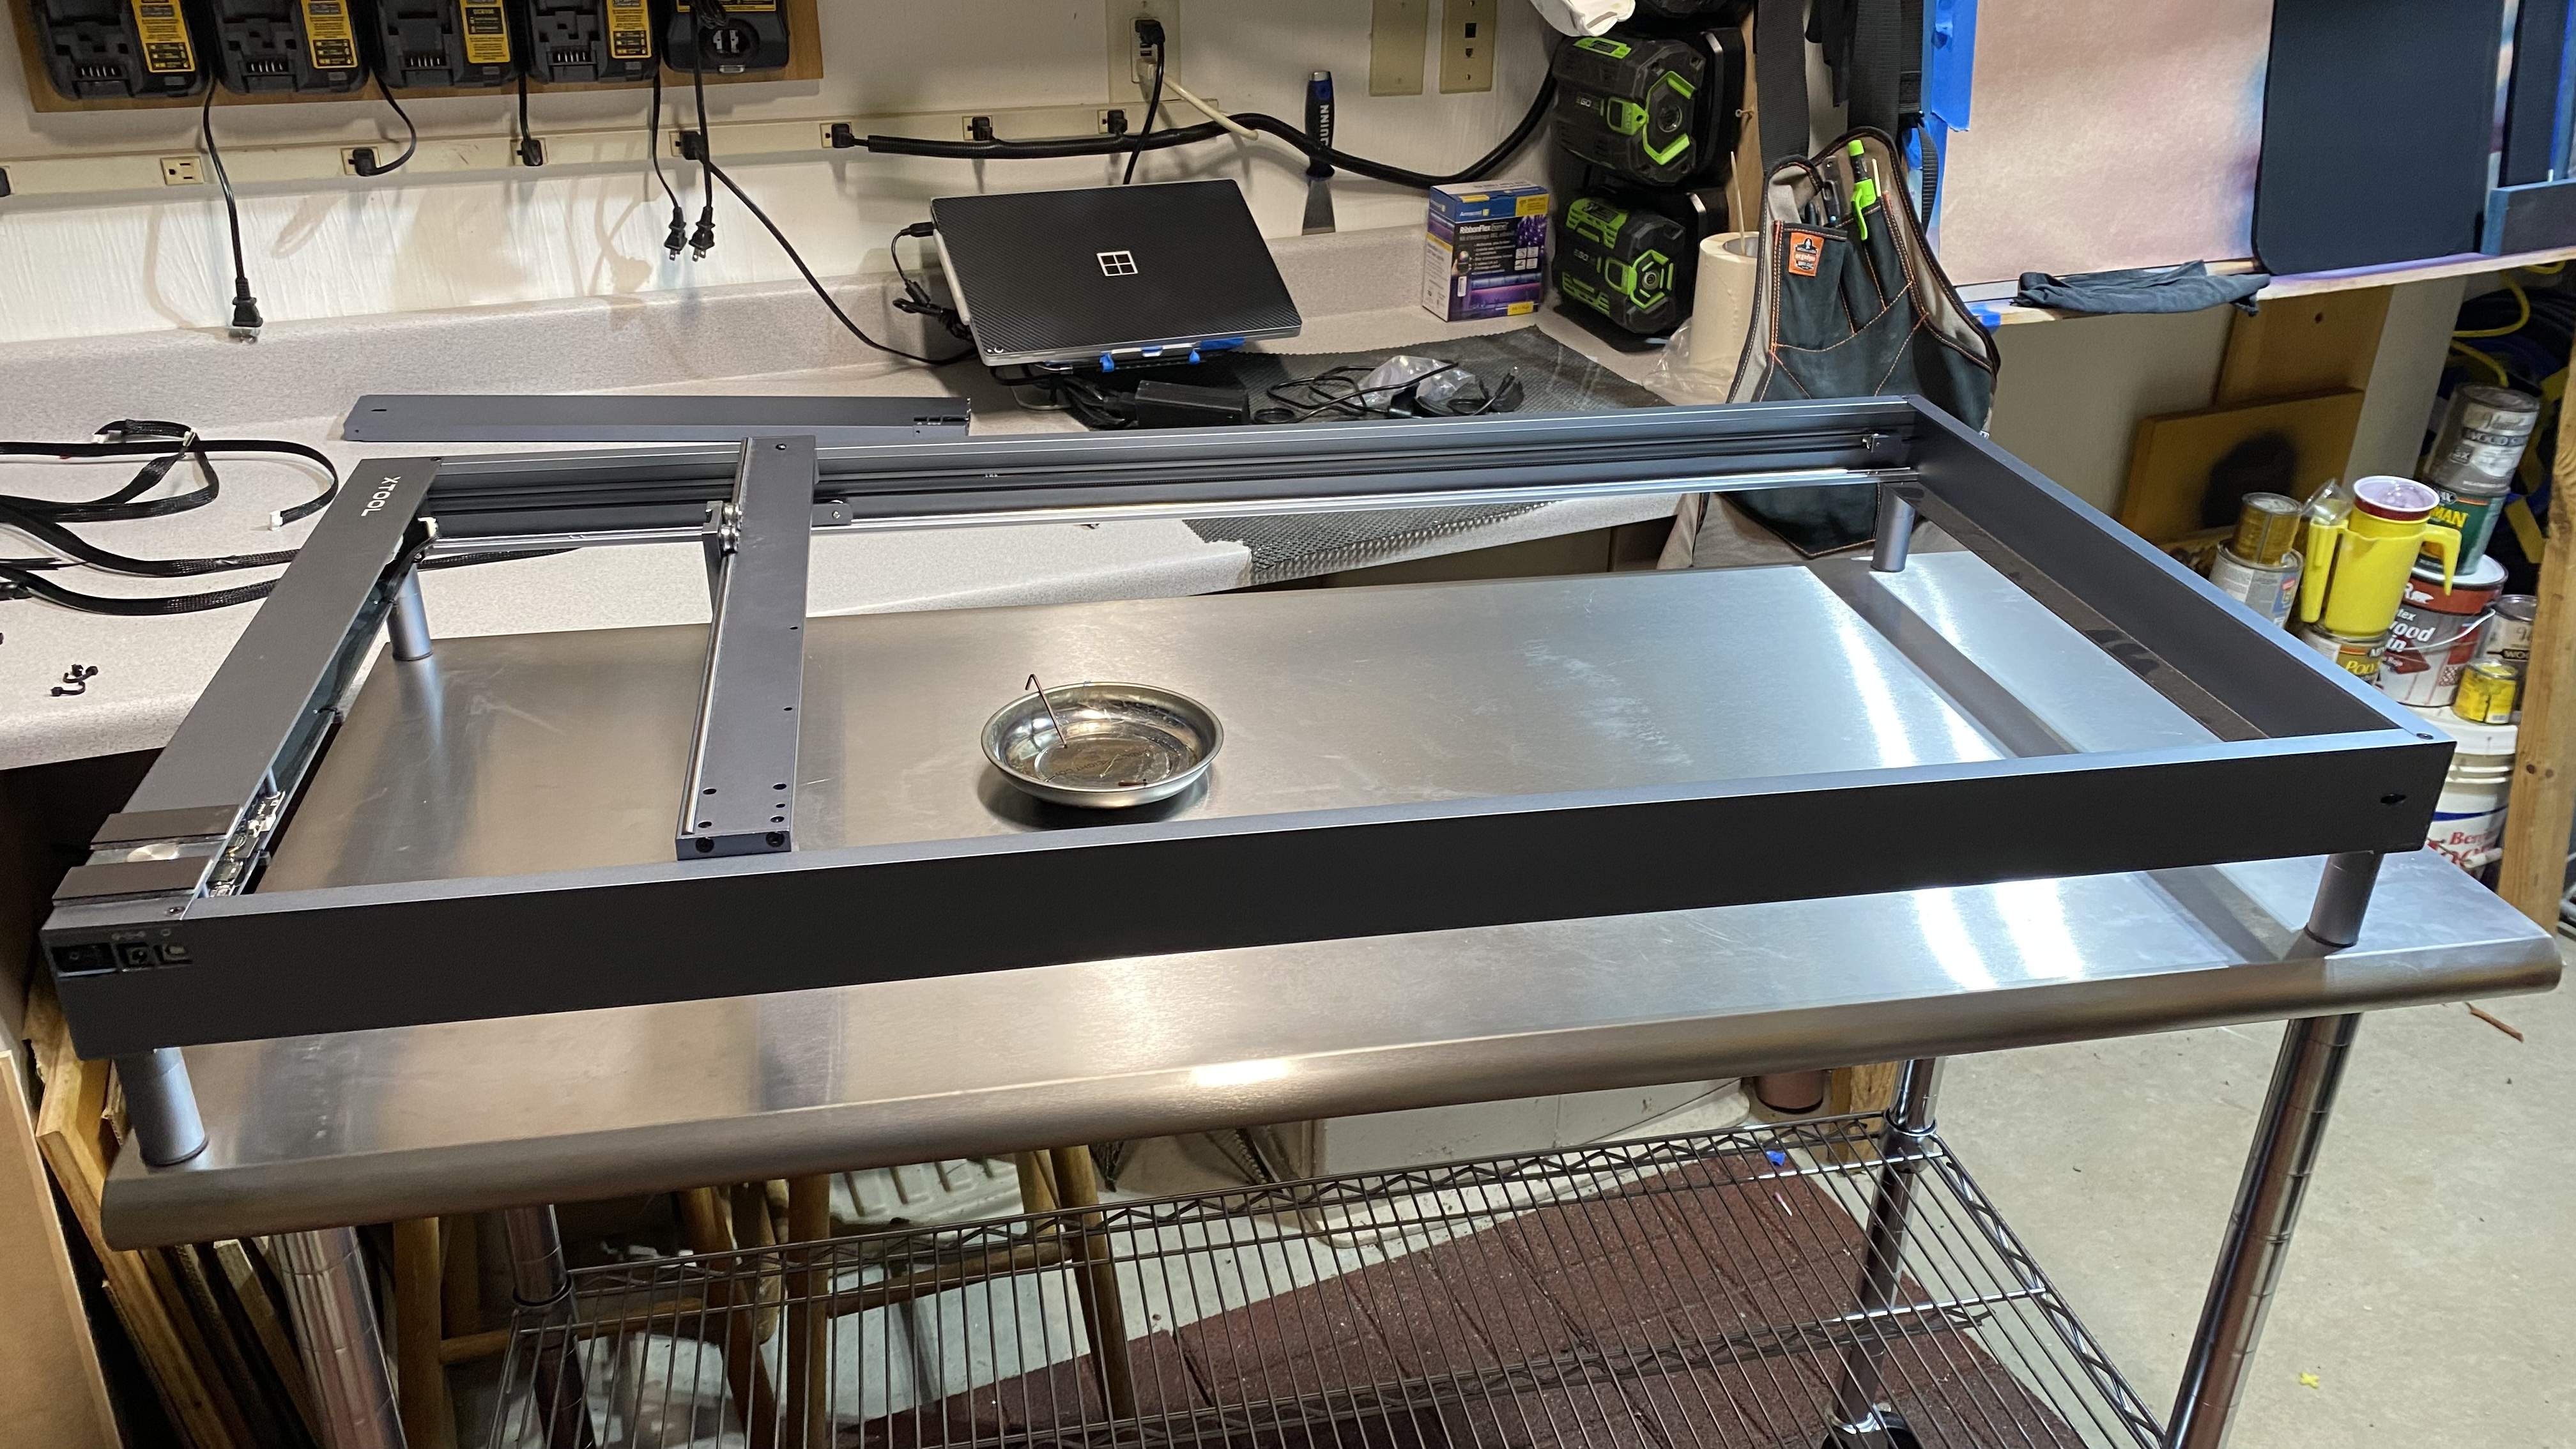
Upgraded the laser with longer rails so I can cut fret slots and full body templates. I’ll be testing fret slots tomorrow… man this thing is big! that table is 24”x49”

- Dec 21, 2007
- 15,220
- 45,000
- Disclosures
- Lark in the Morning Instructional Videos; Audix Microphones
Wha-wha-whaaaa… firmware update issues with the extensions, so reverted that one back to original size and upgraded to a 20w laser instead. So now in the process of building out the table with exhaust, laser safe cover, individual power outlets for each component, etc.Upgraded the laser with longer rails so I can cut fret slots and full body templates. I’ll be testing fret slots tomorrow… man this thing is big! that table is 24”x49”
View attachment 4786202
Hopefully I’ll be back in business this week to begin cutting the top and middle layers instead of routing. I’ll only have to route the main body wood. I’ve got some new plans for inlays now with the new equipment as well.
Yes, I used it to cut the hole in the plywood for the exhaust.
Last edited:
Okay that was a lot of work the laser upgrade is finally completely done and I will be able to safely laser cut components inside the shop all winter long. So for me, this is a major upgrade and changes everything… well at least until the CNC shows up at the end of the month  (aka Extreme Hobbyist
  )
)
- 17.5” x 36” cutting area with 20w diode Laser
-Large honeycomb bed for ventilation under air assist
- Lid has Laser safety glass
- Nice 4” ball bearing hinges and handle
- Drag chains for both axis
- Air assist routed through back of enclosure
- Exhaust fan with 16’ vent hose (also built a panel that slides into my window to vent outside)
- LED tape light runs all the way around the inside (multi color makes it easier to see through glass / eg - can make nice cool blue with remote)
- Individual power switch for each component on strip with master power
- it’s all mounted to a 2’ x 4’ stainless steel table on rollers for easy maneuverability
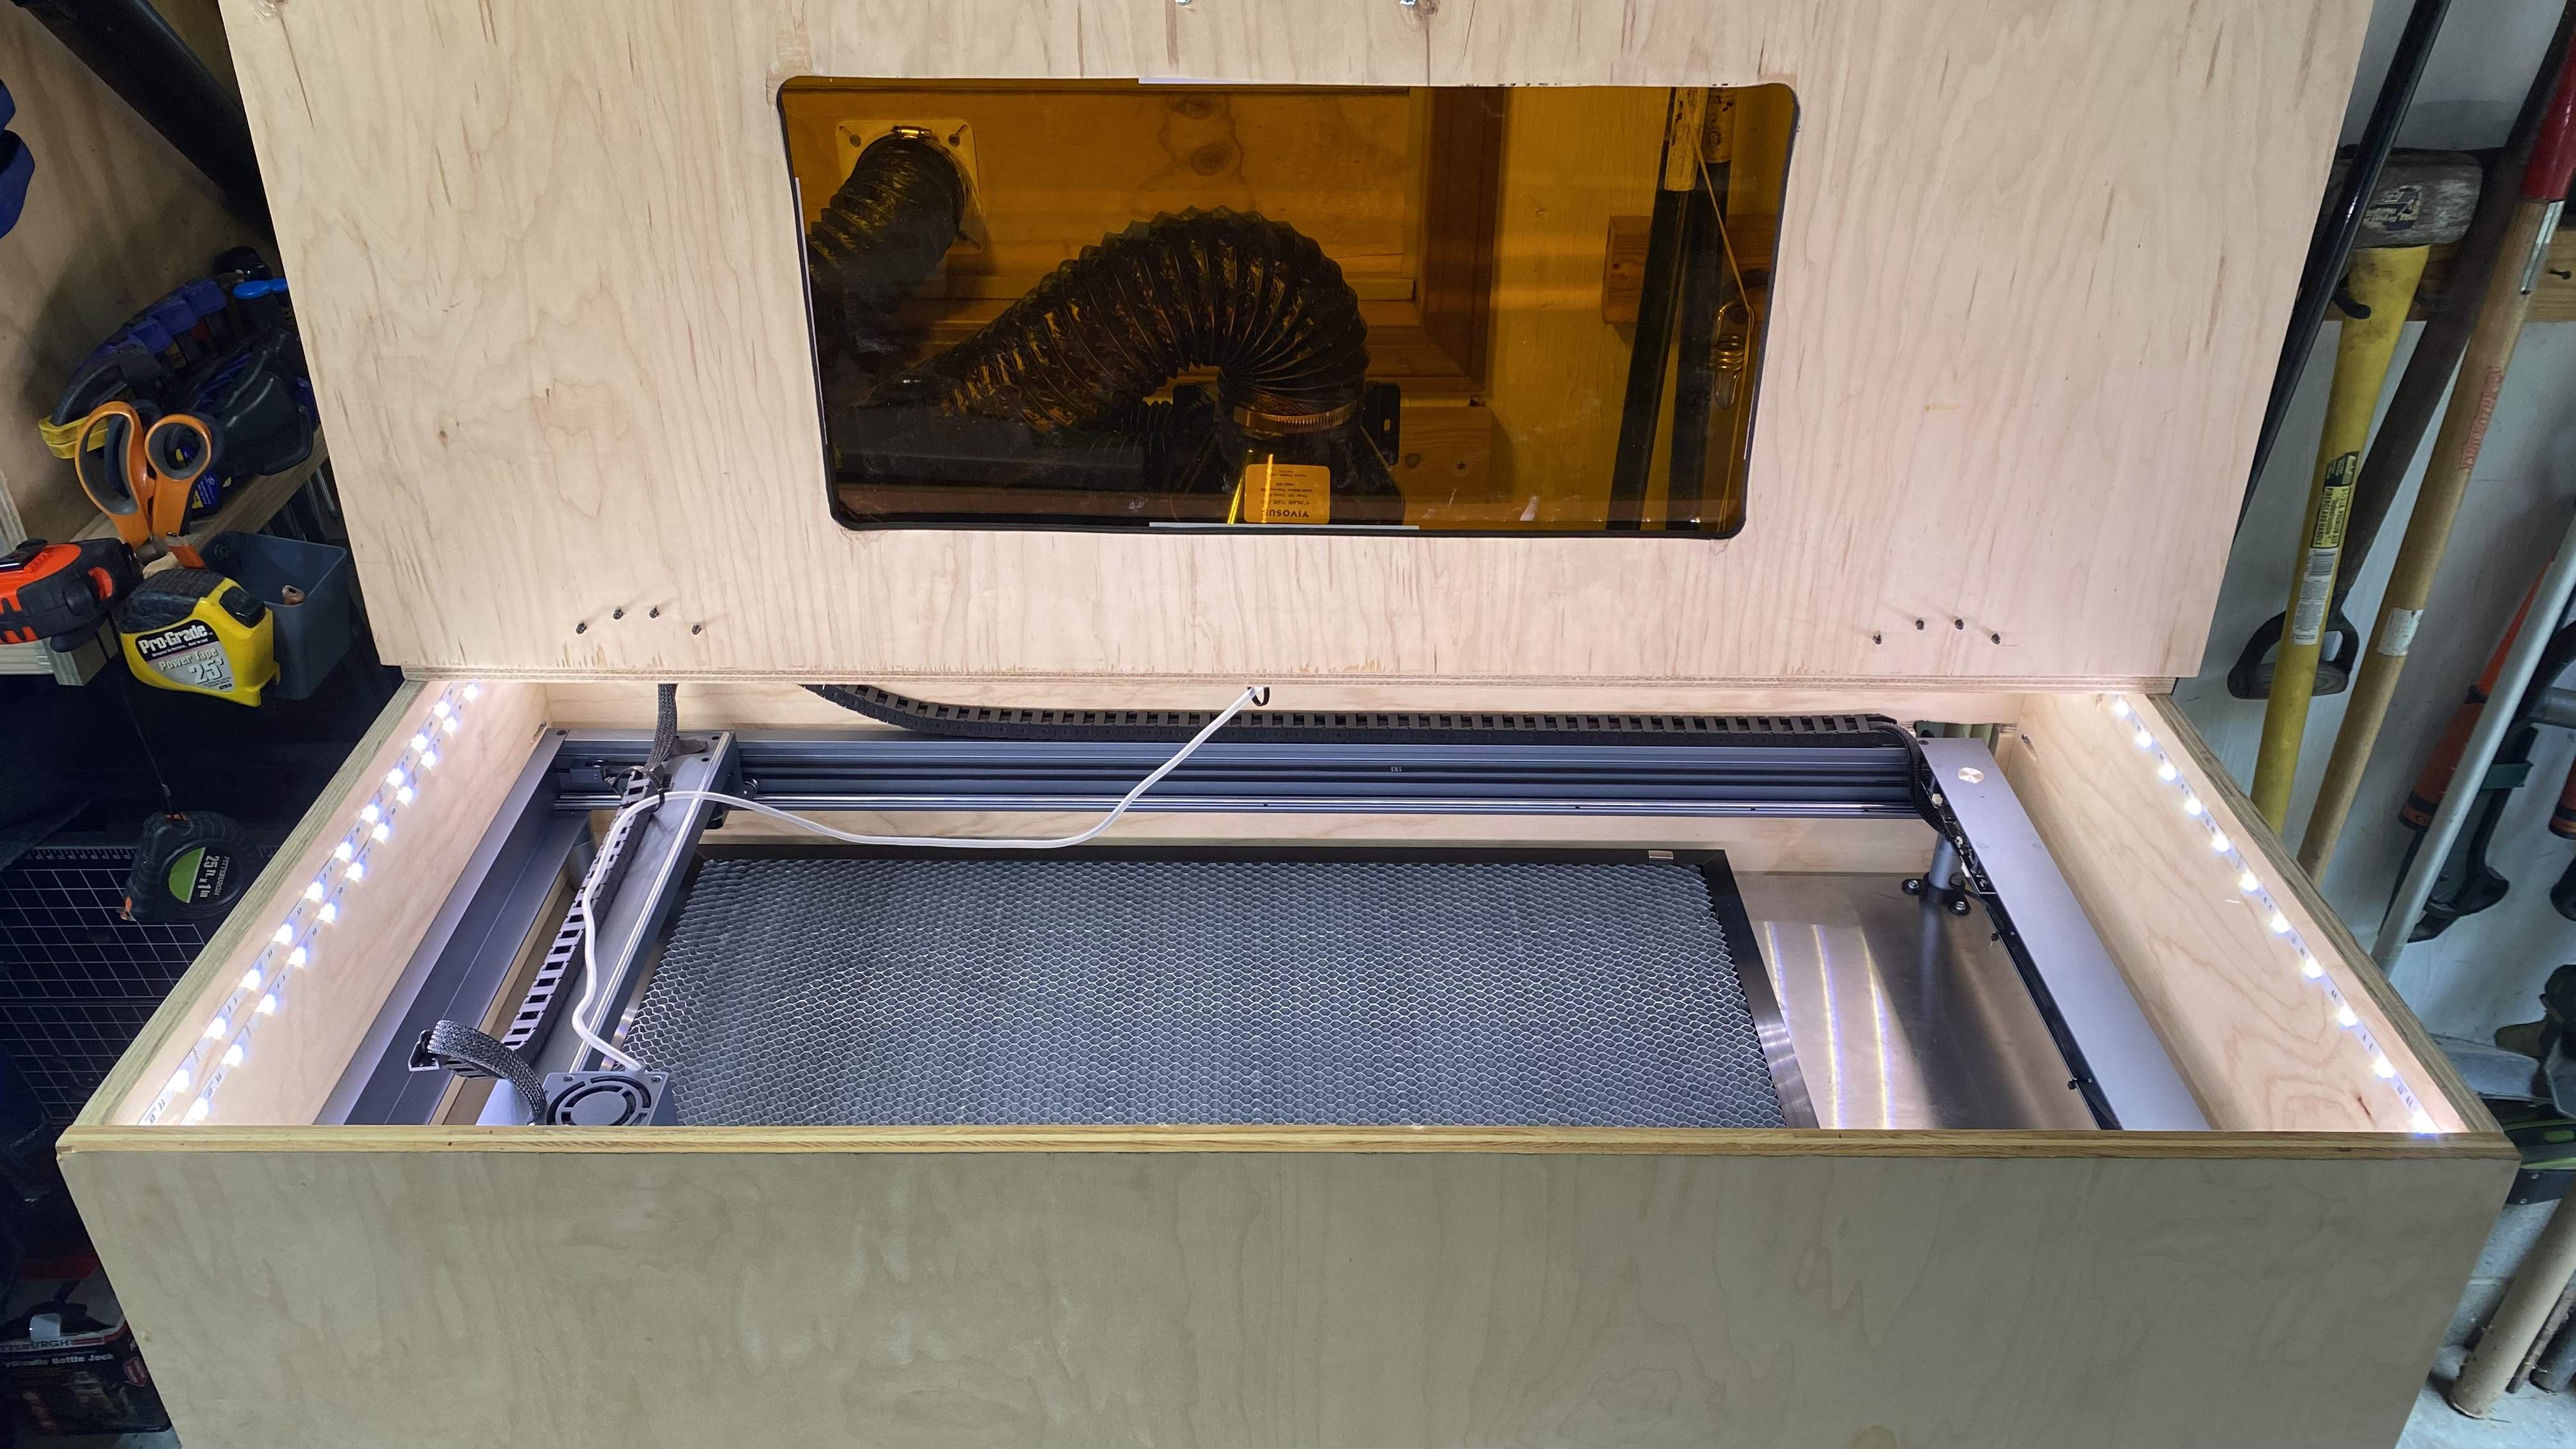
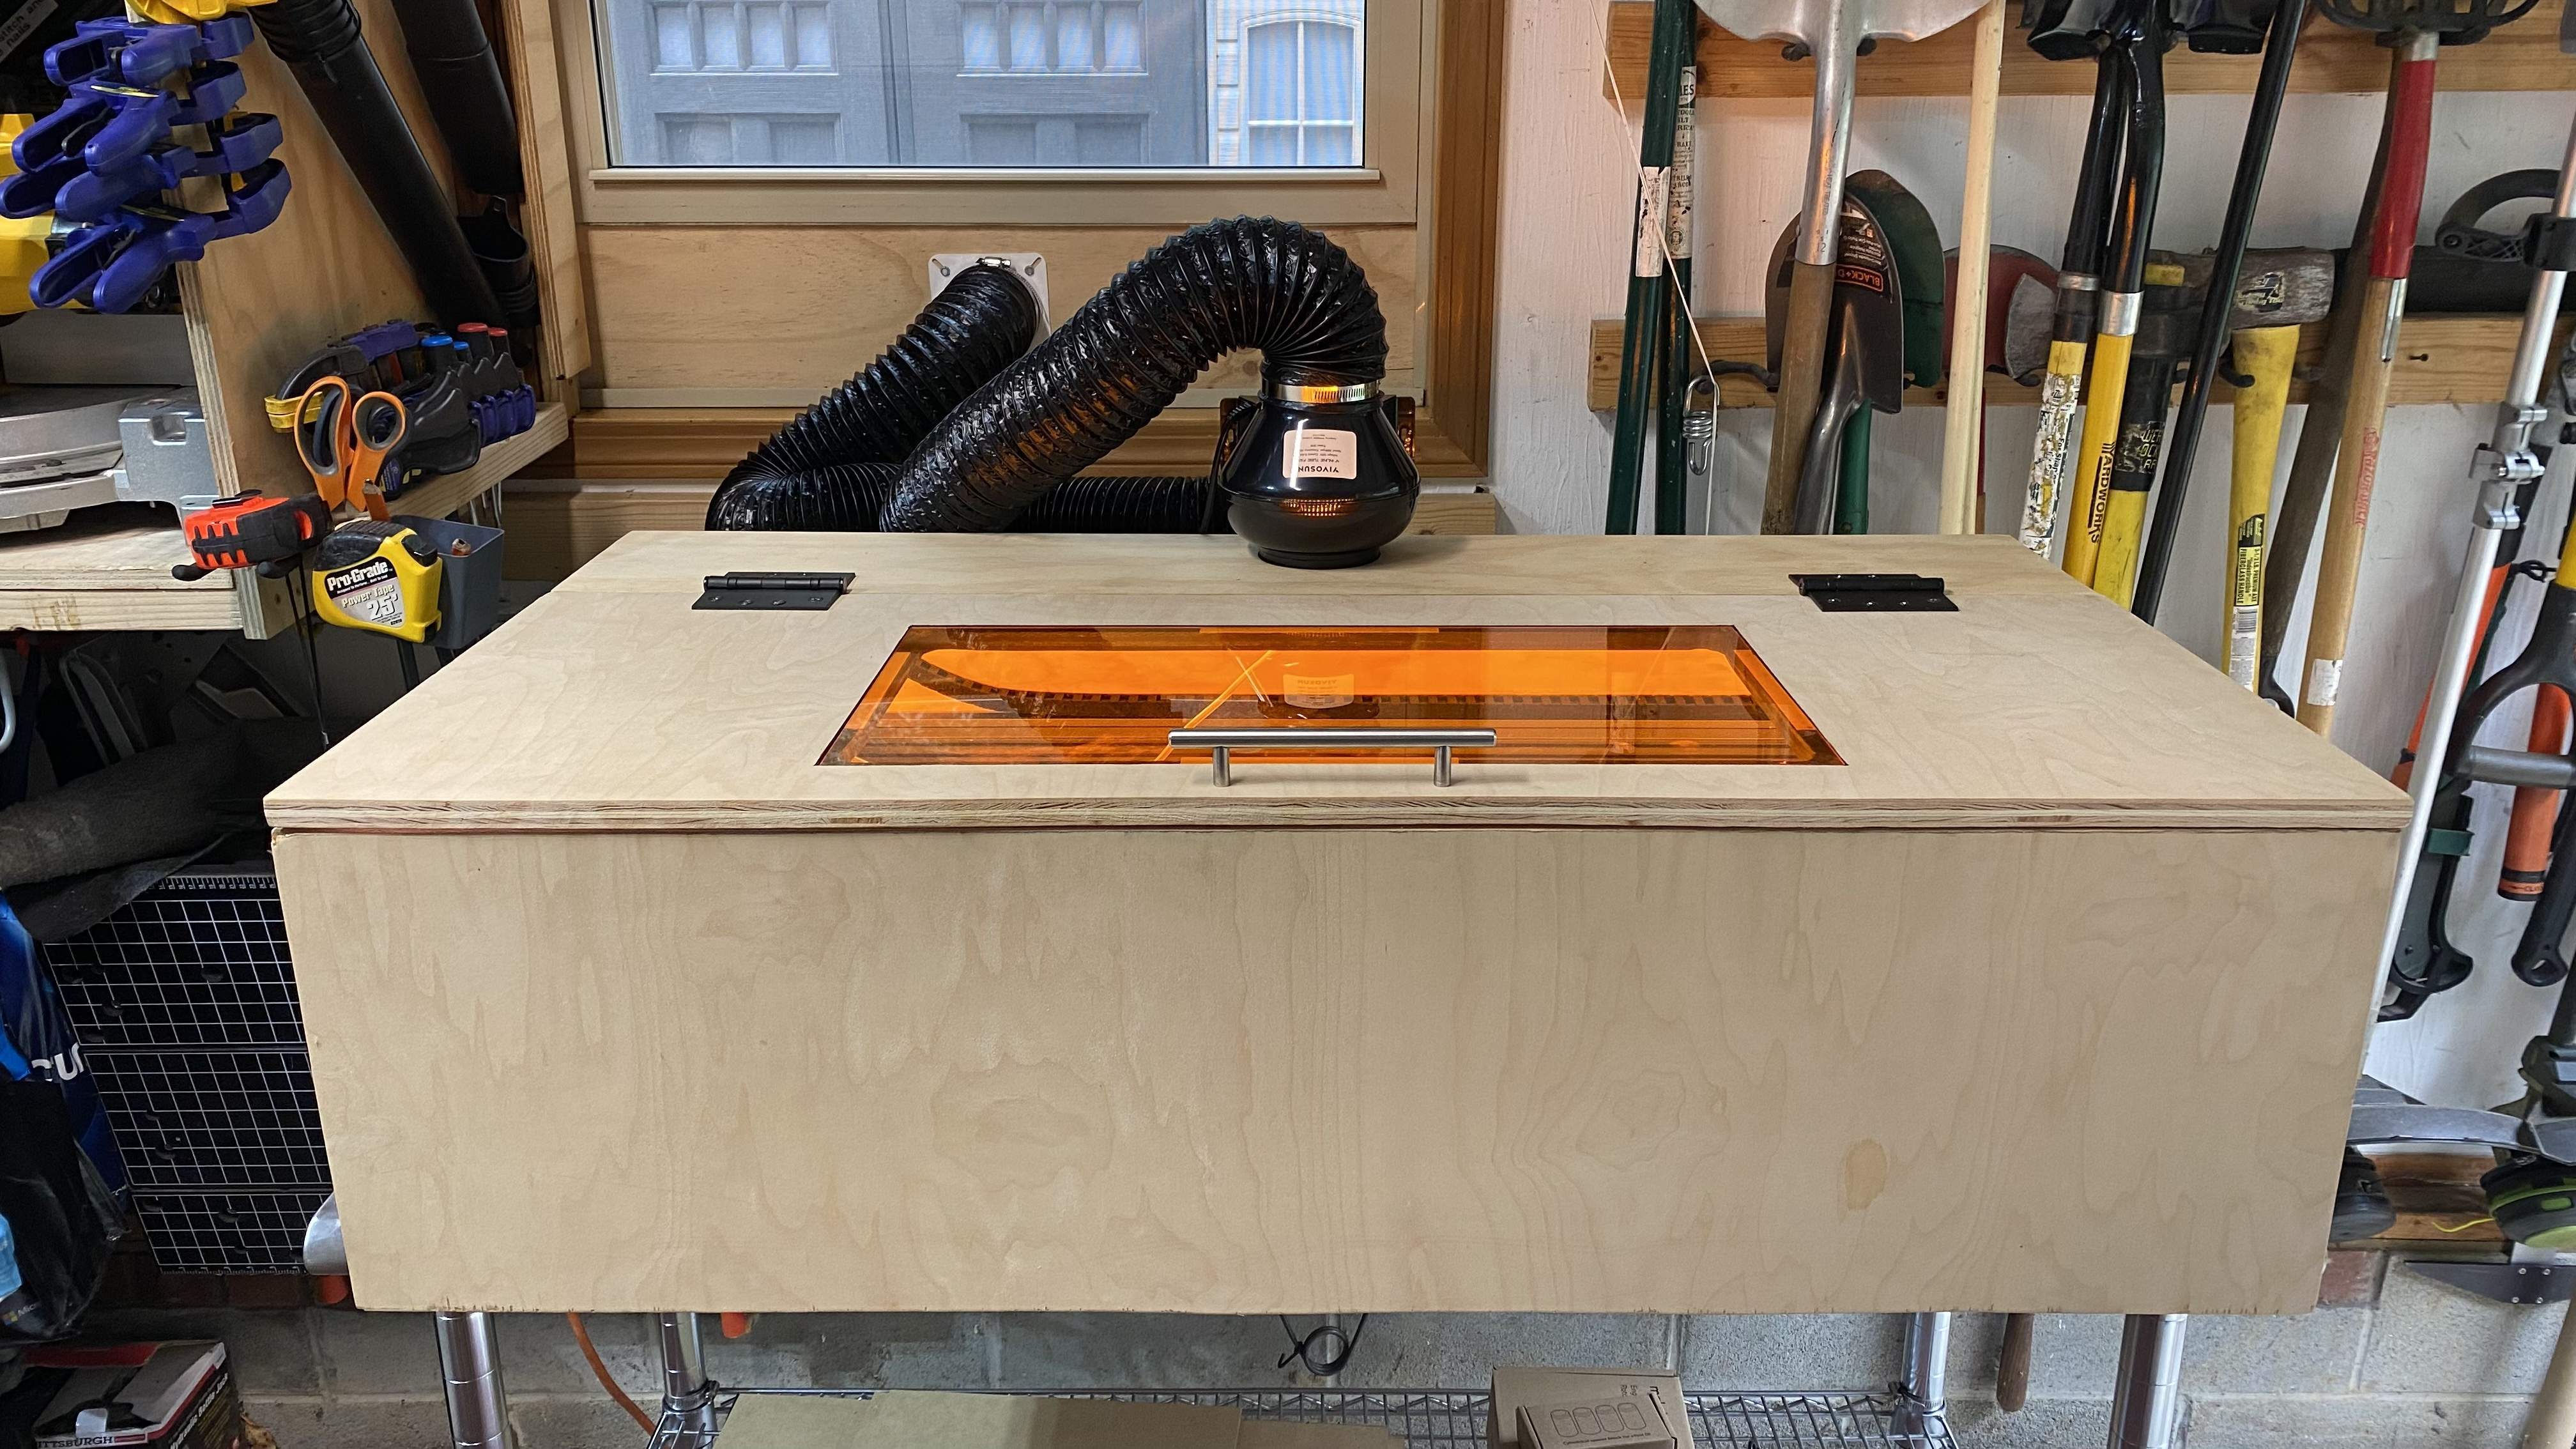
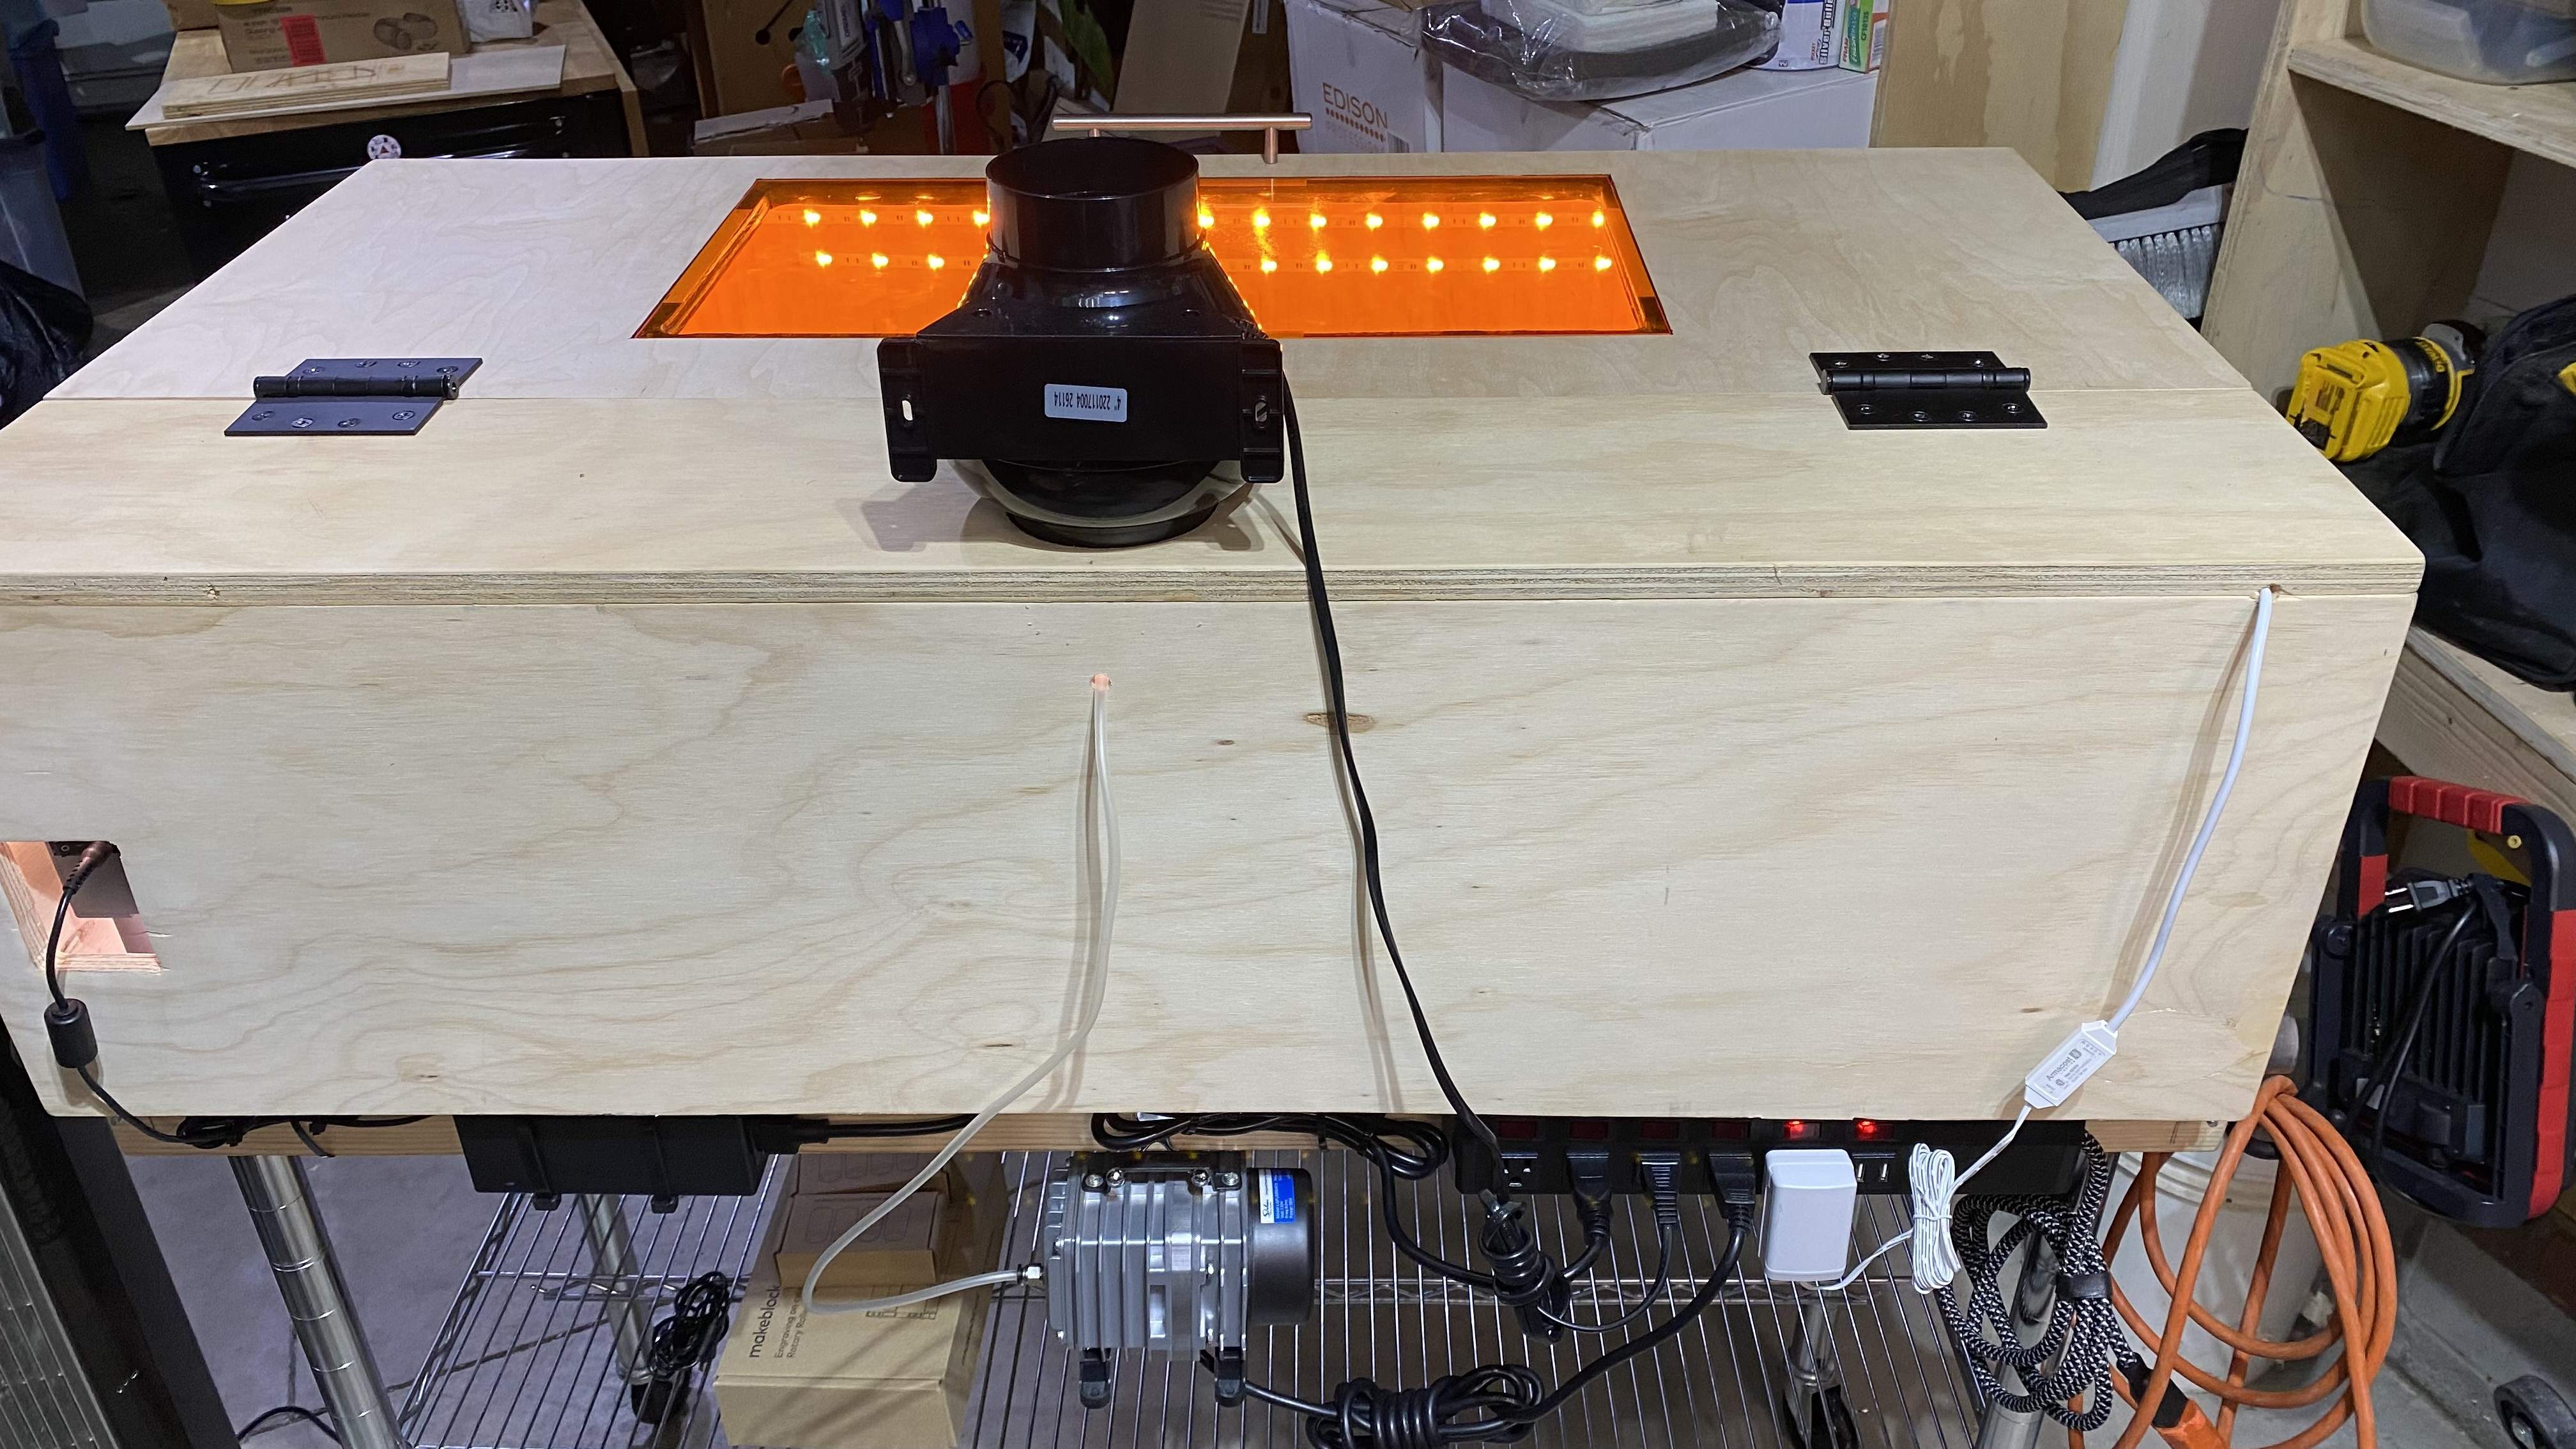
I will finally be cutting sample pieces to dial in settings and hopefully the top pieces and fingerboard inlays in the morning.
the laser upgrade is finally completely done and I will be able to safely laser cut components inside the shop all winter long. So for me, this is a major upgrade and changes everything… well at least until the CNC shows up at the end of the month (aka Extreme Hobbyist )- 17.5” x 36” cutting area with 20w diode Laser
-Large honeycomb bed for ventilation under air assist
- Lid has Laser safety glass
- Nice 4” ball bearing hinges and handle
- Drag chains for both axis
- Air assist routed through back of enclosure
- Exhaust fan with 16’ vent hose (also built a panel that slides into my window to vent outside)
- LED tape light runs all the way around the inside (multi color makes it easier to see through glass / eg - can make nice cool blue with remote)
- Individual power switch for each component on strip with master power
- it’s all mounted to a 2’ x 4’ stainless steel table on rollers for easy maneuverability
I will finally be cutting sample pieces to dial in settings and hopefully the top pieces and fingerboard inlays in the morning.
Last edited:
And yes, I can cut cardboard
In actual size beyond excited
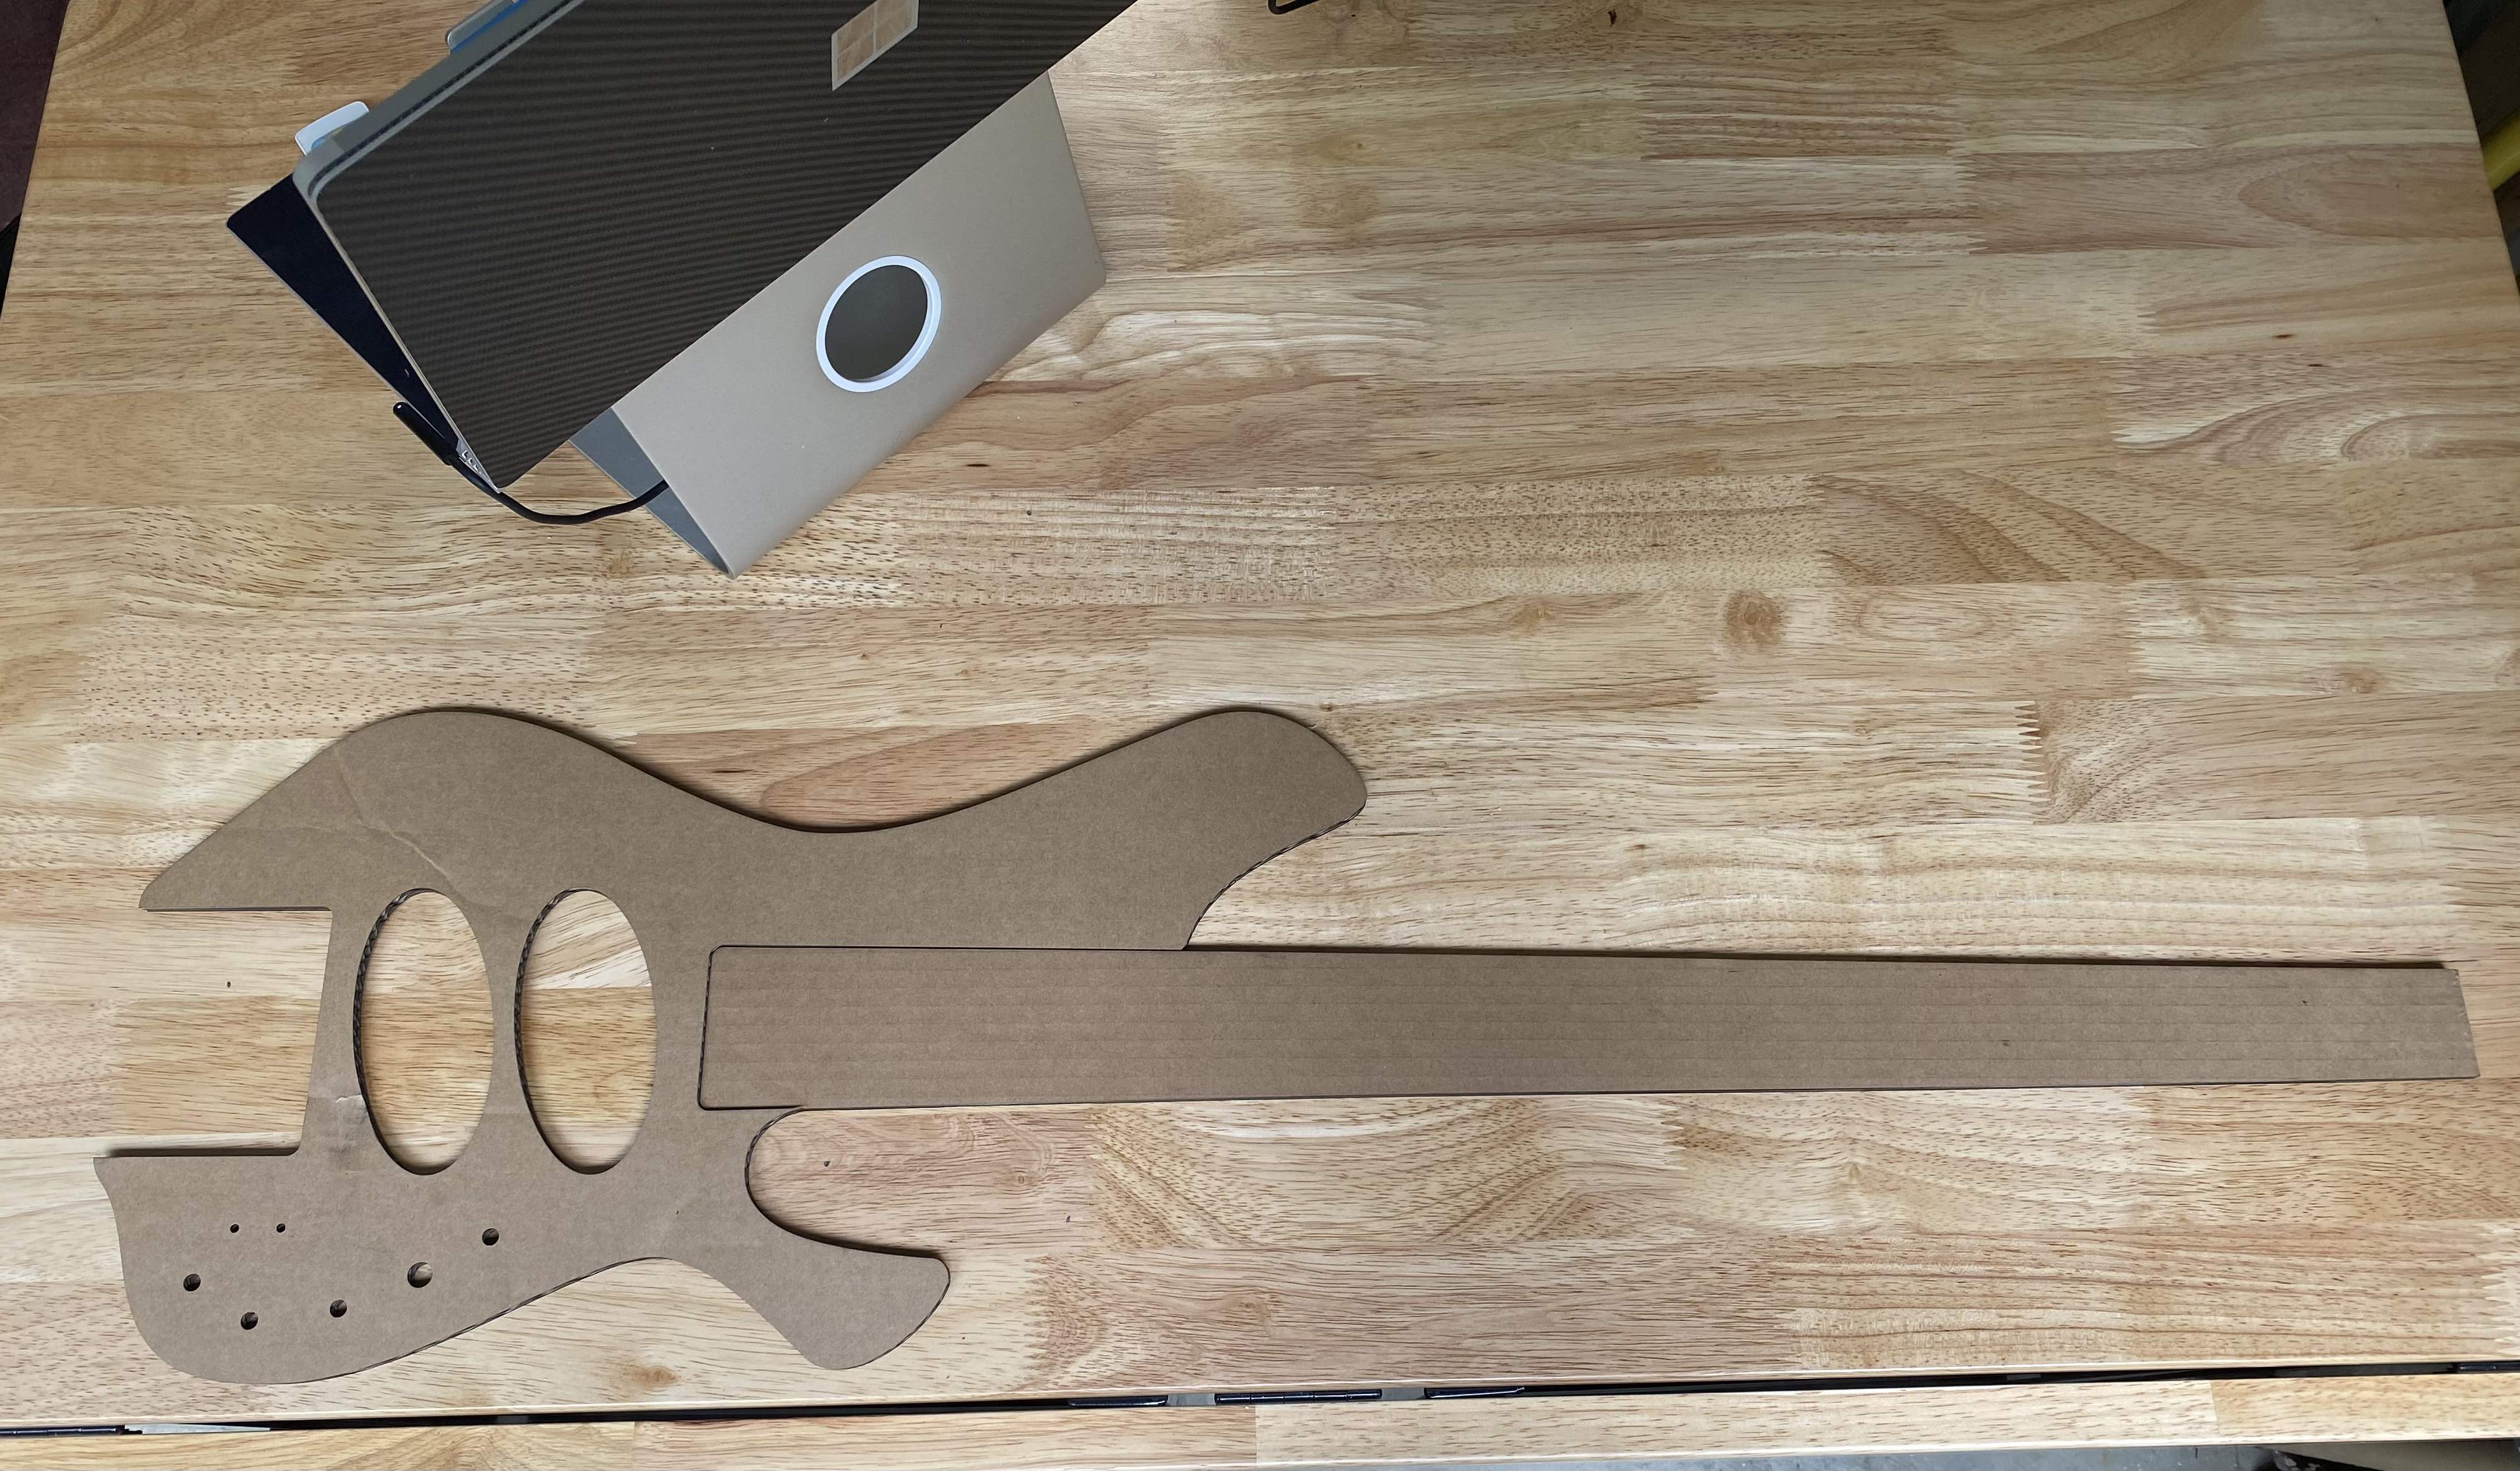
In actual size
beyond excitedLook ma’ no more templates? Maybe?
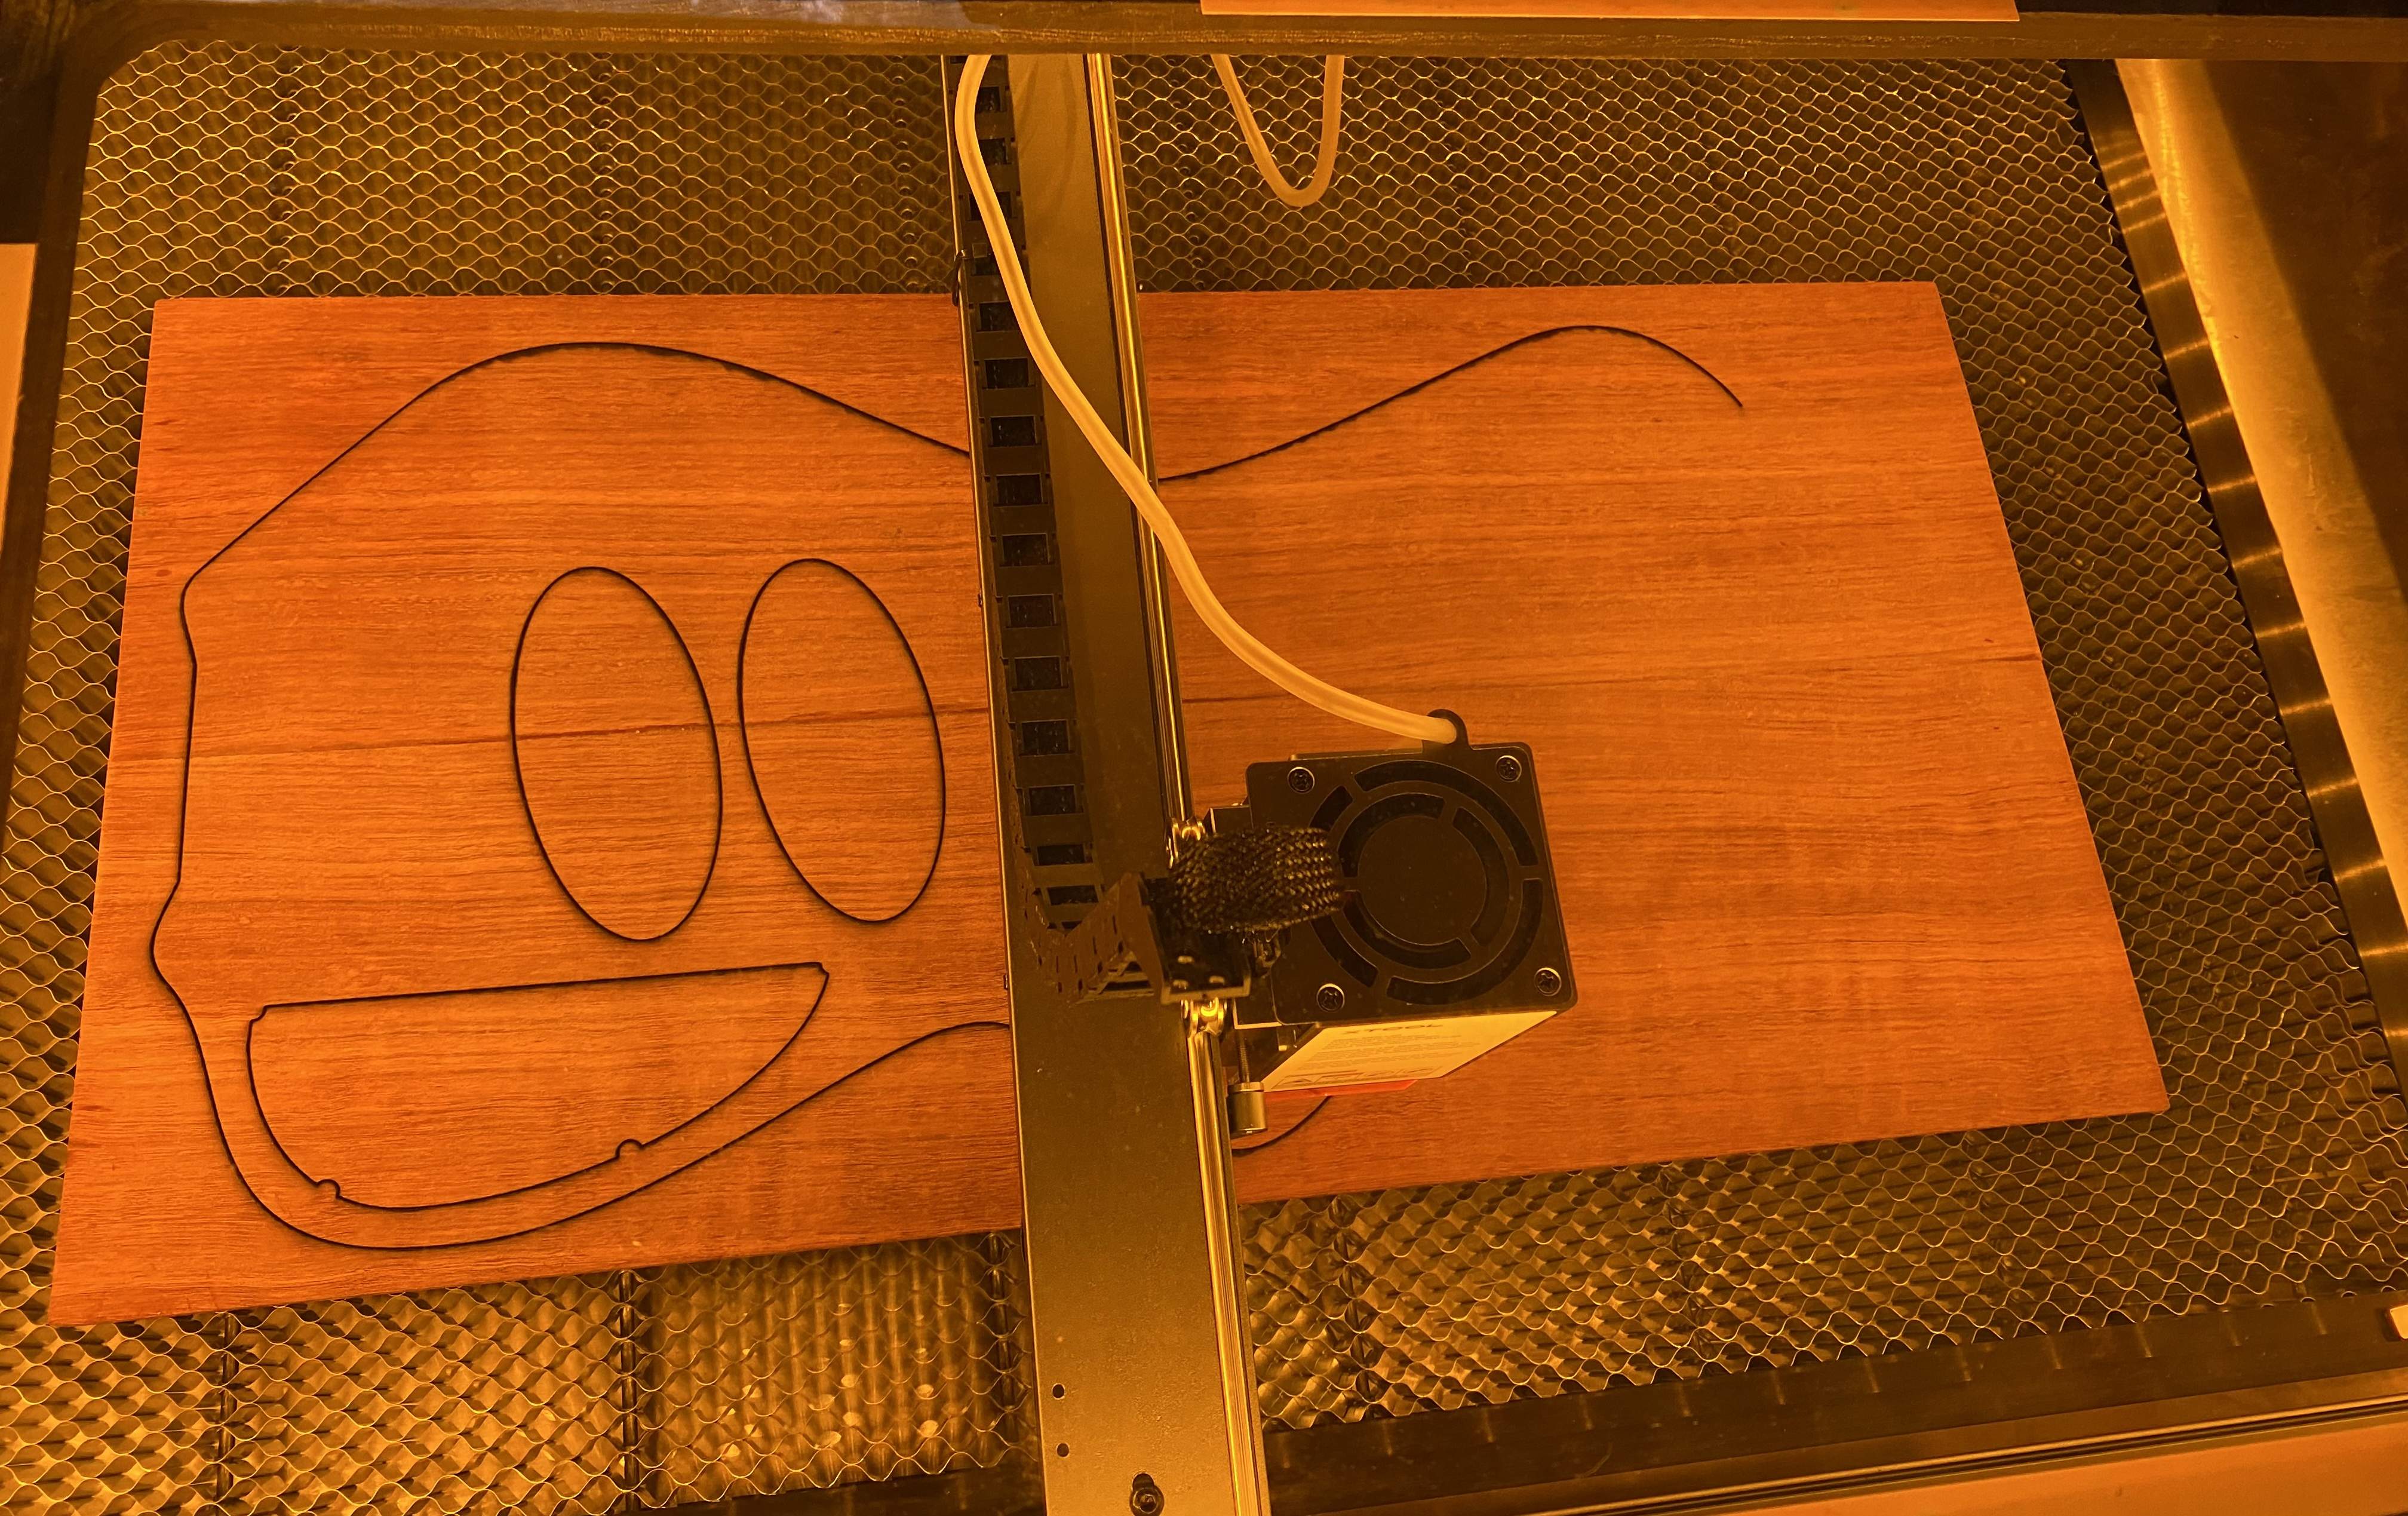
Last edited:
Yep it can cut through hardwood very nicely, here’s a sample of 3/8” maple, this was the sample cut to get the focus right for this type of cutting. I still cut templates out of MDF just in case I need them for clean up if necessary. Now I need to scallop the black limba body and route control and battery cavities.
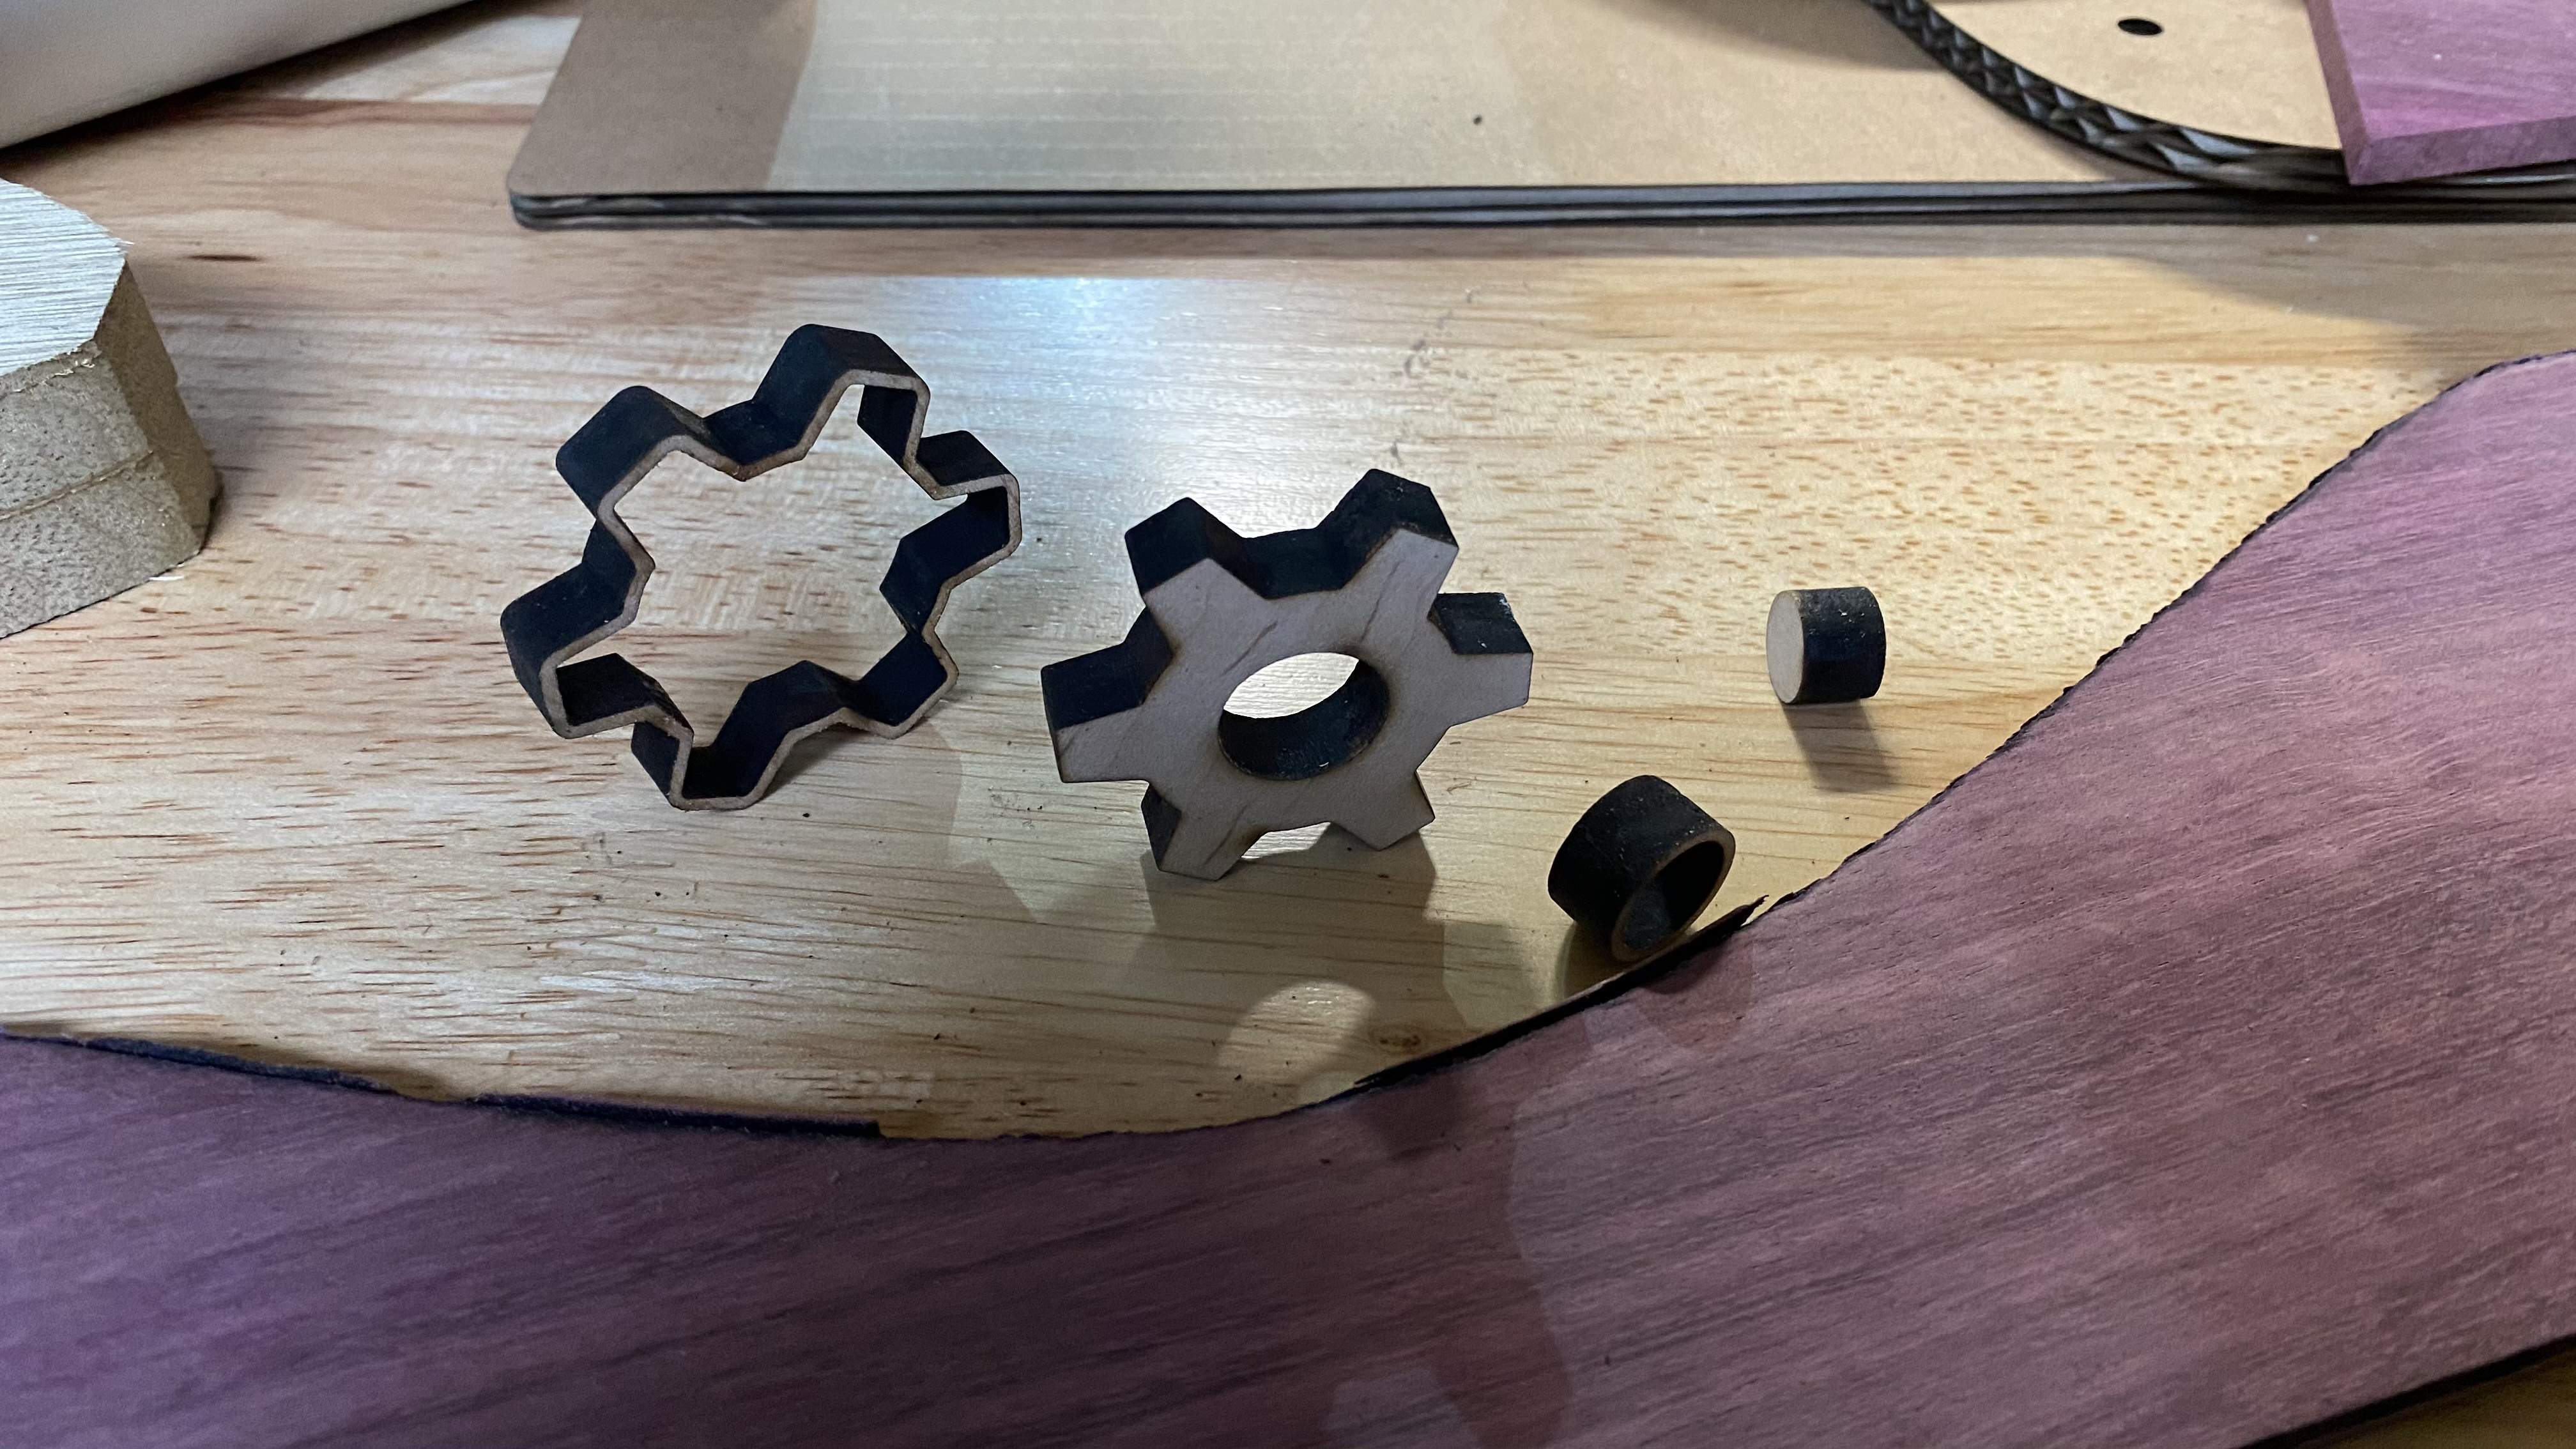
All in all, feeling good about the progress this weekend with finishing the tooling and actually getting to cut the body pieces.
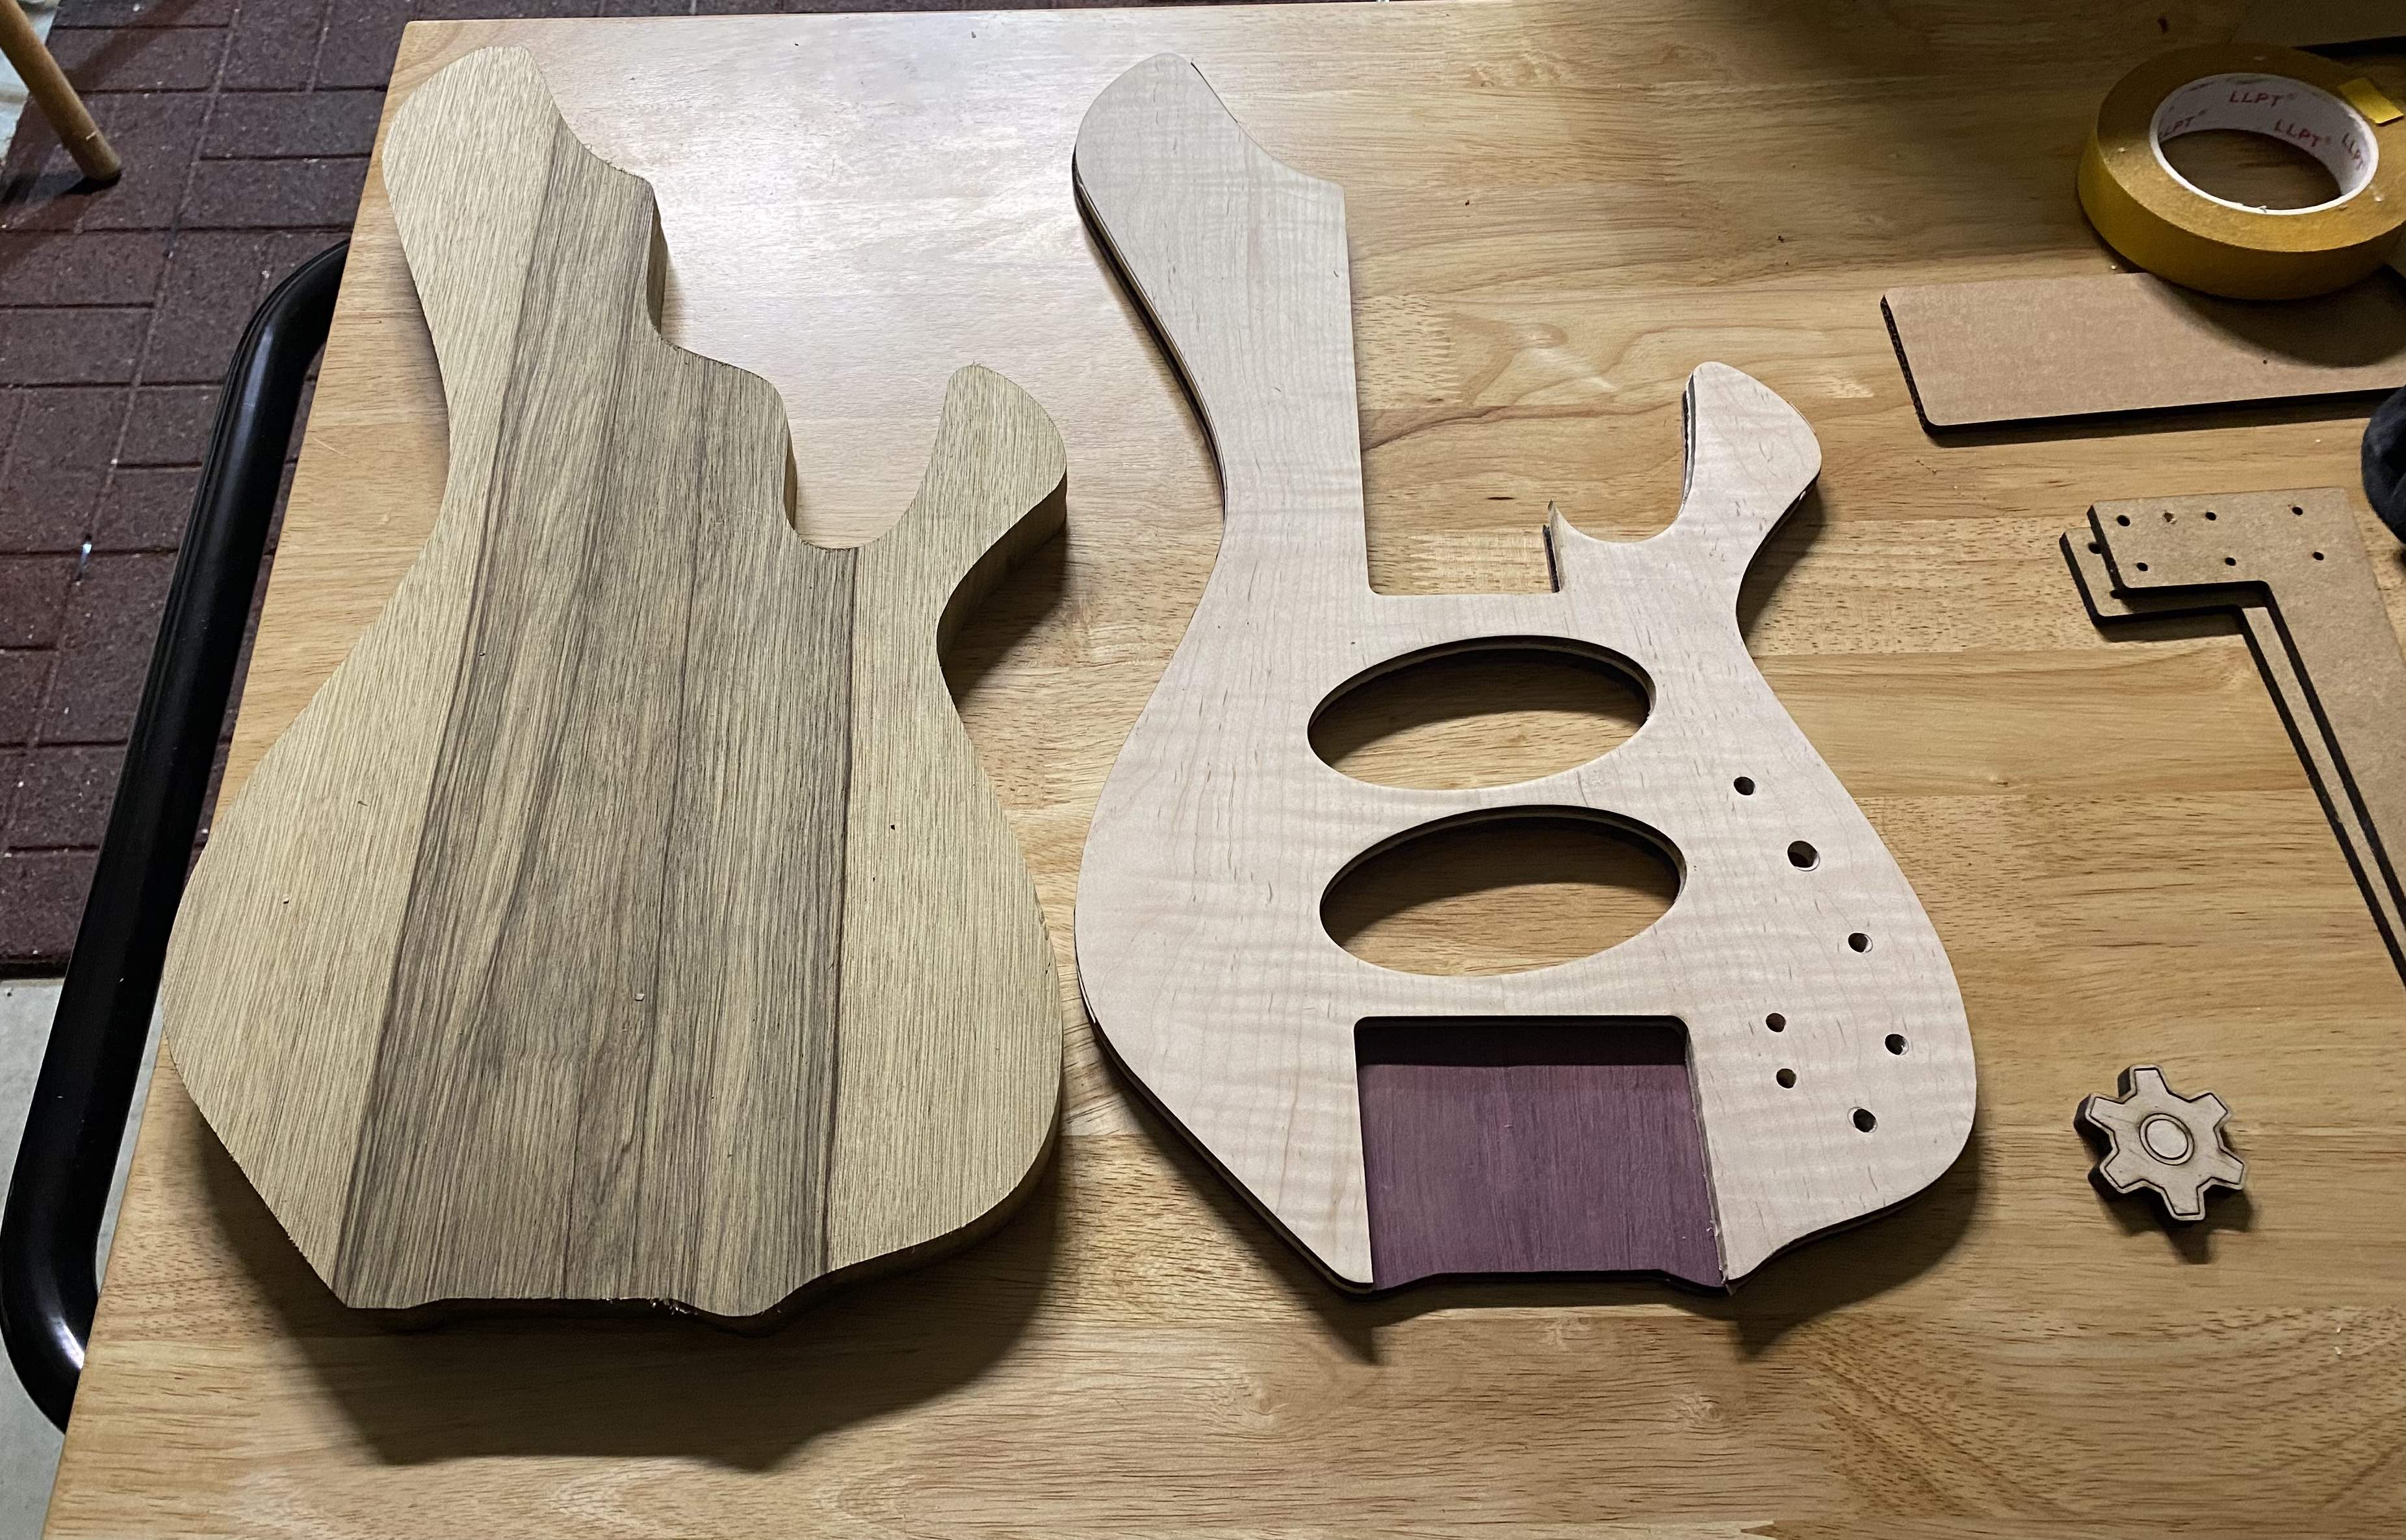
I now have a level of confidence that I can cut various parts pretty fast and efficiently.
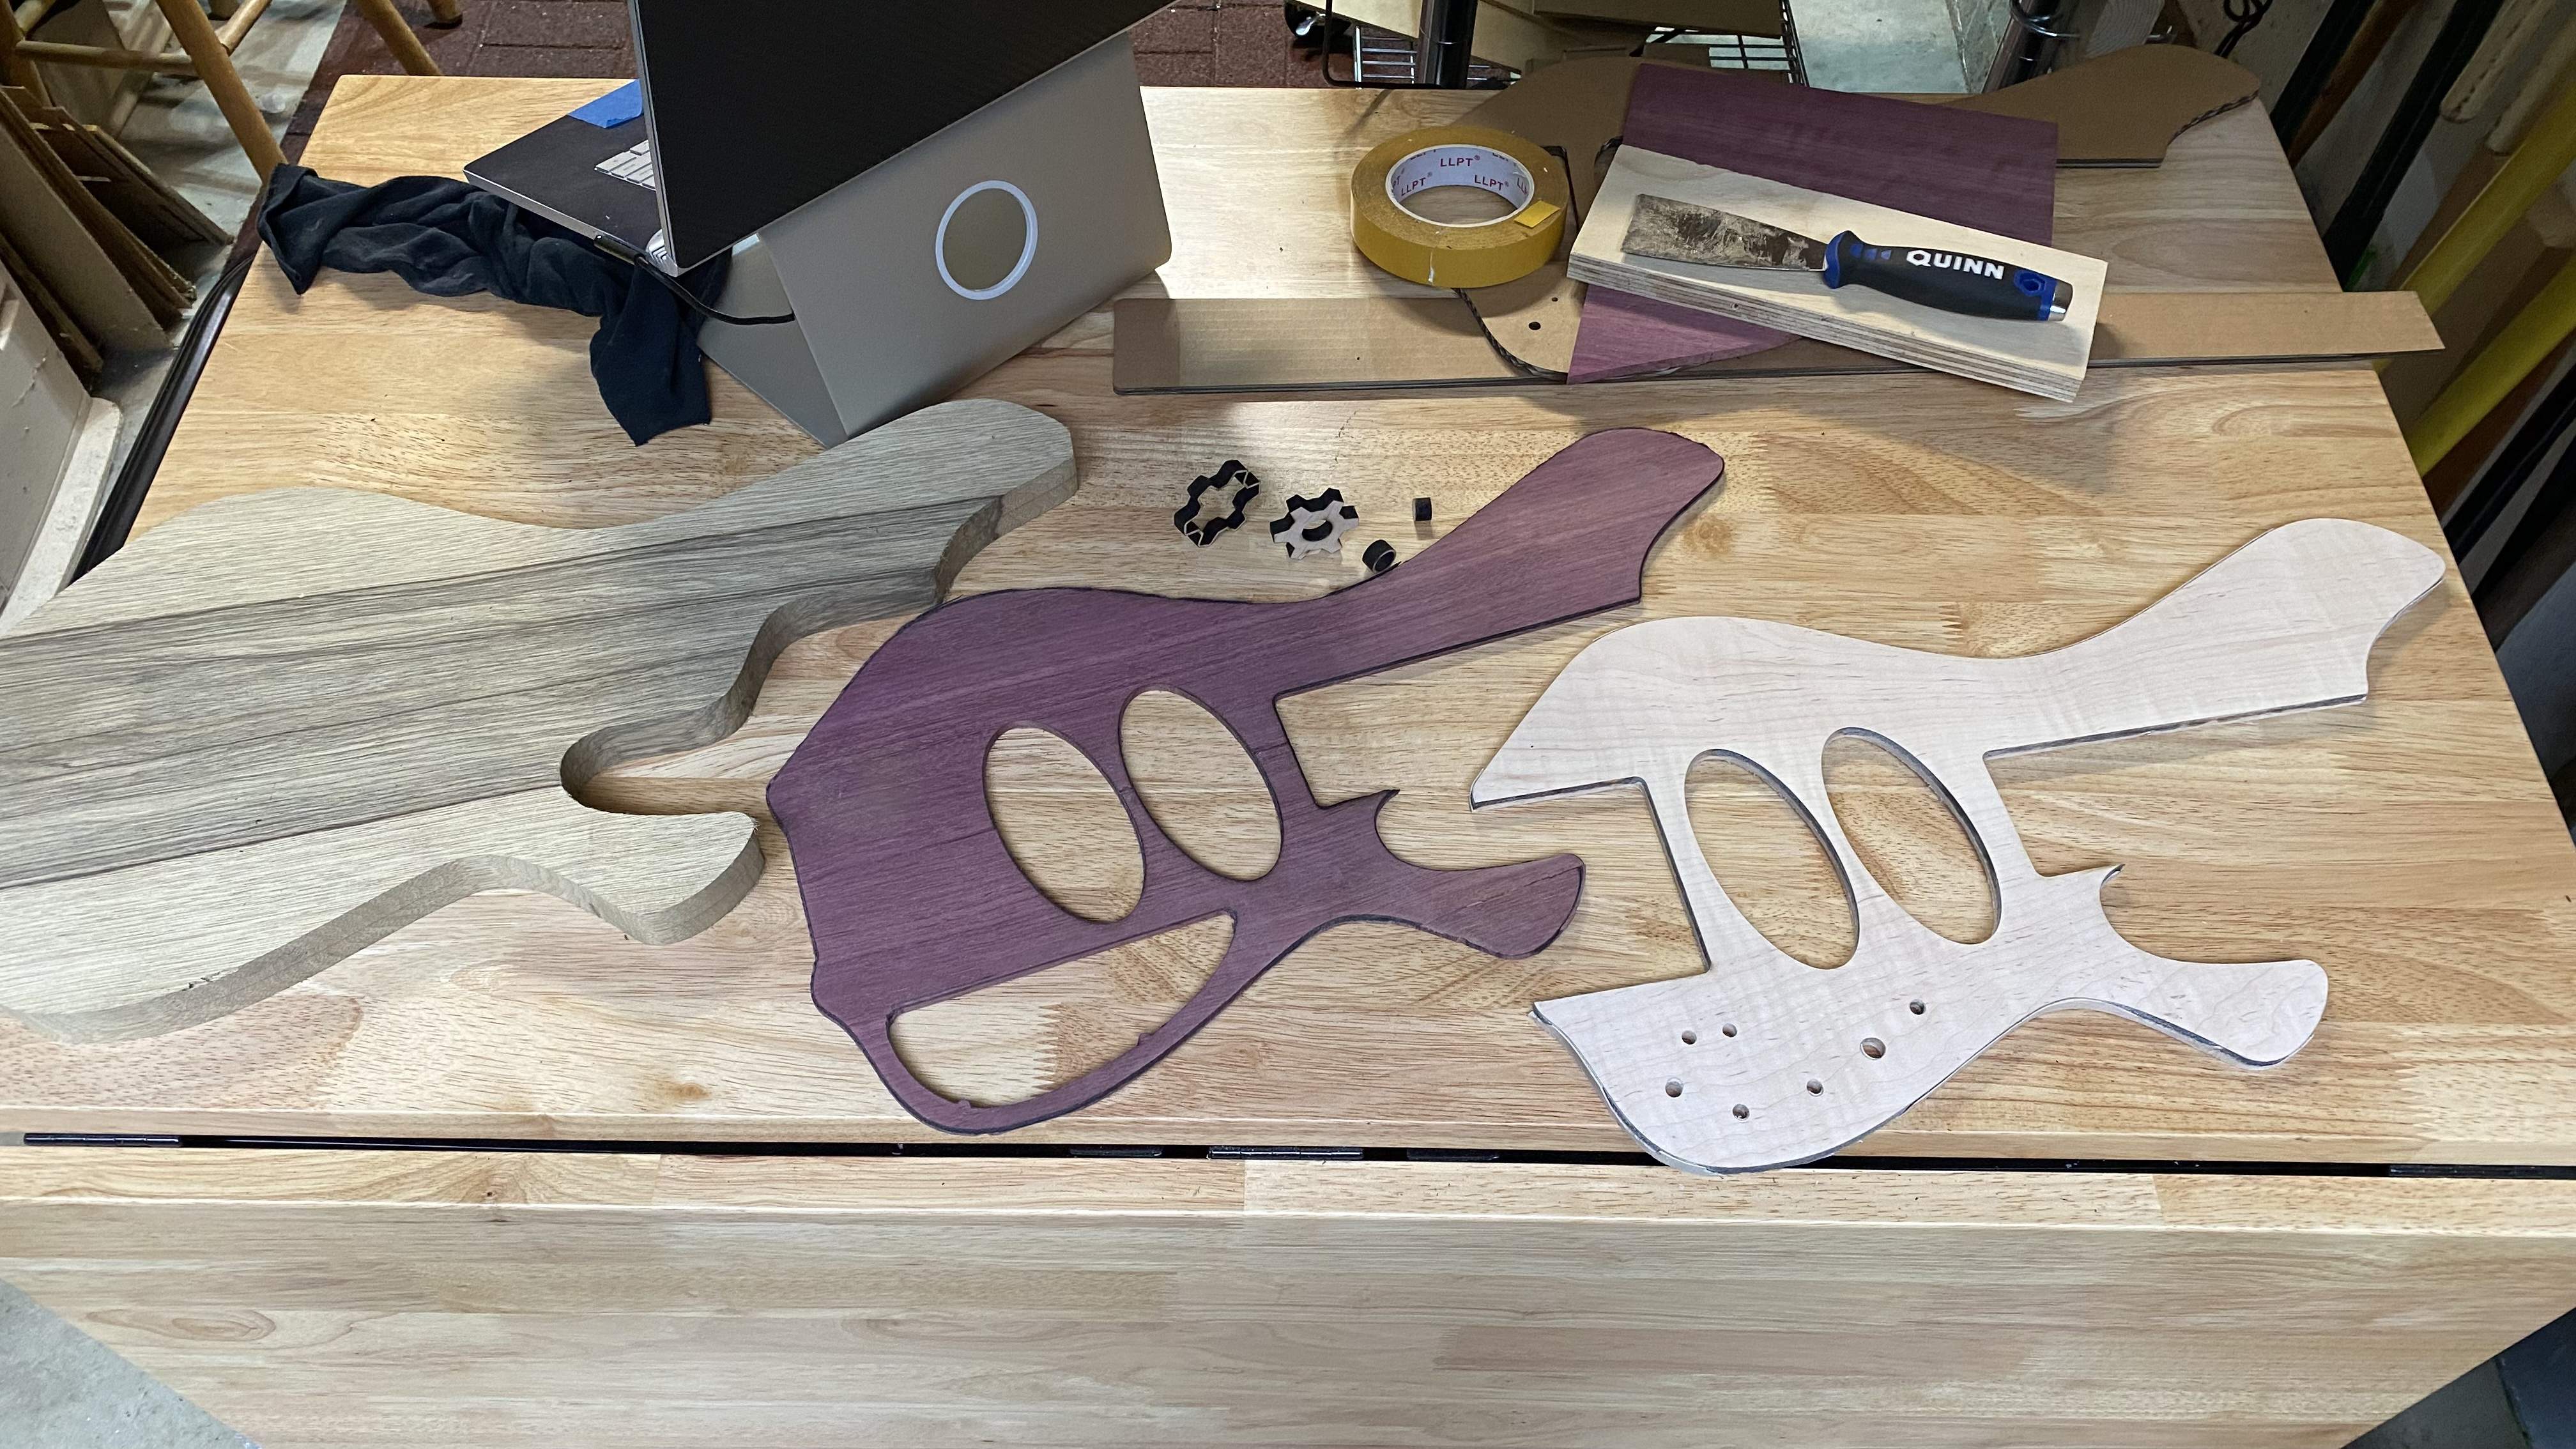
The approach I used to cut each layer with a different cavity worked out really well.
All in all, feeling good about the progress this weekend with finishing the tooling and actually getting to cut the body pieces.
I now have a level of confidence that I can cut various parts pretty fast and efficiently.
The approach I used to cut each layer with a different cavity worked out really well.
Last edited:
Now back to learning those 60 new songs for the 2 new bands I just joined

search for XTool D1 Pro on AmazonJust out of curiosity, what's a laser setup like that cost?

Congratulations on the laser cutter, it must be a very good and versatile tool. Enjoy it!
Is there a practical purpose to the changeable light colours on the inside, or are they just a cool feature?
Is there a practical purpose to the changeable light colours on the inside, or are they just a cool feature?
It was a feature of the tape lights that I used, however when the lid is open the cooler blue hues are a bit easier on the eyes and then lid closed the brightest white is easier to see through the filter.Congratulations on the laser cutter, it must be a very good and versatile tool. Enjoy it!
Is there a practical purpose to the changeable light colours on the inside, or are they just a cool feature?
Laser cuts are a perfect fit for the pickups, very tight tolerances
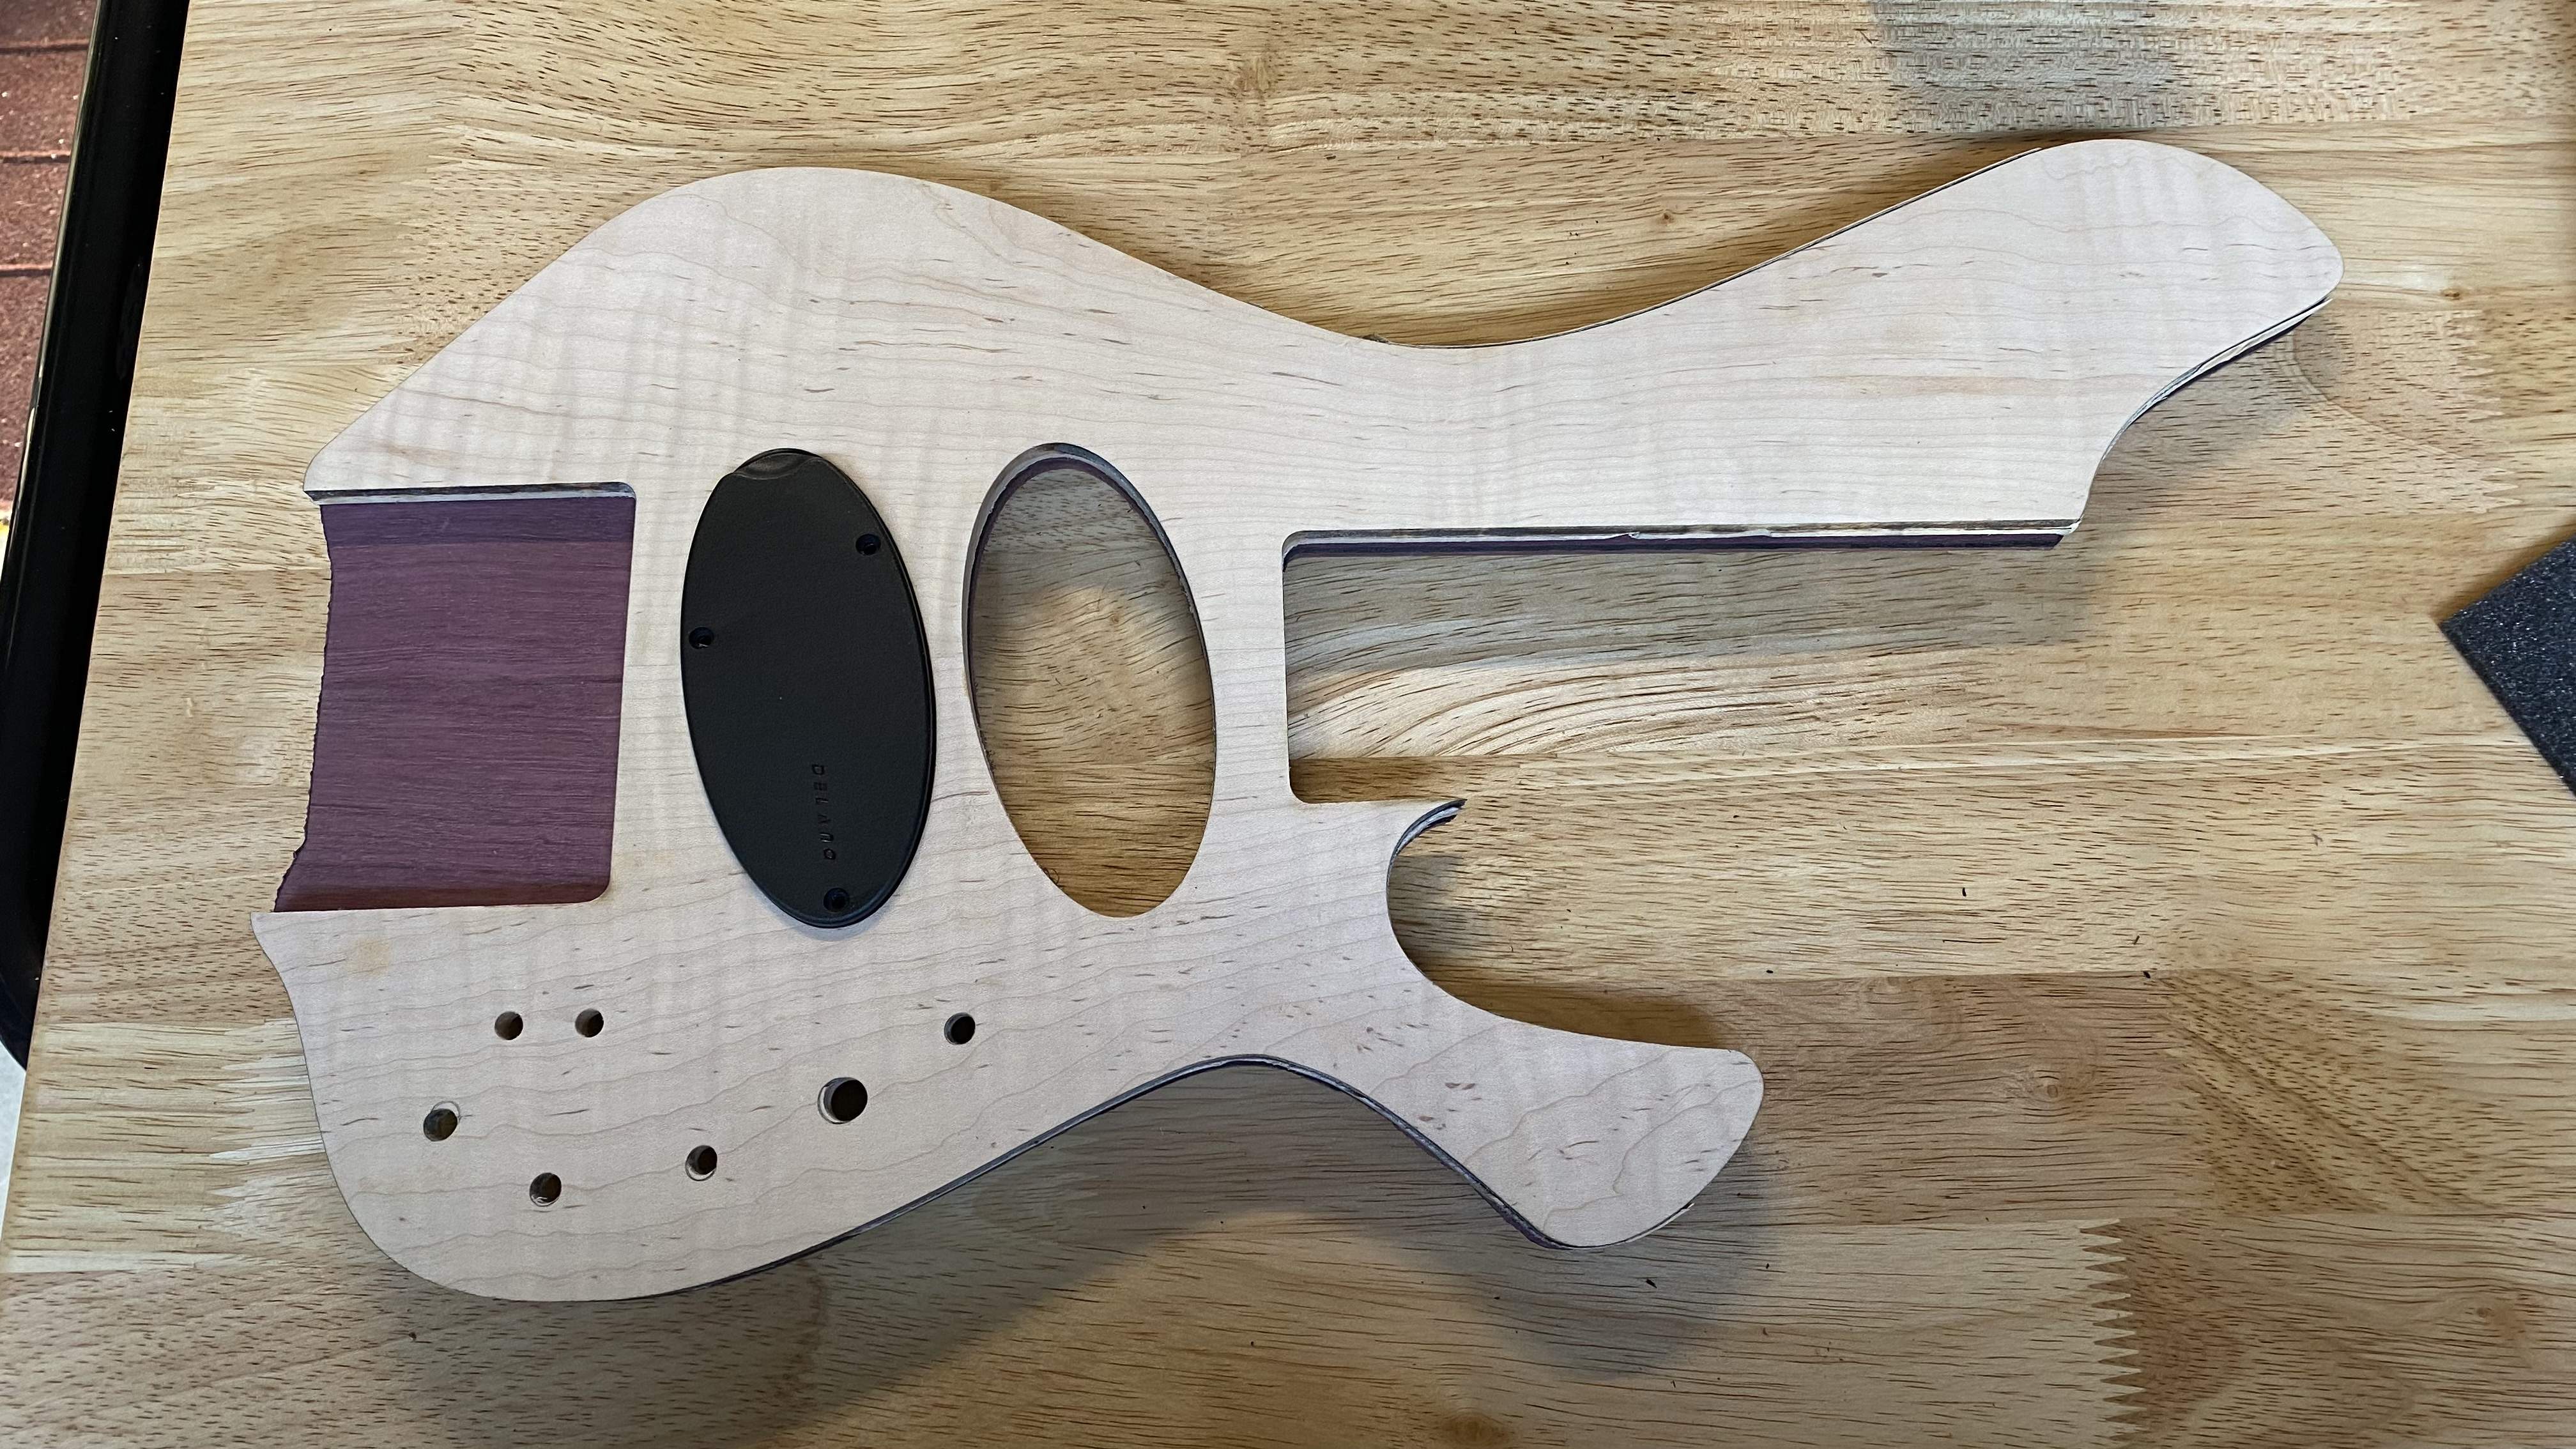
Routed the body control cavity (bottom layer)
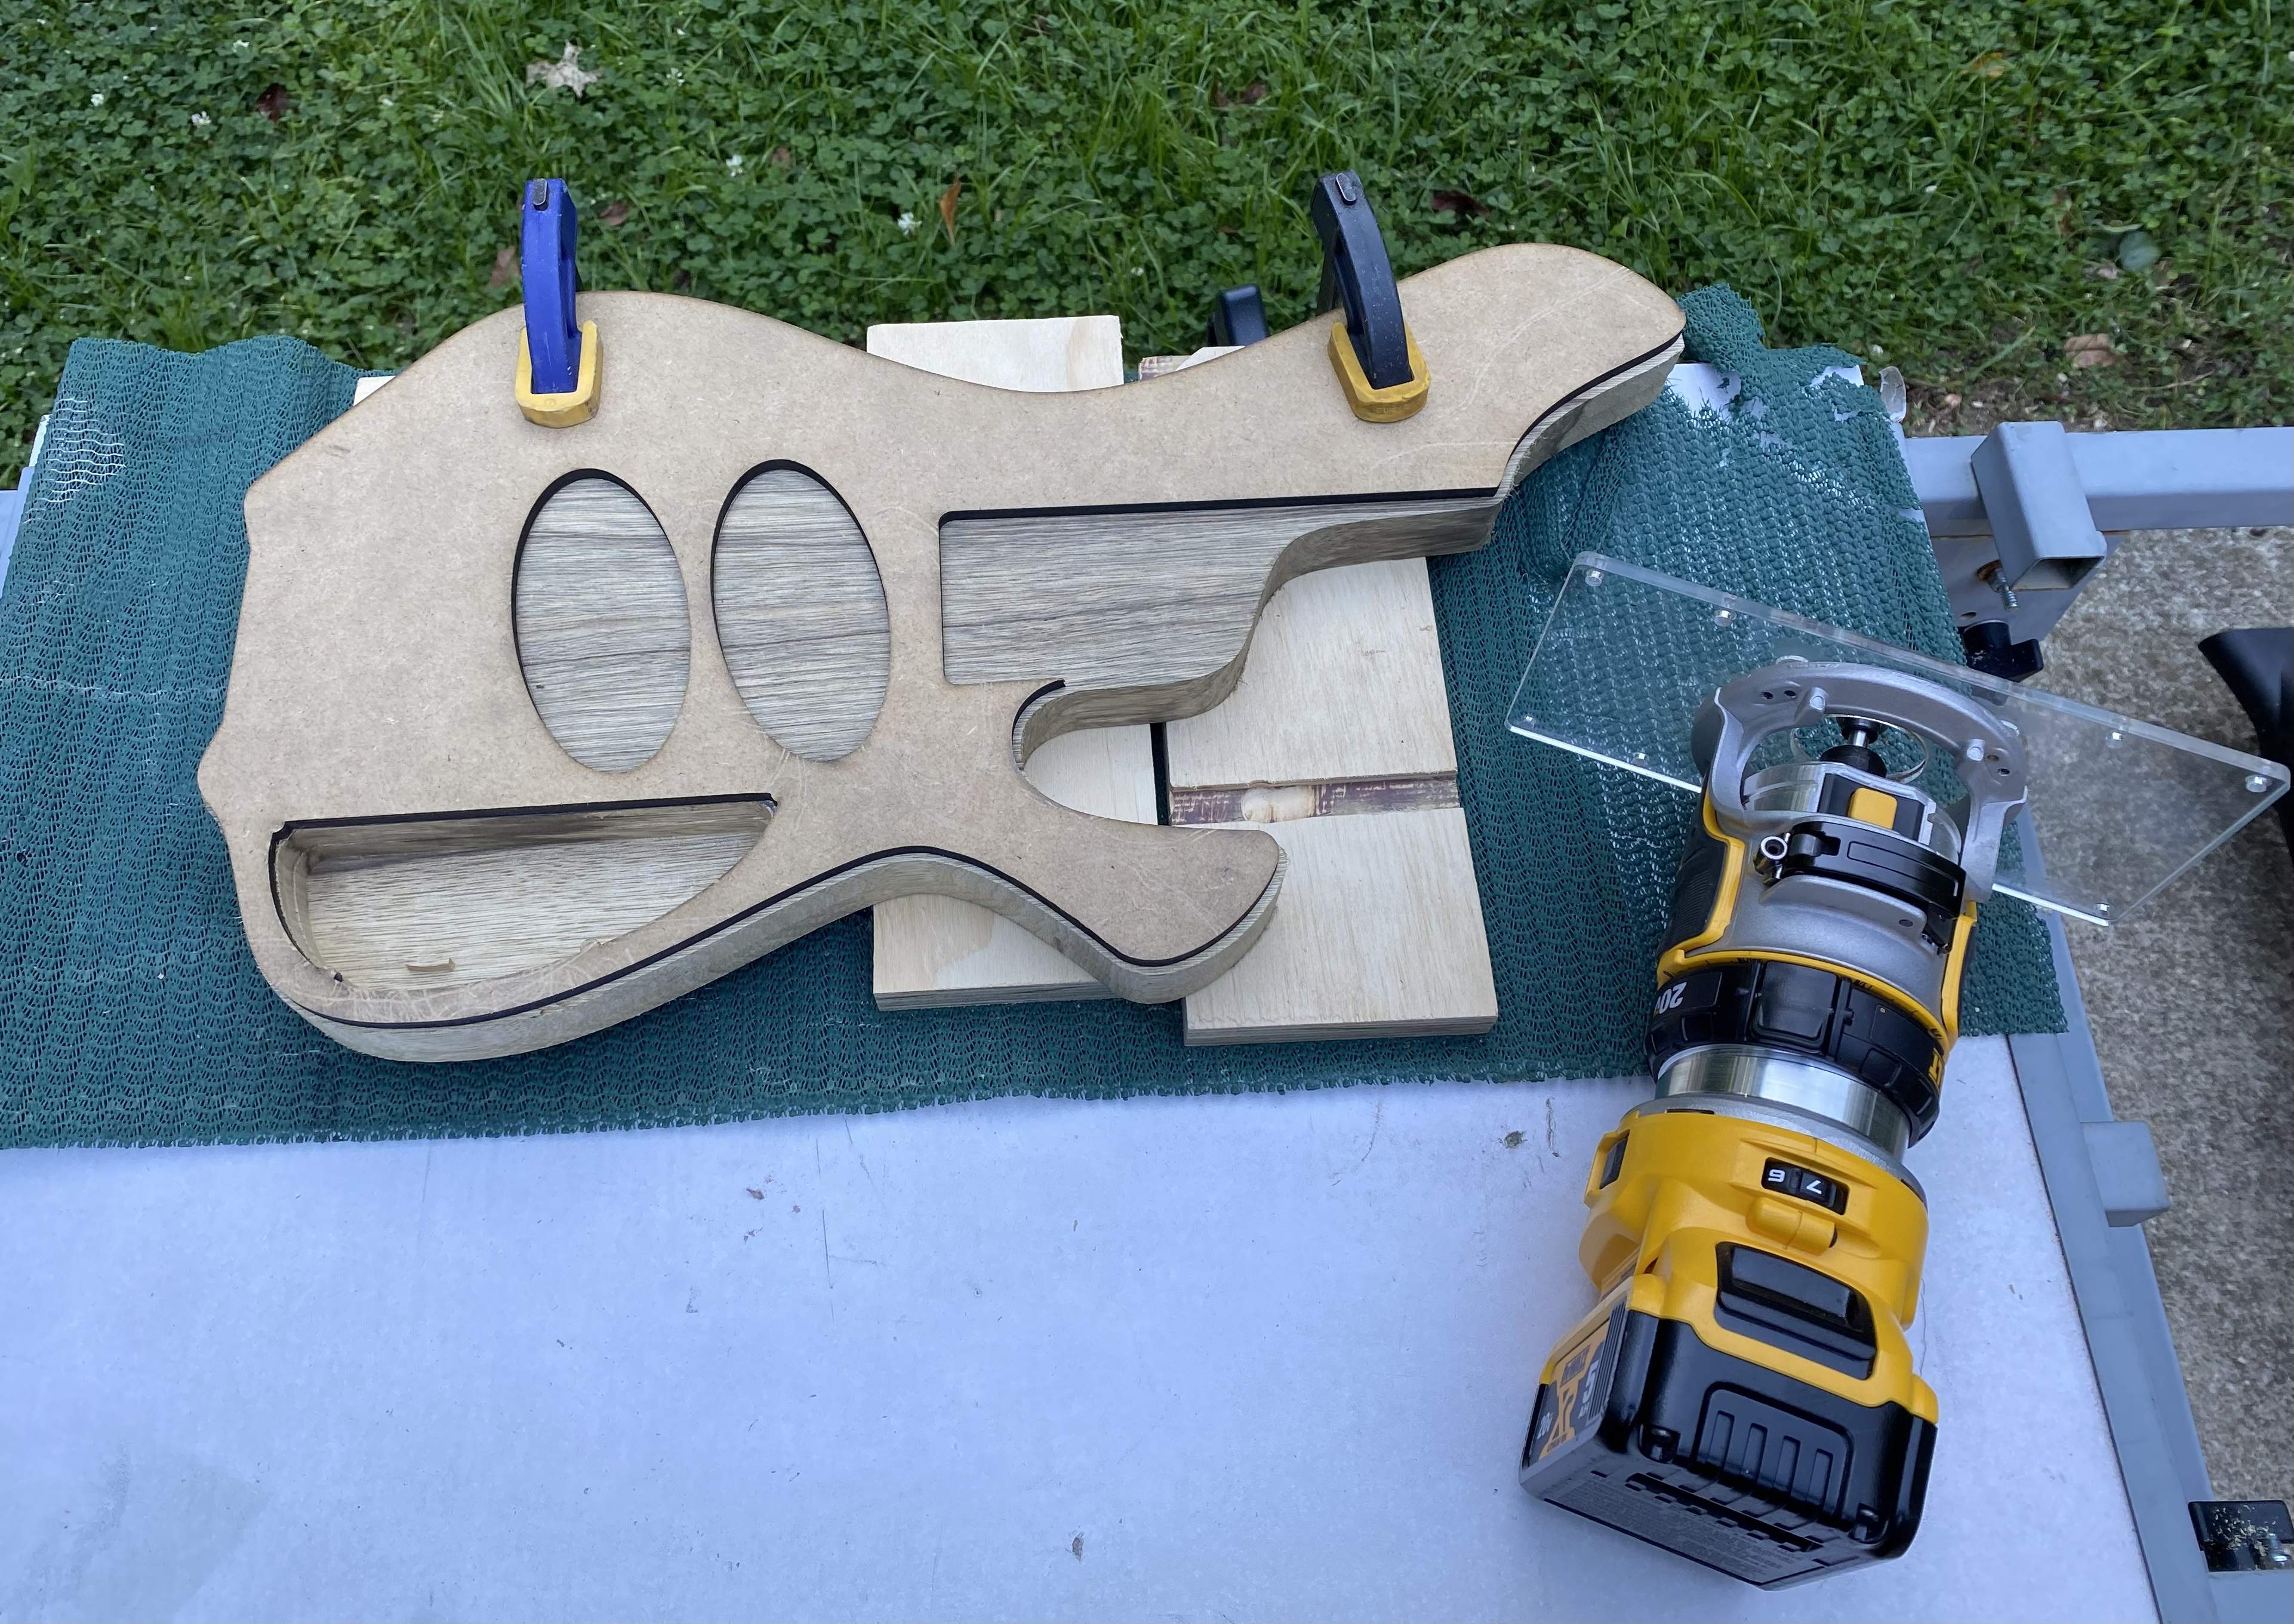
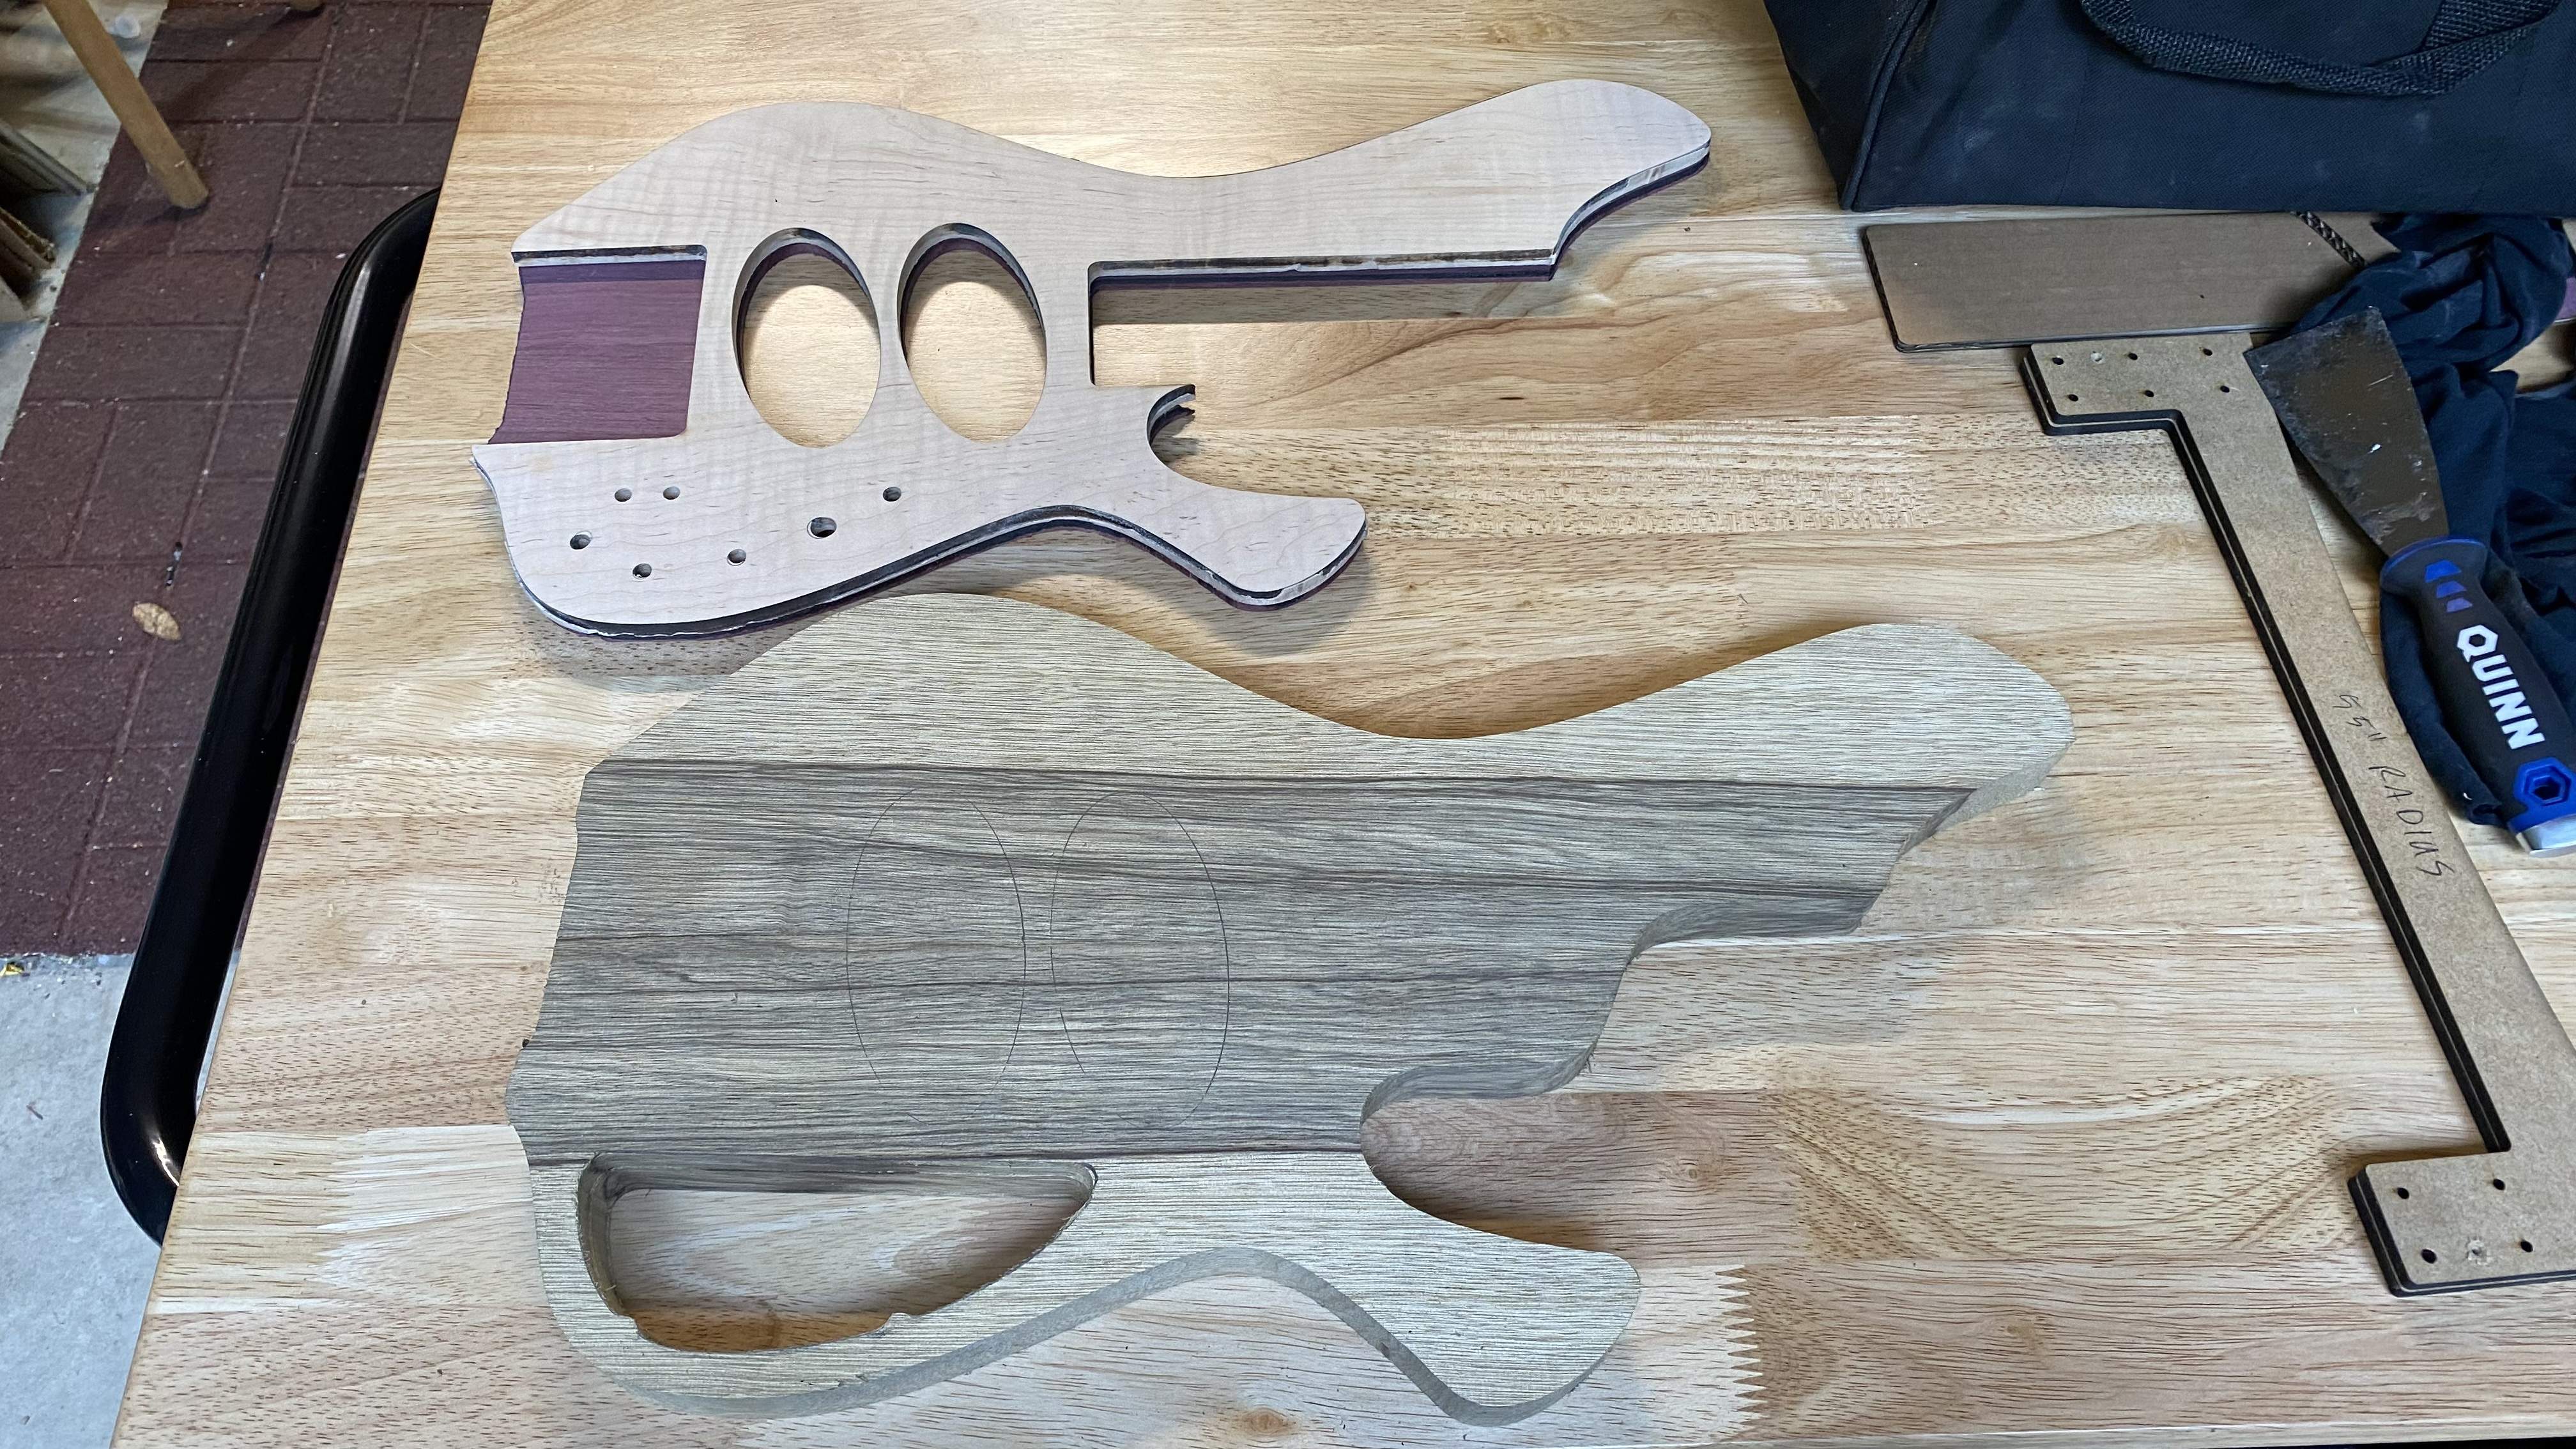
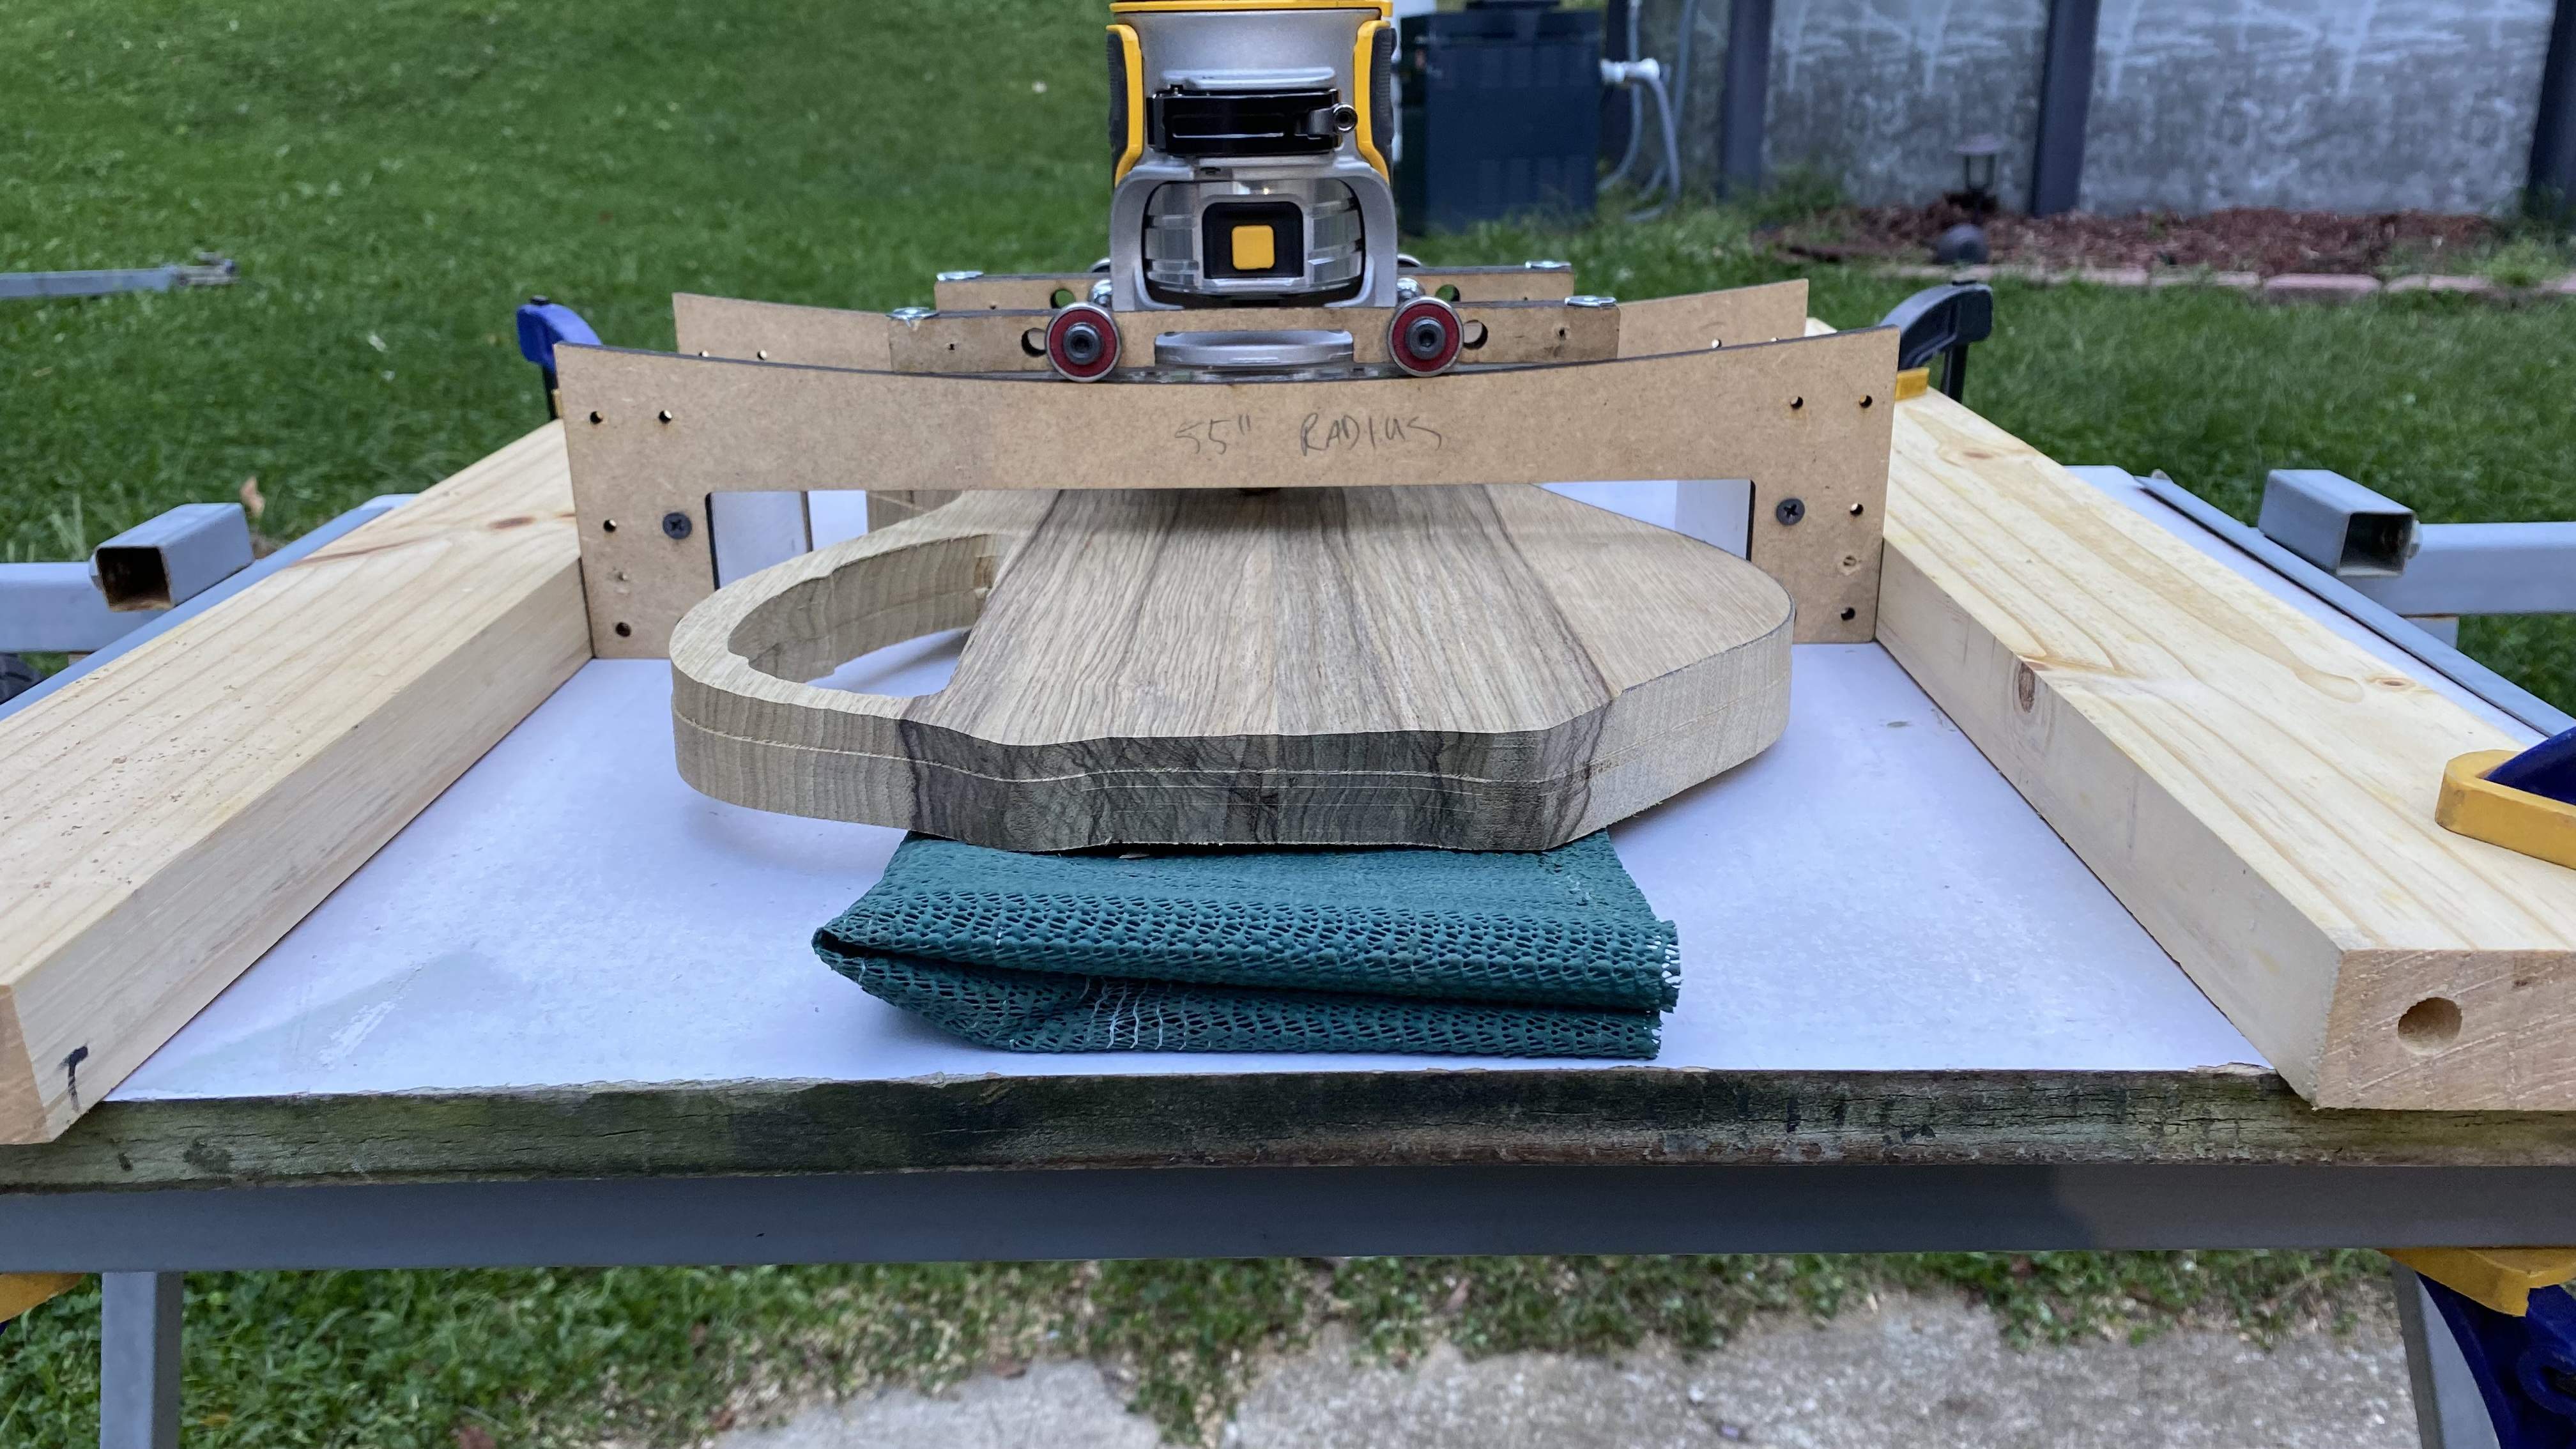
Scalloped the back, so it’ll be nice-n-comfy (55” radius)
Then glued it all up and clamped the layers down with this fun little vacuum bag
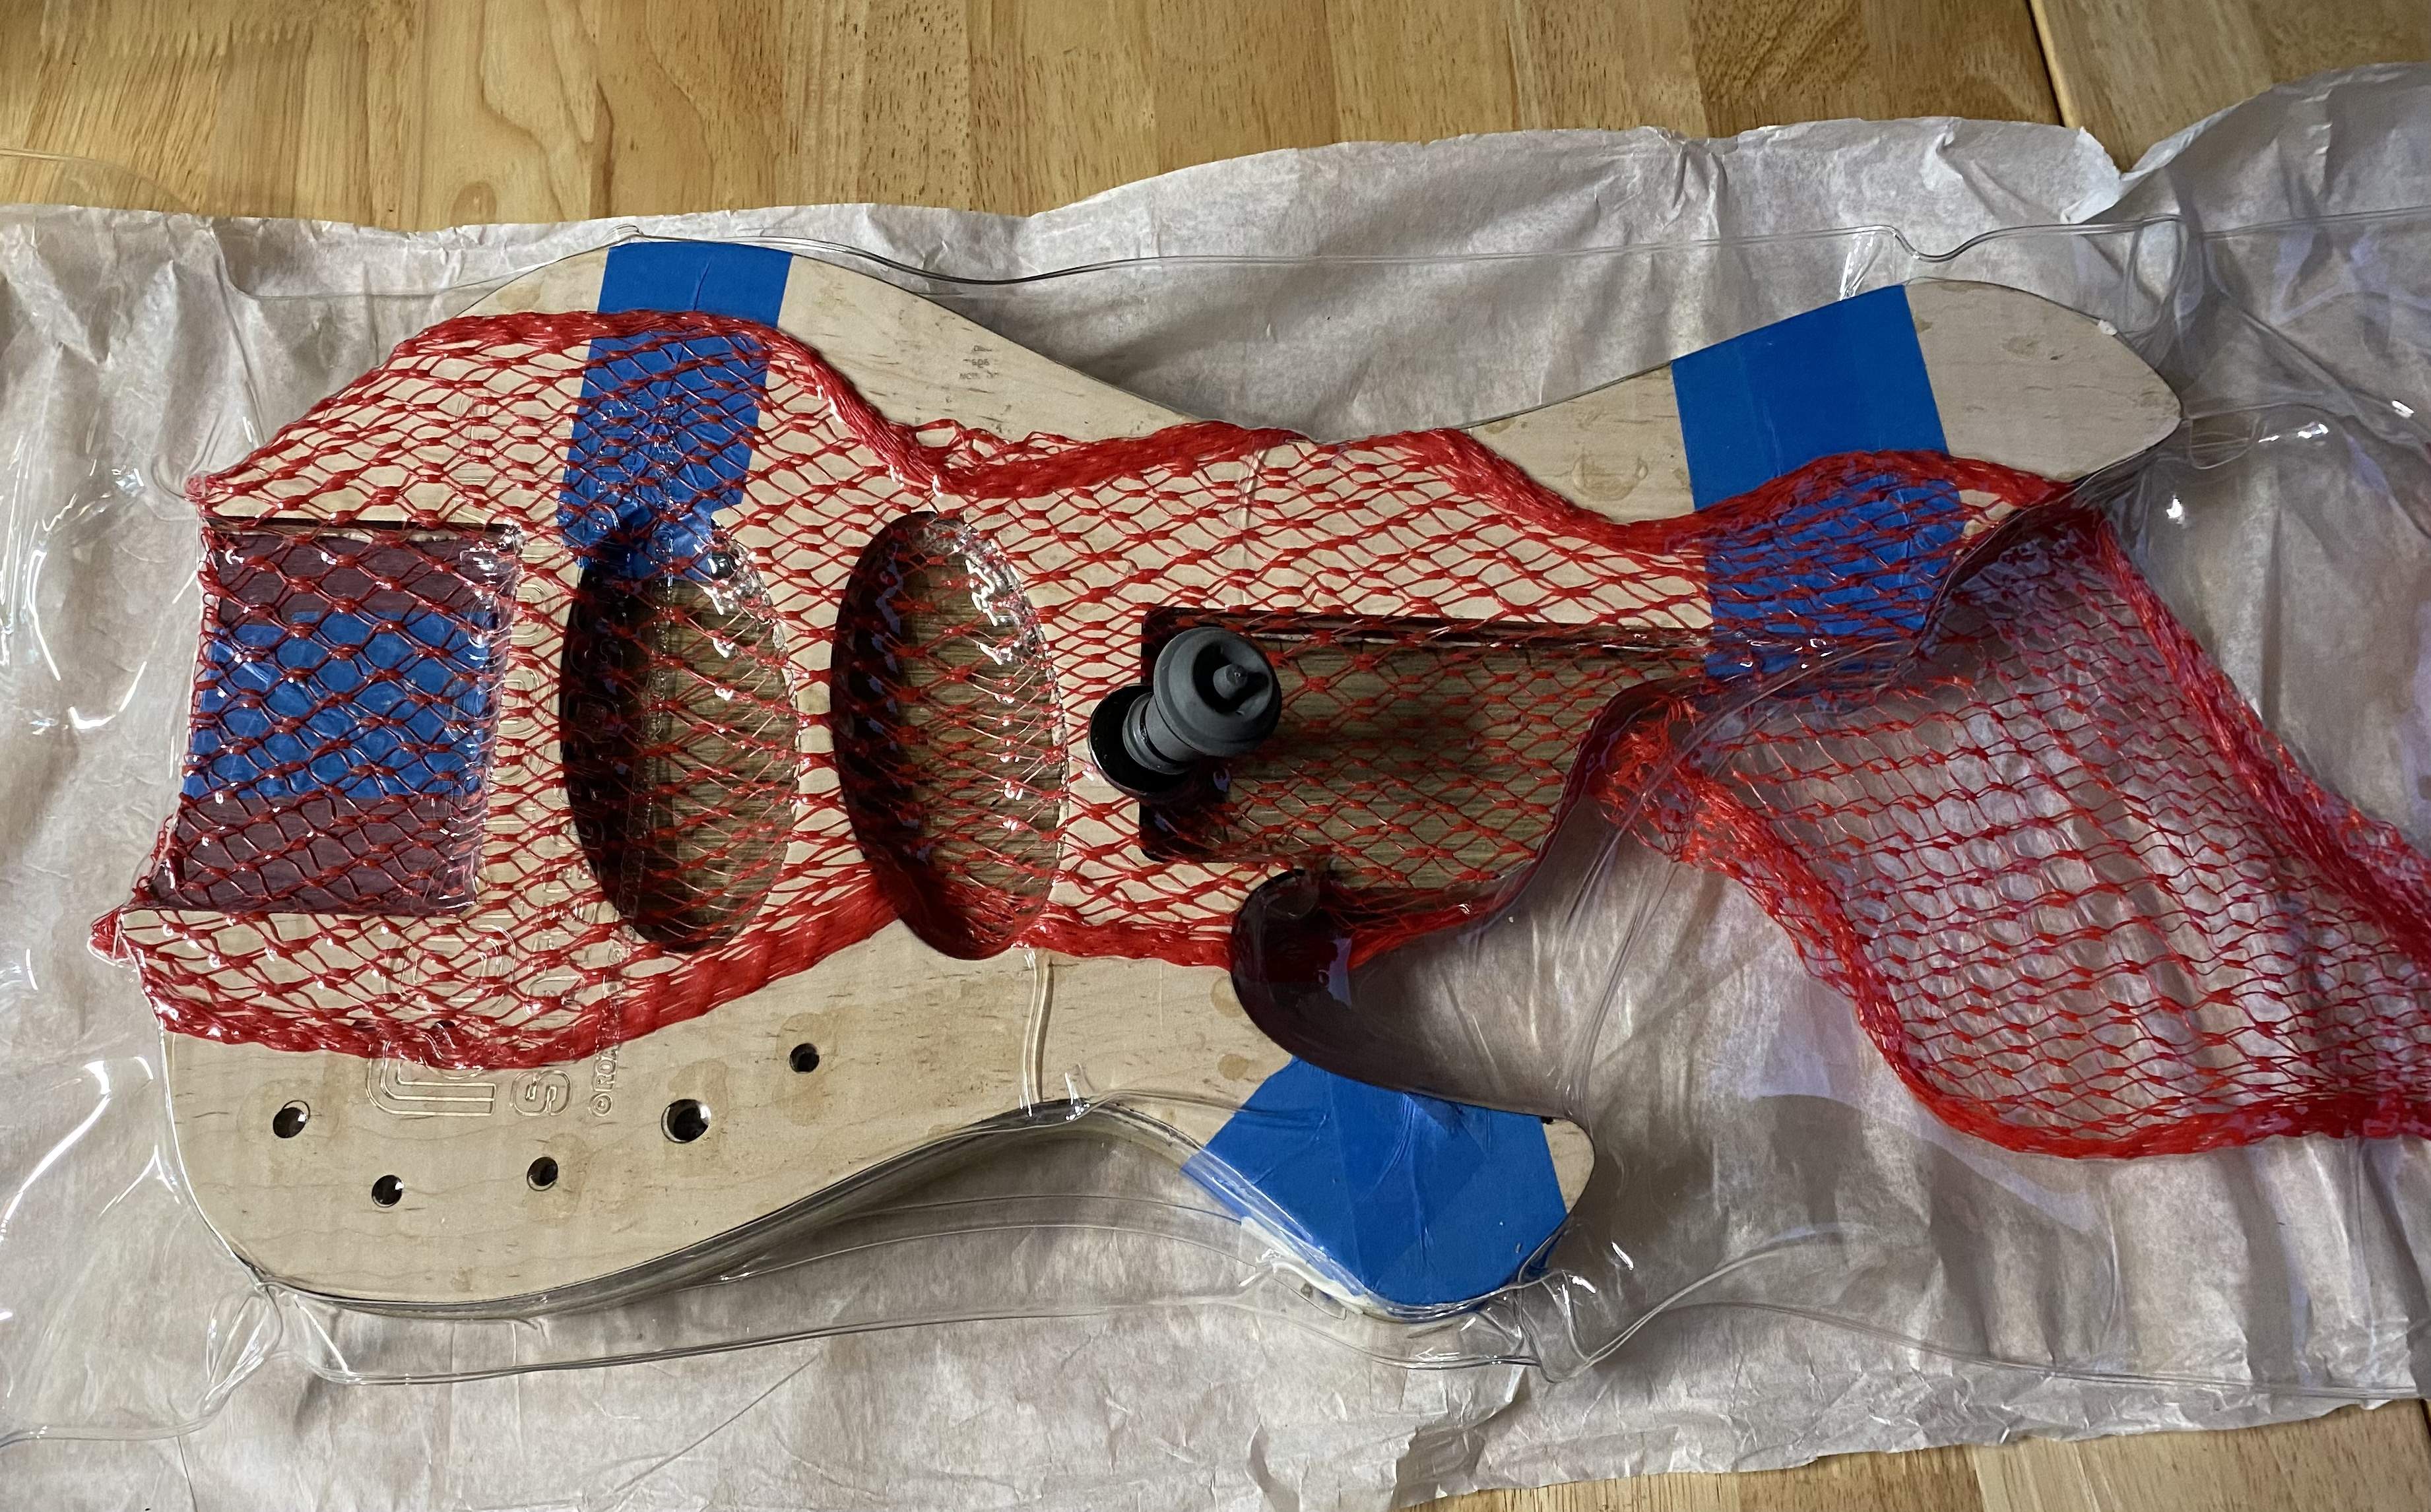
while the fishnet is cool, it’s only temporary

Routed the body control cavity (bottom layer)
Scalloped the back, so it’ll be nice-n-comfy (55” radius)
Then glued it all up and clamped the layers down with this fun little vacuum bag
while the fishnet is cool, it’s only temporary
Last edited:


