• TalkBass has been independent since 1998. Add your voice.
    Create a free account to reply to discussions, view embedded media, and browse with fewer display ads.
    Join freeLog in
    Want zero display ads or expanded classifieds tools? Compare plans.

SBO22 - Wiggle stick V

I do have a bunch of really good pickups already on hand:
  • 1 Peavey T40
  • 1 or 2 Peavey Super Ferrite
  • 1 or 2 Fishman Fluence
  • 1 or 2 Delano SBC
  • 1 or 2 EMG 35
  • 1 or 2 Wilde L90
  • 1 or 2 Wilde L500
  • 1 or 2 DiMarzio D-Activator X
  • 1 or 2 Duncan Quarter Pound J
  • 1 or 2 SGD Neo humbuckers
  • 1 or 2 Guild BiSonic
  • 1 or 2 Novak EB-BSx (double BiSonic)
Yes, I need a 12 step program….

Now do you see why it’s difficult for me to decide and commit? :woot:
 
  • Like
Reactions: WRM and Reedt2000
Gibson cares not for your pickup space problems!
Screenshot 2022-08-15 130423.jpg


:roflmao: :laugh: :roflmao: :laugh: :roflmao:
 
Had some time to work on the neck pocket this weekend. Turned out pretty nice I think.
V2_9097.jpg

If you can see the pencil marks on the body, you can see that there isn’t much room for pickups. I mean there’s plenty of room for a single pickup, but two would be pretty close together. I have been thinking of just doing one pickup, but I have a lot of options here, and having lots of options doesn’t help me decide!
Nordstrand and Delano have hum-cancelling J pickups where the coils are side by side rather than stacked. You could probably fit four or five of them in there.
 
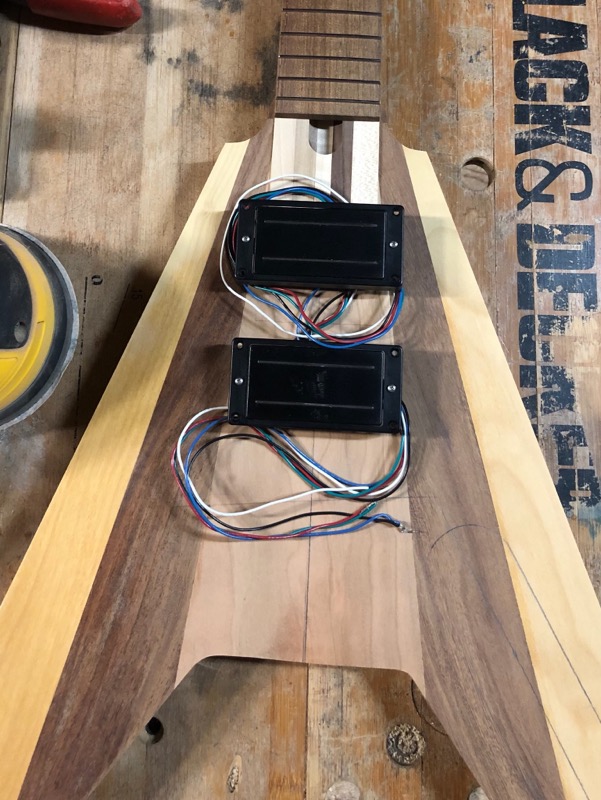
Okay, back to my senses. I decided on a pair of humbuckers. I’ll mount the Wilde L90s, but I have others I could swap out if I want/need to.

V2_9107.jpg


The “neck” pickup cavity will consume a bit of the end of the neck tenon.

V2_9108.jpg


I also got the frets hammered in, and the ends trimmed (but not yet dressed). I got the preliminary neck carve done too; I’ll revisit it again tomorrow for refinement.

Only a month left now!
 
And today’s progress:

Got the fret ends dressed. I was able to use stainless fretwire on the whole neck. Except for the 24th fret. Yep, I ran out of stainless just before crossing the finish line, sigh. Oh well. Stainless takes longer to dress, plus I had to do 50 of them, so it took a while this afternoon….

On the body, I got the control cavity done. First I decided on a control layout - selector switch and master volume for now, nice and simple, so I can have a baseline to work from. Then I drilled the holes from the top, all the way through the body wing.

V2_9111.jpg


Flipped it over, marked the centerline, marked the outline of the cavity, and removed the bulk with a Forstner bit, following up with the template and router. Drilling the control holes beforehand makes it easy to position the cavity template on the back, and leaves nice clean holes when it’s all done.

V2_9112.jpg


Then I blind-drilled the pickup wiring channels. Drilling from neck cavity to bridge cavity was trivial, since the neck isn’t attached yet. Drilling from the bridge cavity to the control cavity was trickier, since it’s an odd angle and a blind drill. I drilled it backwards, from the control cavity to the pickup cavity, since I could get a shallower angle on the drill bit that way. But it’s still a leap of faith. Double-check the position and the angle, then triple-check it, then once more, then it’s time to cross your fingers and go for it.

V2_9109.jpg


Did it work? Did it come out where I wanted it to? Or did I just drill a nice big hole somewhere on the top of my bass? Only way to know is to unclamp it and flip it over. Moment of truth….

V2_9110.jpg


Not too bad. It’s not right in the corner where I would have wanted it, but the depth is right, and I didn’t screw up the top!

Yeah, I hate having to do that. If I’m doing a drop-top, then it’s easy to route the channels before the top gets glued on. I love that. If not, then I will often try to put the drill bit through the jack hole, with a straight shot all the way to the pickup cavity. That often works out well too. But this drill-bit-at-a-shallow-angle-hope-and-pray stuff is stressful! Glad it’s done.
 
And today’s progress:

Got the fret ends dressed. I was able to use stainless fretwire on the whole neck. Except for the 24th fret. Yep, I ran out of stainless just before crossing the finish line, sigh. Oh well. Stainless takes longer to dress, plus I had to do 50 of them, so it took a while this afternoon….

On the body, I got the control cavity done. First I decided on a control layout - selector switch and master volume for now, nice and simple, so I can have a baseline to work from. Then I drilled the holes from the top, all the way through the body wing.

V2_9111.jpg


Flipped it over, marked the centerline, marked the outline of the cavity, and removed the bulk with a Forstner bit, following up with the template and router. Drilling the control holes beforehand makes it easy to position the cavity template on the back, and leaves nice clean holes when it’s all done.

V2_9112.jpg


Then I blind-drilled the pickup wiring channels. Drilling from neck cavity to bridge cavity was trivial, since the neck isn’t attached yet. Drilling from the bridge cavity to the control cavity was trickier, since it’s an odd angle and a blind drill. I drilled it backwards, from the control cavity to the pickup cavity, since I could get a shallower angle on the drill bit that way. But it’s still a leap of faith. Double-check the position and the angle, then triple-check it, then once more, then it’s time to cross your fingers and go for it.

V2_9109.jpg


Did it work? Did it come out where I wanted it to? Or did I just drill a nice big hole somewhere on the top of my bass? Only way to know is to unclamp it and flip it over. Moment of truth….

V2_9110.jpg


Not too bad. It’s not right in the corner where I would have wanted it, but the depth is right, and I didn’t screw up the top!

Yeah, I hate having to do that. If I’m doing a drop-top, then it’s easy to route the channels before the top gets glued on. I love that. If not, then I will often try to put the drill bit through the jack hole, with a straight shot all the way to the pickup cavity. That often works out well too. But this drill-bit-at-a-shallow-angle-hope-and-pray stuff is stressful! Glad it’s done.

I hate drilling holes like that - it’s nerve wracking!
 
Trying to move this along now!

Got the roundover on the body. I went with the smallest roundover bit I have; I think it’s a 1/4” radius.

But the big news is that the headstock is done! (Well, except for drilling tuner holes.) This was the last major operation to do, and I wasn’t exactly sure how to go about it. I decided to continue the arrow motif, so I started by sawing the headstock stub into a triangle shape, and then I jointed the edges with a template bit and a straightedge.

V2_9114.jpg


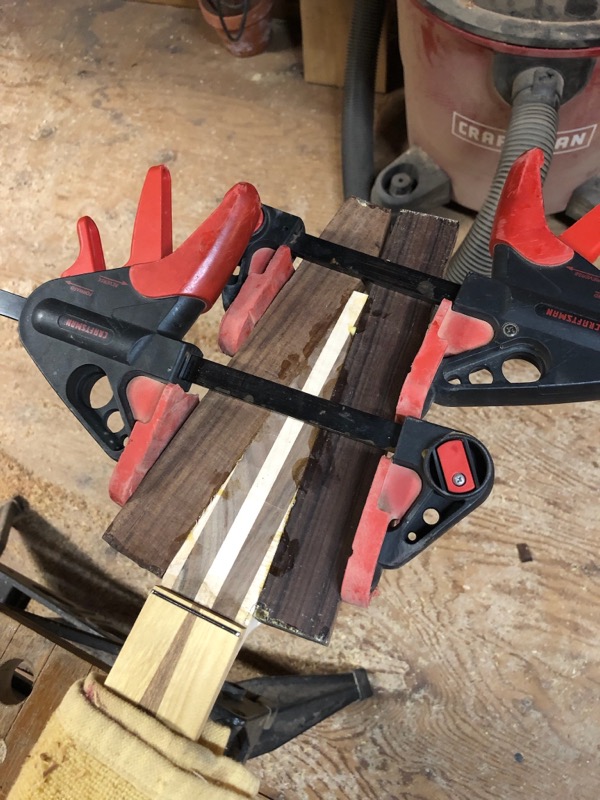
I was lucky to find some rosewood that was the right size for the headstock ears, so I didn’t have to work on that. After a quick surfacing, I glued up the first one, then trimmed away a bit of it so I could glue on the second one.

V2_9115.jpg


V2_9121.jpg


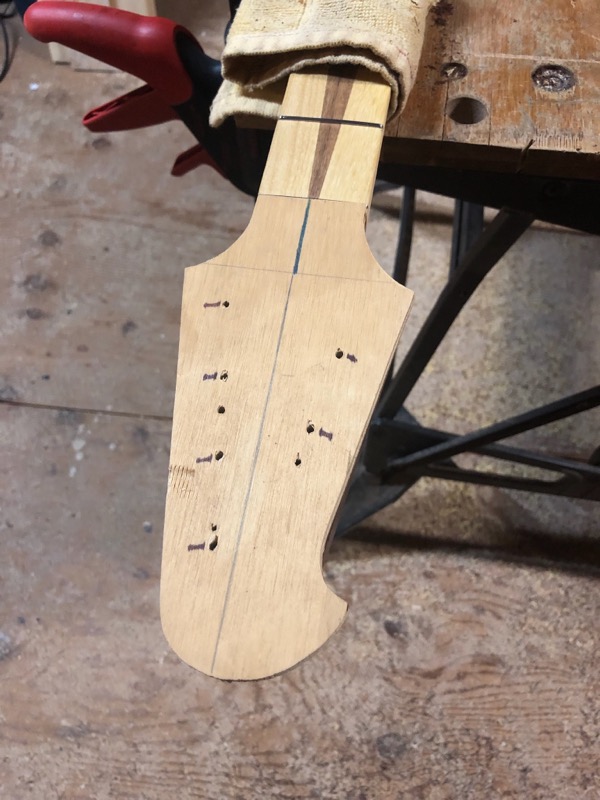
I used an old headstock template, in a Thunderbird shape; I did one half of it, then flipped it over and did the same section again, so it would be symmetrical, like the standard V headstock.

V2_9125.jpg


Sanded it all down, faired in the volute, and I’m pretty happy with how it turned out!

V2_9126.jpg


V2_9127.jpg
 
Tuner holes drilled. Mark with a pencil, pilot hole with an awl, drill with the drill press. Easy.

Side dots done too. Almost forgot! Very important to not forget side dots before gluing that neck in….

Holes are done with a pin vise at the dining table.

V2_9129.jpg


Then the dots go in. My bicolored fretboard means I need different dots to provide visual contrast. I chose 3mm paua abalone below the twelfth…

V2_9130.jpg


…2mm white plastic above the twelfth, with a 3mm mother of pearl at the 24th…

V2_9132.jpg


…and a combination of 3mm paua and 2mm white plastic at the twelfth.

V2_9131.jpg


Also, that’s just what I happened to have on hand. :angel:

—-

So I think it’s time to glue the neck to the body. Is it? Have I forgotten anything? Let’s do a time out, and double-check everything, like the surgery team does before amputating a limb…..
 
Okay, now that the neck is set, it’s time for the final woodworking: setting the bridge. I always like to do this last, since the correct position of the bridge depends on the exact location of the nut, as well as any slight deviation from the body centerline. It’s all about the strings, remember.

I sanded off the remaining old markings, and set down a fresh centerline and a fresh bridge saddle line based on the neck location. Then it was time to do the route for the Kahler. There is a template on the Kahler website, but I just took careful measurements and scribbled my own on the body.

V2_9135.jpg


Hogged the bulk out at the drill press…

V2_9136.jpg


Used various sections of pickup route templates to route the perimeter…

V2_9137.jpg


V2_9138.jpg


Finished it up down to 7/8” depth…

V2_9139.jpg


It fits!

V2_9143.jpg
 
The last bit of sawdust is trimming the excess neck tenon from the neck pickup cavity. Again, hog it out with a Forstner, then route it clean with a template bit.

V2_9144.jpg


V2_9145.jpg


And we have a Bass-Shaped Object! Well, unless you’re one of those “have to have the strap button at the twelfth fret or it’s crap” kind of people. If you are, then just head on back to your arguments about flats and tort….

V2_9146.jpg


(Yep, that’s big brother EUV photo-bombing through the mirror…)