Scrappy, a lightweight 8" cab build.
I'm posting this before I close up the cabinet with the last panel as a last opportunity to collect, and possibly incorporate feedback. Feel free to provide feedback.
Please understand the following:
I recently started playing at church again. The facilities guy is in charge of the PA, and has set HPF filter at about 250k, even for the bass, and kick drum! Also, the compressor/limiter is set at such a ratio as to squash the bass. Together, this makes the bass inaudible through the floor wedges. They also got rid of the entire in-ear monitor set up I had put in place several years ago. So, I need to have a small, quiet amp that doesn't take up much floor space. The venue holds 800 people, but the choir area is low volume. My SWR Monitor 12" wedge is just too big, and with it, I keep my Gnome's volume at about 2-3. My daughter has taken up the bass, and plays in church. She'll need a small cab and amp that are easy for her to carry. I also need the cab to handle my low B (at low volumes). It would be a bonus if this cab is loud enough for practice with my other band (uses acoustic drums).
I really like the idea of JdoubleH's cab. He inspired me to build my own small, 8" cab using a super cheap driver. Don't laugh or balk at my driver choice. I know, I know.
My departure from JdoubleH's design: Pardon me while I "vent"…
I used a spreadsheet to play with cab volumes, tuning, etc. Unfortunately, due to the high FS of the driver, I couldn't get the low end I wanted out of a sealed design, and super small box. I decided on a vented cab.
The driver:
Pyle (I know, I know) PPA8 meant for PA systems
Cost: $16
Source: Newark online
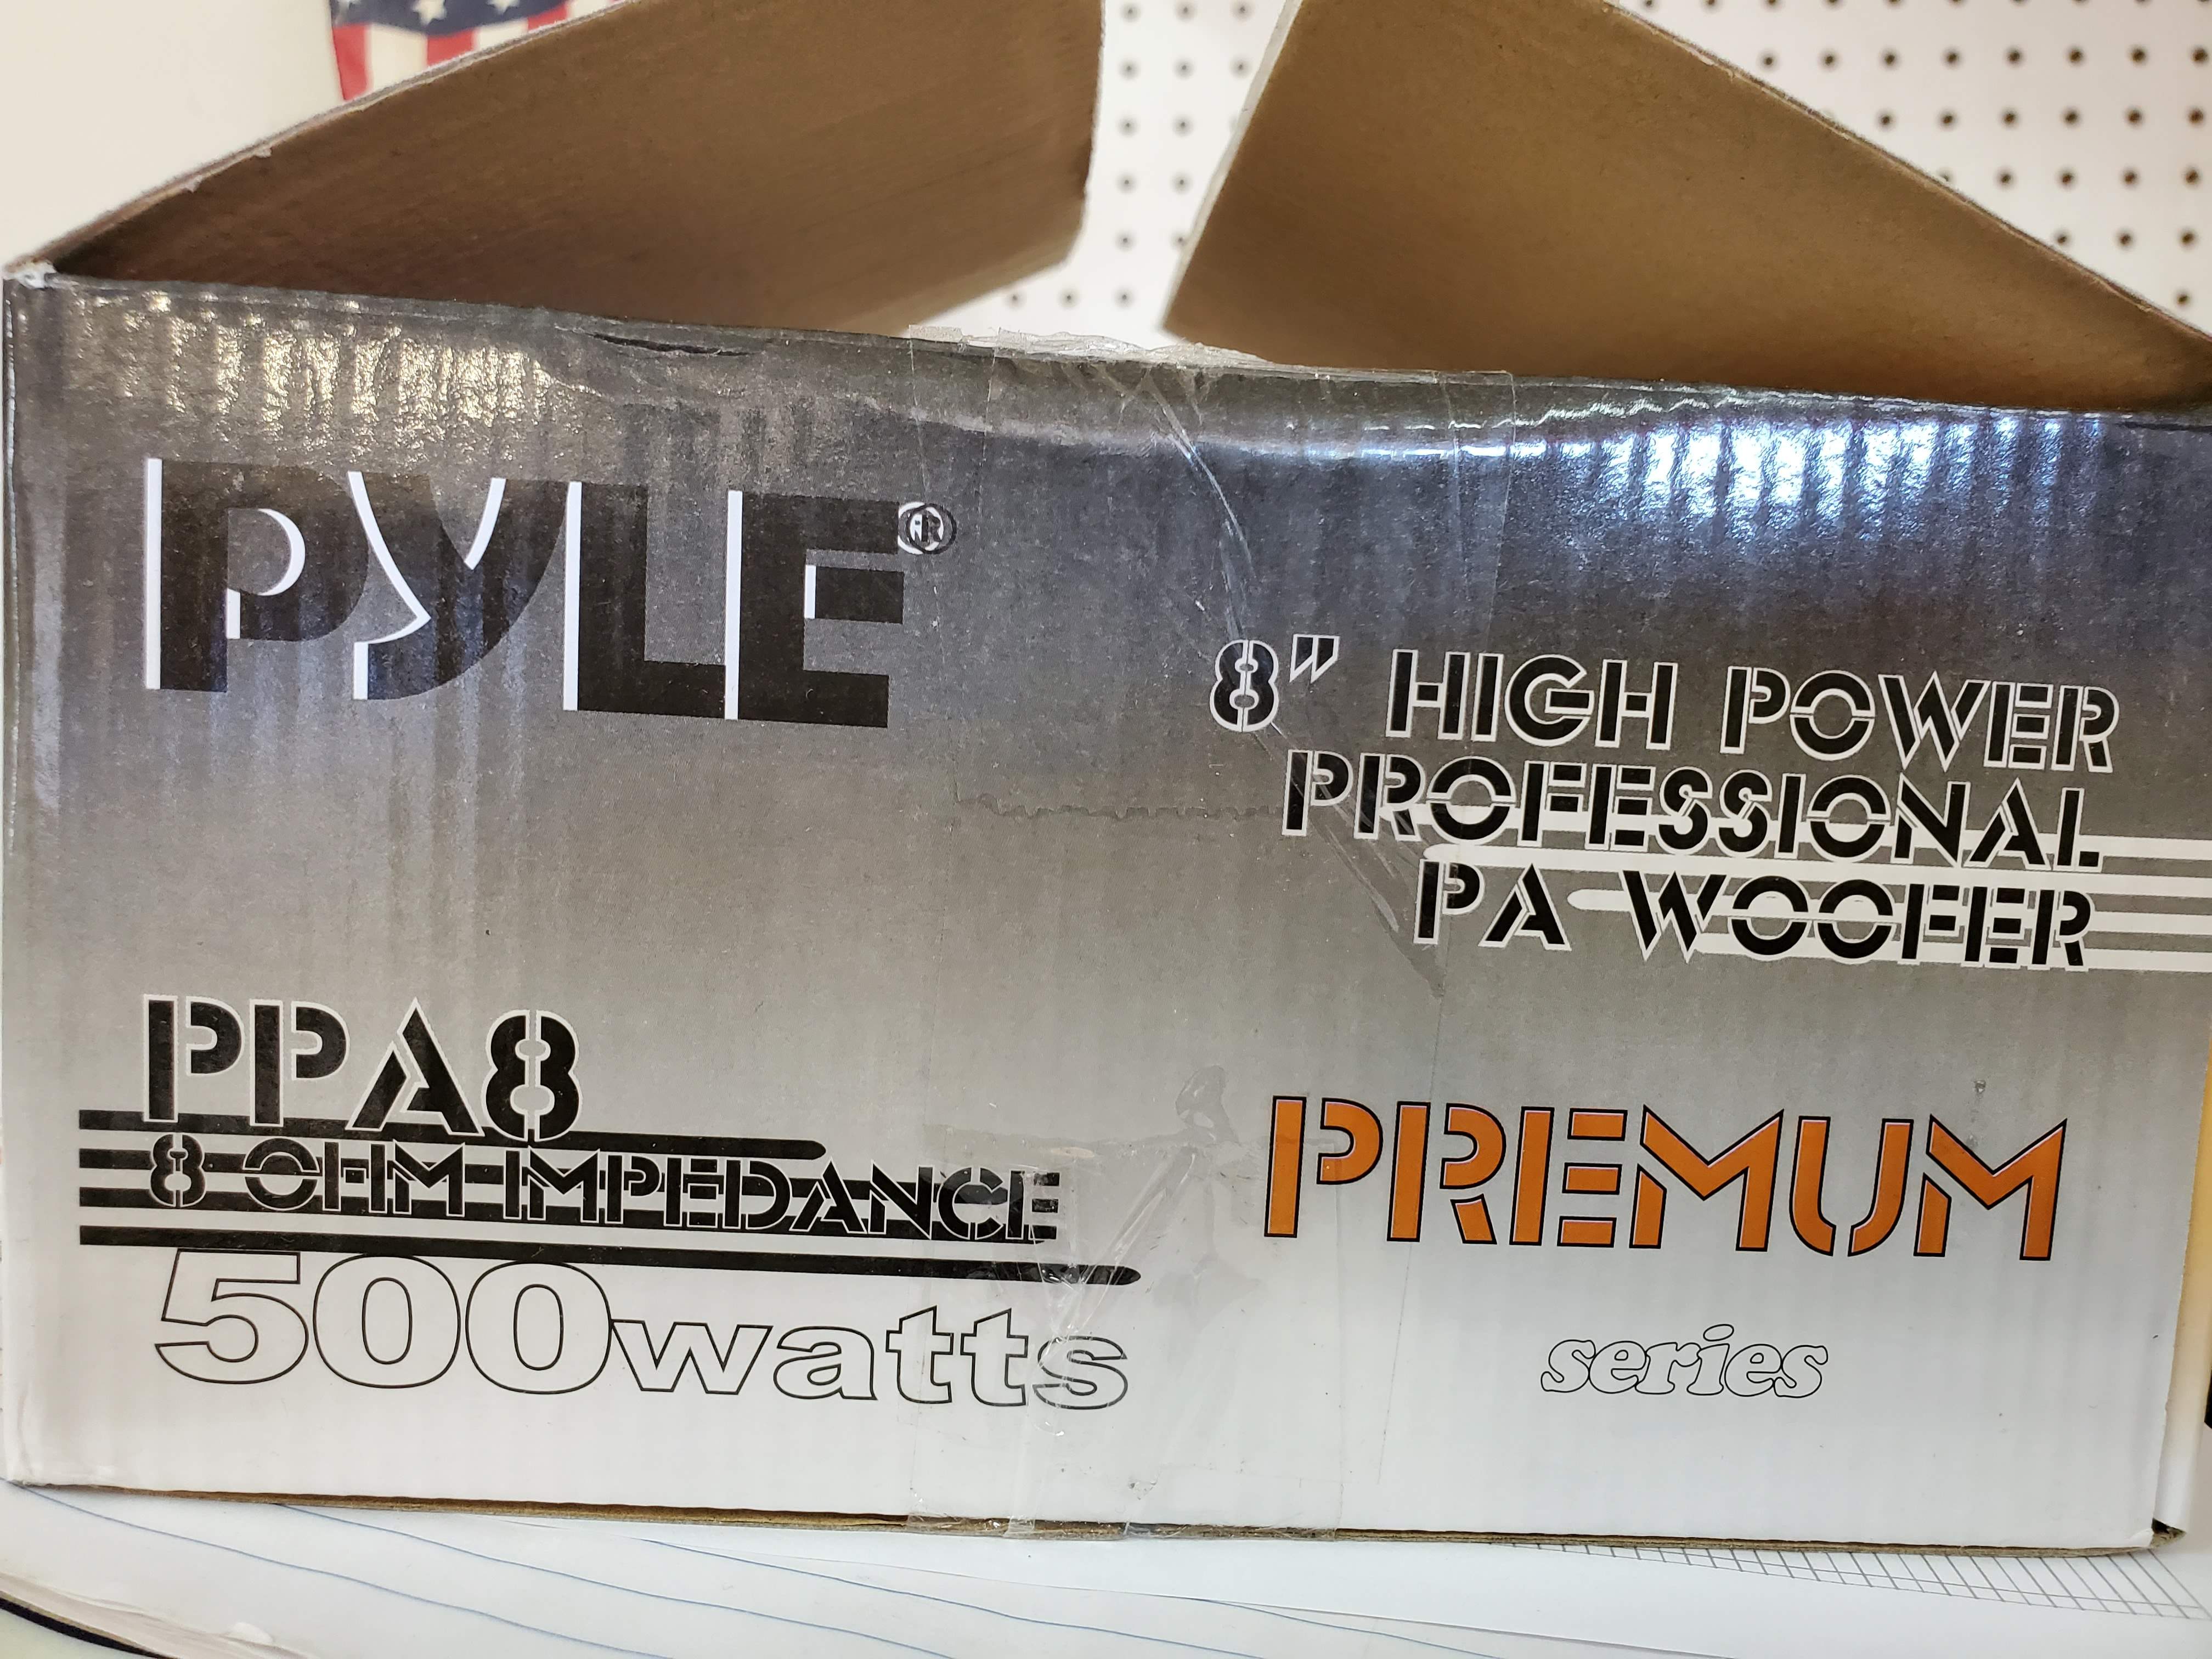
Hey, if they make 'em in 18s, they have to be good. Right?

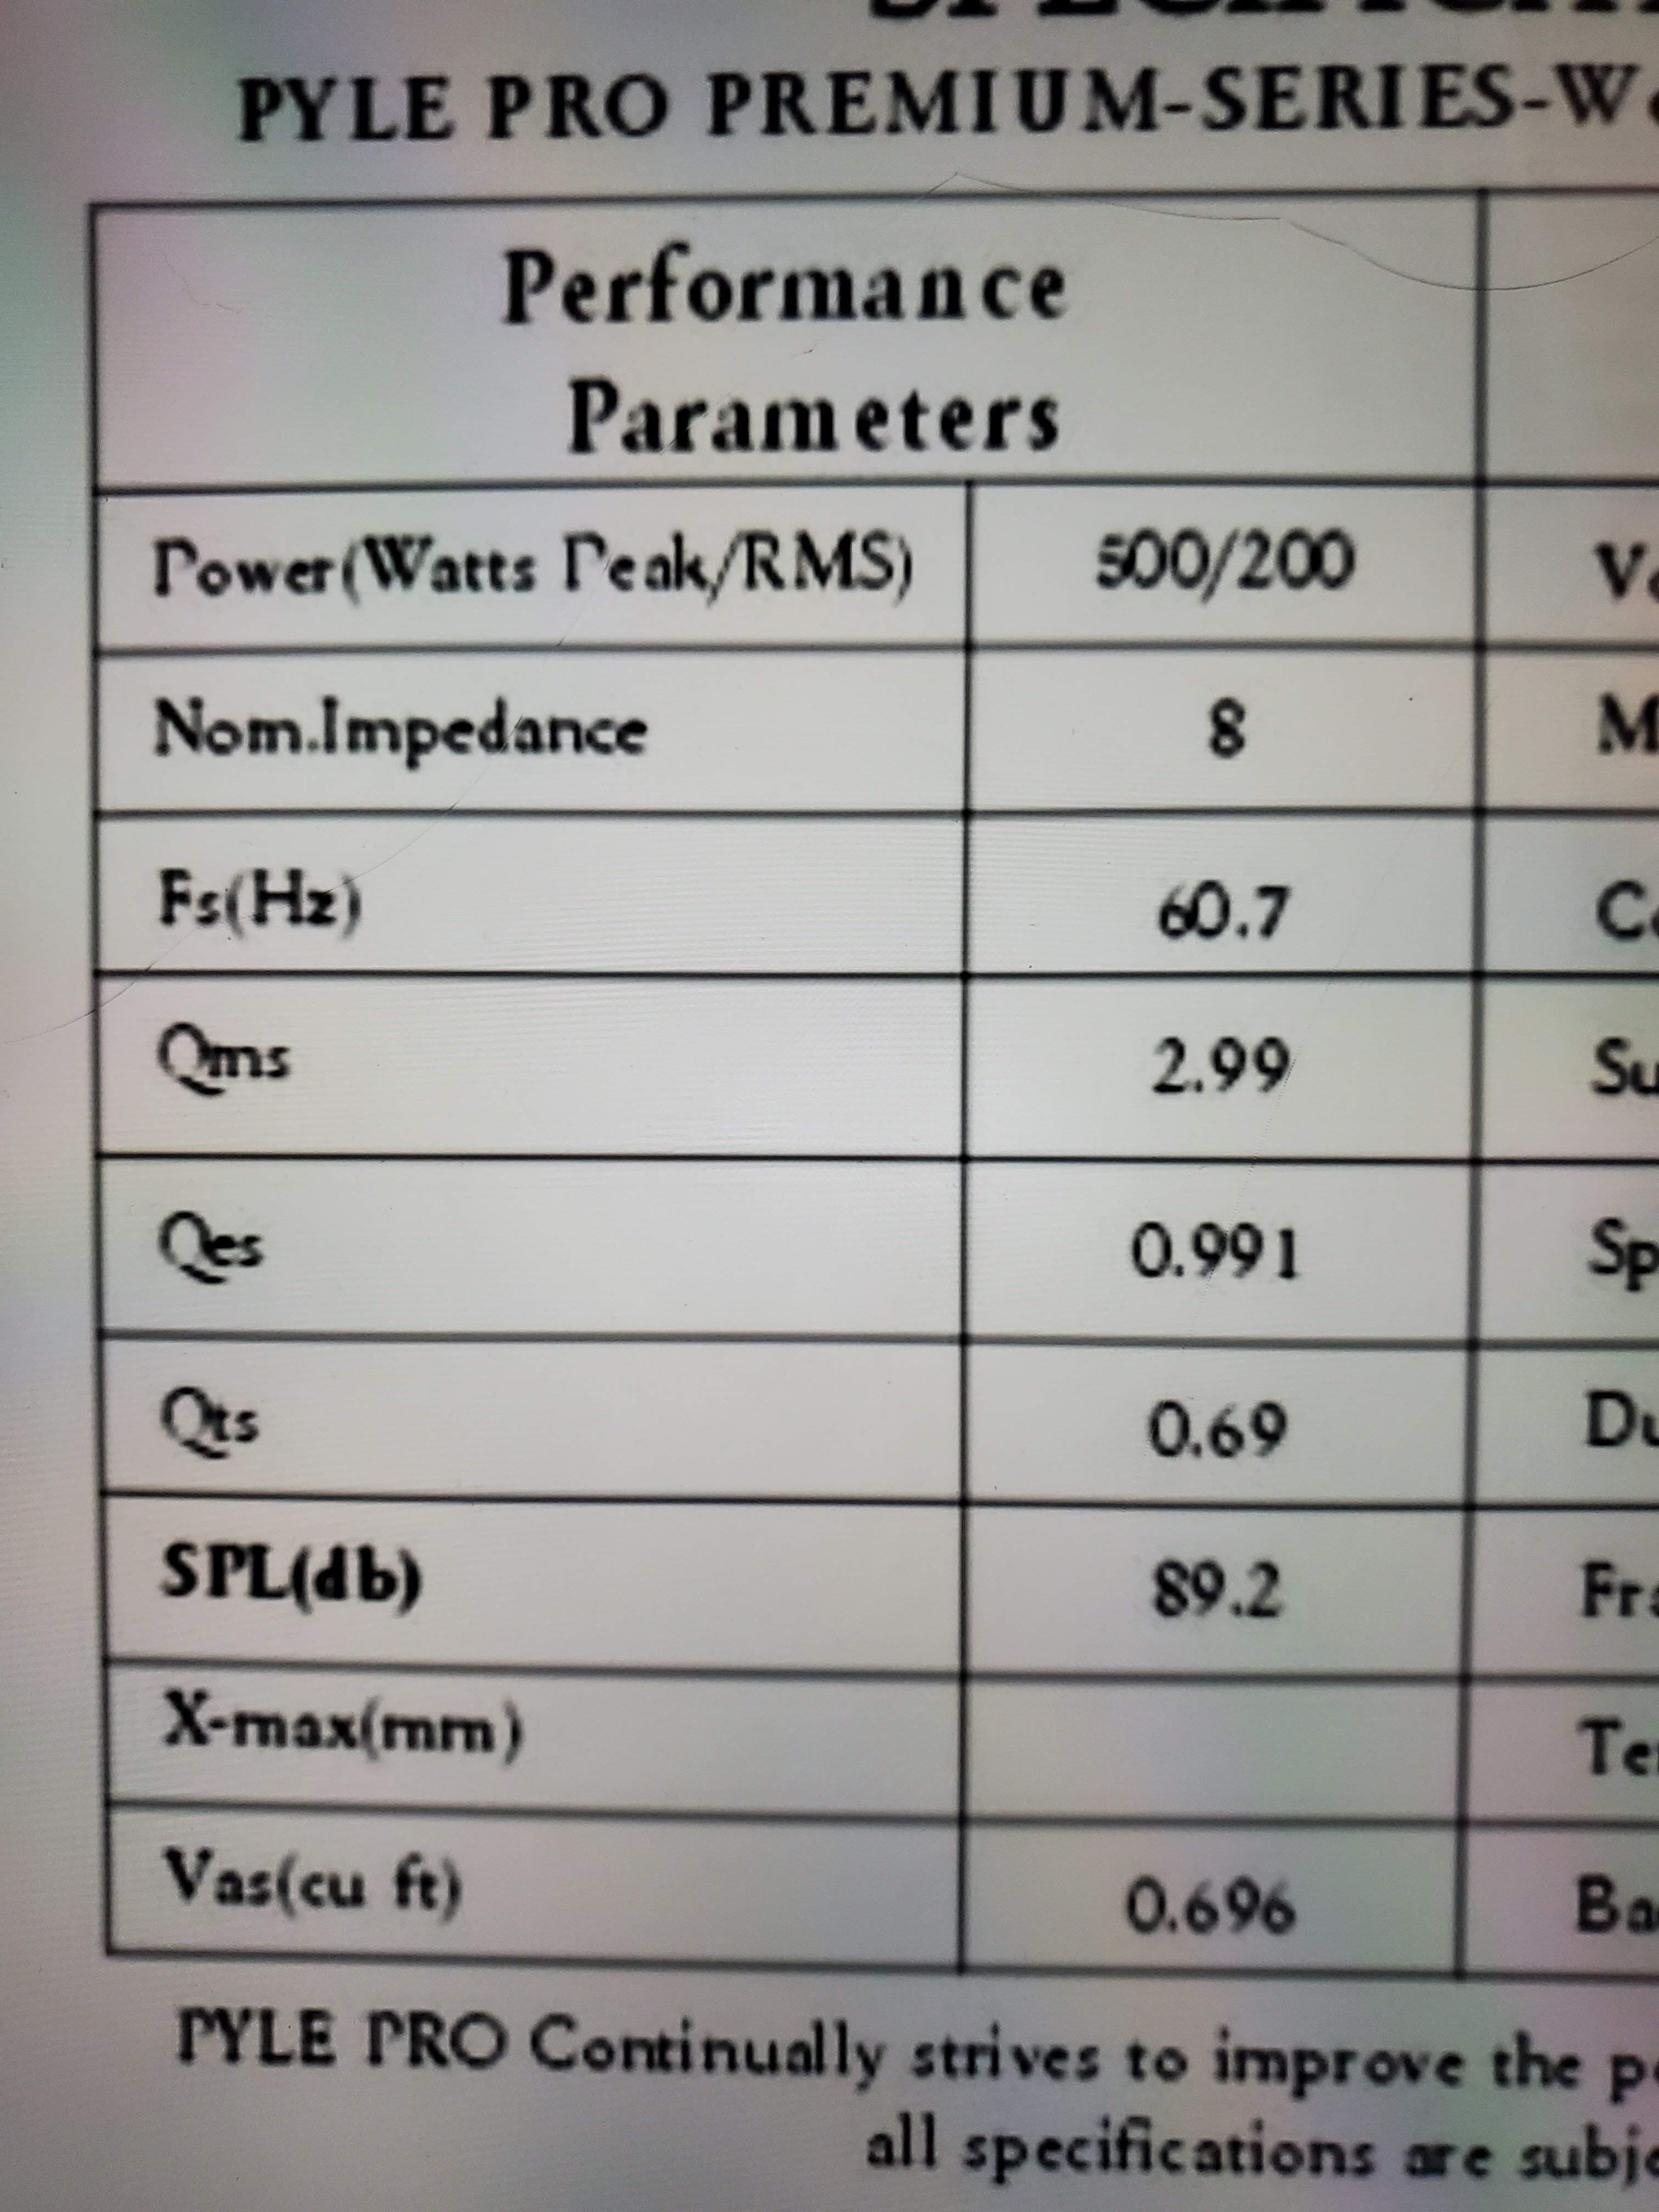
See the stats below:
Box calculator:
I tried WinISD, but my laptop resolution made it unreadable.
I ended up using a spreadsheet provided by YouTube's Audio Judgement (thank you!!). See what I ended up with here:


Build material:
Sande plywood from Home Depot, 1/2" thickness (actually 12mm). This is very light and nearly void-free. I had a full sheet leftover from a storage bench/couch I built a couple years ago. This is described as paint grade, and a hardwood. But's it does need sanding, and is fairly soft. It was warped, so I have to work around that. Since this is from scrap wood, I'm calling it Scrappy. I'm hoping it doesn't turn out to be crappy.
Box dimensions:
Volume is about 1.181 ft3
That worked out to be about 17" x 14" x 10" for the external size. I know that I didn't quite compensate for the driver volume (partially), and cab bracing. But, I kept the bracing design minimal since this is a low volume cab.
Weight:
I'm hoping for less that 20 pounds. I weighed just the six outer panels, and the driver together, and came up with 15 pounds even. With the port tube, bracing, foam, and hardware, I expect another pound or two.
Like JdoubleH's approach, I plan on recessing the handle so that the Gnome sits easily on top. Instead of using plywood to create the recess, I'll use a some fancy aluminum that I've had lying around from my Jeeping days. It's about and 1/8" thick, and will not take up much internal volume, but provide enough rigidity for the purpose.
Handle:
I bought a strap handle from Amazon, but it turned out longer than advertised. I might make it work, but am hesitant to try. I might order a different one.
Cab corners:
Although I'm kind of wanting a vintage look for this cab, I know from experience that metal corners can let a cab slide around in a vehicle, and can be tough on fingers. Plus, they would require separate rubber feet to be added to the cab. Because of these factors, I went with the stackable plastic corners. I don't expect to make a second cab that will stack. But, these corners will keep the cab from sliding around as much, won't scratch up things, and will eliminate the need for rubber feet.
Port:
I went with the spreadsheet suggestion for a 3" diameter tube. The tube is a shipping tube from UPS, and only cost $5! I committed to the tuning when I incorporated the tube support into the cab bracing. I reduced the length of the tube from 5.8" to about 5.5" due to the modest flair routed at the ends. The length is now fixed.
How will it sound?
Not sure. I know that I risk pushing driver extension in the low frequency tuning. I'm hoping that the low volume needs, and the inherent inefficiency of the driver will keep things in check in the low end. The Qms of 2.9 seems to suggest high damping of the driver, and maybe a flatter response, but I'm at about 7,000' in elevation, which could possibly play a part. We'll see.
Here are pics of the build.
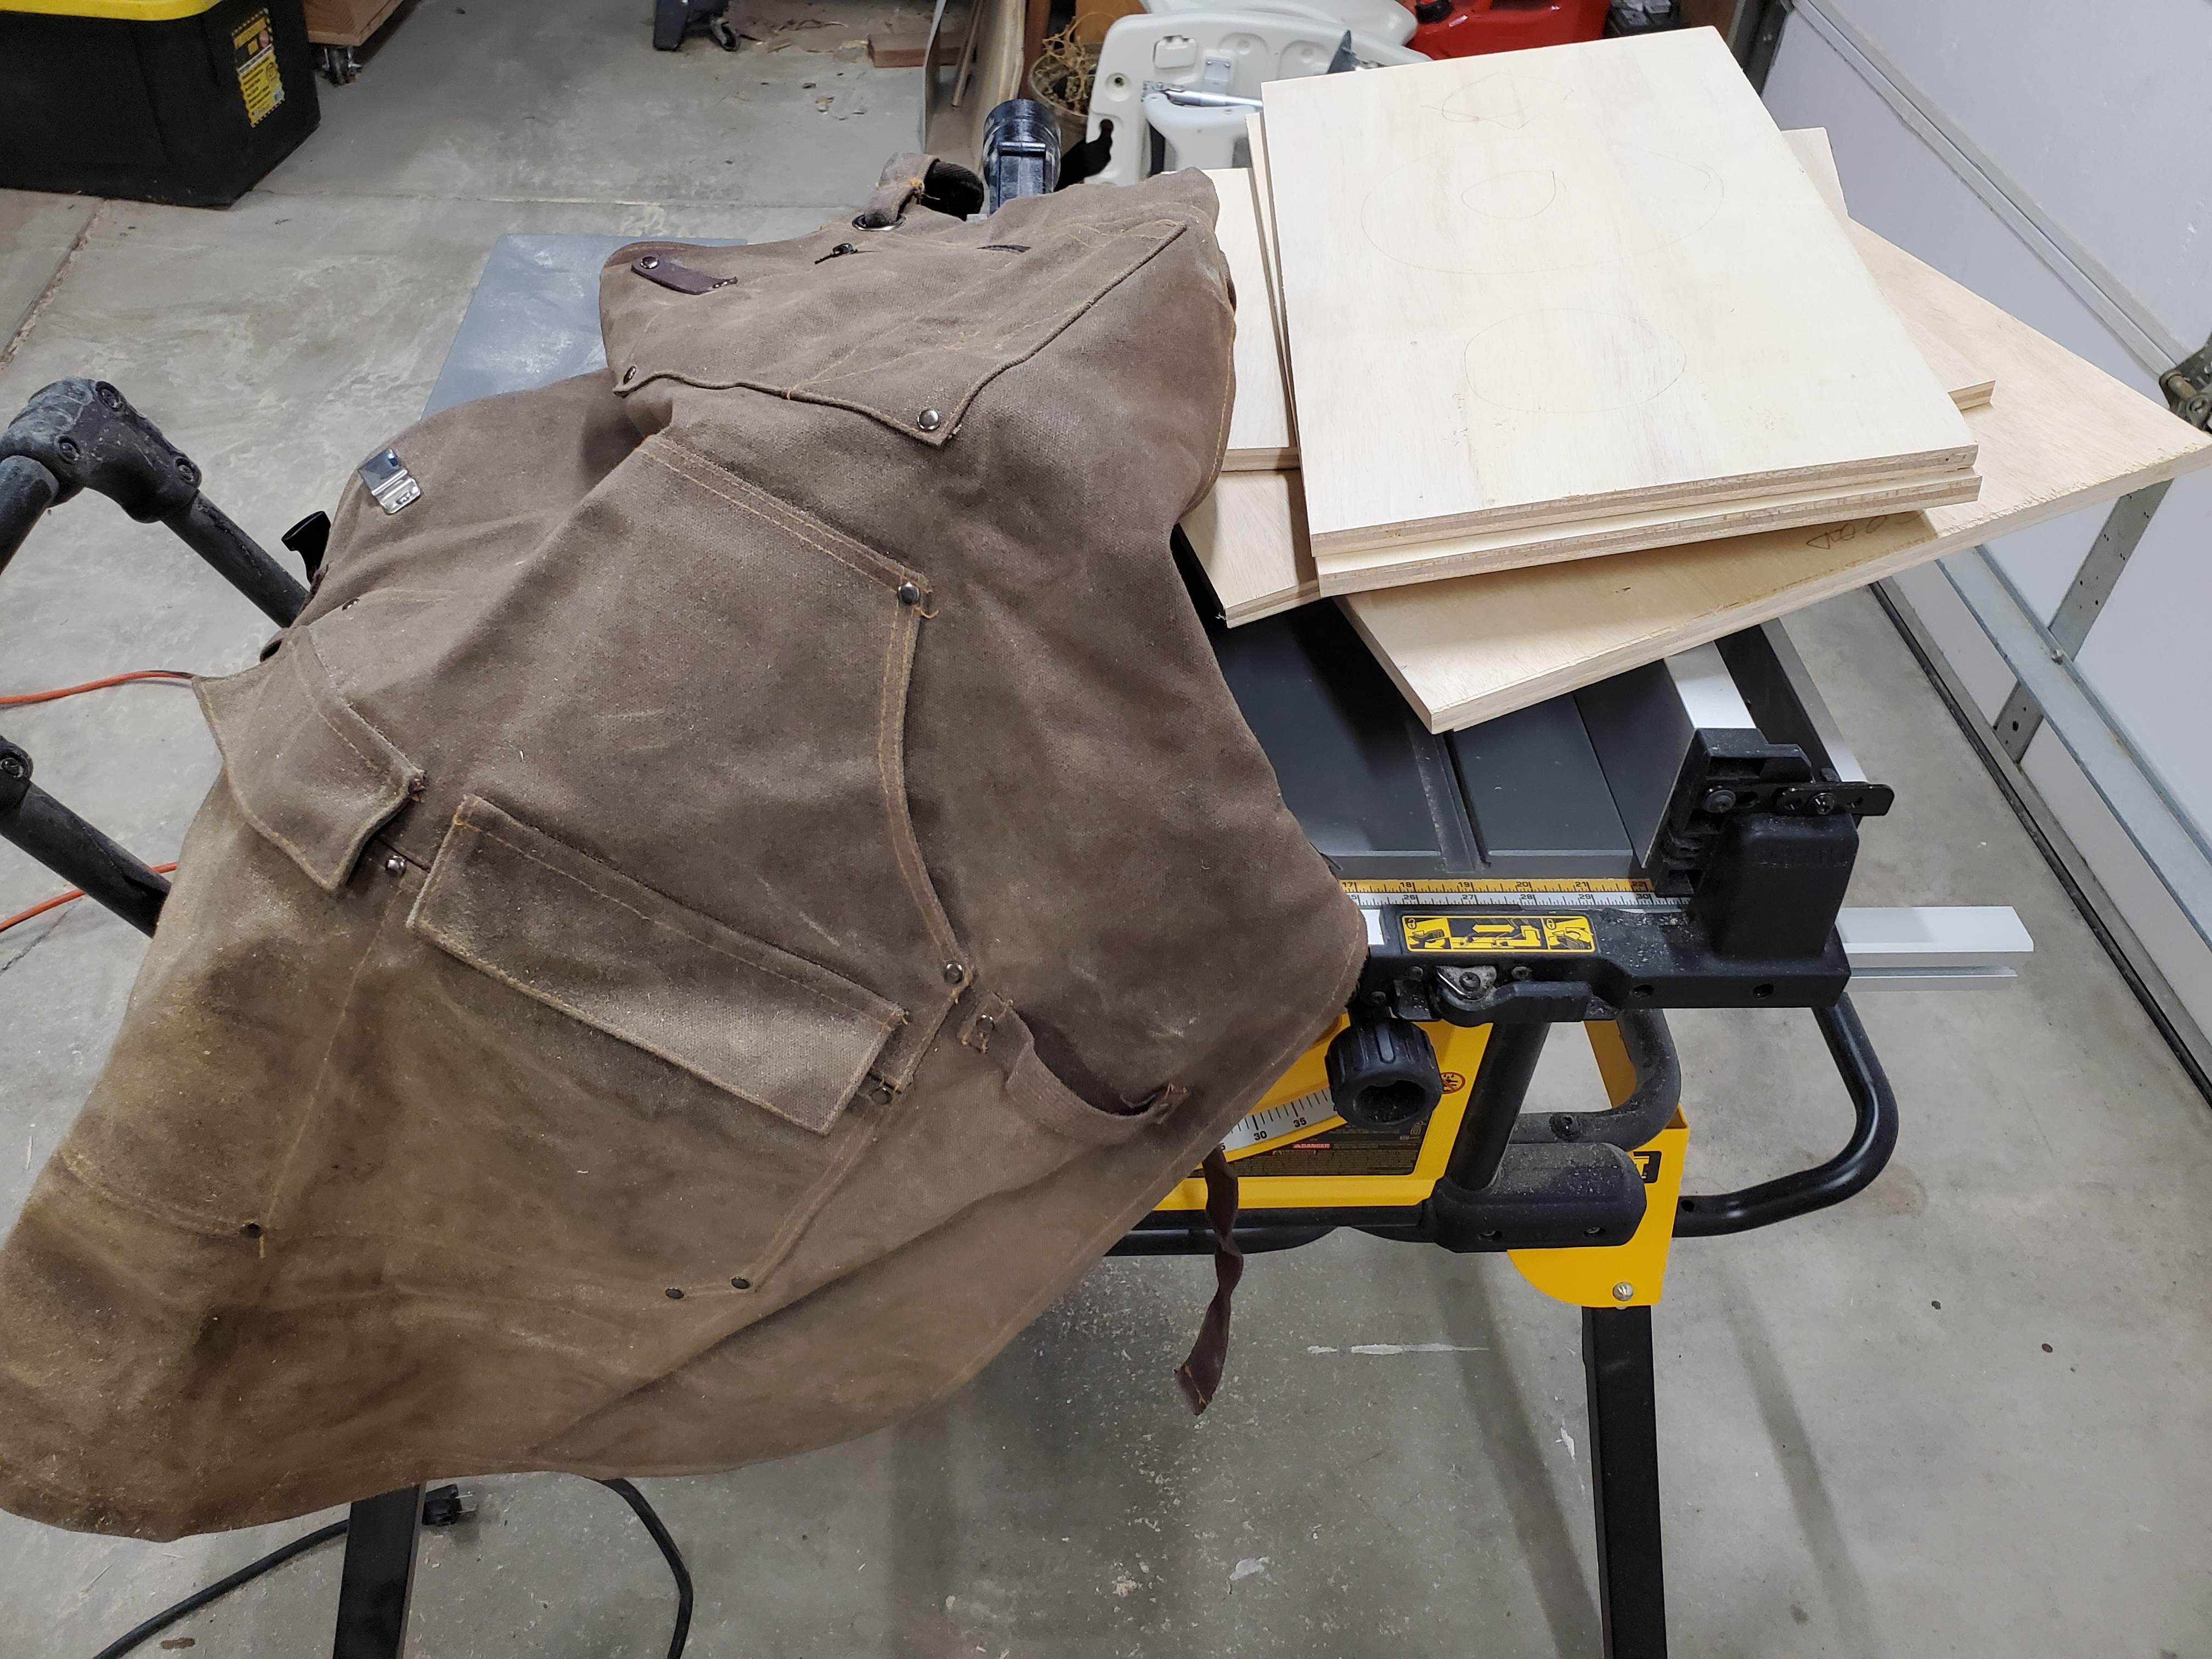
Panels, cut to size:
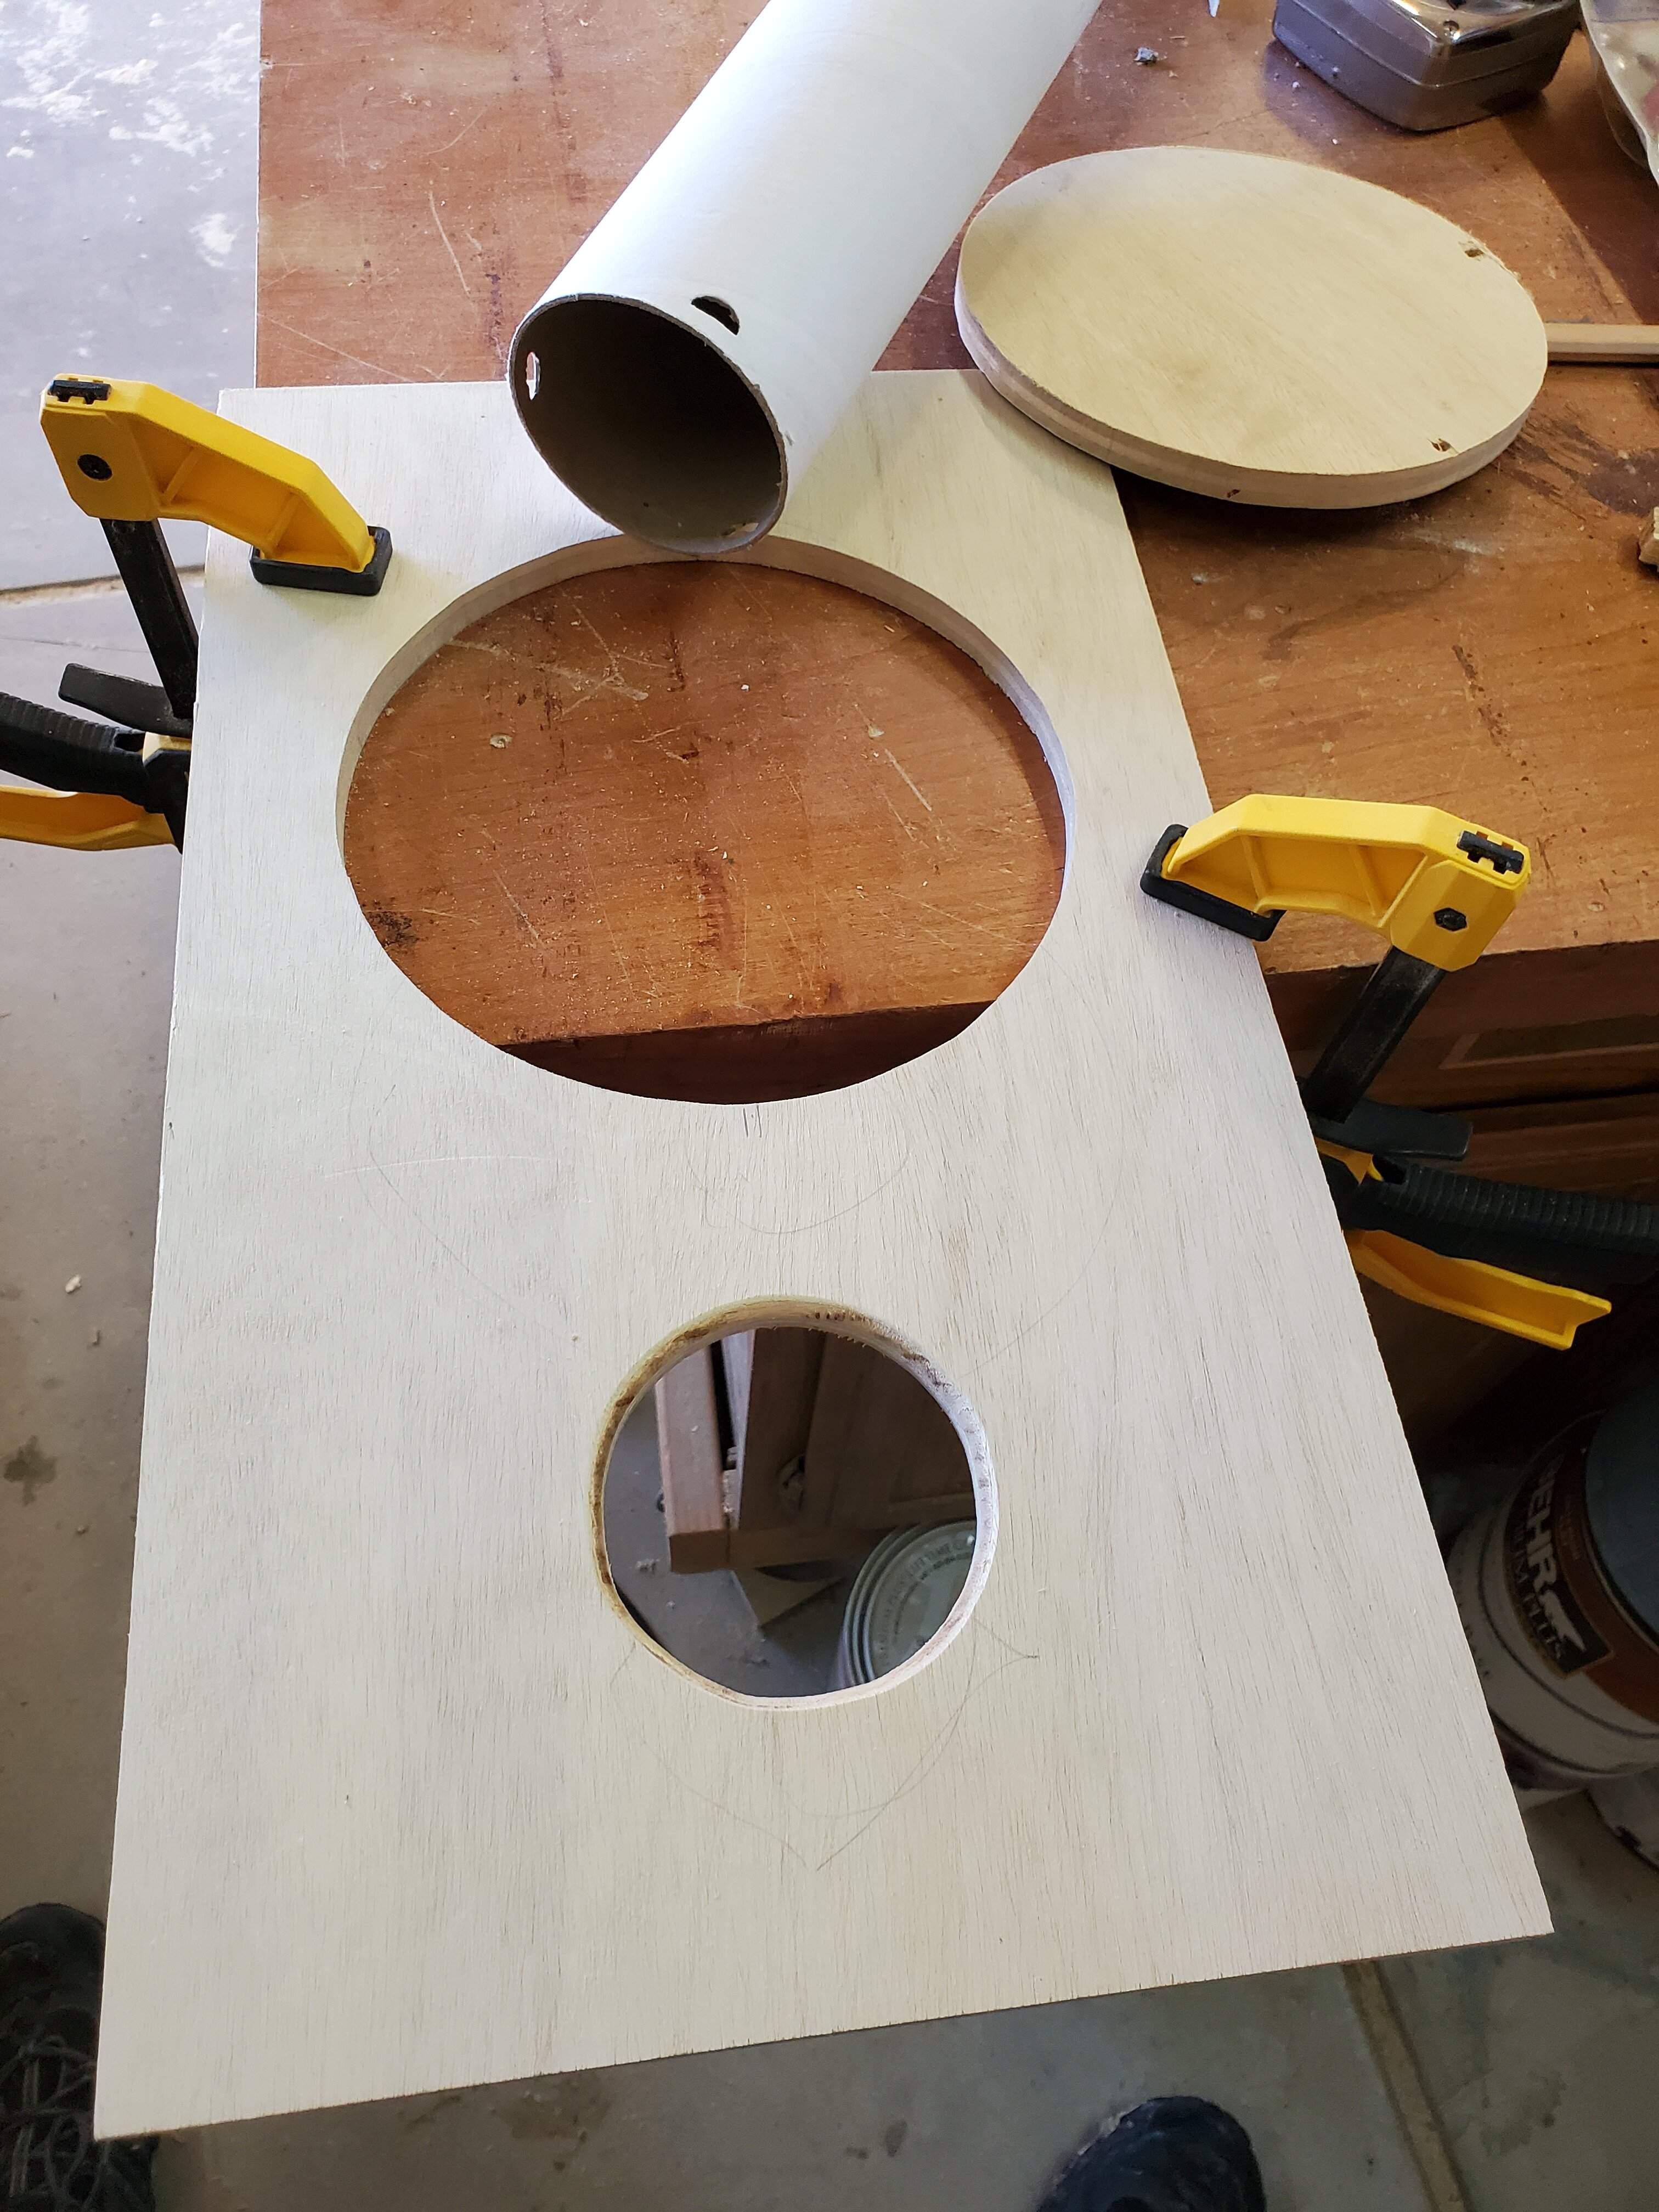
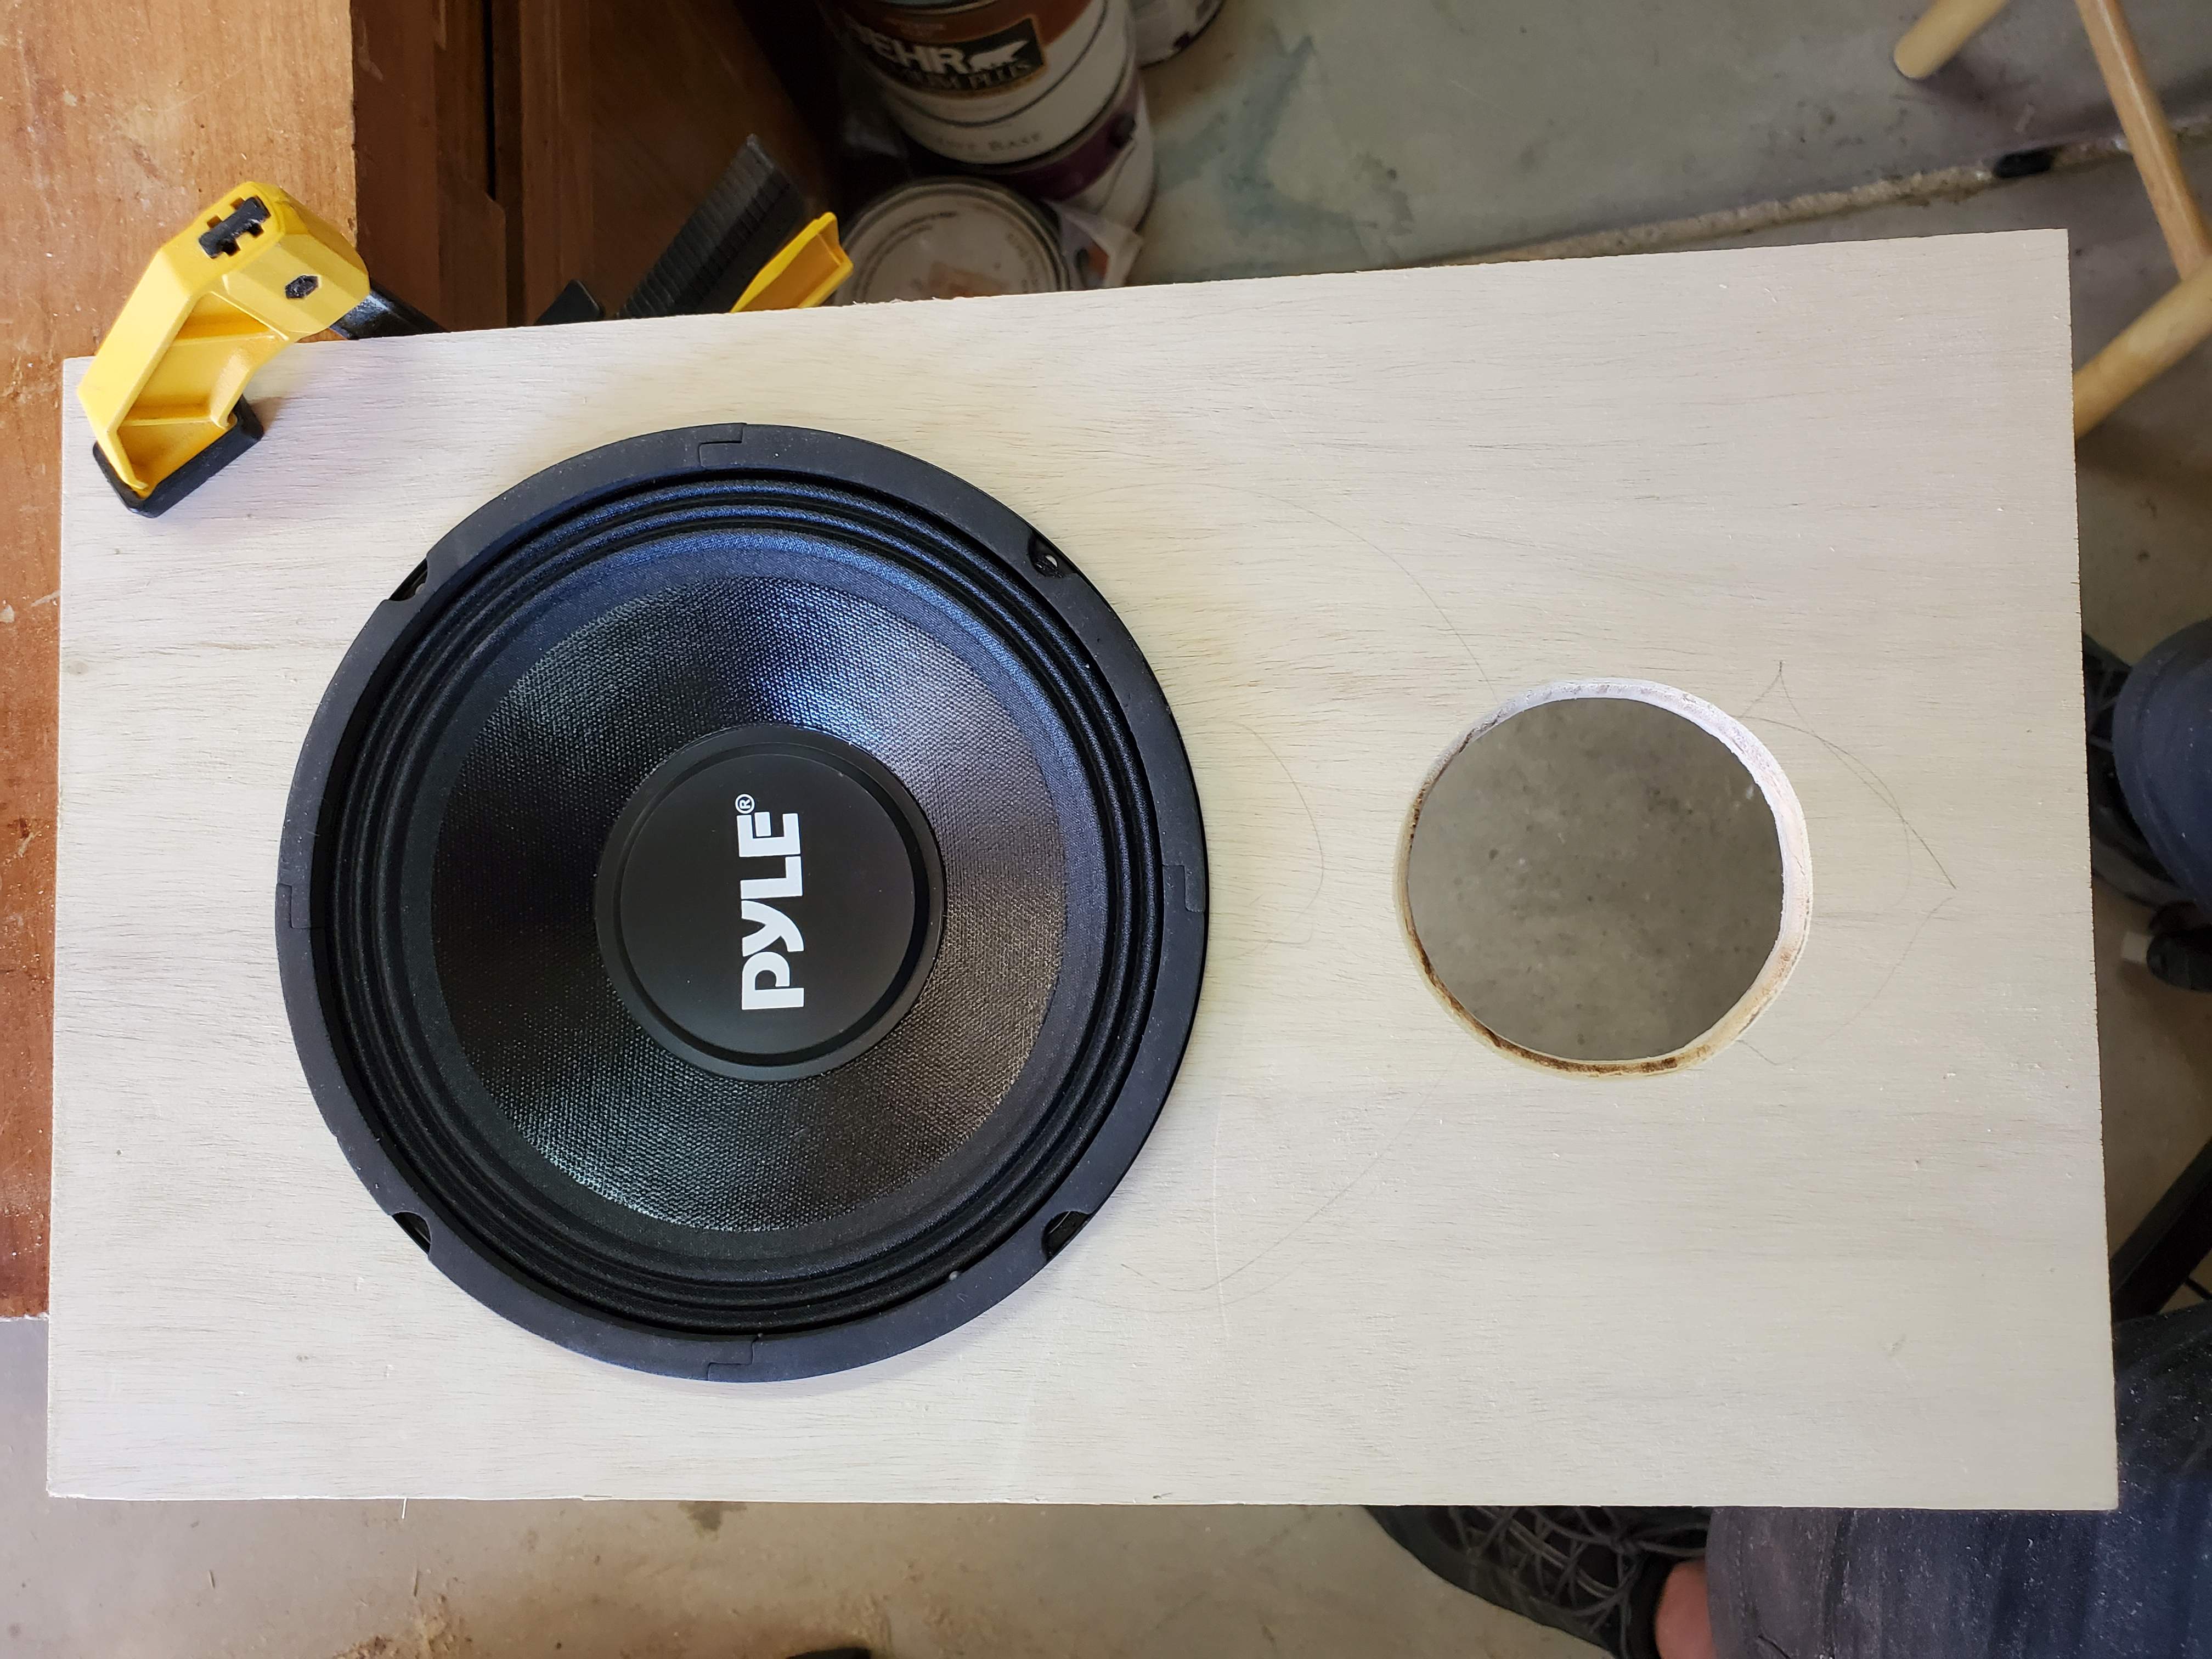
Baffle with driver, and port cutouts. Life Bill Fitzmaurice says, (paraphrased) "people buy with their eyes, not their ears". I centered the driver, and port, but tried to leave room for a future tweeter, if needed. I got lazy and used the scroll saw. Don't judge me!
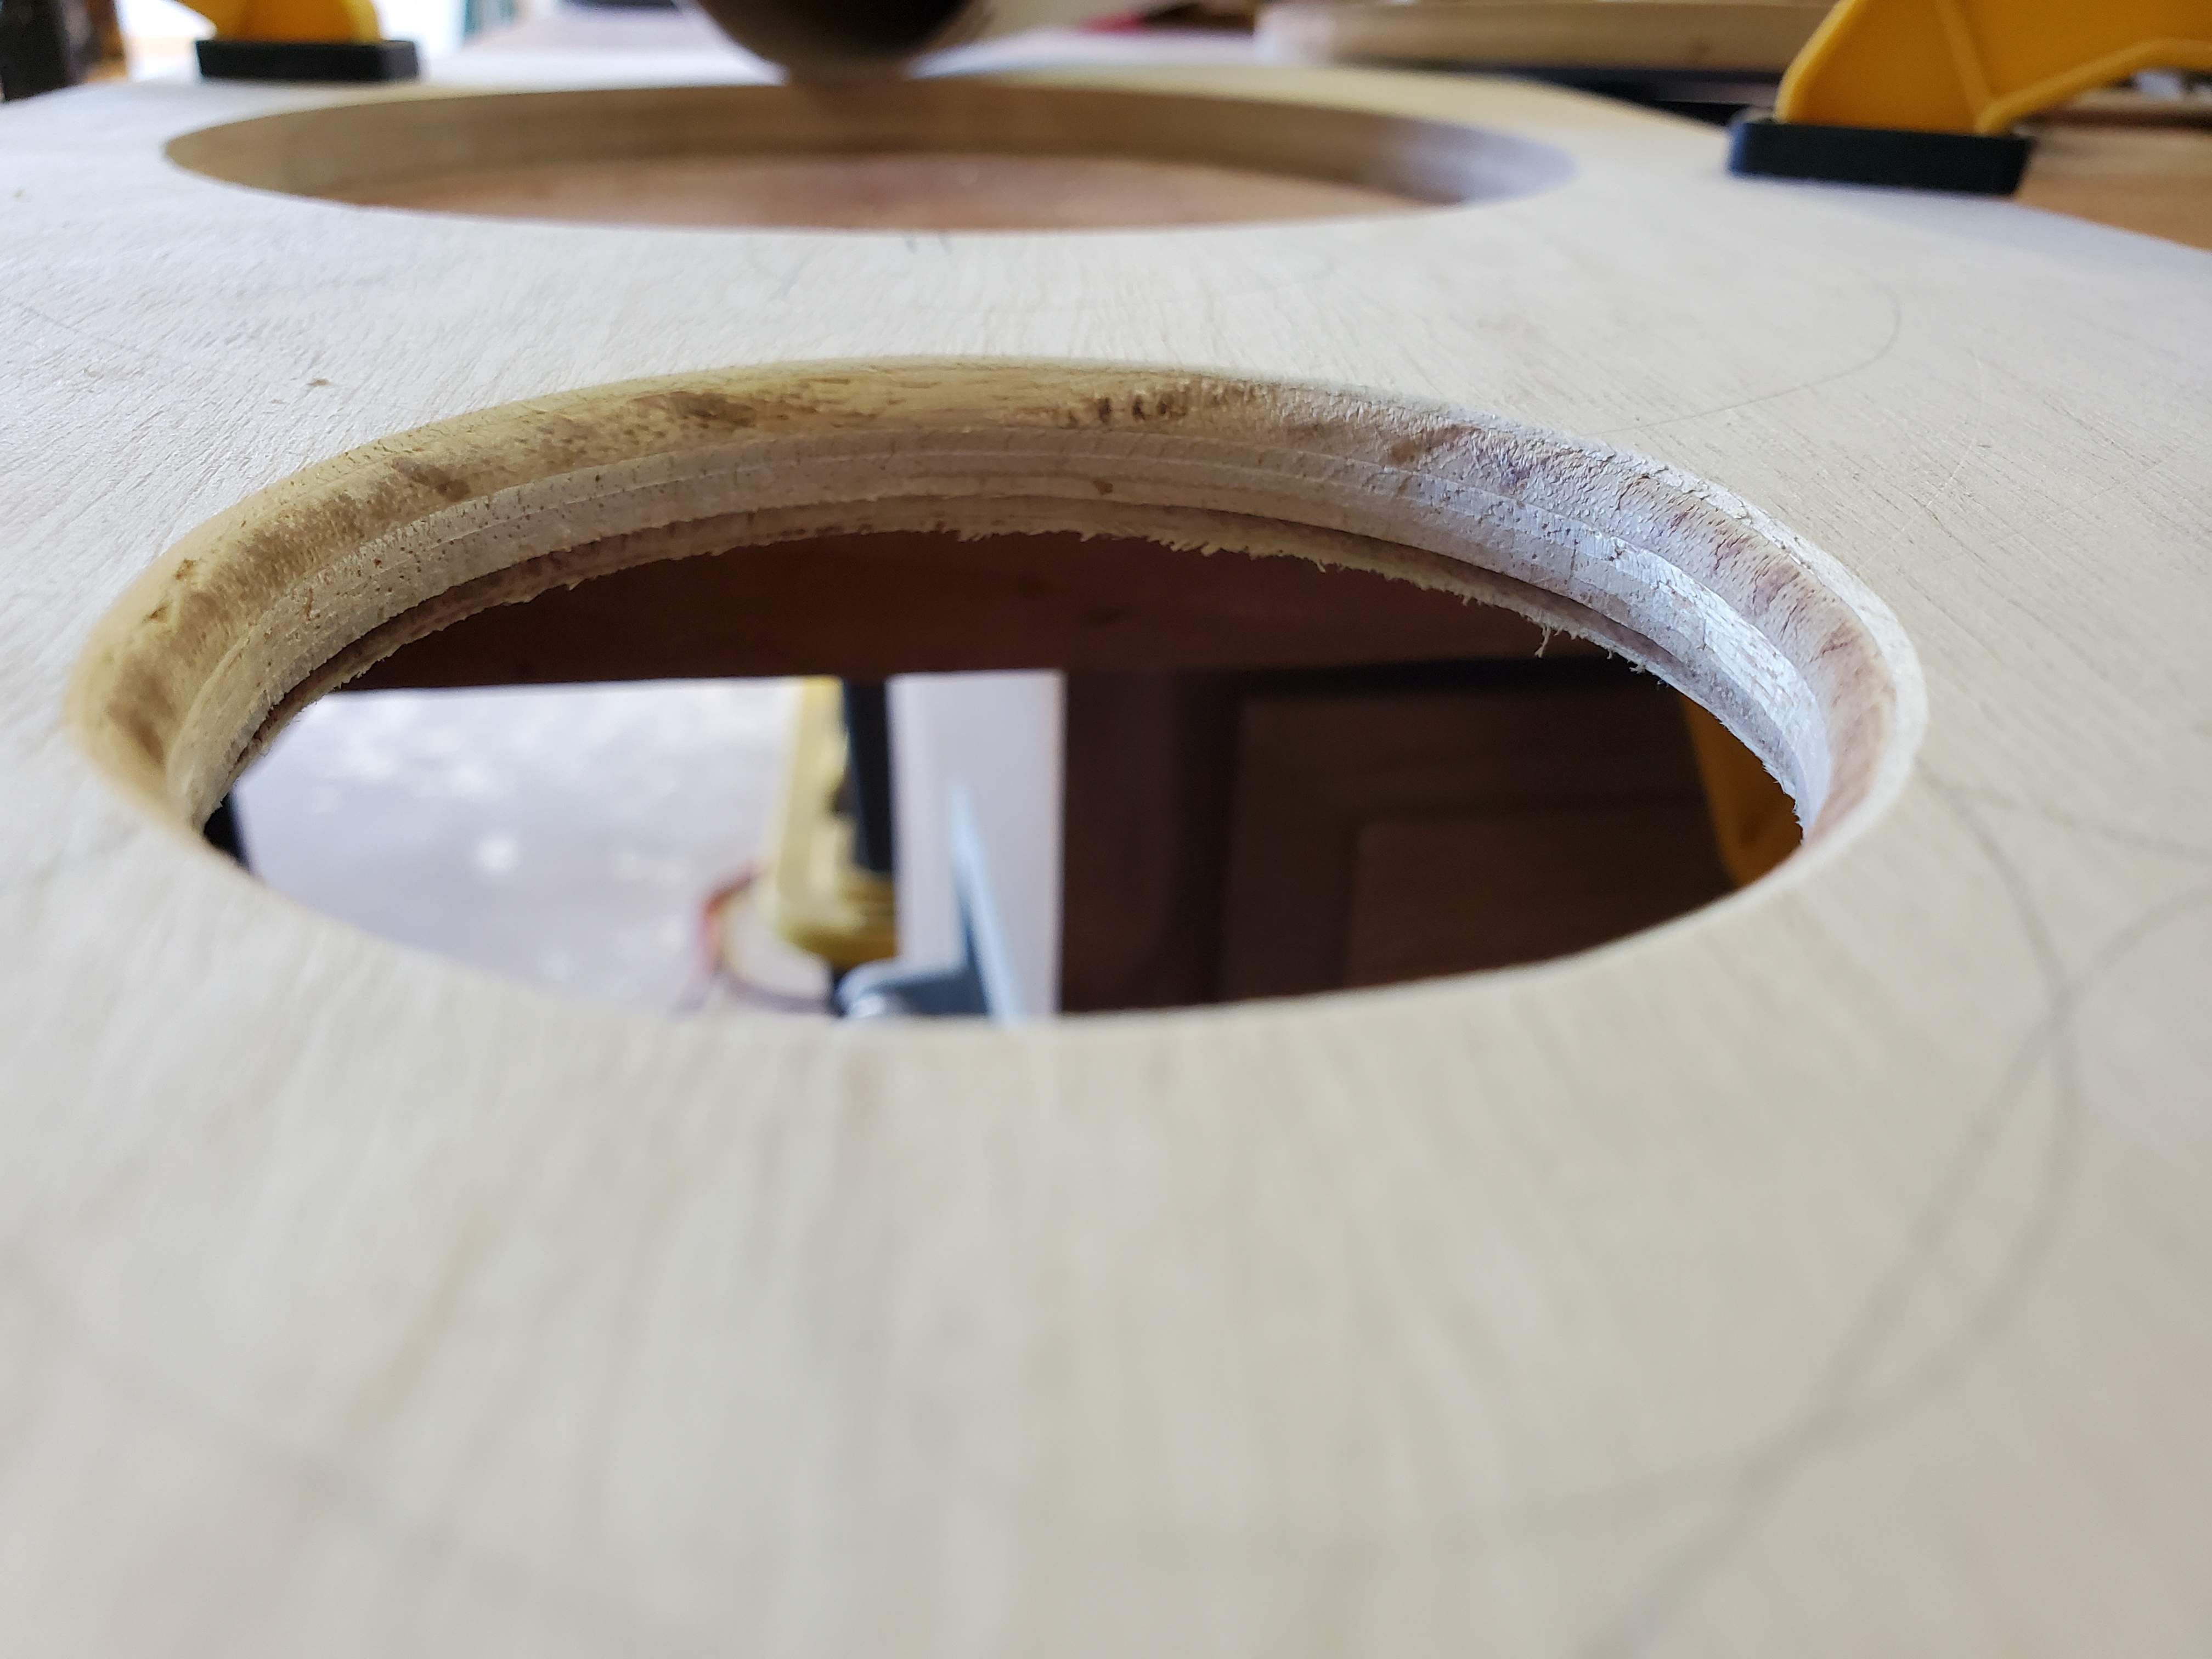
I rounded over the outside of the port for a cheap flare, which probably won't be that effective.
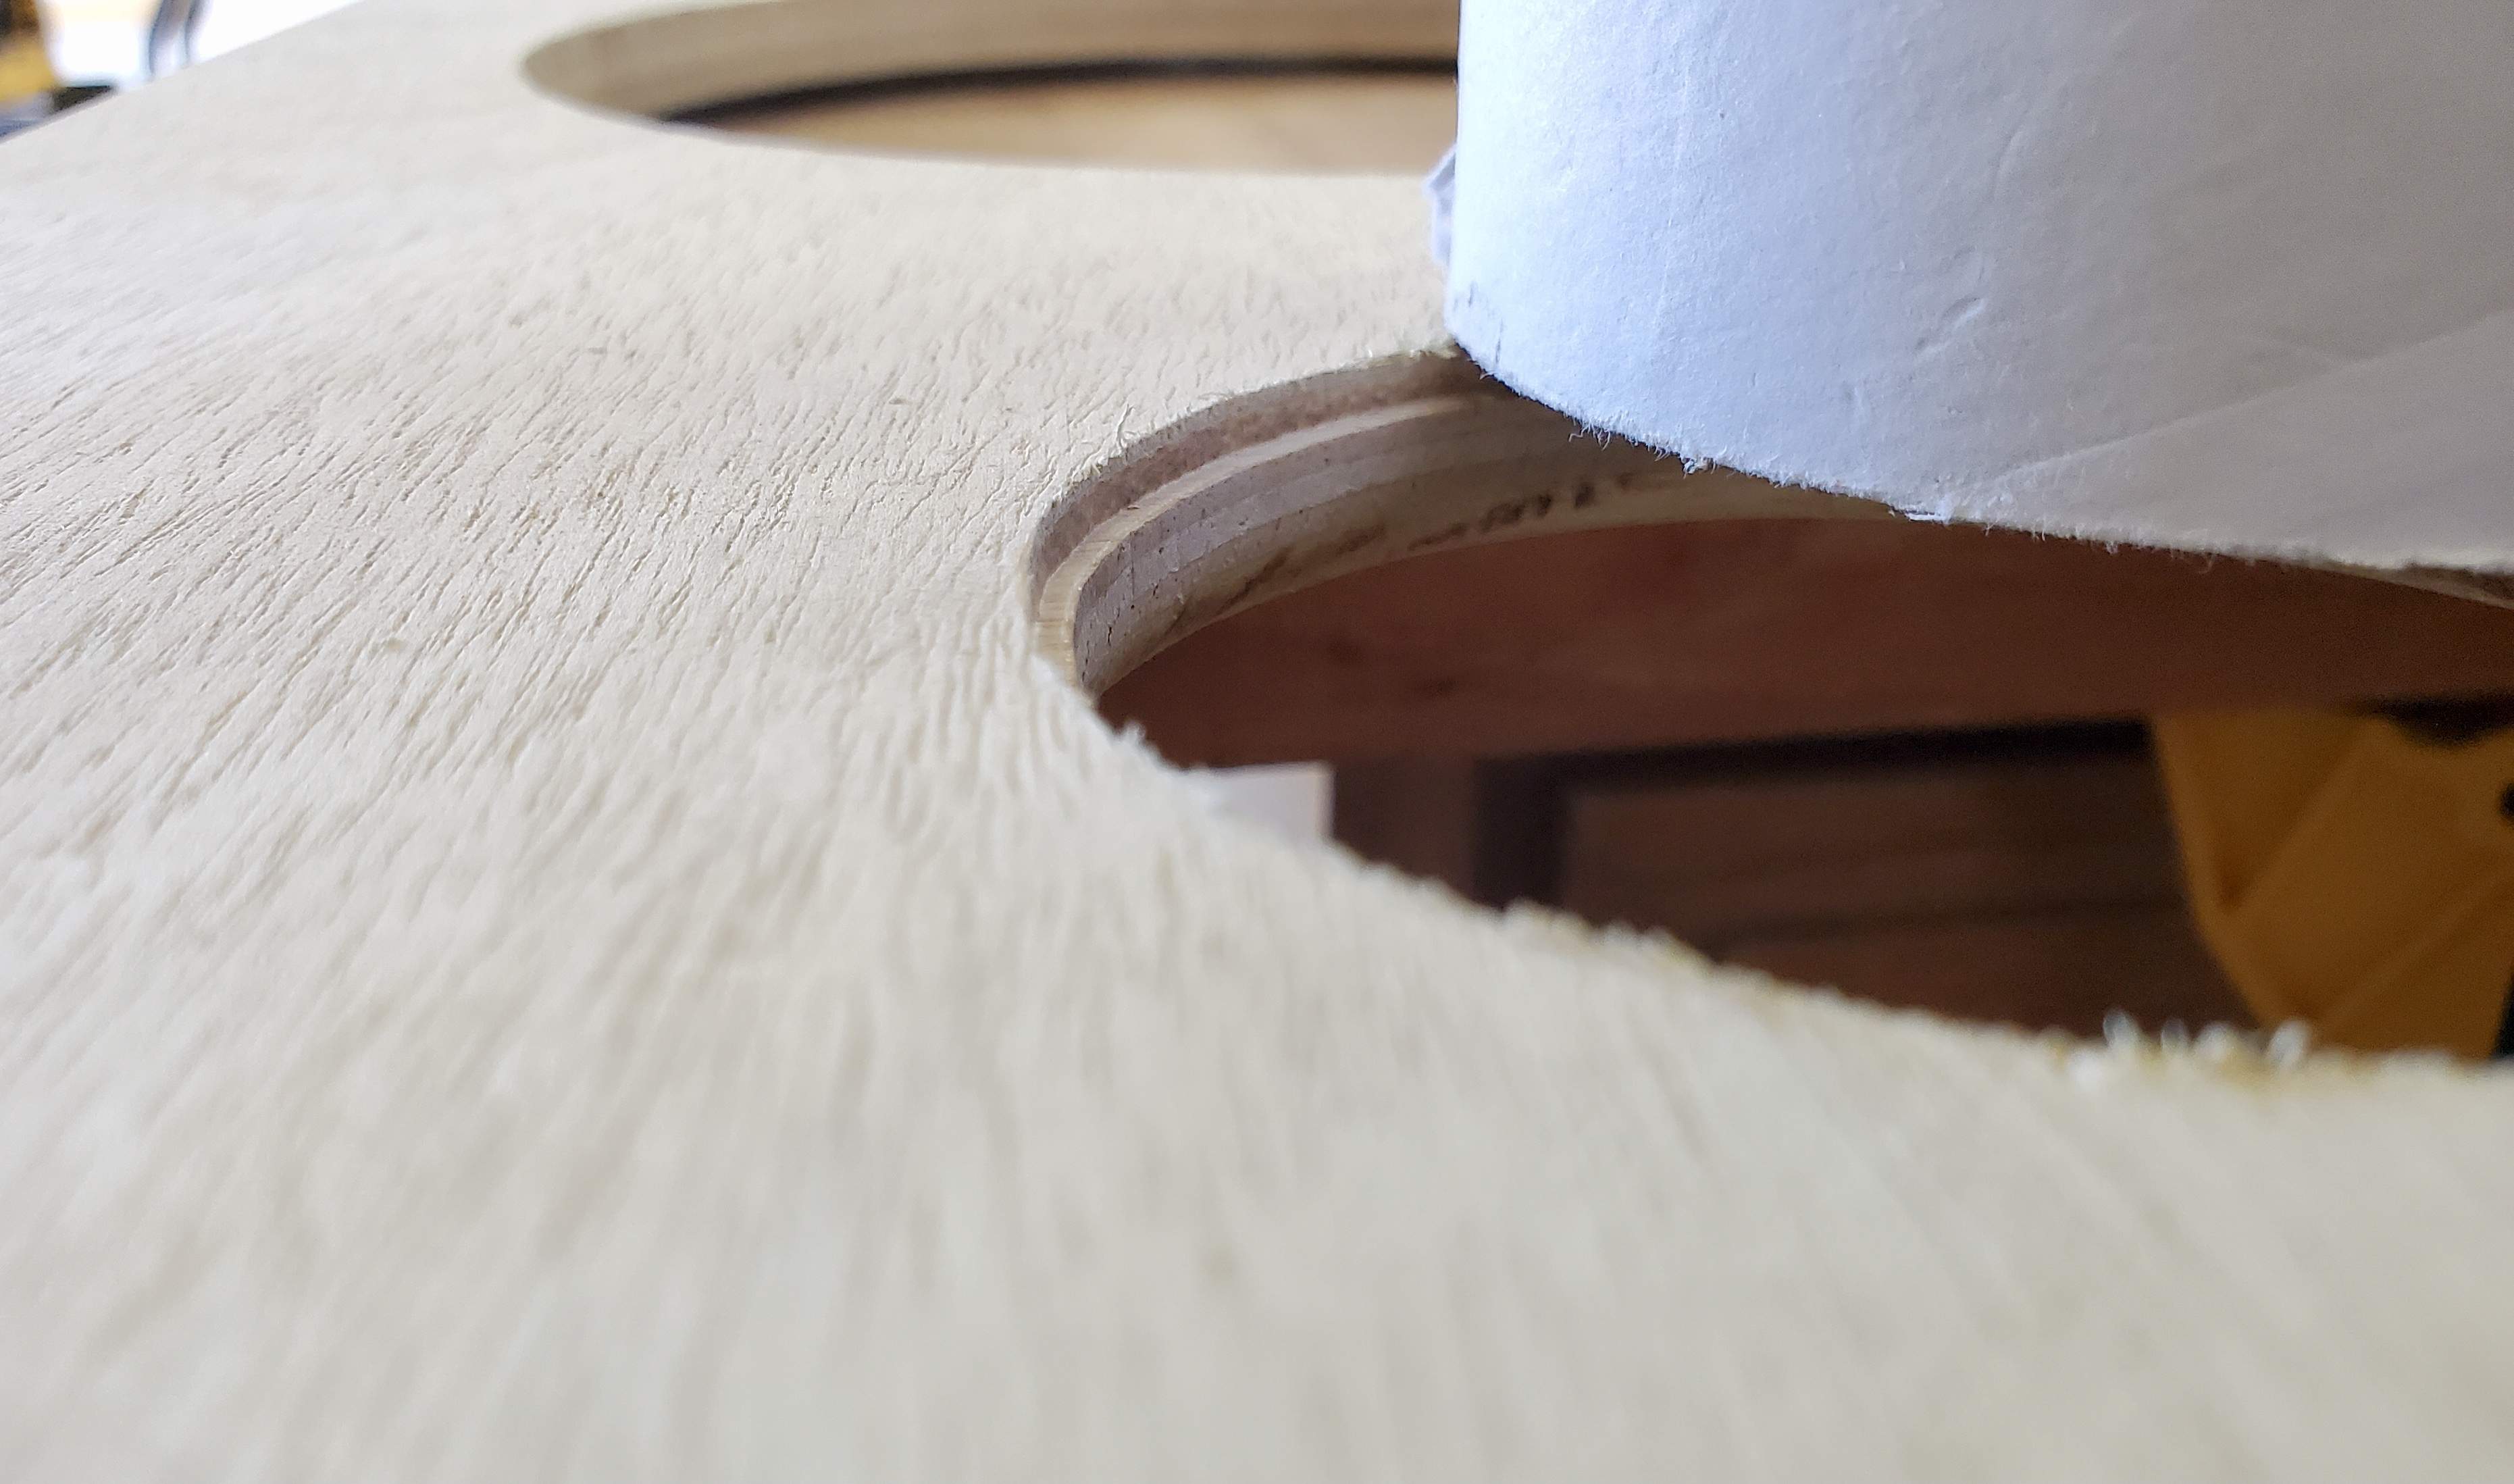
I recessed the back of the baffle to hold the port tube. This was eyeballed, not measured (again, no judging, please)
Behold the $16 Pyle driver:
Here's the vertical brace which will also hold the back end of the por tube. The port hole was flared, and recessed because I could, and it will help me sleep at night knowing I did it. I knocked this out with the saber saw because it doesn't need to be 'CNC pretty' (also because I don't have a CNC machine).
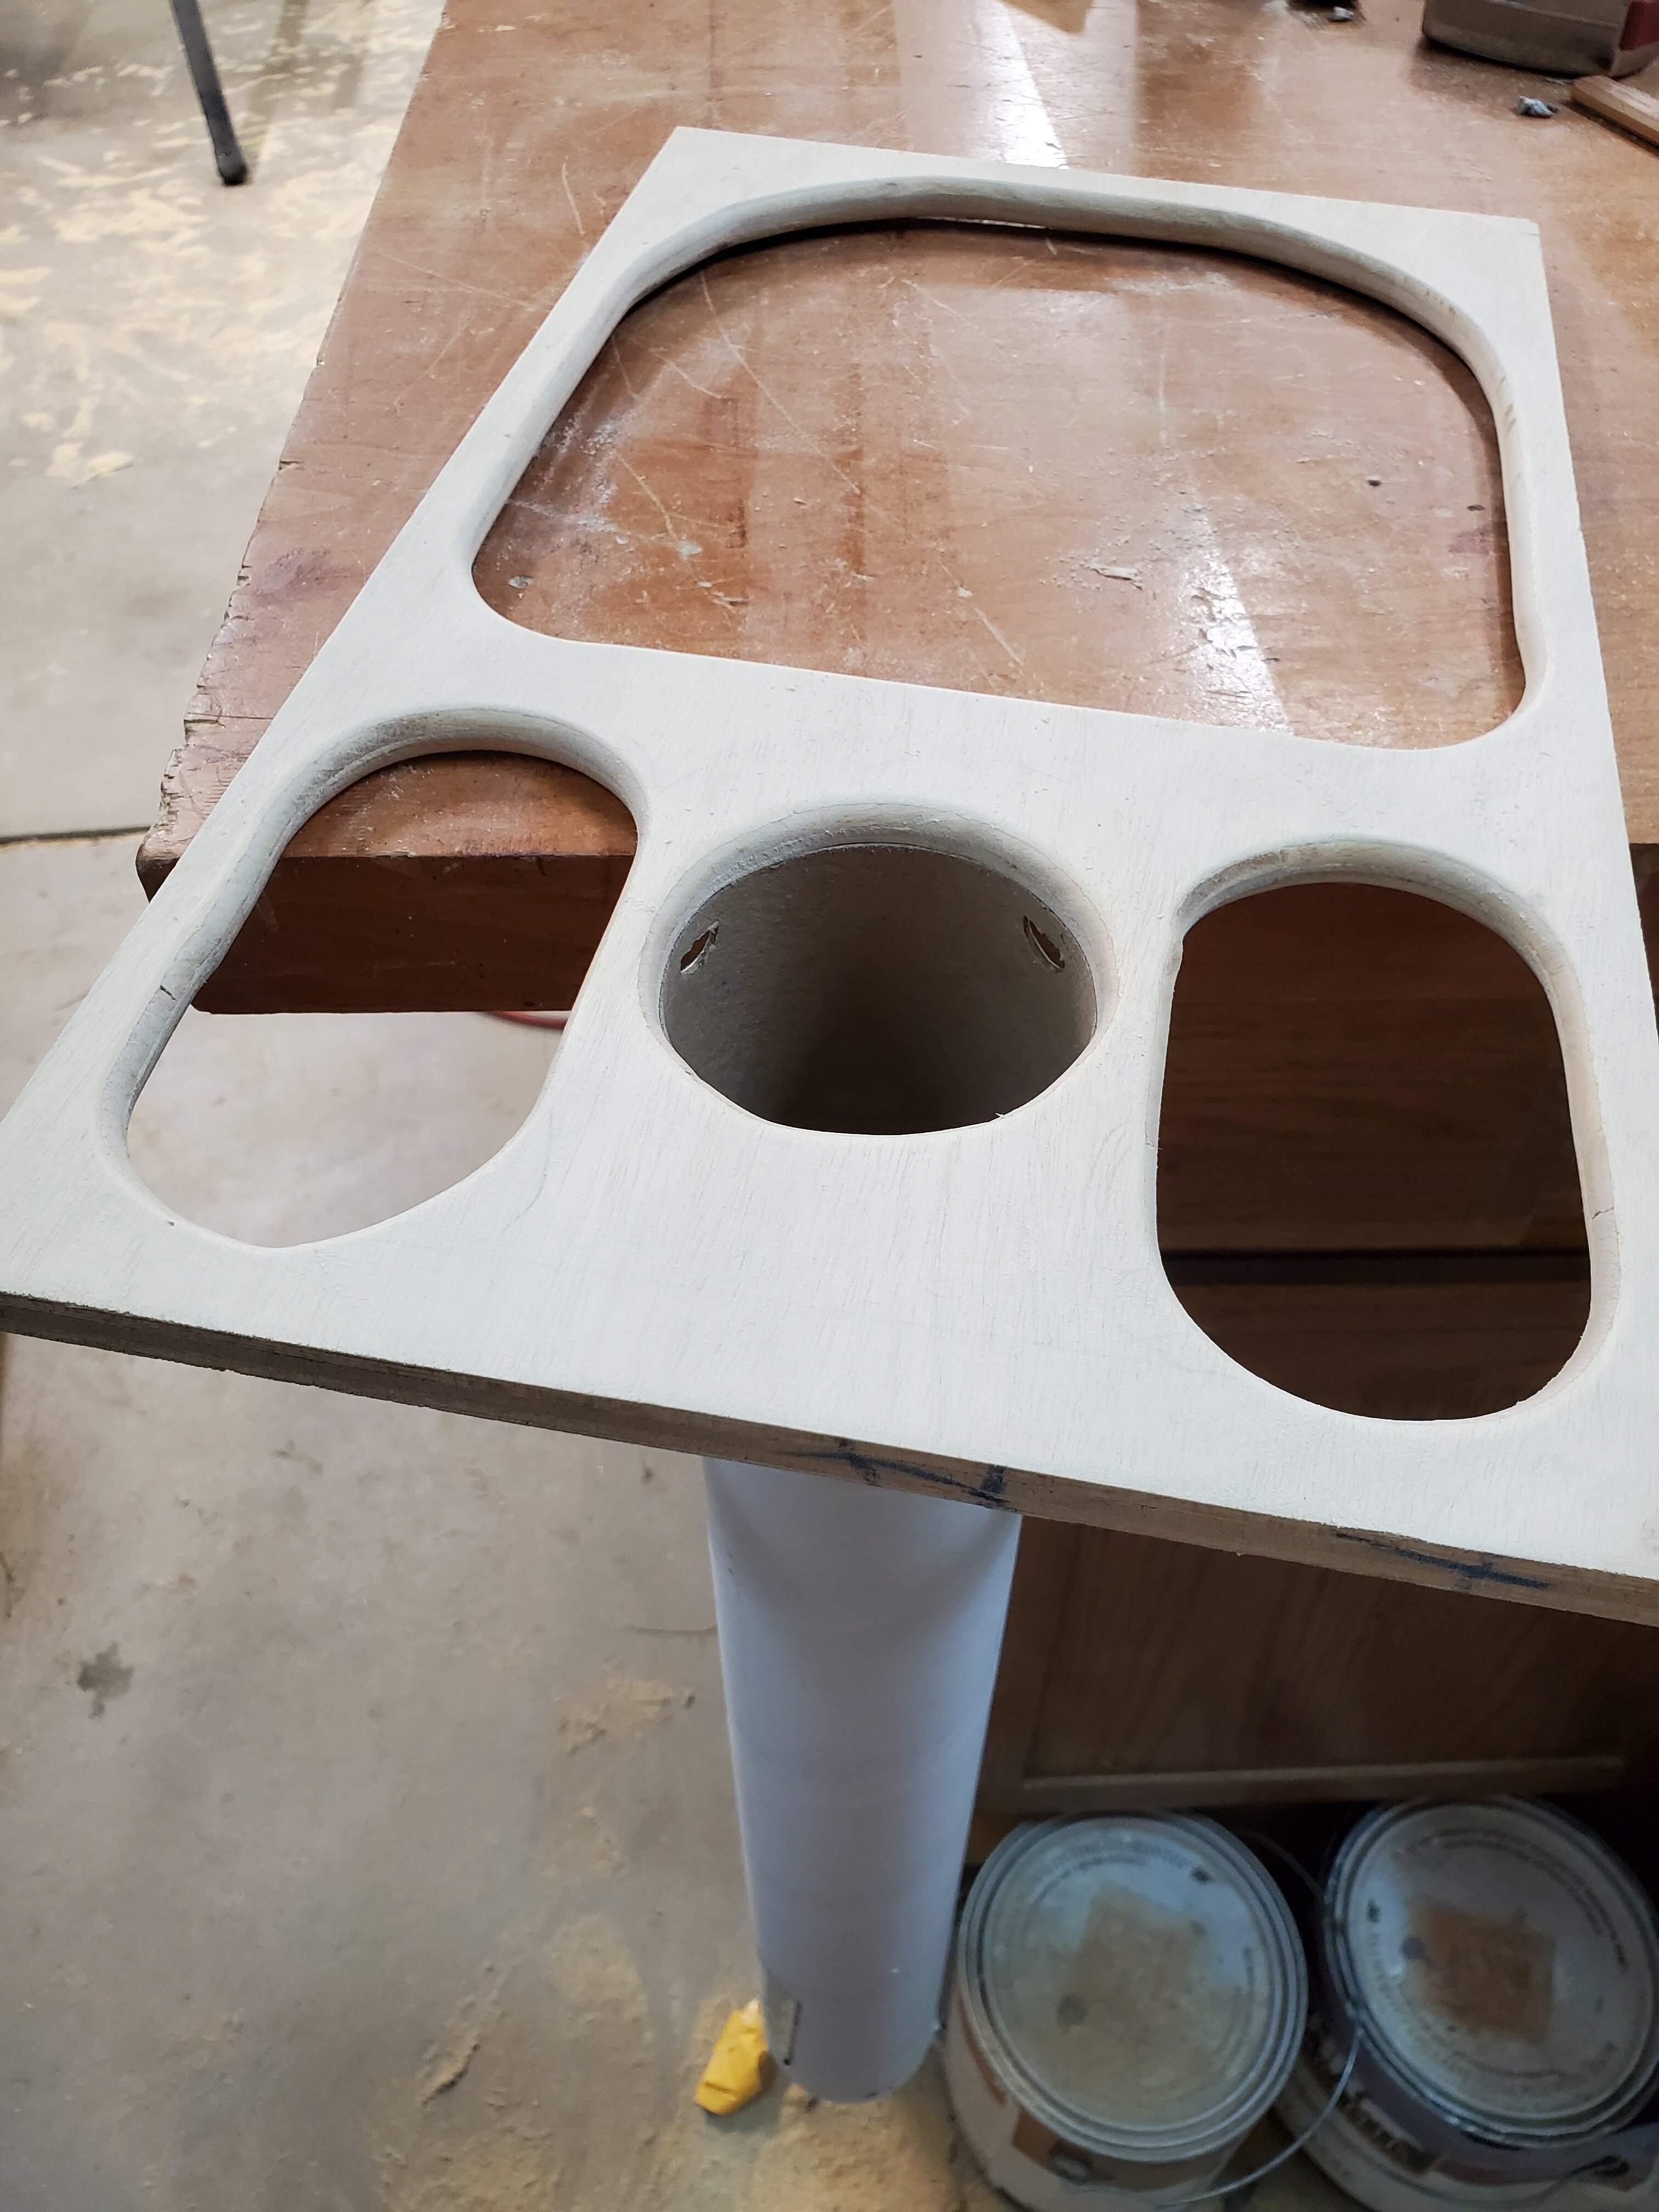
Note that this is just a test fit of the tube.
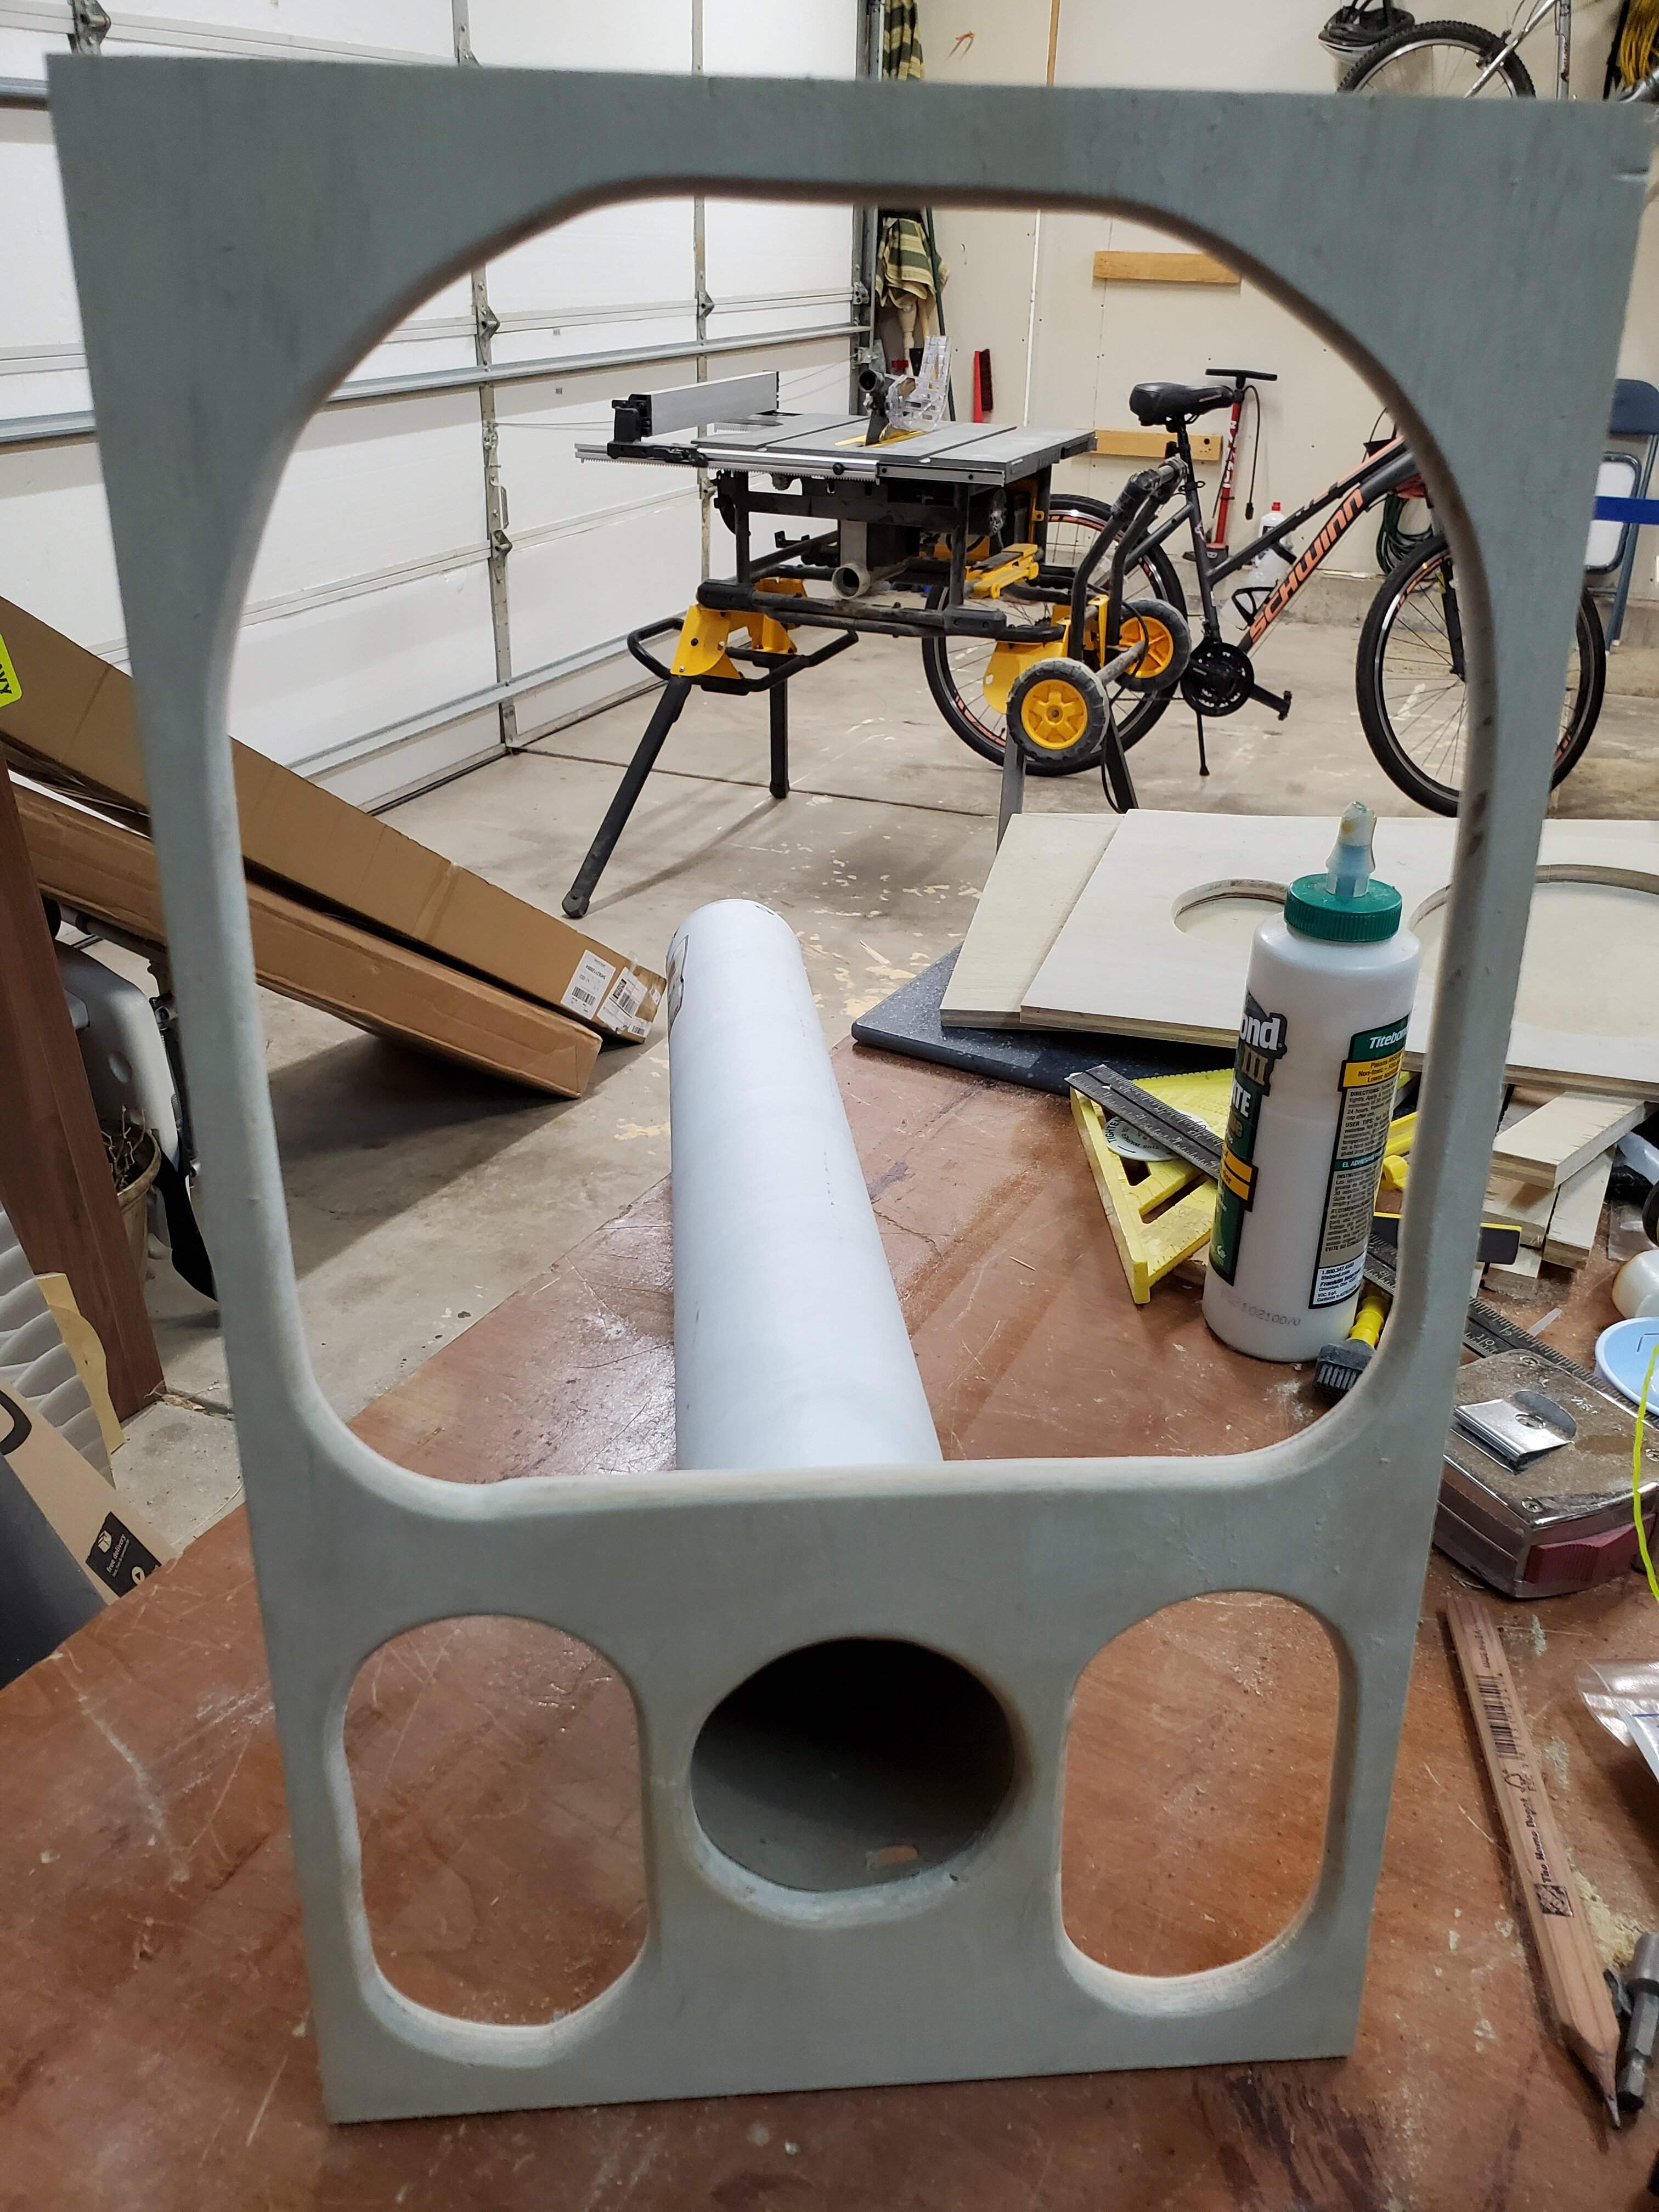
Baffle and brace meet in what will be a forever a totally tubular relationship.
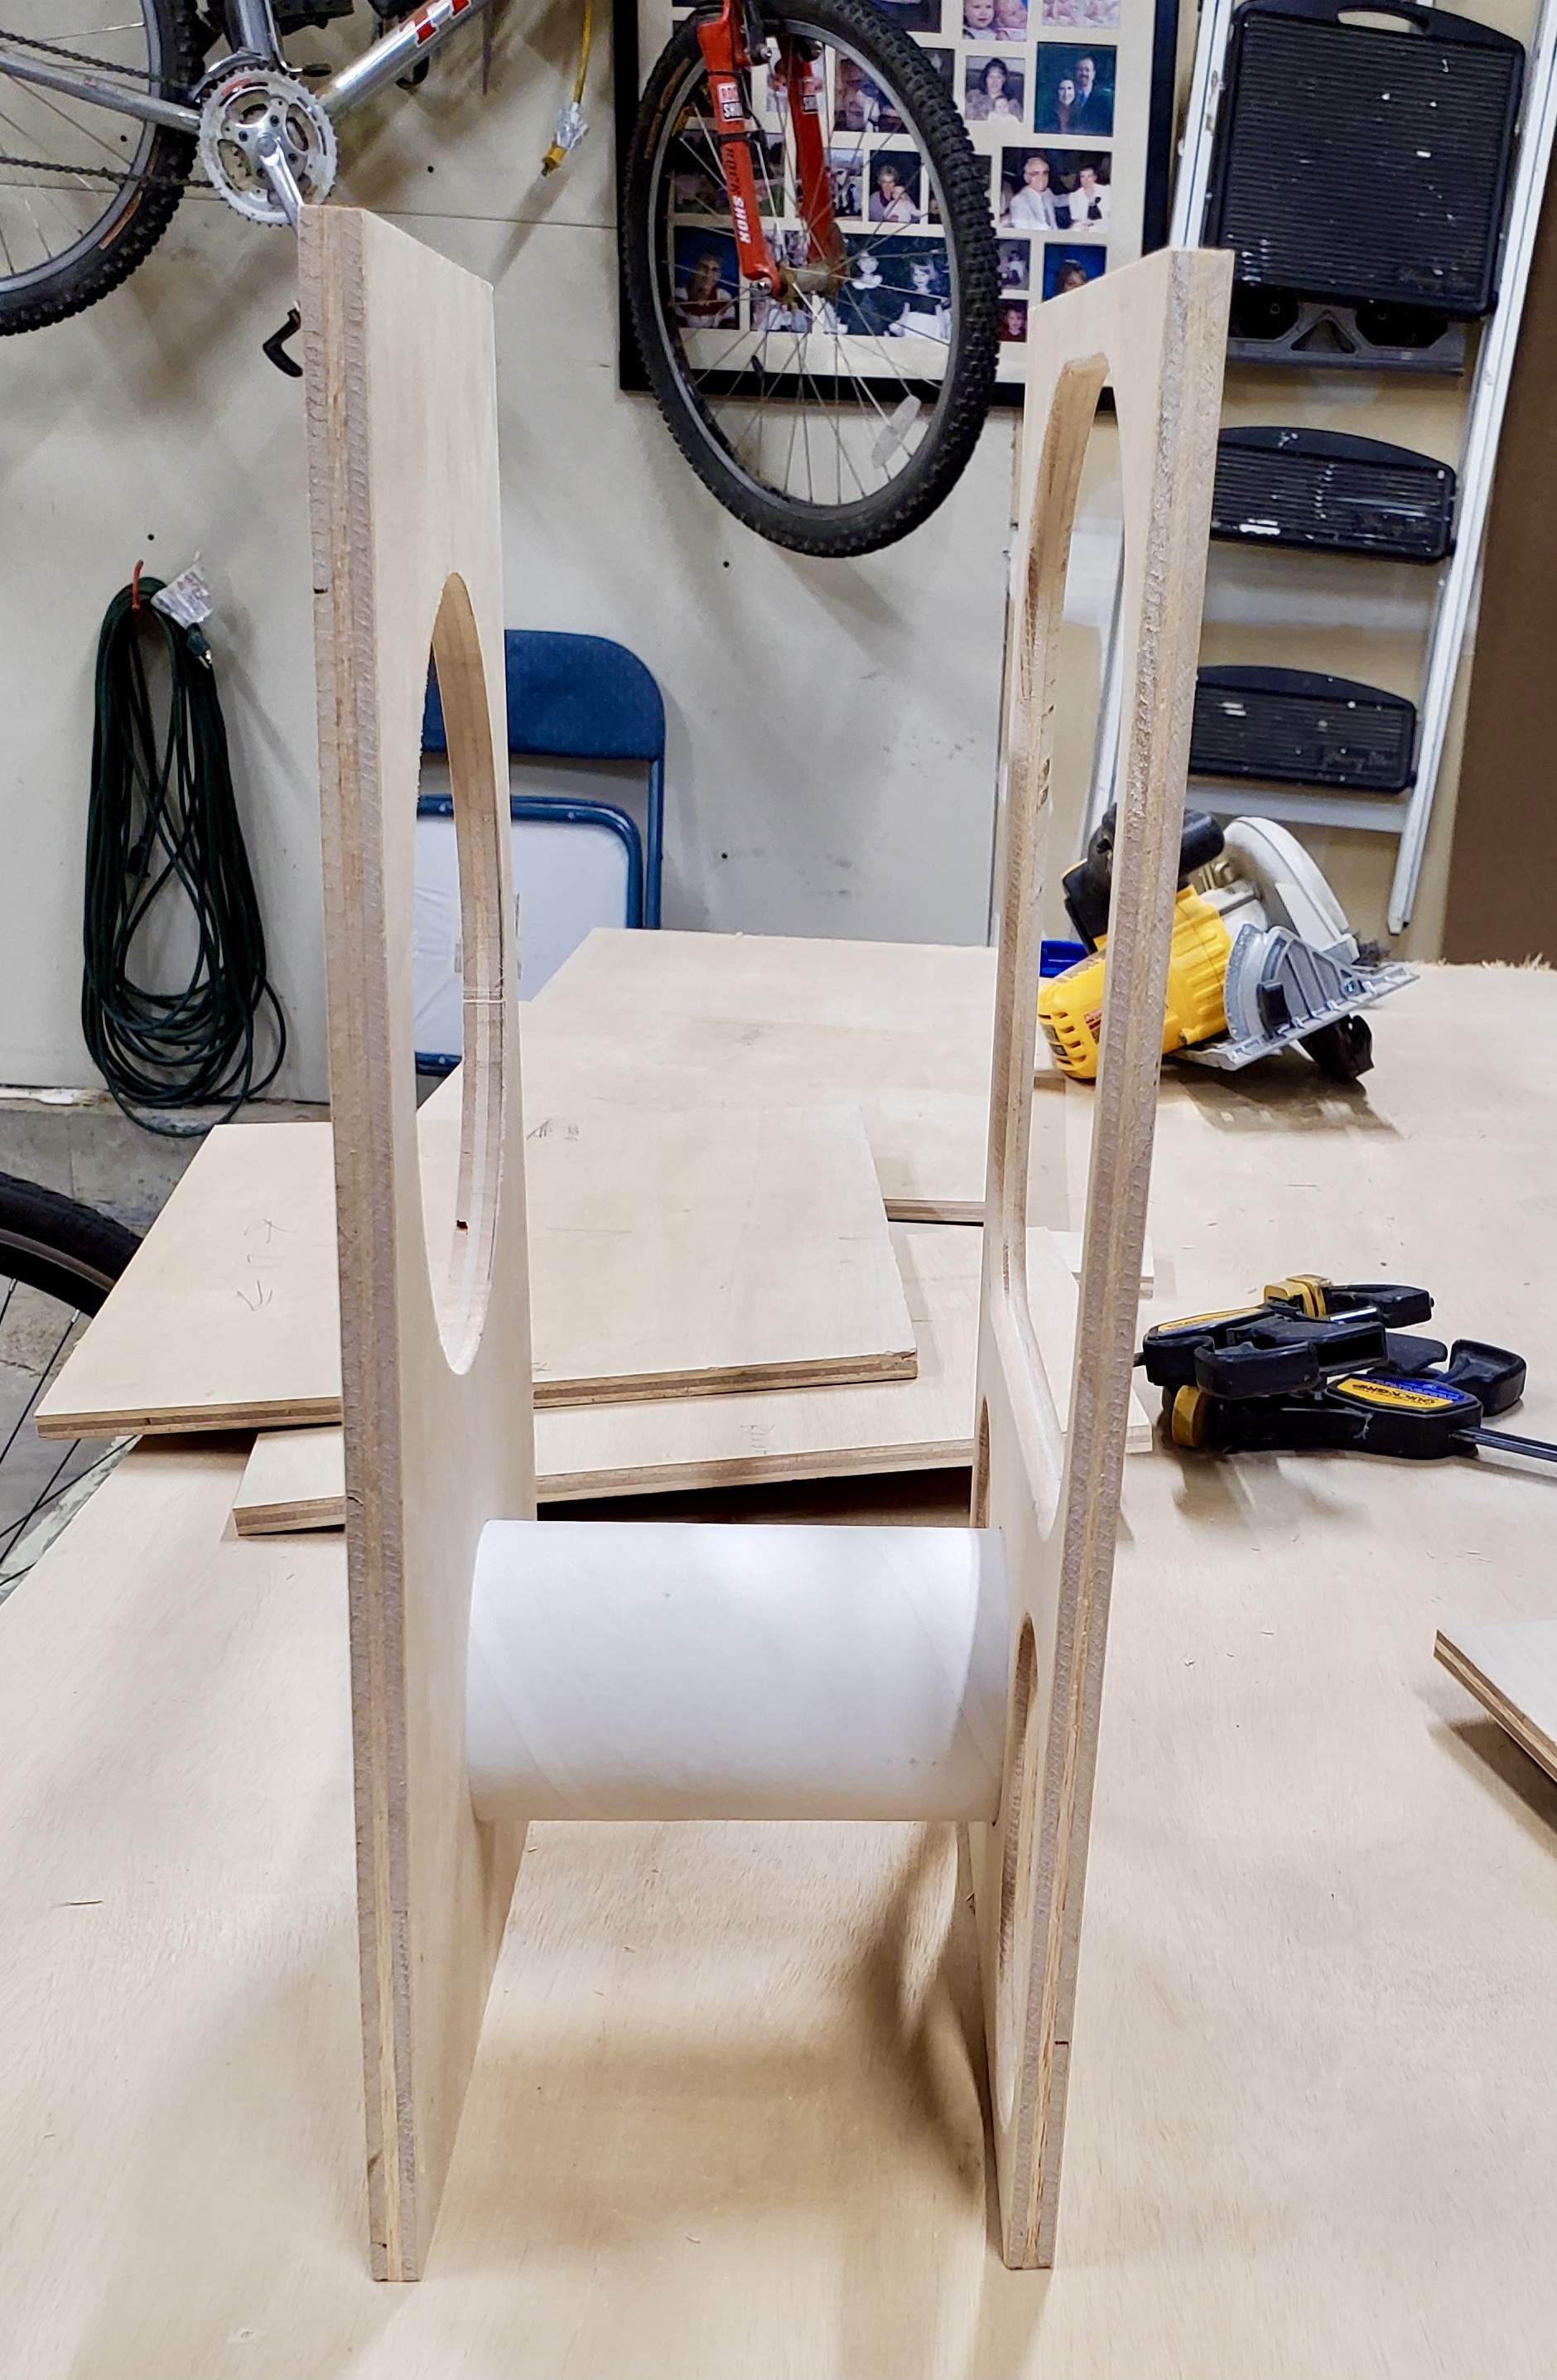
All the panels assembled. For you Nodal Nerds, the brace is technically not in the center of the sides, but slightly forward of center (determined by port length). Also, since this is made from warped scrap, the box is decidedly NOT square. I'll be clamping on some pressure to bring what's now a trapezoid back to square. I knew this would happen going in, and will do what I can to hide the warpage. Note that I added an inch up front for a speaker grill.
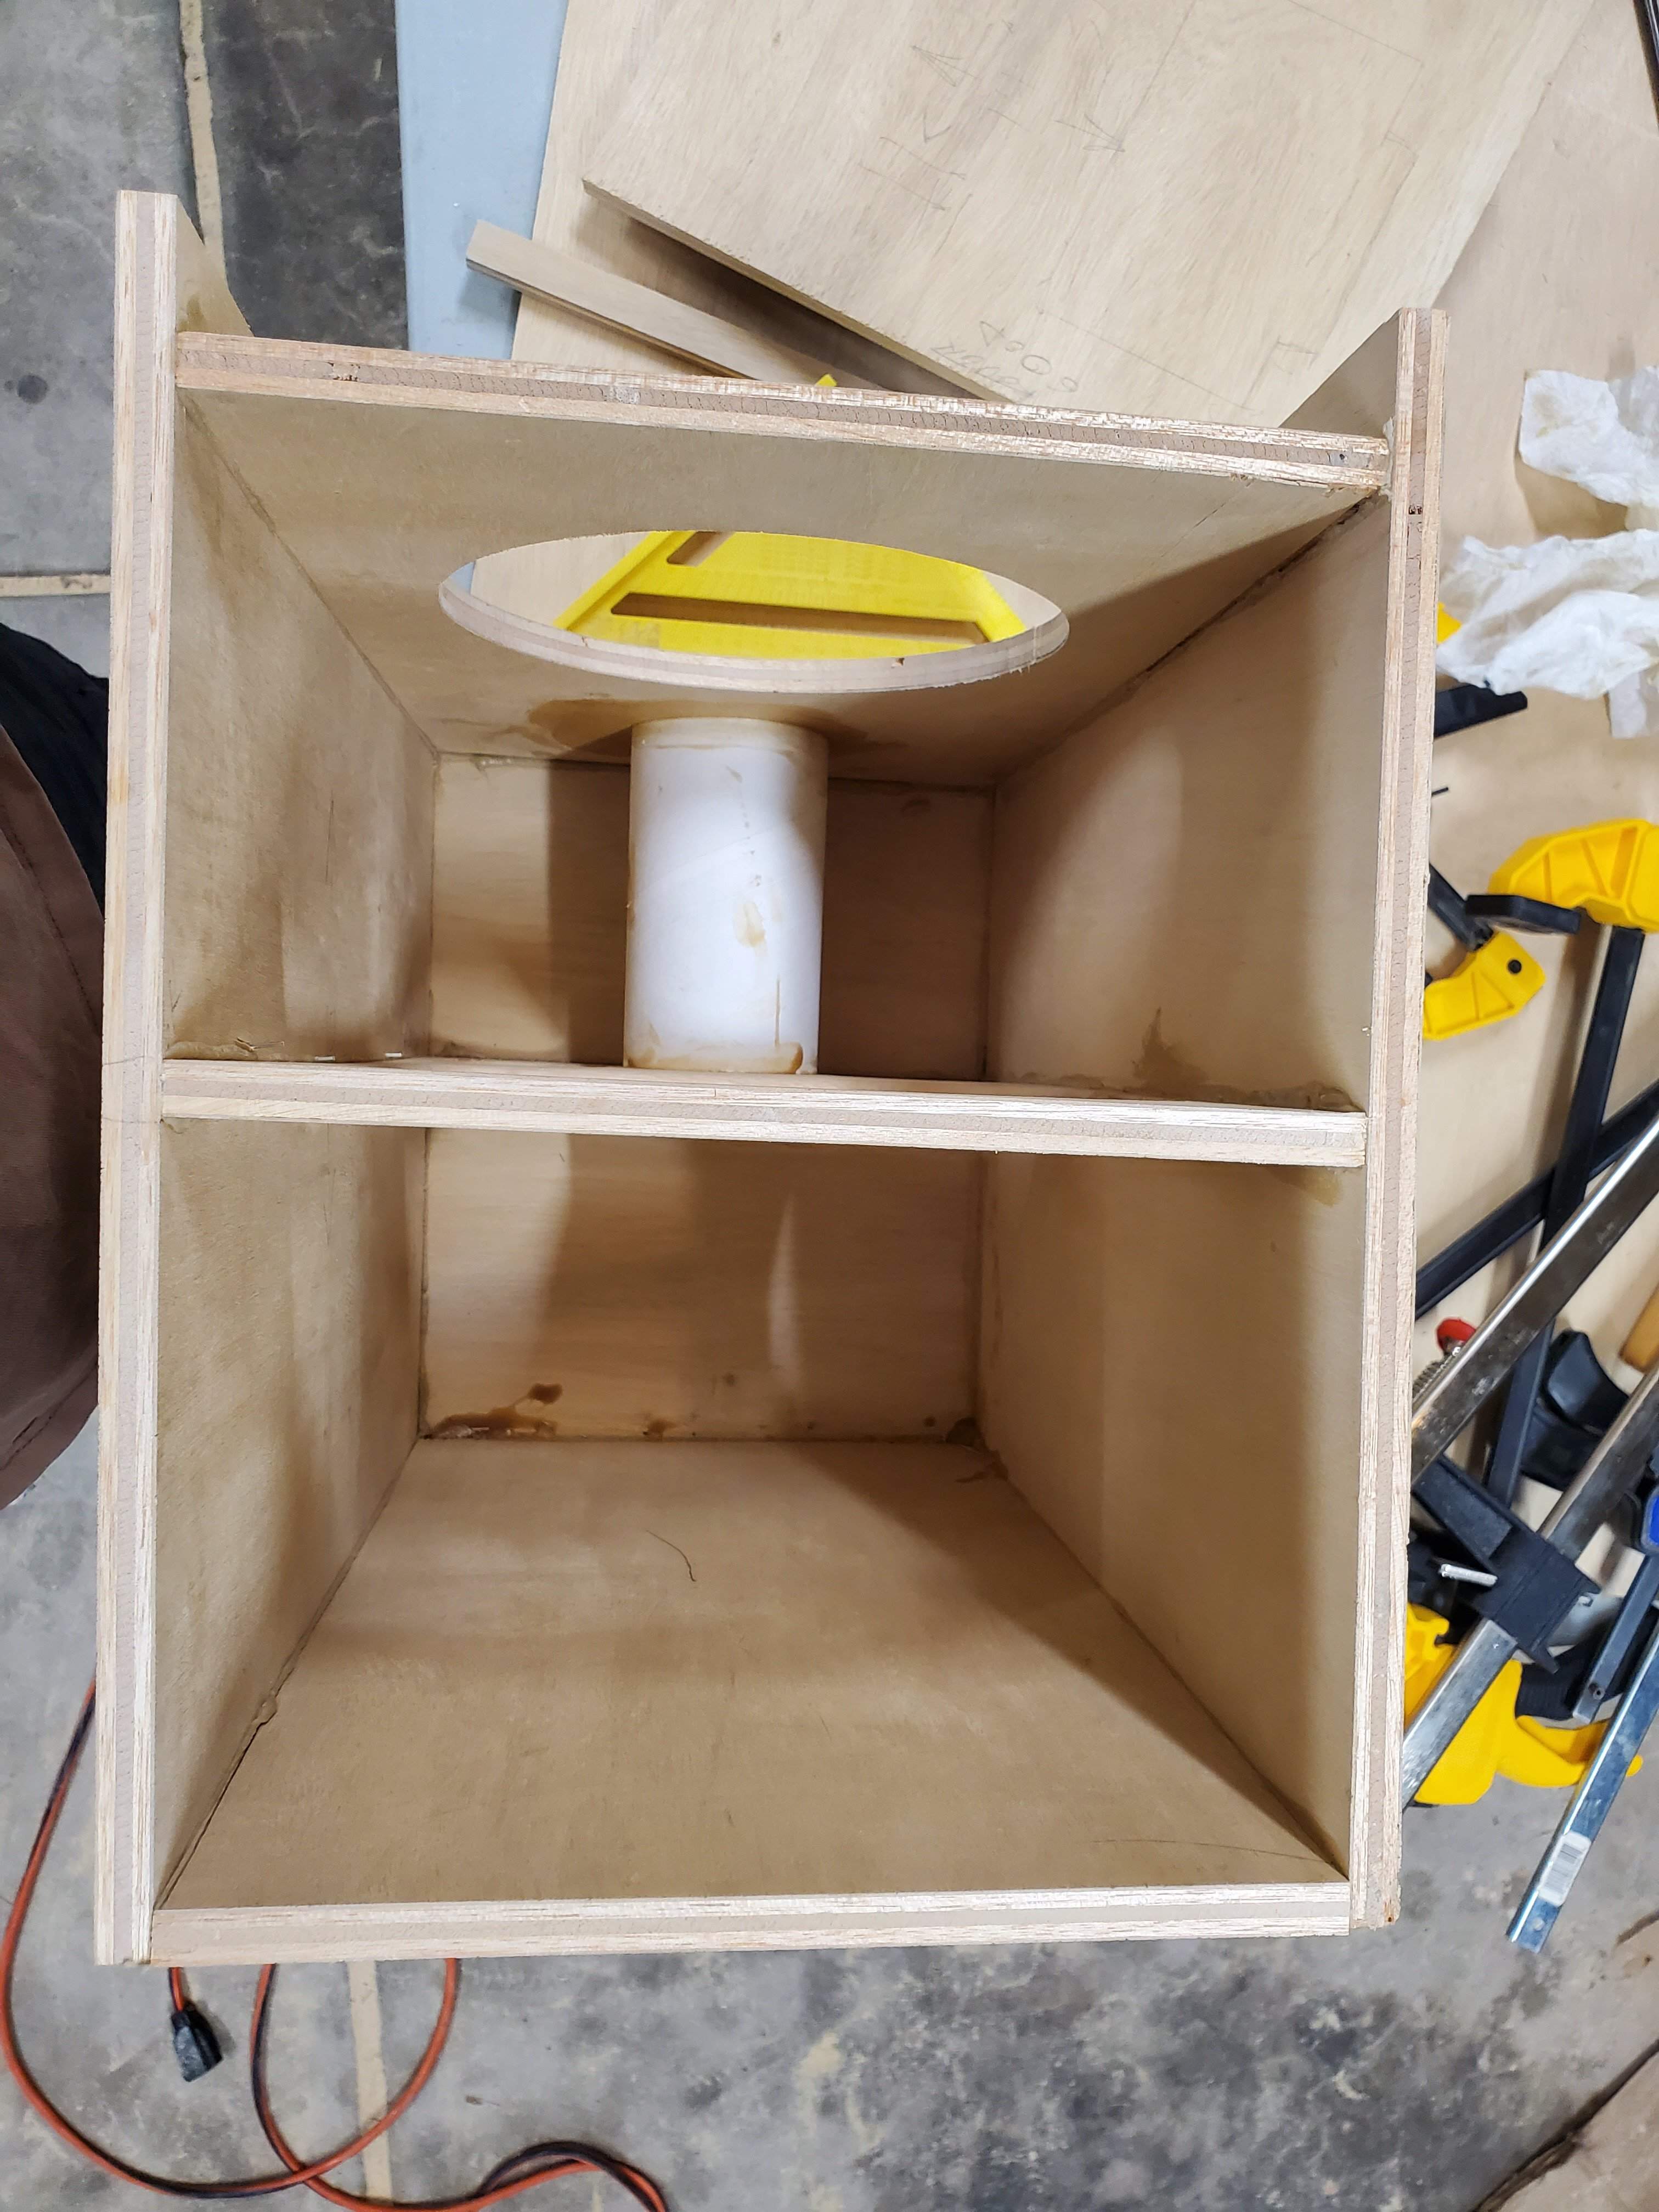
Here's how it sits today. Next steps are to cut a strategic, and hopefully appealing hole in the tope for the handle recess. Then, cut the aluminum plate to be screwed into the top. I'll have to rebate the top of the brace for clearance.
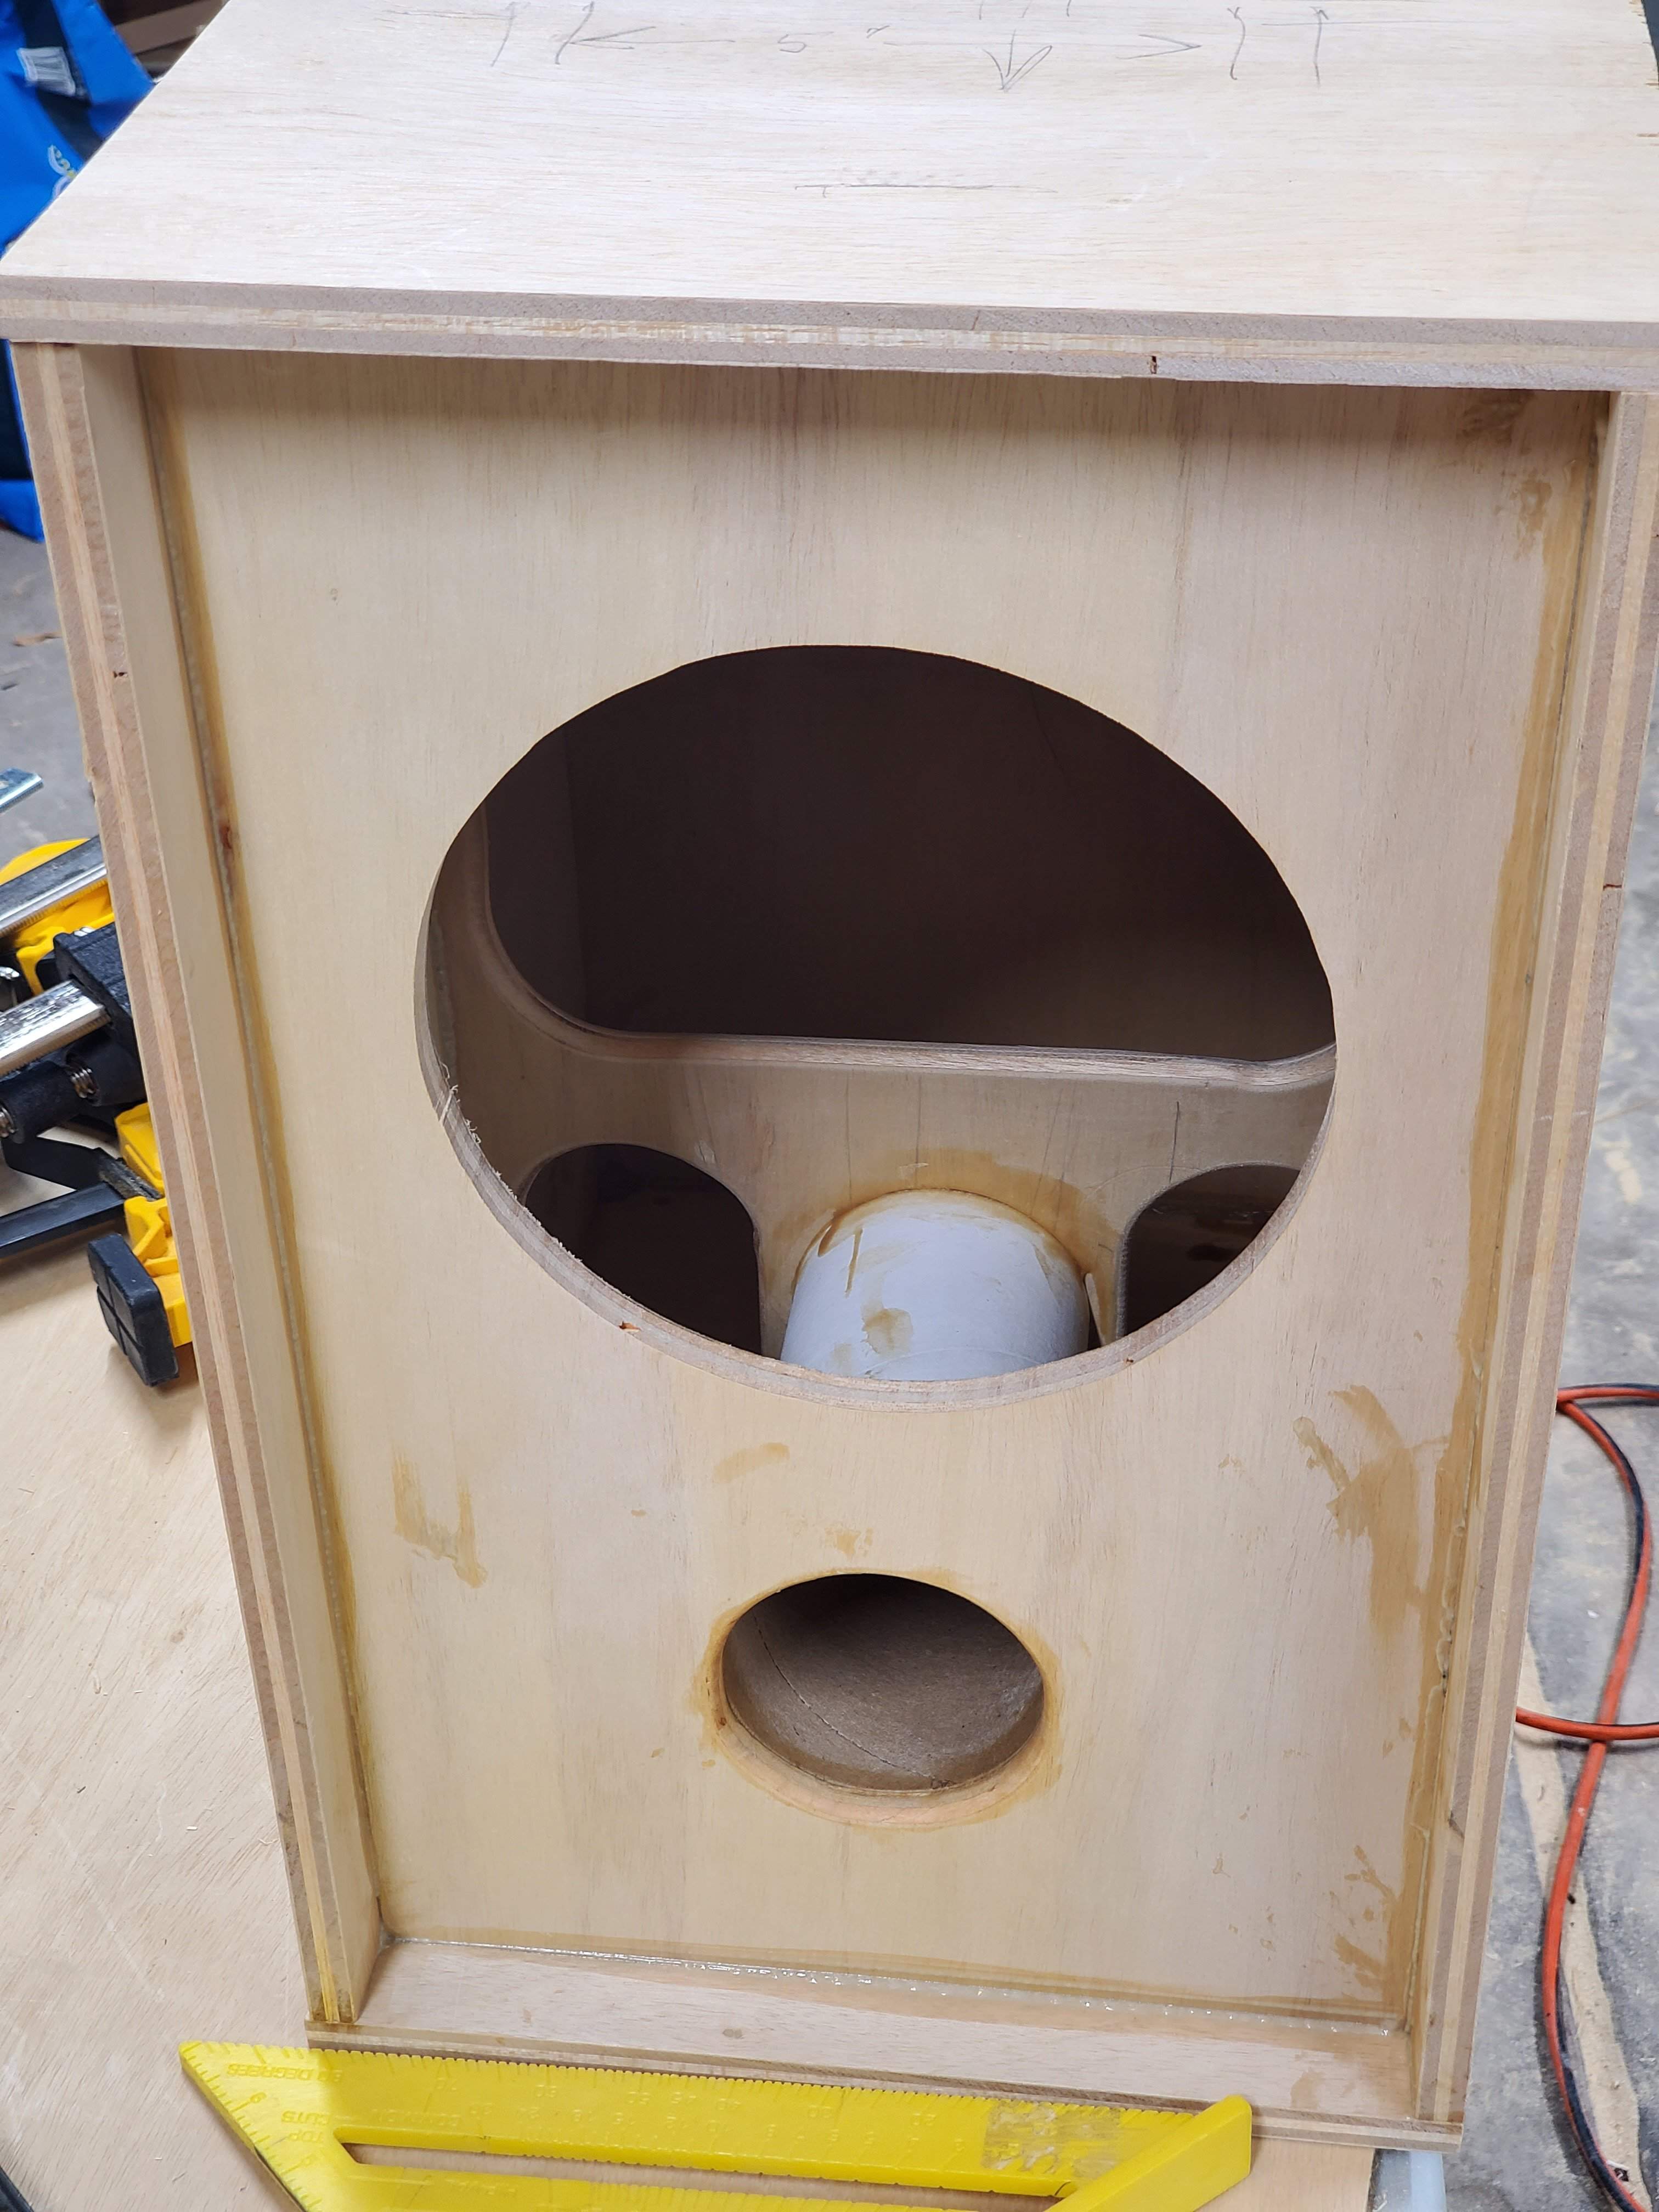
Let the feedback and guidance befall me, oh wisened cabinet builders.
Oh, let me know if this thread needs to be moved elsewhere.
Thanks.
I'm posting this before I close up the cabinet with the last panel as a last opportunity to collect, and possibly incorporate feedback. Feel free to provide feedback.
Please understand the following:
- I am absolutely inexperienced in building, and especially designing speaker cabinets.
- I am a moderately experienced wood worker, having built several pieces of furniture, and can turn a bowl or two.
- I bowed to expediency, and simplicity in my methods here by using butt joints (gasp!), No rabbets, dadoes, grooves, box joints, or dovetails, or pocket holes here. I intend to reinforce the butt joint with dowels before routing the roundovers.
- I built this to meet a general goal of small, light, narrow, low volume, and cheap. More on what drove the design parameters to follow.
- I was inspired by JdoubleH's DIY Practice Cab Build here: 1x8 DIY practice cab build
I recently started playing at church again. The facilities guy is in charge of the PA, and has set HPF filter at about 250k, even for the bass, and kick drum! Also, the compressor/limiter is set at such a ratio as to squash the bass. Together, this makes the bass inaudible through the floor wedges. They also got rid of the entire in-ear monitor set up I had put in place several years ago. So, I need to have a small, quiet amp that doesn't take up much floor space. The venue holds 800 people, but the choir area is low volume. My SWR Monitor 12" wedge is just too big, and with it, I keep my Gnome's volume at about 2-3. My daughter has taken up the bass, and plays in church. She'll need a small cab and amp that are easy for her to carry. I also need the cab to handle my low B (at low volumes). It would be a bonus if this cab is loud enough for practice with my other band (uses acoustic drums).
I really like the idea of JdoubleH's cab. He inspired me to build my own small, 8" cab using a super cheap driver. Don't laugh or balk at my driver choice. I know, I know.
My departure from JdoubleH's design: Pardon me while I "vent"…
I used a spreadsheet to play with cab volumes, tuning, etc. Unfortunately, due to the high FS of the driver, I couldn't get the low end I wanted out of a sealed design, and super small box. I decided on a vented cab.
The driver:
Pyle (I know, I know) PPA8 meant for PA systems
Cost: $16
Source: Newark online
Hey, if they make 'em in 18s, they have to be good. Right?
See the stats below:
Box calculator:
I tried WinISD, but my laptop resolution made it unreadable.
I ended up using a spreadsheet provided by YouTube's Audio Judgement (thank you!!). See what I ended up with here:
Build material:
Sande plywood from Home Depot, 1/2" thickness (actually 12mm). This is very light and nearly void-free. I had a full sheet leftover from a storage bench/couch I built a couple years ago. This is described as paint grade, and a hardwood. But's it does need sanding, and is fairly soft. It was warped, so I have to work around that. Since this is from scrap wood, I'm calling it Scrappy. I'm hoping it doesn't turn out to be crappy.
Box dimensions:
Volume is about 1.181 ft3
That worked out to be about 17" x 14" x 10" for the external size. I know that I didn't quite compensate for the driver volume (partially), and cab bracing. But, I kept the bracing design minimal since this is a low volume cab.
Weight:
I'm hoping for less that 20 pounds. I weighed just the six outer panels, and the driver together, and came up with 15 pounds even. With the port tube, bracing, foam, and hardware, I expect another pound or two.
Like JdoubleH's approach, I plan on recessing the handle so that the Gnome sits easily on top. Instead of using plywood to create the recess, I'll use a some fancy aluminum that I've had lying around from my Jeeping days. It's about and 1/8" thick, and will not take up much internal volume, but provide enough rigidity for the purpose.
Handle:
I bought a strap handle from Amazon, but it turned out longer than advertised. I might make it work, but am hesitant to try. I might order a different one.
Cab corners:
Although I'm kind of wanting a vintage look for this cab, I know from experience that metal corners can let a cab slide around in a vehicle, and can be tough on fingers. Plus, they would require separate rubber feet to be added to the cab. Because of these factors, I went with the stackable plastic corners. I don't expect to make a second cab that will stack. But, these corners will keep the cab from sliding around as much, won't scratch up things, and will eliminate the need for rubber feet.
Port:
I went with the spreadsheet suggestion for a 3" diameter tube. The tube is a shipping tube from UPS, and only cost $5! I committed to the tuning when I incorporated the tube support into the cab bracing. I reduced the length of the tube from 5.8" to about 5.5" due to the modest flair routed at the ends. The length is now fixed.
How will it sound?
Not sure. I know that I risk pushing driver extension in the low frequency tuning. I'm hoping that the low volume needs, and the inherent inefficiency of the driver will keep things in check in the low end. The Qms of 2.9 seems to suggest high damping of the driver, and maybe a flatter response, but I'm at about 7,000' in elevation, which could possibly play a part. We'll see.
Here are pics of the build.
Panels, cut to size:
Baffle with driver, and port cutouts. Life Bill Fitzmaurice says, (paraphrased) "people buy with their eyes, not their ears". I centered the driver, and port, but tried to leave room for a future tweeter, if needed. I got lazy and used the scroll saw. Don't judge me!
I rounded over the outside of the port for a cheap flare, which probably won't be that effective.
I recessed the back of the baffle to hold the port tube. This was eyeballed, not measured (again, no judging, please)
Behold the $16 Pyle driver:
Here's the vertical brace which will also hold the back end of the por tube. The port hole was flared, and recessed because I could, and it will help me sleep at night knowing I did it. I knocked this out with the saber saw because it doesn't need to be 'CNC pretty' (also because I don't have a CNC machine).
Note that this is just a test fit of the tube.
Baffle and brace meet in what will be a forever a totally tubular relationship.
All the panels assembled. For you Nodal Nerds, the brace is technically not in the center of the sides, but slightly forward of center (determined by port length). Also, since this is made from warped scrap, the box is decidedly NOT square. I'll be clamping on some pressure to bring what's now a trapezoid back to square. I knew this would happen going in, and will do what I can to hide the warpage. Note that I added an inch up front for a speaker grill.
Here's how it sits today. Next steps are to cut a strategic, and hopefully appealing hole in the tope for the handle recess. Then, cut the aluminum plate to be screwed into the top. I'll have to rebate the top of the brace for clearance.
Let the feedback and guidance befall me, oh wisened cabinet builders.
Oh, let me know if this thread needs to be moved elsewhere.
Thanks.