Here's a special Luthier tool that I'm experimenting with.
I'm not really interested in making or selling these. I built this for my own use, and I may make up a few more for the other guys here in the Lab. Any of you are welcome to grab the basic idea and make your own.
I like leveling my frets using a flat sharpening stone. There are various reasons, but mostly because the stone is very precise, lasts approximately forever, and it minimizes scratches on the frets. I particularly like the stone method on stainless frets, which are what I mostly use these days. My favorite stone is an 8" x 2" Medium Grit Norton Sharpening Stone. I have one that I've been using on frets for many years. An 8" long stone does a fine job leveling frets, as long as you are careful to work the surface evenly, and keep checking with a straightedge. We've talked about the technique on some other threads.
So, I got to thinking: Wouldn't it be nice to have a long, narrow, accurate sharpening stone, just for this purpose? In a flash of brilliance (I get headaches when that happens..) I thought of the small narrow stones that are used on automotive engine cylinder hones. They are available as replacements, in sets of three, in various grits.
I bought two sets of three for $7 each on Amazon. They are Lisle brand, and I chose 3" stones in 320 grit. The stones are about 3" long x 3/8" wide x 5/16" high. They are epoxied onto a steel channel bracket. They are fairly consistent in height, not to high precision, but these six measured within a range of 0.020".
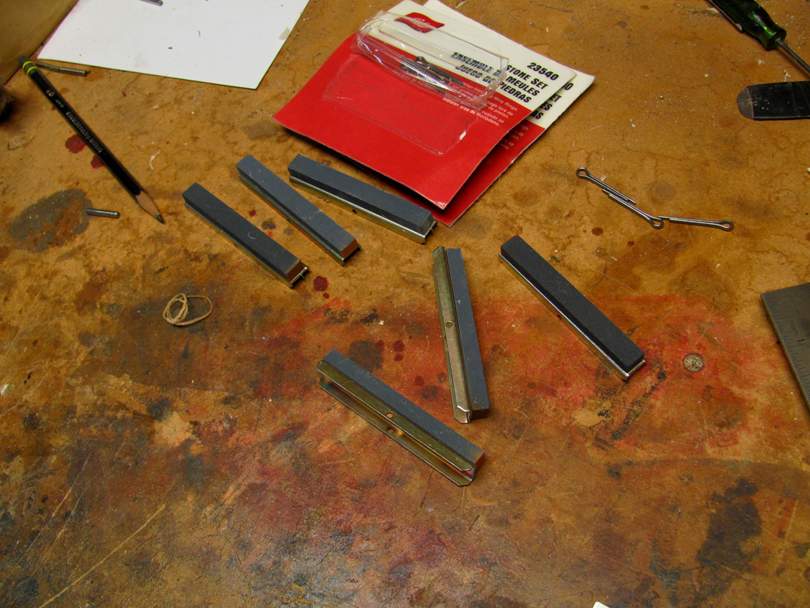
The inside width of the brackets measured 0.360", a little less than 3/8". There were some stamping burrs on the brackets that I took down with a small square file.

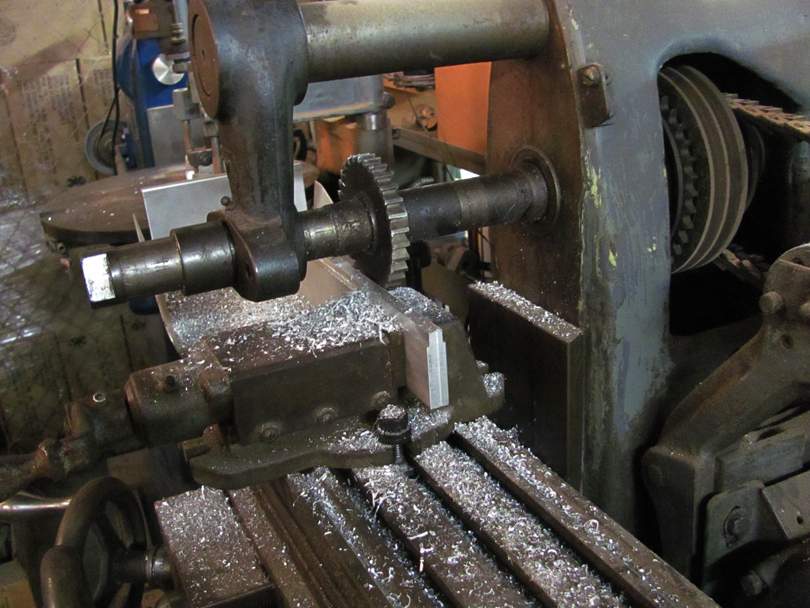
I pulled out a chunk of 1/2" x 2" 6061 aluminum bar stock and sawed it off to 18" long, to use as a backbone for the stones. I used one of my small horizontal milling machines to cut rabbits on one edge of the bar, for a nice fit on the stones' brackets.
I epoxied the row of stones along the bar with West Systems, making sure that they were seated solidly. There are small cotter pin holes in the sides of the brackets, but I didn't see any need for extra mechanical reinforcement. Here's what the bar looks like:
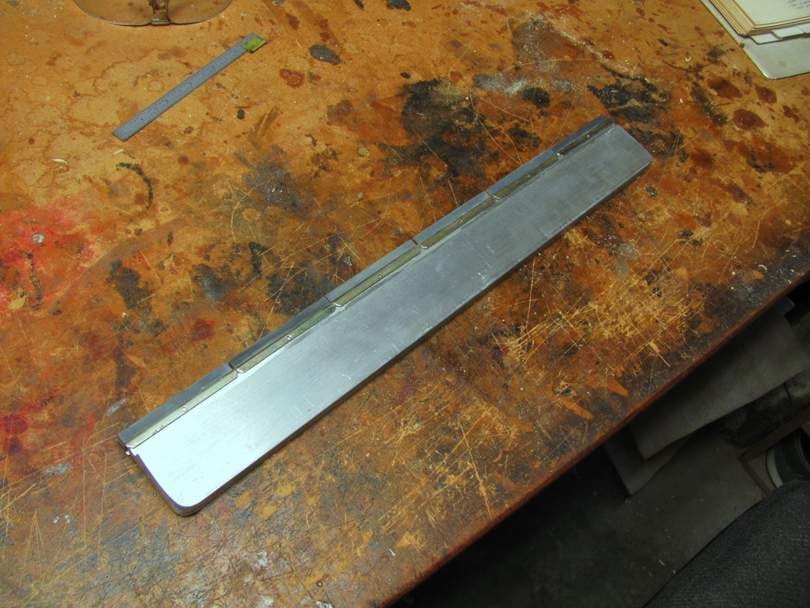
There are some gaps between the stones, from the stones being somewhat unevenly glued onto the brackets. I don't think they are going to cause any problems, but on the next one, I'll grind the ends of the brackets a bit to make the stones fit tighter together.

After gluing, there was a small amount of unevenness in the surfaces of the stones. I clamped the beam in the vise of my big mill, and used a small 1/4" shaft-mounted grinding stone to level off the stones. Gently, in light passes, until it was cleaning the surface of all of them. It's probably flat within +/- 0.001". Good as a starting point.

I may make up one or two more of them. One way to increase the flatness accuracy is to grind them against each other. An old Machinist's trick is to use three straightedges to flatten each other out. In rotation, rub A against B, B against C, and A against C, and eventually all three become flat.
I haven't tried any fret leveling with this beam yet, but it feels like about the right size and weight. I have two fretted necks coming up this week to test it on. I may add some wood handles on the top edge at the ends to make it more comfortable.
I'm not really interested in making or selling these. I built this for my own use, and I may make up a few more for the other guys here in the Lab. Any of you are welcome to grab the basic idea and make your own.
I like leveling my frets using a flat sharpening stone. There are various reasons, but mostly because the stone is very precise, lasts approximately forever, and it minimizes scratches on the frets. I particularly like the stone method on stainless frets, which are what I mostly use these days. My favorite stone is an 8" x 2" Medium Grit Norton Sharpening Stone. I have one that I've been using on frets for many years. An 8" long stone does a fine job leveling frets, as long as you are careful to work the surface evenly, and keep checking with a straightedge. We've talked about the technique on some other threads.
So, I got to thinking: Wouldn't it be nice to have a long, narrow, accurate sharpening stone, just for this purpose? In a flash of brilliance (I get headaches when that happens..) I thought of the small narrow stones that are used on automotive engine cylinder hones. They are available as replacements, in sets of three, in various grits.
I bought two sets of three for $7 each on Amazon. They are Lisle brand, and I chose 3" stones in 320 grit. The stones are about 3" long x 3/8" wide x 5/16" high. They are epoxied onto a steel channel bracket. They are fairly consistent in height, not to high precision, but these six measured within a range of 0.020".
The inside width of the brackets measured 0.360", a little less than 3/8". There were some stamping burrs on the brackets that I took down with a small square file.
I pulled out a chunk of 1/2" x 2" 6061 aluminum bar stock and sawed it off to 18" long, to use as a backbone for the stones. I used one of my small horizontal milling machines to cut rabbits on one edge of the bar, for a nice fit on the stones' brackets.
I epoxied the row of stones along the bar with West Systems, making sure that they were seated solidly. There are small cotter pin holes in the sides of the brackets, but I didn't see any need for extra mechanical reinforcement. Here's what the bar looks like:
There are some gaps between the stones, from the stones being somewhat unevenly glued onto the brackets. I don't think they are going to cause any problems, but on the next one, I'll grind the ends of the brackets a bit to make the stones fit tighter together.
After gluing, there was a small amount of unevenness in the surfaces of the stones. I clamped the beam in the vise of my big mill, and used a small 1/4" shaft-mounted grinding stone to level off the stones. Gently, in light passes, until it was cleaning the surface of all of them. It's probably flat within +/- 0.001". Good as a starting point.
I may make up one or two more of them. One way to increase the flatness accuracy is to grind them against each other. An old Machinist's trick is to use three straightedges to flatten each other out. In rotation, rub A against B, B against C, and A against C, and eventually all three become flat.
I haven't tried any fret leveling with this beam yet, but it feels like about the right size and weight. I have two fretted necks coming up this week to test it on. I may add some wood handles on the top edge at the ends to make it more comfortable.
Last edited: