• TalkBass has been independent since 1998. Add your voice.
    Create a free account to reply to discussions, view embedded media, and browse with fewer display ads.
    Join freeLog in
    Want zero display ads or expanded classifieds tools? Compare plans.

Special Tools: Stone Bar For Leveling Frets

Well, it's about time for an update to this special tool thread......

The original Stone bar that I made in the posts above has been in service for 5 1/2 years, and it's finally worn out. I polled the guys, and I think we've leveled 50-60 necks with it.

IMG_0043B.jpg


The stones wore down to nothing at one end. It's interesting, though, that they stayed flat as they wore down. Even now, it still measures flat and will level the frets. Most of the wear was from Jeremy using it. I noticed that he was pushing down harder on it that Keith and I were. When I use it, I barely press down on it all. I use the weight of the bar and hold it lightly, sliding it up and down the neck. I'll guess that if you use it gently, it'll level 100 necks.

Overall, I'm happy with this tool. It's proven to be a useful time-saver, and it does an accurate job leveling the frets. A simple solution.

So it's time to make up a replacement or two. I'm going to make a few changes to the design, based on what I've learned. Construction will be simpler, and I'll show it all here, so any of you on here can make your own, if you like.

I'm going to make up two of them at the same time, so I can grind them against each other to true them up. The original bar was 1/2" x 2" aluminum, because I happened to have some on hand. But I had to do that rabbit-milling operation on the bar to fit the width of the stones. For these new ones, I'm going with 3/8" x 3" aluminum. No need to do any milling on it, and the bar is taller. I think this will make it easier to control and use.

I'm staying with the 320 grit stones on them. They seem to cut reasonably quickly, but leave a fairly good finish.
IMG_0042B.jpg


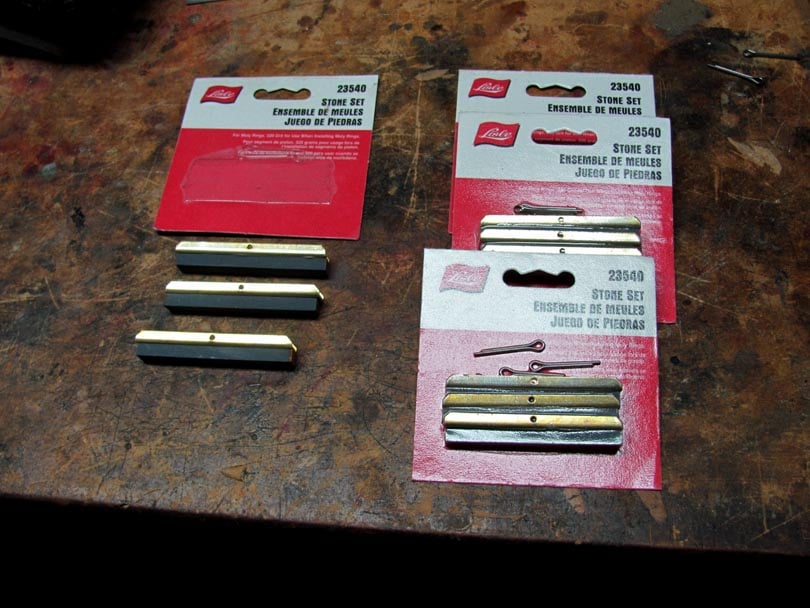
Here's the stone sets. They are replacement stones for automotive cylinder hones, made by Lisle, sets of 3. I bought them on Amazon for $14/set. I got 4 sets to make up two 18" bars. These stones are also available in other lengths and grits. These are 3" long, 320 grit.
IMG_0044B.jpg


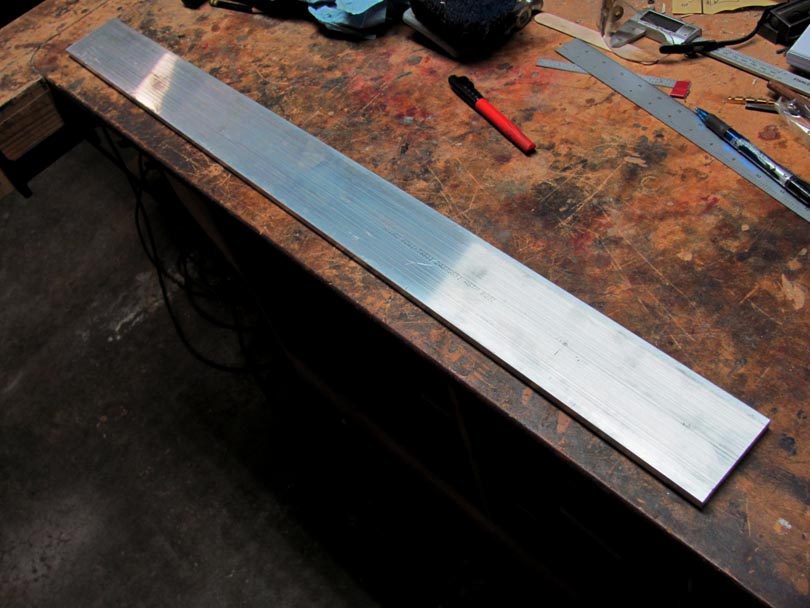
A 3' long bar of 3/8" x 3" 6061 aluminum from Online Metals. About $38.
IMG_0045B.jpg


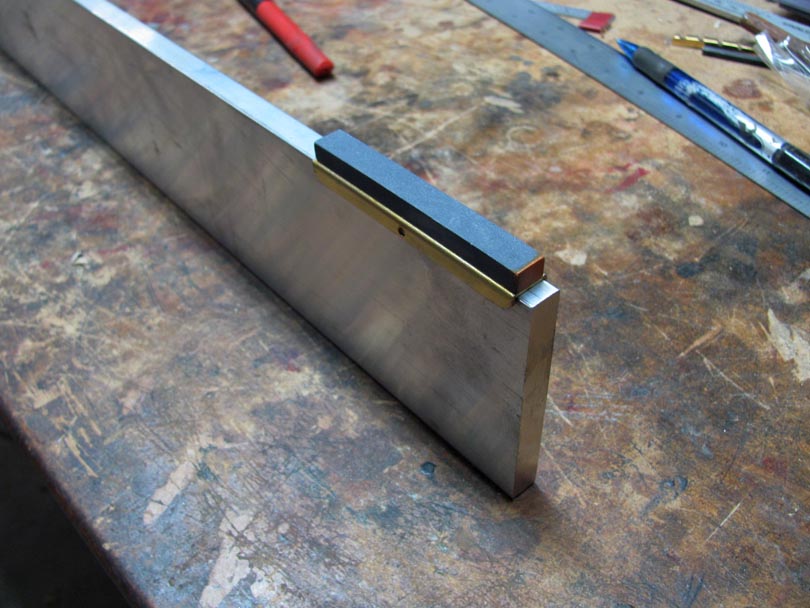
The stones are epoxied to a plated steel shoe, which fits nicely over the 3/8" bar.
IMG_0046B.jpg


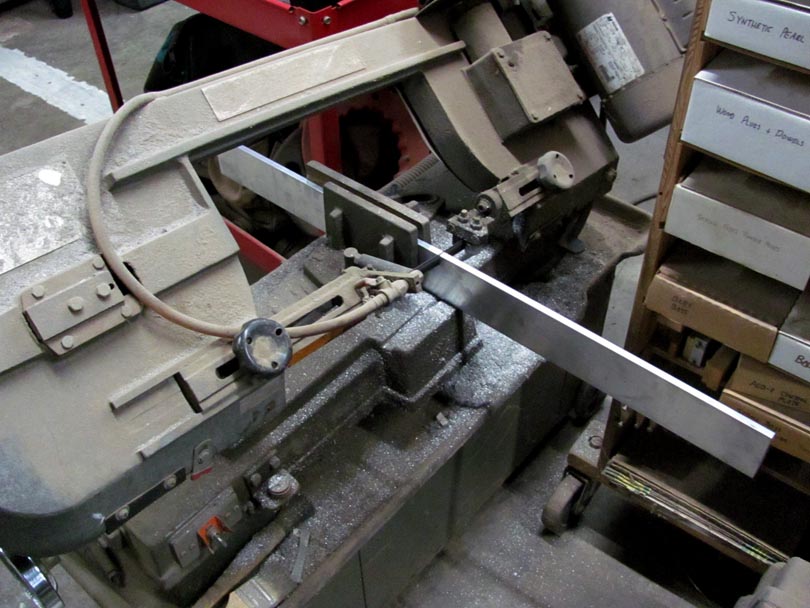
I sawed the bar into two 18" pieces. I used my large cutoff bandsaw, but you can do this with a hacksaw.
IMG_0047B.jpg


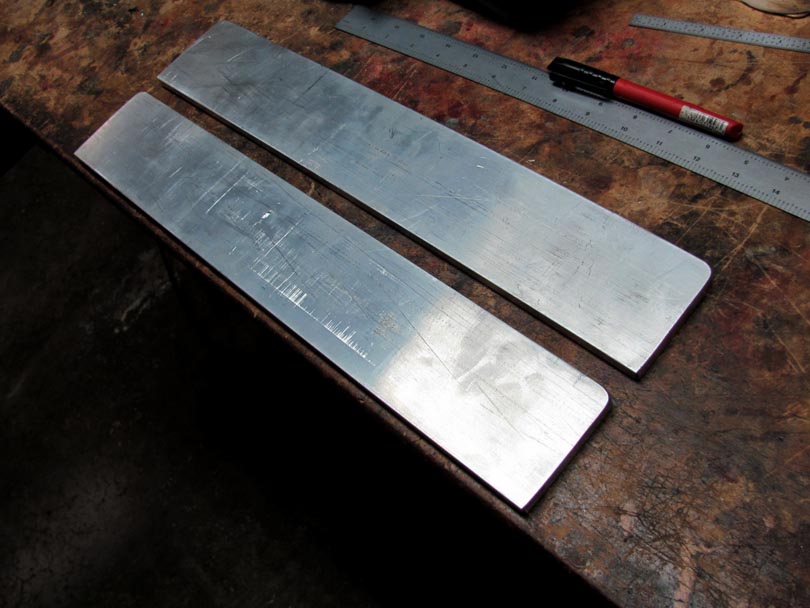
I rounded the upper corners and smoothed the edges of the bars, so I don't cut myself on them later.
IMG_0048B.jpg


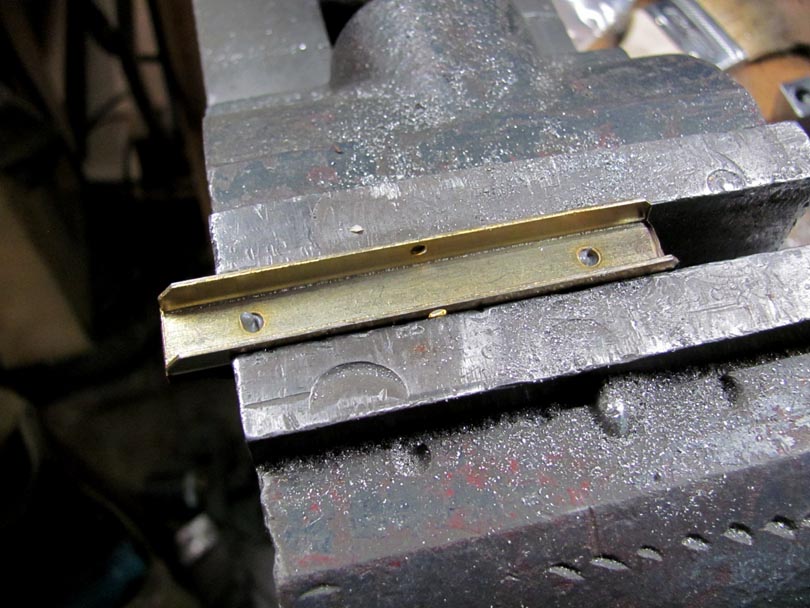
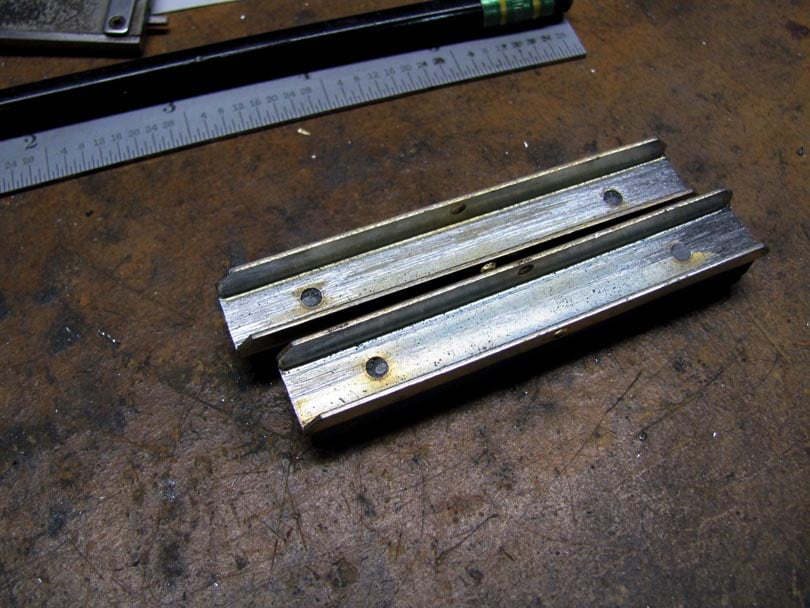
Most of the stones' shoes had little blobs of epoxy sticking up inside......
IMG_0049B.jpg


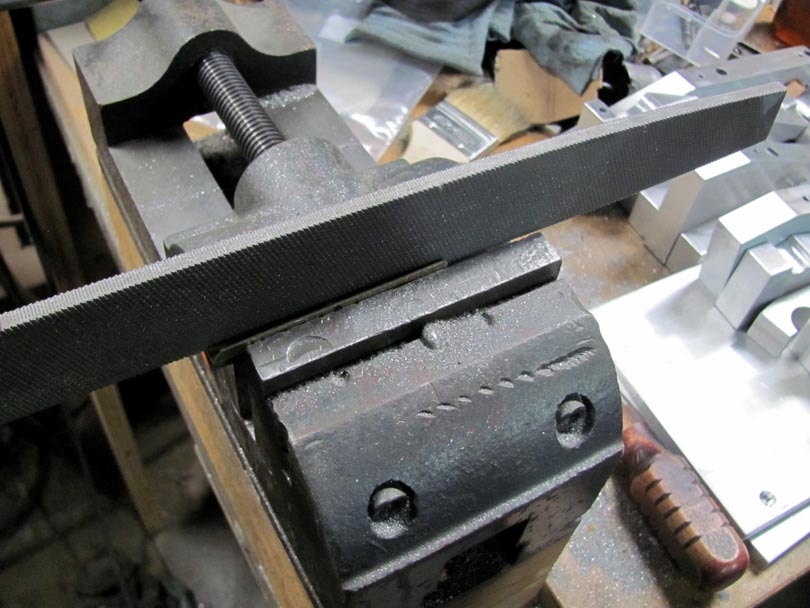
So, I clamped them in a vise and ran the edge of a big file through them.......
IMG_0050B.jpg


I smoothed down the epoxy bumps and roughened up the plating on the inside.

IMG_0051B.jpg


I also took a file over the bottom edge of the bars to roughen them up.....for a better epoxy bond.

IMG_0052B.jpg


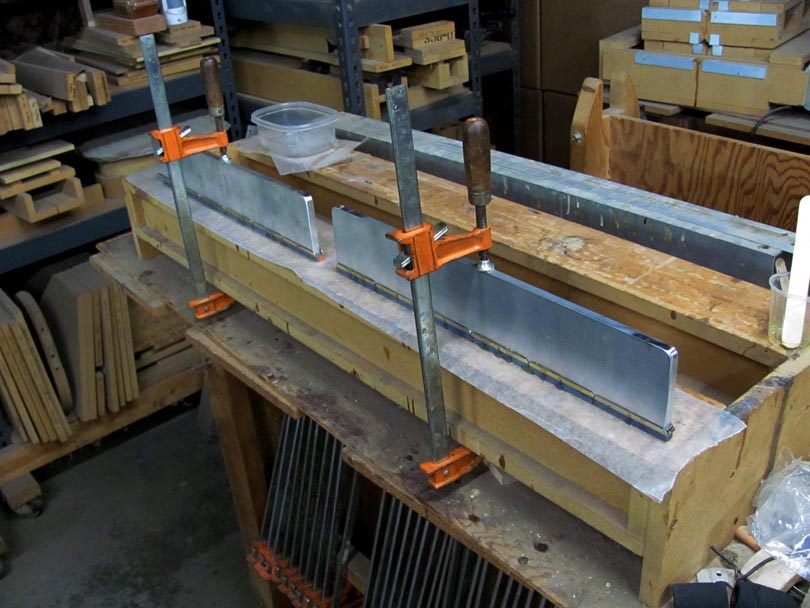
Lined up on the gluing bench, I dabbed some epoxy down into the backs of the shoes. I used West Systems 105/205, but almost any epoxy will do here.
IMG_0053B.jpg


Set the bars down into the stones, checked the alignment, and clamped them.
IMG_0054B.jpg


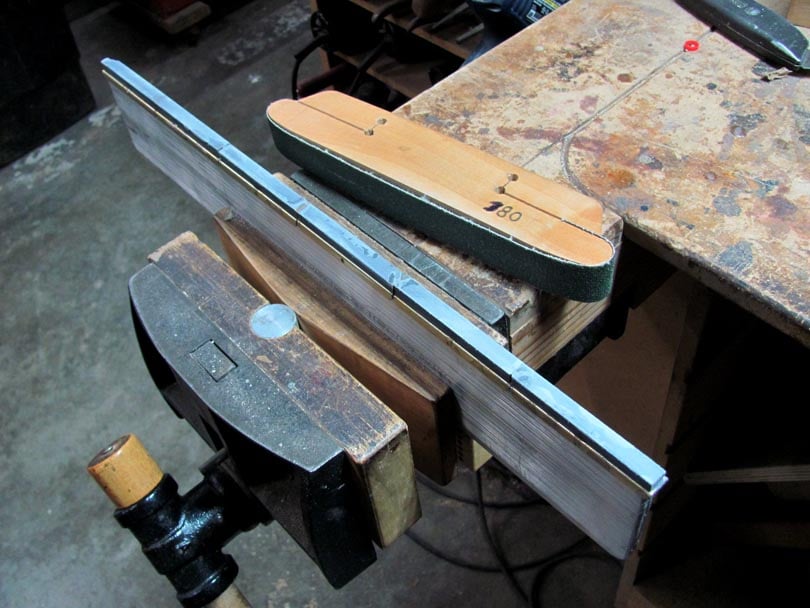
The next day, I used the edge sander and 180 grit paper on a block to clean the excess epoxy off around the stones. I also slightly beveled the edges of the stones, so they won't make grooves.

IMG_0055B.jpg


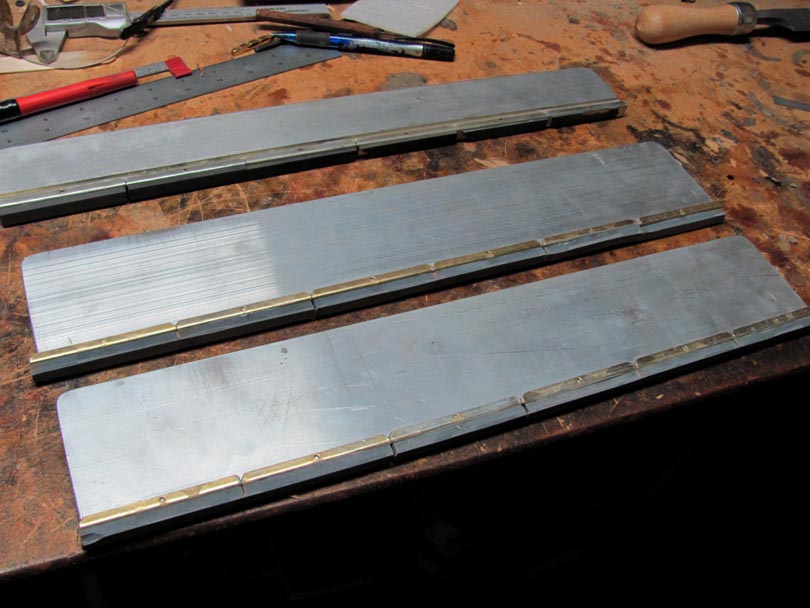
As glued up, they came out quite flat. But I still ground the two of them together to make sure. My plan is to use both stone bars about equally, and occasionally grind them against each other to keep them true.
IMG_0056B.jpg


And there they are, all ready for some years of precision fret leveling.

It took me 1 hr 10 minutes to make them, and cost me $94.

My plan is to knock the stones off of the old stone bar, mill a notch in the middle of it, and figure out how to mount a narrow fine file in it. Like a #2 Swiss file. An 18" bar with a file set flush in the middle third of it. I'm thinking that would be the tool for quickly roughing down a few high frets. Then go over them with the stone bar.
 
Last edited:
Some guy told us we need 3 straightedges to keep them honest a while back :D

https://www.talkbass.com/threads/school-me-on-straightedges.1244651/page-2#post-19275467

...but you can check the rocks against a steel one...

As for the differential wear on the original, might be as simple as marking which end is which, and swapping the direction it's used in from time to time, rather than a probable default tendency to put the same end in front all the time.
 
Last edited:
Here's a special Luthier tool that I'm experimenting with.

I'm not really interested in making or selling these. I built this for my own use, and I may make up a few more for the other guys here in the Lab. Any of you are welcome to grab the basic idea and make your own.

I like leveling my frets using a flat sharpening stone. There are various reasons, but mostly because the stone is very precise, lasts approximately forever, and it minimizes scratches on the frets. I particularly like the stone method on stainless frets, which are what I mostly use these days. My favorite stone is an 8" x 2" Medium Grit Norton Sharpening Stone. I have one that I've been using on frets for many years. An 8" long stone does a fine job leveling frets, as long as you are careful to work the surface evenly, and keep checking with a straightedge. We've talked about the technique on some other threads.

So, I got to thinking: Wouldn't it be nice to have a long, narrow, accurate sharpening stone, just for this purpose? In a flash of brilliance (I get headaches when that happens..) I thought of the small narrow stones that are used on automotive engine cylinder hones. They are available as replacements, in sets of three, in various grits.

I bought two sets of three for $7 each on Amazon. They are Lisle brand, and I chose 3" stones in 320 grit. The stones are about 3" long x 3/8" wide x 5/16" high. They are epoxied onto a steel channel bracket. They are fairly consistent in height, not to high precision, but these six measured within a range of 0.020".

View attachment 1197526
The inside width of the brackets measured 0.360", a little less than 3/8". There were some stamping burrs on the brackets that I took down with a small square file.

View attachment 1197528
I pulled out a chunk of 1/2" x 2" 6061 aluminum bar stock and sawed it off to 18" long, to use as a backbone for the stones. I used one of my small horizontal milling machines to cut rabbits on one edge of the bar, for a nice fit on the stones' brackets.

View attachment 1197527
I epoxied the row of stones along the bar with West Systems, making sure that they were seated solidly. There are small cotter pin holes in the sides of the brackets, but I didn't see any need for extra mechanical reinforcement. Here's what the bar looks like:

View attachment 1197530

There are some gaps between the stones, from the stones being somewhat unevenly glued onto the brackets. I don't think they are going to cause any problems, but on the next one, I'll grind the ends of the brackets a bit to make the stones fit tighter together.
View attachment 1197531
After gluing, there was a small amount of unevenness in the surfaces of the stones. I clamped the beam in the vise of my big mill, and used a small 1/4" shaft-mounted grinding stone to level off the stones. Gently, in light passes, until it was cleaning the surface of all of them. It's probably flat within +/- 0.001". Good as a starting point.

View attachment 1197529

I may make up one or two more of them. One way to increase the flatness accuracy is to grind them against each other. An old Machinist's trick is to use three straightedges to flatten each other out. In rotation, rub A against B, B against C, and A against C, and eventually all three become flat.

I haven't tried any fret leveling with this beam yet, but it feels like about the right size and weight. I have two fretted necks coming up this week to test it on. I may add some wood handles on the top edge at the ends to make it more comfortable.

The few times I've done this I used industrial diamond sharpening stones (I already own several, in different grits, which I use to sharpen woodworking tools), which worked well.
 
The few times I've done this I used industrial diamond sharpening stones (I already own several, in different grits, which I use to sharpen woodworking tools), which worked well.

I actually don't like to use diamond stones on frets, particularly stainless frets. They cut well, but they leave too many scratches. Too much extra work sanding out the scratches. Oilstones seem to leave a smoother finish. When I'm doing stainless frets I typically use the 320 grit long stone beam to do the basic leveling, then a Norton Medium (approximately 800 grit) stone, then go right to the rubberized abrasive polishing wheels. No hand sanding steps in between.

I also do my crowning with an old-school Stew-Mac Crowning File, the kind with concave steel teeth. Same reason. It leaves a smoother surface than the diamond crowning files.
 
  • Like
Reactions: Jazzdogg
Some guy told us we need 3 straightedges to keep them honest a while back :D

https://www.talkbass.com/threads/school-me-on-straightedges.1244651/page-2#post-19275467

...but you can check the rocks against a steel one...

As for the differential wear on the original, might be as simple as marking which end is which, and swapping the direction it's used in from time to time, rather than a probable default tendency to put the same end in front all the time.

Yeah, the old-school machinist's technique for flattening straightedges to high precision is to grind 3 straightedges against each other. That's for flatness better than +/-0.0001", like you need on straightedges for scraping ways on lathes, or in inspection labs. For leveling bass frets, we're good with +/-0.001". Which you can get just rubbing 2 together. I didn't do an accurate measurement, but I believe my two stone bars are good to 0.001".
 
  • Like
Reactions: llmk
Yeah, the old-school machinist's technique for flattening straightedges to high precision is to grind 3 straightedges against each other. That's for flatness better than +/-0.0001", like you need on straightedges for scraping ways on lathes, or in inspection labs. For leveling bass frets, we're good with +/-0.001". Which you can get just rubbing 2 together. I didn't do an accurate measurement, but I believe my two stone bars are good to 0.001".
I've been distracted by thoughts lately of how we arrived at the degree of precision in the tools we have today, which descend from tools that were made with less precision, which themselves had been made with less precise tools, and so on. Maybe James Burke's "Connections" series has something about it.
 
I've been distracted by thoughts lately of how we arrived at the degree of precision in the tools we have today, which descend from tools that were made with less precision, which themselves had been made with less precise tools, and so on. Maybe James Burke's "Connections" series has something about it.

Yes, the process of making machine parts with more precision, using less precise tools, is quite interesting. It mostly involves figuring out ways to measure how far off the parts are, in ways finer than the eye can see by comparison.

For example, when truing up a straightedge, the method is to wipe a thin dye on the edge. Then gently slide another straightedge over it. The sliding action rubs the dye off the highest spots, and shows you where they are. Then you go to work with a scraper, shaving a tiny bit of metal off of the high spots, as you see them. Apply more dye, do the sliding again, look for the high spots again, scrape them. Repeat, repeat, repeat until the sliding rubs the dye off the entire surface evenly. That means your straightedge surface is flat, no lumps or dips.

In the machinery world, that process is called Scraping a Surface True. A straightedge, that you know is straight and true, is used with dye to find the high spots. Then a hand scraper is used to lightly shave the high spots until it reads true and flat. That's the traditional way of making the linear ways (the precision sliding surfaces) on a lathe or milling machine precise. Once you've made your milling machine and lathe precise and true, you can use them to cut parts to that same level of precision. If you've done everything else right.

There are many more advanced techniques for aligning other parts of a machine to high accuracy. Such as making two ways precisely perpendicular to each other. In this case, you use a square that you know to be accurately square, put some dye on the way surface, rub to find the high spots, scrape the high spots, repeat. Same basic process of using the contact and the dye to do the "measurement". That's the fundamental process for making a machine accurate.

So, where does your precision straightedge come from? How do you make the first one, which you can then use to true up everything else? It's simple. Make two of them, truing them up against each other at the same time. Same technique of applying dye, rubbing them together, scraping the high spots, repeat, repeat. But do them both at the same time, against each other. Better yet, make three of them and true them up against each other in pairs. A against B, B against C and A against C. For geometric reasons, this ends up with an even higher level of flatness for all three.

Getting back to building basses, that process is about what we are doing when leveling frets. Wipe the tops of the frets with a Sharpie, which puts a thin layer of dye on them. Then slide a known straight flat-bottom beam over them, and look to see where the dye gets scraped off. Those are the high spots. Which need to be lowered down even with the others. Using the technique of rubbing off the dye will reveal high spots that are much smaller than you could see by looking for a gap under the straightedge, or inserting feeler gauges.

We save time by making up an abrasive-bottom straightedge. Like my Stone Bar or a beam with sandpaper on the bottom. Sliding that over the frets finds the high spots and grinds them down all in one action. We can see that the frets are level when the dye has been scraped off of the tops of all of them.

If you want to double check the accuracy of your fret leveling job after it's done, put the Sharpie lines back on. Then gently slide a smooth accurate straightedge over the tops, along the string paths. It should rub a thin line of Sharpie off of all the frets. Any frets where the dye doesn't get rubbed are low spots. If you do it carefully, this technique will find frets that are low by as little as 0.0001". That's well beyond the accuracy you need for a "perfect" fret leveling job.

If you use good technique with a stone bar or a sanding beam, the tops of the frets will be flat and level to 0.001". That's what you want to achieve.
 
Yeah, the old-school machinist's technique for flattening straightedges to high precision is to grind 3 straightedges against each other. That's for flatness better than +/-0.0001", like you need on straightedges for scraping ways on lathes, or in inspection labs. For leveling bass frets, we're good with +/-0.001". Which you can get just rubbing 2 together. I didn't do an accurate measurement, but I believe my two stone bars are good to 0.001".
Thank you for this awesome thread!
If I were only making one of these bars let's say 24", would I be able to attach 8 stones to the beam, and use the last stone to flatten the entire bar (instead of making two whole bars and grinding them together)?
Thanks.
 
Last edited:
Thank you for this awesome thread!
If I were only making one of these bars let's say 24", would I be able to attach 8 stones to the beam, and use the last stone to flatten the entire bar (instead of making two whole bars and grinding them together)?
Thanks.

I guess you could...but that would be tedious. The quickest way to true up a single stone bar is to find a good long flat surface. A good tabletop, a countertop, a metal bar? Lay a piece of sandpaper down on that, face up, like 320 grit. Slide the bar over it. Grinding stone vs sandpaper. The sandpaper will lose that battle, but it will trim down any high spots on the stones.

An important thing is to do the epoxying with the stones facing down, on a good flat surface. With a strip of waxed paper on it. That will get the stones really close to flat to begin with. I did that on the newer pair of bars, and they were almost dead true right out of the clamps. I only needed to grind them together to check them against each other. Only a few strokes.

On the first bar, I did the epoxying with the stones facing up. So there was a little bit of unevenness because of the thickness of the stones. That's why I had to true up that first one in the milling machine with the grinding stone.
 
These little wheels, available from Stew-Mac and others. Use in a Dremel, you can polish up a whole set of frets in a few minutes. They work very well.

Fret Polishing Wheels - StewMac
The polishing wheels referred to earlier are what I know as "rubber bonded abrasives" quite possibly manufactured by Cratex. They make other shapes that some people may find useful.

 
The polishing wheels referred to earlier are what I know as "rubber bonded abrasives" quite possibly manufactured by Cratex. They make other shapes that some people may find useful.


Yep, that's exactly what they are. I'm pretty sure that Stew-Mac has always been getting them right from Cratex. They have a few competitors these days, but Cratex has been the leader in rubberized abrasives in the US for decades. They make good products.

I remember them well, from my days building race car engines. I've spent quite a few hours with a screaming die grinder and a box of Cratex wheels, polishing ports in cylinder heads.
 
  • Like
Reactions: Beej
@Bruce Johnson
Have you ever put handles on any of the Stone Bars?

Hello Flamingo;

No, I never bothered putting handles on the Stone Bars. It doesn't seem necessary. When using the bar, I'm not gripping it tightly and applying any real muscle. I'm holding it gently, mostly using the weight of the aluminum bar for the downforce, and sliding it back and forth in about 6" to 12" strokes.

If the frets are installed well, the leveling should only need to take off maybe 0.002" of metal. On one of my basses, with stainless frets, this usually takes 4 or 5 strokes down each string path, verifying that the stones are touching the Sharpie on all the frets. Then another dozen strokes between the string paths and out at the edges, just to make sure all the Sharpie lines have thin silver lines in them.

The whole leveling process takes maybe ten minutes per neck, and it's gentle work.
 
  • Like
Reactions: Flamingo21 and Beej