Hi guys! Long time reader first time refinisher here!
Here's a little back story on the Bass I will be working on. She is an '02 Stingray in trans teal that I bought in 2006. I was quite hesitant to buy based on the amount of damage that was already done to the body and the fact that trans-teal didn't really appeal to me, but the bass as a whole played so nicely that I decided that for $500 and an OHSC, I could overlook those things. After all, I'm not super careful with my gear anyways, so what's a few 'starter dings' anyways???
Well during 5 years of heavy gigging I've seen my arsenal of basses grow, with the Stingray being phased out due to some electronics issues, and the fact that I began to enjoy playing my Sterling just a bit more. In short, the Stingray was banished to the closet, with no reason to ever return
After nearly a year of excommunication, I had a series of events occur. I found my old automotive spray gun in my shop, an item long thought lost or sold, and I also discovered a Seymour Duncan MM pickup in the Clearance bin at my local GC.
So out came the StingRay!!
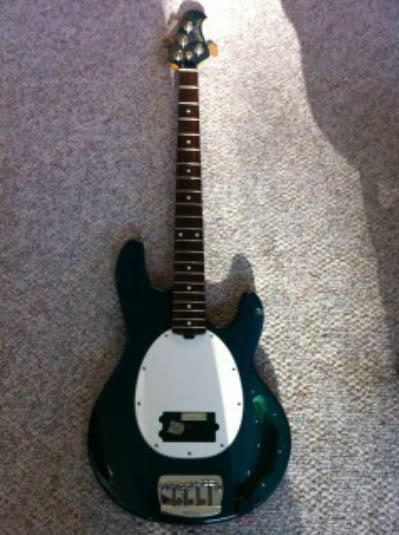
I decided I wanted to give her a new lease on life! I have seen so many great threads here on Talkbass with guys doing the same, that I figure I can give it a try!
So off comes the neck, pickguard, & bridge
the heel of the neck
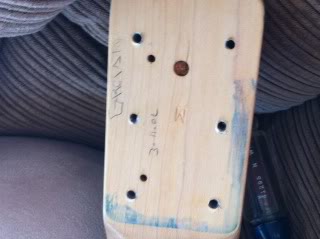
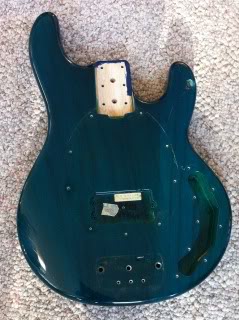
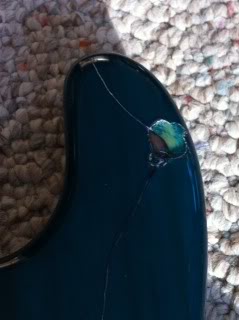
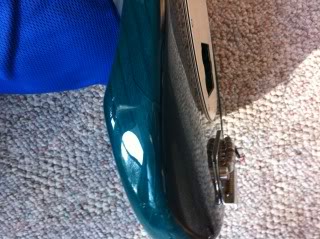
Notice the dents and cracks in the poly
Here's a little back story on the Bass I will be working on. She is an '02 Stingray in trans teal that I bought in 2006. I was quite hesitant to buy based on the amount of damage that was already done to the body and the fact that trans-teal didn't really appeal to me, but the bass as a whole played so nicely that I decided that for $500 and an OHSC, I could overlook those things. After all, I'm not super careful with my gear anyways, so what's a few 'starter dings' anyways???
Well during 5 years of heavy gigging I've seen my arsenal of basses grow, with the Stingray being phased out due to some electronics issues, and the fact that I began to enjoy playing my Sterling just a bit more. In short, the Stingray was banished to the closet, with no reason to ever return
After nearly a year of excommunication, I had a series of events occur. I found my old automotive spray gun in my shop, an item long thought lost or sold, and I also discovered a Seymour Duncan MM pickup in the Clearance bin at my local GC.
So out came the StingRay!!
I decided I wanted to give her a new lease on life! I have seen so many great threads here on Talkbass with guys doing the same, that I figure I can give it a try!
So off comes the neck, pickguard, & bridge
the heel of the neck
Notice the dents and cracks in the poly