• TalkBass has been independent since 1998. Add your voice.
    Create a free account to reply to discussions, view embedded media, and browse with fewer display ads.
    Join freeLog in
    Want zero display ads or expanded classifieds tools? Compare plans.

SVT810E Refinish

mapleglo

Warp Engineer
Supporting Member
Sep 7, 2013
13,357
47,654
phoenix, az
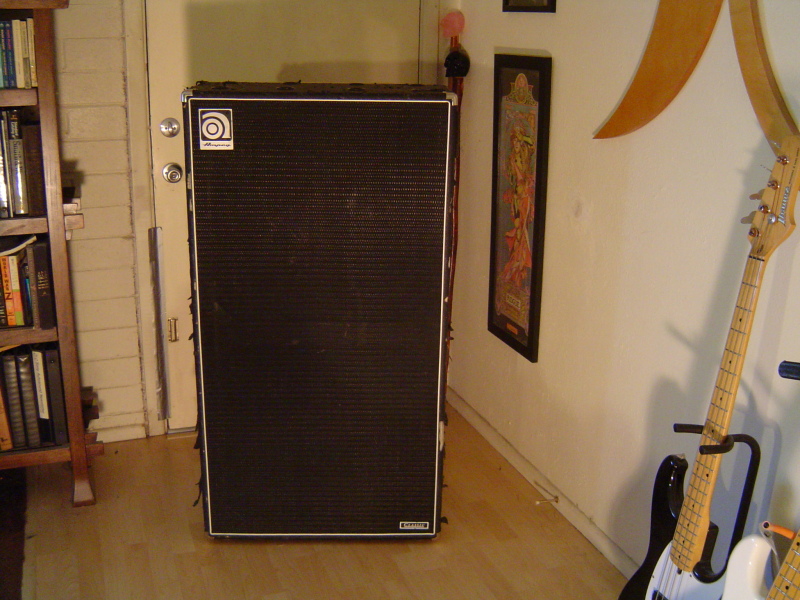
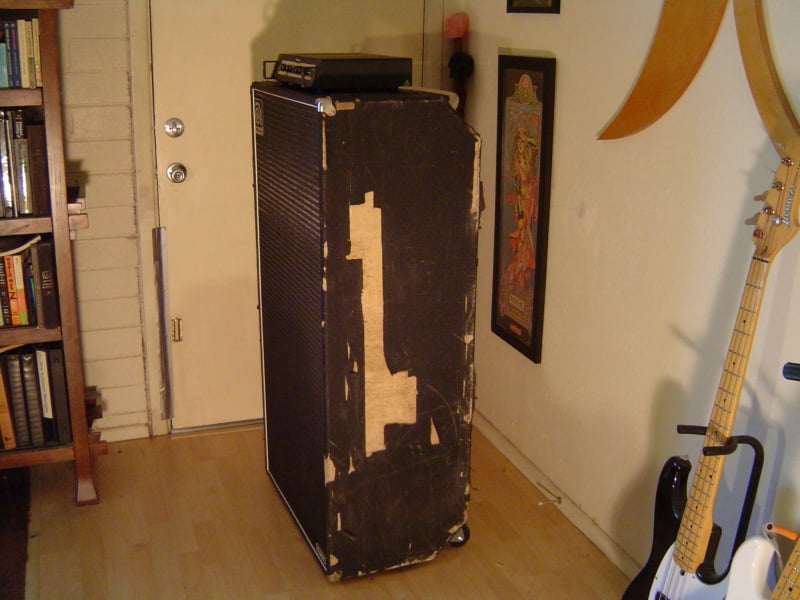
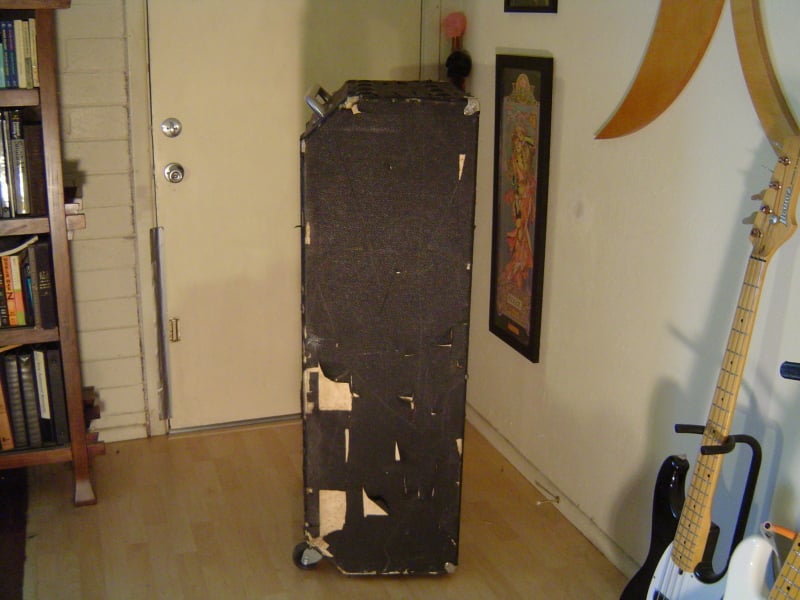
I bought this SVT810E cabinet a few months back from Craig's List for $375.00. It's sounds great, but it is in pretty rough shape.
2rw3u2x.jpg


2rhlm4w.jpg


The grille is in pretty good shape.

23wmjrp.jpg


So I bought a gallon of that Duratex, and started stripping the cabinet.
206dl6p.jpg


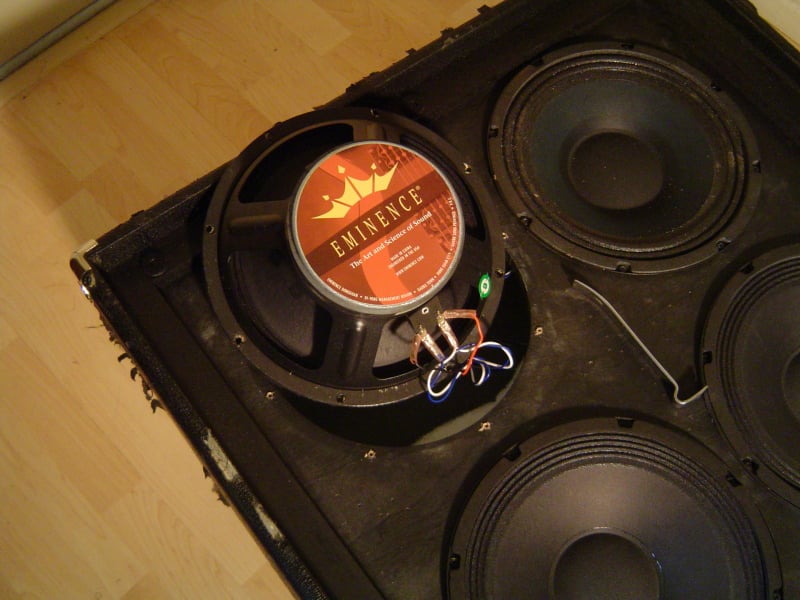
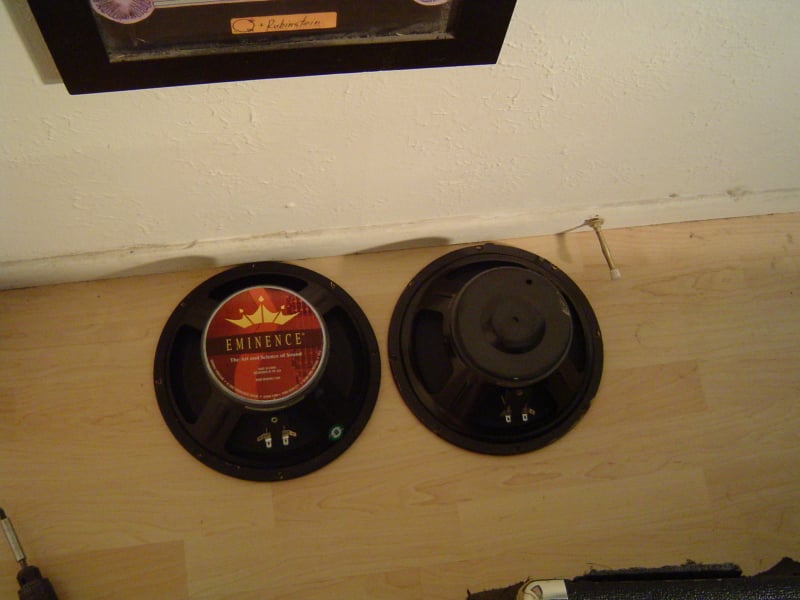
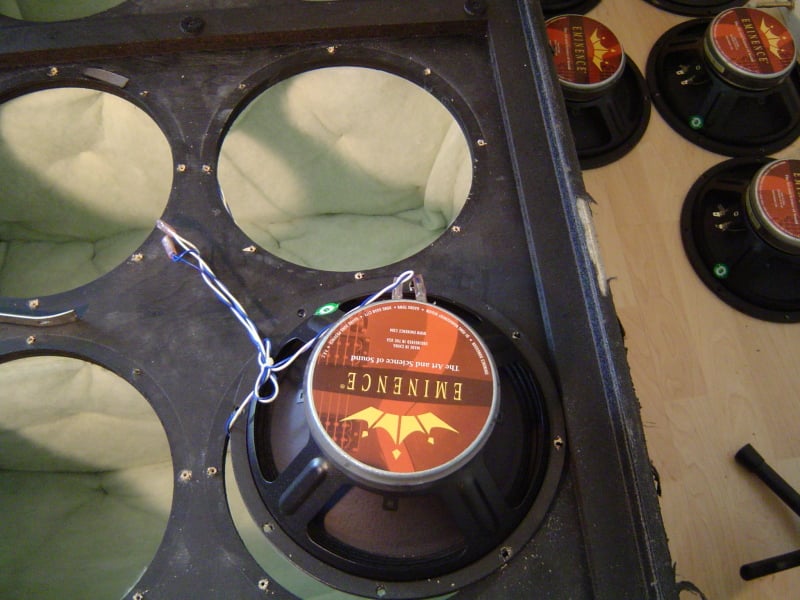
I took pictures of each speaker before I disconnected it so I'll know how to wiring it properly when I reassemble it.
28cg0vc.jpg


It looks like the top right speaker had been replaced at some point. All the others have that same "Eminence" sticker with the flat magnet back. The replacement has a bump on the back - bumped pole piece? I don't know, it's been a while since I worked with speakers.

OK, last speaker out.
2uo165j.jpg


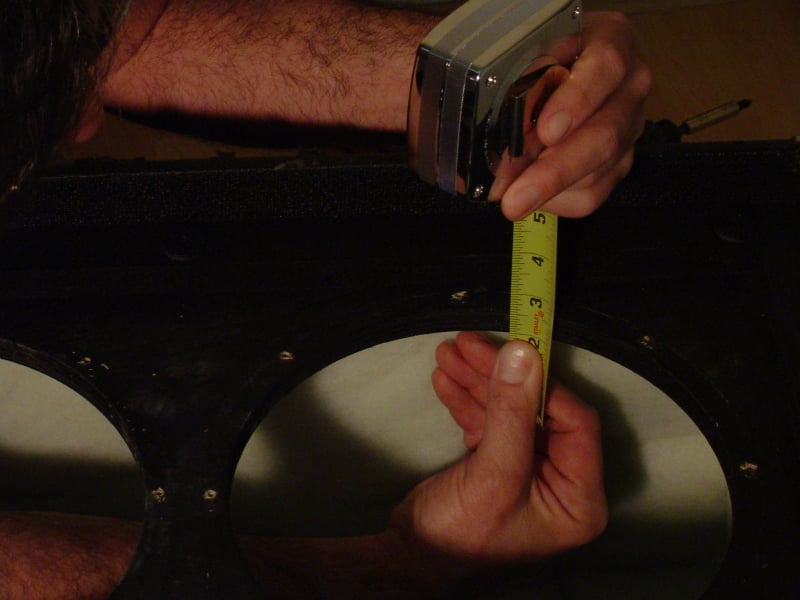
I also took measurements of everything. I had been thinking of making 4 speaker cabs, each with 2 of these 10's. A lot easier to move around. Turns out the wood is 9/16", and not 3/4".
154isk5.jpg


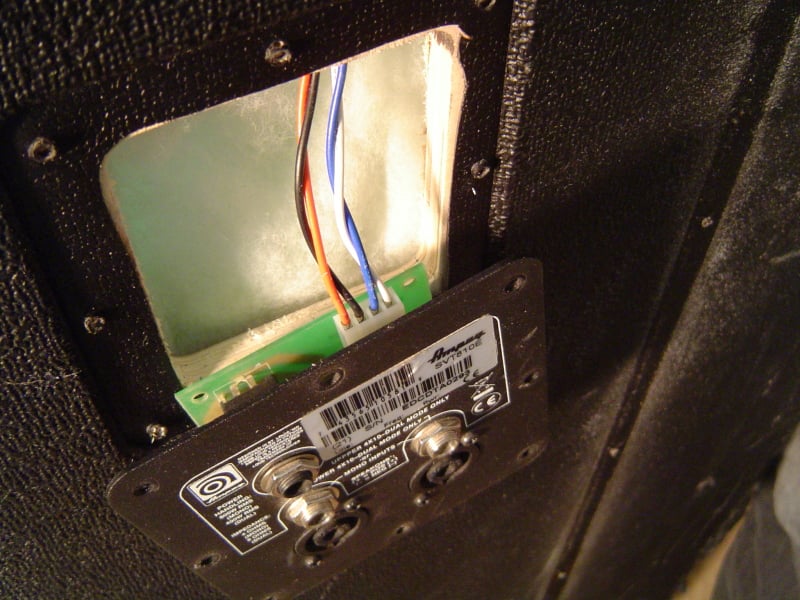
I remember back in the early 70's, I had an old SVT, that came with the 2 cabs. If you pushed in on one speaker cone, you'd see the other speaker cone push out. That cab was sealed tight. This one is not, and upon disassembly, I can see why.
2db89xi.jpg


First, the connector panel isn't sealed, and there's nothing behind it but stuffing and the cab's interior. Additionally, the wiring from each speaker section just goes through a 1/2" hole drilled through each section. It's a sealed design, but just not sealed very well. Cost cutting measure, I'd imagine. Depending on how this goes, I may seal everything up, like they did back in the day.

So once I pulled off all the hardware, I started pulling off the tolex. That's my husband giving me a hand. It was a big job, and I wasn't able to do it myself.
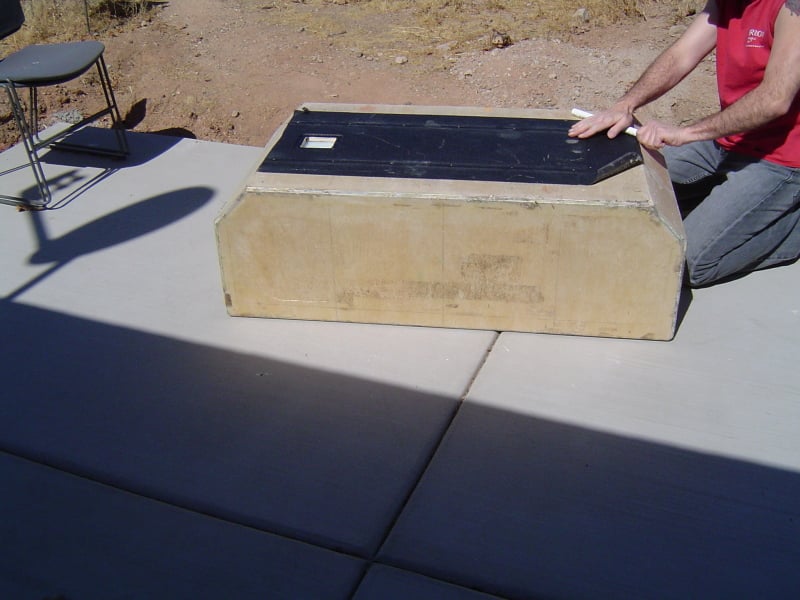
35n7pti.jpg


Some of the pieces were glued tighter than others. We ended up using a piece of pipe, and rolled up the tolex on to it. Definitely helped.
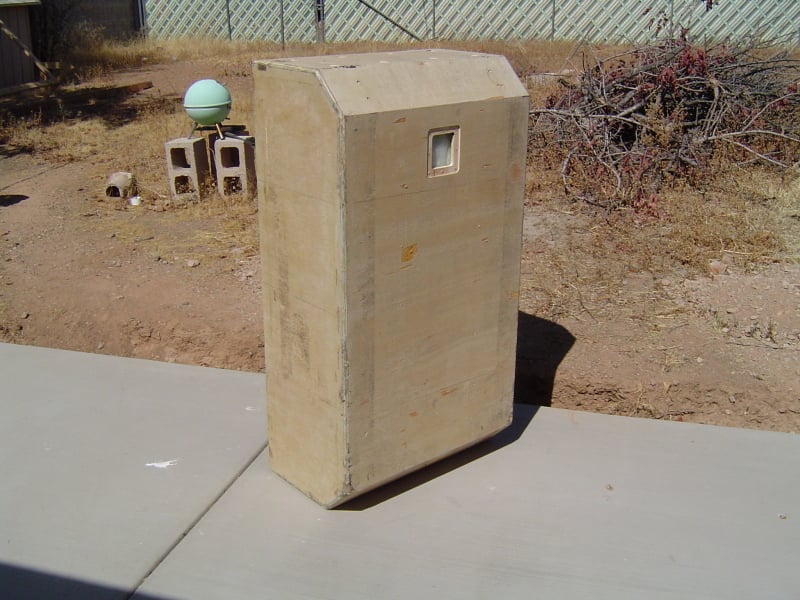
2vi1gdv.jpg


Once it was all stripped, we went at it with various methods. The quickest seems to be taking off the remaining glue with a belt sander, and sanding it smooth by hand with a sanding block. The belt sander can take off quite a bit, so it's slow going.

Since we live in Phoenix, and it's getting into the triple digits these days, we may call it quits for today. I have to pickup some sandpaper and dust masks at the hardware store as well. I'm hoping this can be done in a week or two. But of course, everything takes at least twice as long, and costs at least twice as much as we imagine :p

I'll post progress pictures as we move forward.
 
Last edited:
It's so strange that I was actually thinking of doing a similar project to this and that you just happened to post this thread :p

How much of that duratex liner will it take to cover your cab? I'm taking a small practice amp that I got for free and turning it into a head/cab setup for bedroom use where my combo is too large and loud, so I need significantly less duratex than a large cab, but it seems like the best method for applying a finish to a cabinet. Does it come in any cool colors?

-Ron
 
Interesting. I'll be following your progress.

Is that PF500 on top?

I like your Roadstar!

Thanks!

That's a PF800. I have to say they did a great job on the amp. The combination of the 810e and PF800 really nails that vintage tone I remember so well.

It's so strange that I was actually thinking of doing a similar project to this and that you just happened to post this thread :p

How much of that duratex liner will it take to cover your cab? I'm taking a small practice amp that I got for free and turning it into a head/cab setup for bedroom use where my combo is too large and loud, so I need significantly less duratex than a large cab, but it seems like the best method for applying a finish to a cabinet. Does it come in any cool colors?

-Ron

I bought the gallon tub, and according to the website estimates, I should have plenty left over. They also sell a "trial" pack, which comes with enough paint to cover a mid size cabinet, and the recommended rollers for application. It's about half the price of the gallon tub. I'm not sure about the colors - I do seem to remember there is a choice.

5mmick.jpg


A quick look over there shows it comes in both black and white. I got the black. You'll see the trial size for $24.95 which should easily cover a small practice combo.
 
  • Like
Reactions: drea2304
Nifty neato! I've been considering Duratexing my 73 flatback since the resale value isn't great with the cab anyway (you can part out the speakers and make more than you can for the whole cab), so I'll be very interested to see where you land with this one.
 
  • Like
Reactions: mapleglo
A quick look over there shows it comes in both black and white. I got the black. You'll see the trial size for $24.95 which should easily cover a small practice combo.

I wonder if the white would be tintable? I think it would be cool to have a seafoam green practice amp, but tolex isn't really available where I am to, so this seemed like the better alternative.

-Ron
 
I wonder if the white would be tintable? I think it would be cool to have a seafoam green practice amp, but tolex isn't really available where I am to, so this seemed like the better alternative.

-Ron

I'd send them an email and ask. I would think a little tint wouldn't hurt, but there may be some kind of reaction between the paint types or something that might effect the durability or adherence ability of it?
 
I'll email them when I get a chance, sorry for hi-jacking your thread! It's a really cool project, and I love to see that some people still have a lot of interest in those giant fridge cabinets, how much does that thing weigh?

-Ron

It weighs more than I do! Of course, it's much lighter without the speakers in it :P

The Ampeg website shows it as 140 lbs. With the towel bar and wheels, it's actually pretty easy to move around, so long as there are no stairs. And after 45 years of playing, I still have not found a cabinet that sounds as good.
 
I did one just like this about six months ago. A heat gun and a putty knife was the easiest way I found to get the old tolex and glue off. The glue that was left turned hard and dry instead of gooey so it sanded easily after the heat dried it out. I did a 2-15 and the 8-10 cabinet with a gallon of Duratex and had about 1/3 of the gallon left after doing both cabinets. Both turned out great. The only small problem with the 8-10 is that the grill dosen't fit as tight due to the Duratex not being as thick as the Tolex. It would take a lot of Duratex to equal the thickness of the Tolex. I plan on trying a strip of felt or something around the grill to tighten it up. Good luck with yours , I hope it turns out as good as mine did.
 
It looks like the top right speaker had been replaced at some point. All the others have that same "Eminence" sticker with the flat magnet back. The replacement has a bump on the back - bumped pole piece? I don't know, it's been a while since I worked with speakers.

I remember back in the early 70's, I had an old SVT, that came with the 2 cabs. If you pushed in on one speaker cone, you'd see the other speaker cone push out. That cab was sealed tight. This one is not, and upon disassembly, I can see why. First, the connector panel isn't sealed, and there's nothing behind it but stuffing and the cab's interior. Additionally, the wiring from each speaker section just goes through a 1/2" hole drilled through each section. It's a sealed design, but just not sealed very well. Cost cutting measure, I'd imagine. Depending on how this goes, I may seal everything up, like they did back in the day.

Once it was all stripped, we went at it with various methods. The quickest seems to be taking off the remaining glue with a belt sander, and sanding it smooth by hand with a sanding block. The belt sander can take off quite a bit, so it's slow going.

But of course, everything takes at least twice as long, and costs at least twice as much as we imagine :p

If it sounds good, the odd speaker won't be an issue. Some people prefer to change the drivers in a chamber as a pair. That way they are balanced, one driver won't stress the other.

These old cabinets can get leaky. Sometimes some silicon sealant can be used on the inner seams and back plate to take care of any issues.

Be careful not to change the edge round over when sanding. Otherwise, the metal corners will not fit as tightly as they should. I like to make a cardboard template and use it as a guide to ensure that the round over is consistent along the edge. Any issues with the wood can be fixed with a filler. Over sanded edges can be built up. Gouges can be filled. Many use Bondo, an automotive filler. I use wood epoxy. The better the wood preparation, the better the final result, weather you are applying Duratex or vinyl.

So true about the costs getting out of hand quickly.

Look forward to seeing additional pics as you progress.
 
If it sounds good, the odd speaker won't be an issue. Some people prefer to change the drivers in a chamber as a pair. That way they are balanced, one driver won't stress the other.

These old cabinets can get leaky. Sometimes some silicon sealant can be used on the inner seams and back plate to take care of any issues.

Be careful not to change the edge round over when sanding. Otherwise, the metal corners will not fit as tightly as they should. I like to make a cardboard template and use it as a guide to ensure that the round over is consistent along the edge. Any issues with the wood can be fixed with a filler. Over sanded edges can be built up. Gouges can be filled. Many use Bondo, an automotive filler. I use wood epoxy. The better the wood preparation, the better the final result, weather you are applying Duratex or vinyl.

So true about the costs getting out of hand quickly.

Look forward to seeing additional pics as you progress.

Thanks, I was hoping someone would comment on the odd speaker. I was looking at replacement speakers, and they run upwards of $75 each or more, so replacing it, or the pair, is not something I'm looking forward to doing. The cabinet sounds fine, so maybe I'll just leave it for now.

Regarding the leakage issue, this just seems "sloppier" than the cabinet I had back in the 70's. The back panel clearly is designed with leakage in mind. And the speaker wire holes between chambers. I'll likely seal everything up, and maybe even make a quick wooden "filler" for the back panel connector, and seal it up with silicon, along with the speaker wire holes. That's my OCD kicking in :P

And thanks for the tips about the round overs. I hadn't thought about that.

I'm hoping to do some more sanding tomorrow.
 
Last edited:
These SVT speakers sell for $95: http://www.speakerrepair.com/page/product/B-Beta-225W-350W/86-032-01.html but are different than what you have in there now.
Some used one or two pairs of Jensen MOD-10 50 speakers in their 810's: http://www.jensentone.com/mod_series/mod_10_50. A 50W speaker that at about $50 is more affordable. They can add a bit of brightness to an 810.

I'm not unhappy with the sound of the cabinet as it is. If I were to swap out the speaker, I'd want to either match what's in there, or get a matched pair. The existing odd one is an Eminence, just not an exact match to the others. Looking over the Jensens, frankly, I'm not impressed. Most of the models have a maximum excursion (xmax) of 1-2 mm, and the power ratings are pretty low. Of course, their prices are also lower.

You are on a roll, looks like a coll project. I see so many 810's on CL with trashed tolxe, gives me so inspiration.

Thanks, yes, once the tolex goes, the price also falls, which is why I was able to get my cab so cheaply. I don't mind putting in some labor and cash to bring this back to life, at least visually.