
Enjoy the benefits of a premium membership!
Upgrade Account
-
TalkBass has been independent since 1998. Add your voice.
Create a free account to reply to discussions, view embedded media, and browse with fewer display ads.
Join free Log in
Want zero display ads or expanded classifieds tools? Compare plans.
You are using an out of date browser. It may not display this or other websites correctly.
You should upgrade or use an alternative browser.
You should upgrade or use an alternative browser.
The Über-M - fretless
- Thread starter miziomix
- Start date
More options
Who Replied?
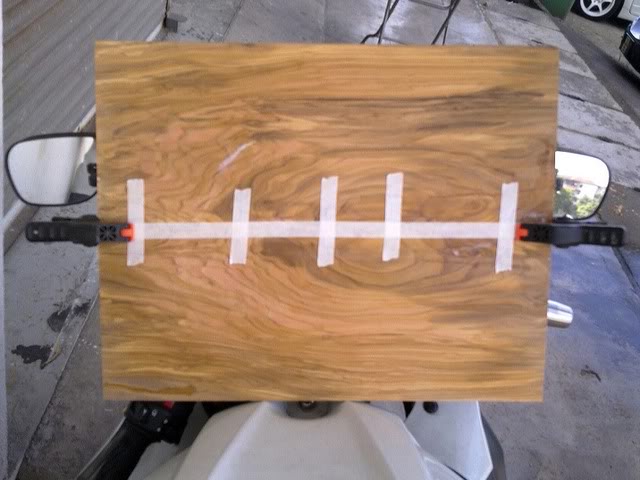
Before gluing the selected Olive laminates, I clamped and glued the cracks on the right above and below the masking tape.
I also glued the one on bottom left corner. But that one is less of a concern since it's outside the template.
This is the Ebony set that will provide the accent line at the back - like that on the Ragnarök, the other build in progress. An aesthetic feature that has become a bit of a signature of my basses.
I might go as far as saying that inserting 2mm of hard wood in a body made of soft wood potentially adds some snap to the sound. But then I will have to show proof of such a claim... So I won't
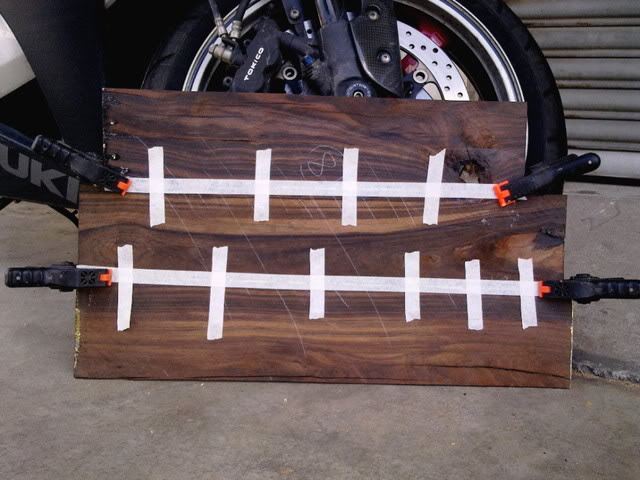
It always gives me joy when I can make use of good wood that might otherwise be discarded - like the Macassar top on the first Ü-J.
These three laminate have too many cracks and holes to become a top. Individually, they look pretty awful. But they're perfect for the job. The cracks and holes will fall right outside the template and once sanded they'll look great
Enjoy the week end!
I also glued the one on bottom left corner. But that one is less of a concern since it's outside the template.
This is the Ebony set that will provide the accent line at the back - like that on the Ragnarök, the other build in progress. An aesthetic feature that has become a bit of a signature of my basses.
I might go as far as saying that inserting 2mm of hard wood in a body made of soft wood potentially adds some snap to the sound. But then I will have to show proof of such a claim...
So I won't It always gives me joy when I can make use of good wood that might otherwise be discarded - like the Macassar top on the first Ü-J.
These three laminate have too many cracks and holes to become a top. Individually, they look pretty awful. But they're perfect for the job. The cracks and holes will fall right outside the template and once sanded they'll look great
Enjoy the week end!
I am surprised that no one has commented on the potential hilarity of the name of this wood.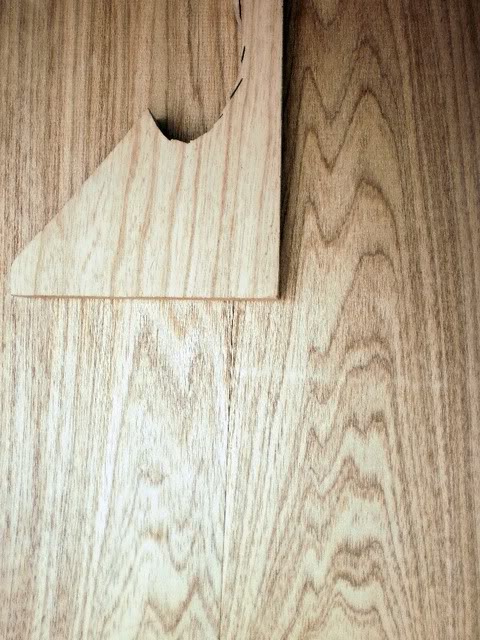
What looks like Swamp Ash is instead an Asian wood called - among the many names - Semangkok, Blooming Seed. The small piece sitting onto it is a Swamp Ash scrap.
It's slightly more dense and heavier than SA. The overall texture has a subtle silky sheen. It machines nicely and it's often used for high end furniture, paneling and interior design. And it's beautiful

I am surprised that no one has commented on the potential hilarity of the name of this wood.
Ahahhahhha... actually I was wrong, the correct name is - Bloating Seed... LMAOL

I really enjoyed your last build. In fact it is a contributing factor for getting off my tail and building mine!


JAUQO III-X
Inactive

you guys are so awesome... thank you!
quick update before I take off for four days - a holiday finally
The Blackwood laminate is glued to the back of the core wood and veeery roughly shaped. Doesn't it look good? I mean, compared to the wreck the three pieces were before they became one laminate.
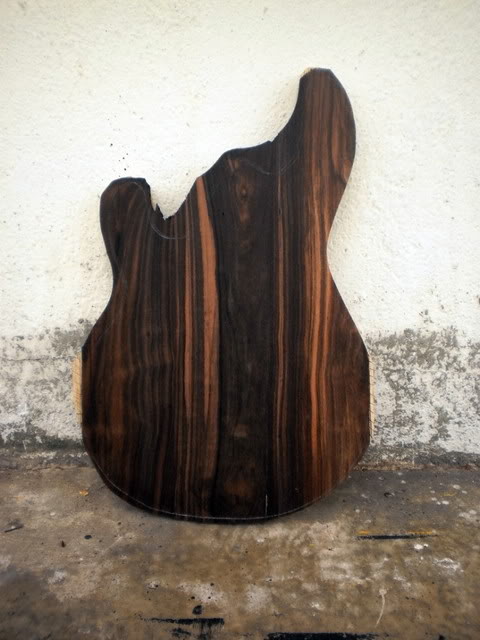
Even the owner said - I feel bad at covering it. Oh well... it'll look great on the profile. And we will always know that it's there
Now the Olivewood top is glued onto the veneer/core wood and curing. This top is extremely brittle, threatening to crack under the weight of my stare. And I can't help but.....
quick update before I take off for four days - a holiday finally
The Blackwood laminate is glued to the back of the core wood and veeery roughly shaped. Doesn't it look good? I mean, compared to the wreck the three pieces were before they became one laminate.
Even the owner said - I feel bad at covering it. Oh well... it'll look great on the profile. And we will always know that it's there
Now the Olivewood top is glued onto the veneer/core wood and curing. This top is extremely brittle, threatening to crack under the weight of my stare. And I can't help but.....
Here's the body. The pencil lines mark areas that I want to sand further.
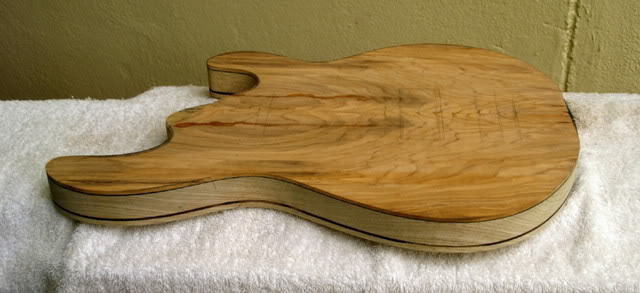
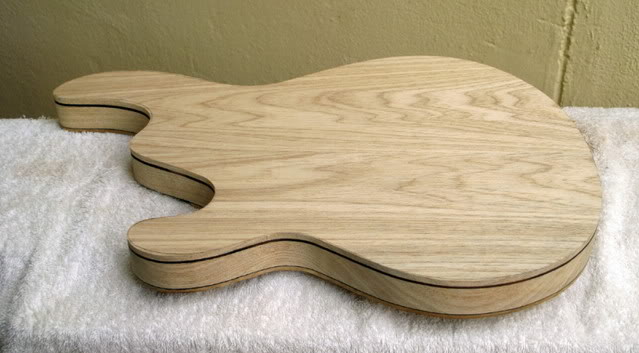
I really like working with this wood and it looks just great. The continuous grain will show once I start working on the contour. The look will in fact be very similar to that of the Ragnarök.
Next step however, will be neck and fingerboard.
On a separate note, does anyone know whether there are differences in p-up placement between pre and post EBMM? Thanks
I really like working with this wood and it looks just great. The continuous grain will show once I start working on the contour. The look will in fact be very similar to that of the Ragnarök.
Next step however, will be neck and fingerboard.
On a separate note, does anyone know whether there are differences in p-up placement between pre and post EBMM? Thanks

snip...
On a separate note, does anyone know whether there are differences in p-up placement between pre and post EBMM? Thanks
I've never heard of that. I do have a transitional Stingray ('83) and I would be happy to measure for you. Just tell me how you want it measured.
I've never heard of that. I do have a transitional Stingray ('83) and I would be happy to measure for you. Just tell me how you want it measured.
Hey Zuma, neither have I actually. But I read somewhere that there might be a difference. Anyway, if you can, please measure for me the distance between 12th fret and center p-up and between center p-up and saddle - G string. Thank you my friend.
I had a '77. Sold. God have mercy of my soul


that sandwich looks tasty...
Indeed - What are the thicknesses for each piece?
Indeed - What are the thicknesses for each piece?
I change according to the desired final look. In this case, the thickness is (back to front) - 6mm or .23; 2mm or 5/64"; 26mm or about 1"; 0.8mm or 1/32"; 4mm or .15".
I can't believe I'm saying this...but... I'm glad holiday season is over After Xmas and new year, Chinese new year and Thaipusam the world over here is finally back to the good ol' habit of opening the shop, replying to emails and delivering parts long payed for - no CF necks though, sorry.
Today I prepared the Zericote fingerboard and the Wenge laminates. I also spent some time making templates for one the next builds which is another beast altogether - but that's for another thread.
A few pictures to usher in the year of the Dragon
The Zericote is 7.9mm or 5/16" thick. It's a two octaves long. I have left one extra mm on each side. It will be unlined, with side dots. 12"radius.
The lower half of the board was sanded to 350 grit and oiled to show to the owner how it will look once finished. I'd say, er... black
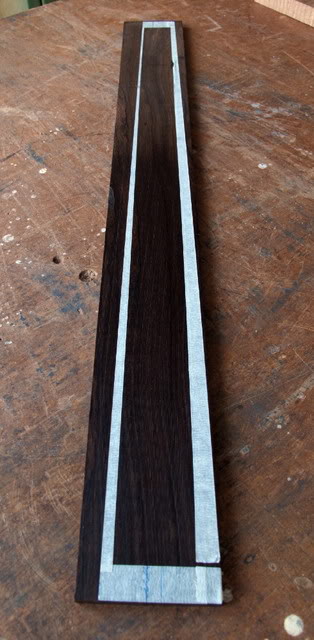
The layout of the fingerboard is off center to save wood which can be used for bindings.
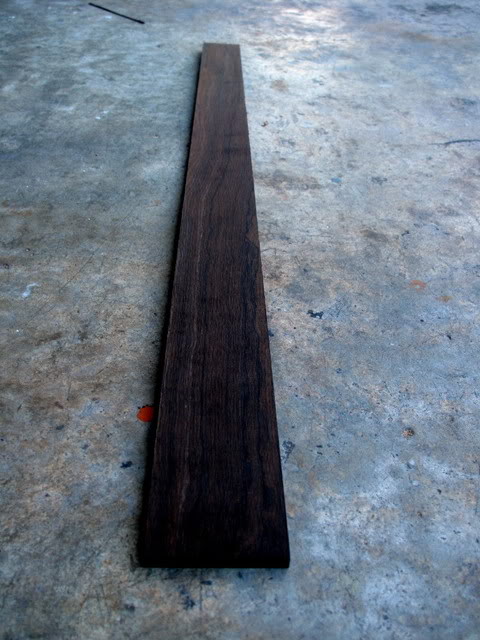
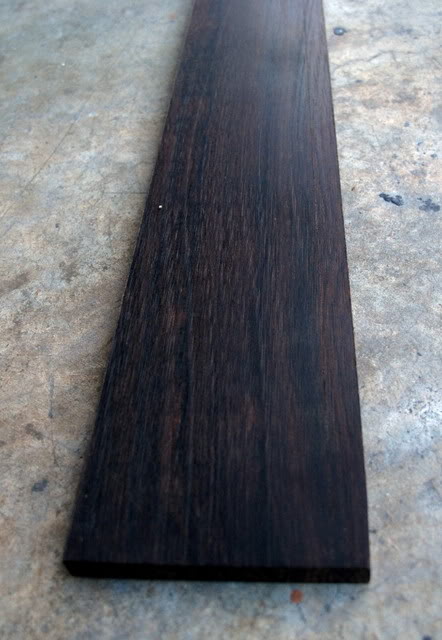
Then I cut and sanded the Wenge laminates. It's such a pretty wood.
I've thought about this long enough and have concluded that the combination of Wenge and Zericote is especially nice.
To add a final touch to the combo, the center laminate will be a tapered jet black Ebony which I will prepare tomorrow.
Zericote on Wenge/Ebony/Wenge. It's black on black on black
Wenge...
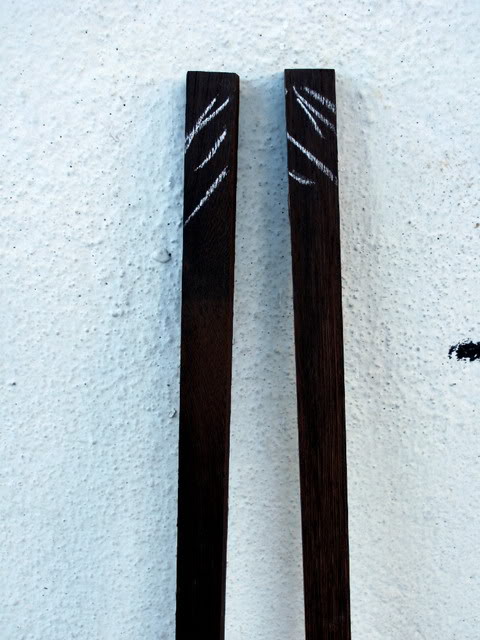
Wenge... (I have over exposed the picture below to show the grain.)
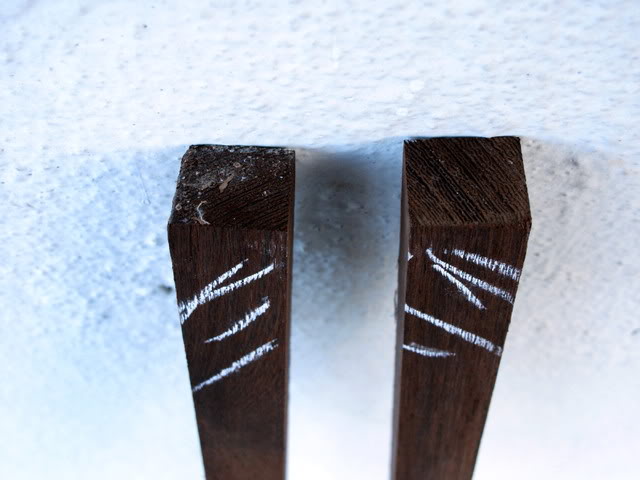
Wenge.

After Xmas and new year, Chinese new year and Thaipusam the world over here is finally back to the good ol' habit of opening the shop, replying to emails and delivering parts long payed for - no CF necks though, sorry. Today I prepared the Zericote fingerboard and the Wenge laminates. I also spent some time making templates for one the next builds which is another beast altogether - but that's for another thread.
A few pictures to usher in the year of the Dragon
The Zericote is 7.9mm or 5/16" thick. It's a two octaves long. I have left one extra mm on each side. It will be unlined, with side dots. 12"radius.
The lower half of the board was sanded to 350 grit and oiled to show to the owner how it will look once finished. I'd say, er... black
The layout of the fingerboard is off center to save wood which can be used for bindings.
Then I cut and sanded the Wenge laminates. It's such a pretty wood.
I've thought about this long enough and have concluded that the combination of Wenge and Zericote is especially nice.
To add a final touch to the combo, the center laminate will be a tapered jet black Ebony which I will prepare tomorrow.
Zericote on Wenge/Ebony/Wenge. It's black on black on black
Wenge...
Wenge... (I have over exposed the picture below to show the grain.)
Wenge.

Thank you Dreamy2006!
Here's the neck combo. Wenge/Ebony/Wenge. For a moment I thought of adding a Maple veneer between laminates. Only for a moment
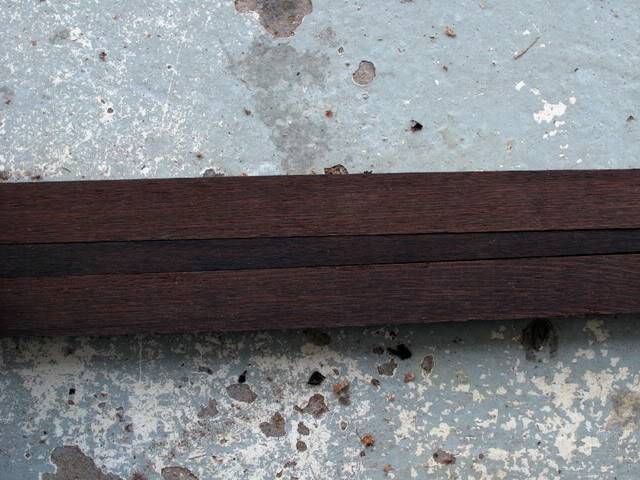
The center laminate is tapered, much like on my previous builds. I made this one slimmer though, given that Ebony is such a hard and heavy wood. It's 5mm wide at the headstock and 20mm wide at the heel. It will make a pretty stiff neck.
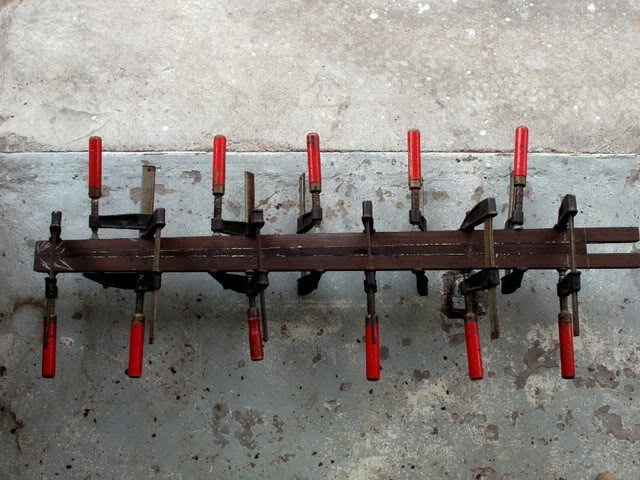
Glued. These days is so hot that one can literally see the glue drying up.
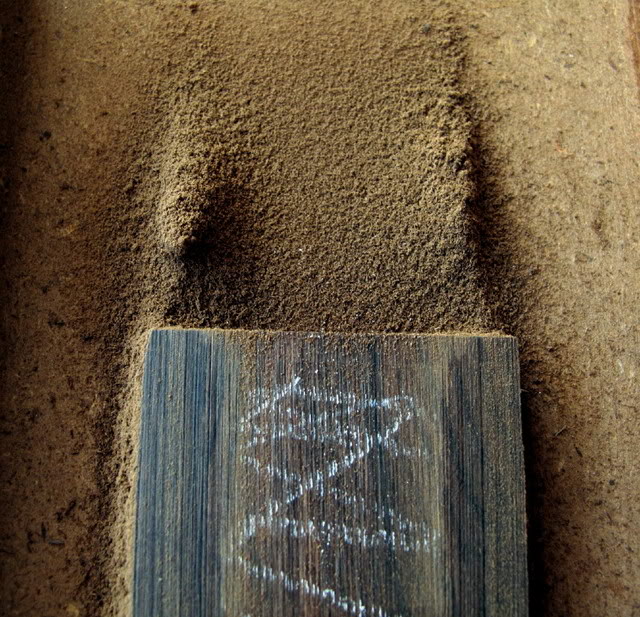
This is a picture at the stage when the fingerboard starts producing a seemingly endless supply of sawdust.
The Zericote really is a pretty wood and I enjoy working with it. I forgot to take a picture of the finished fingerboard...
In the next few days the focus will be on finishing the neck. There will be hardly any work on the body until then.....in spite of the fact that I can't wait to work on the contour
Thanks for reading this far
Here's the neck combo. Wenge/Ebony/Wenge. For a moment I thought of adding a Maple veneer between laminates. Only for a moment
The center laminate is tapered, much like on my previous builds. I made this one slimmer though, given that Ebony is such a hard and heavy wood. It's 5mm wide at the headstock and 20mm wide at the heel. It will make a pretty stiff neck.
Glued. These days is so hot that one can literally see the glue drying up.
This is a picture at the stage when the fingerboard starts producing a seemingly endless supply of sawdust.
The Zericote really is a pretty wood and I enjoy working with it. I forgot to take a picture of the finished fingerboard...
In the next few days the focus will be on finishing the neck. There will be hardly any work on the body until then.....in spite of the fact that I can't wait to work on the contour
Thanks for reading this far


