• TalkBass has been independent since 1998. Add your voice.
    Create a free account to reply to discussions, view embedded media, and browse with fewer display ads.
    Join freeLog in
    Want zero display ads or expanded classifieds tools? Compare plans.

The Peeler Precision Tribute

MadJack

Supporting Member
Nov 4, 2013
1,241
6,169
Central Florida
This is a project I had been thinking of for a while. I'm putting it here, since it's all mods and I'm not building this from scratch, or even unfinished bodies or neck, but modifying an existing model.

I've been a bit of a ZZ Top fan and I like the style of their guitars and electric basses. On in particular that caught my eye was Dusty Hill's John Bolin Peeler Precision Bass. According to the information I've been able to find on this bass the original one, a '56 Precision, was spotted by Elwood Francis (at the time was ZZ Top's guitar tech) on eBay and he showed it to Dusty Hill and Billy Gibbons. After that somebody took a bunch of detailed pictures and they went to John Bolin of Bolin Guitars, Billy's favorite luthier.

Subsequently, Bolin Guitars made a matching pair of Billy's Humbucker Esquire and Dusty's '51 Precision.

4af4b9dc-cc82-4a73-9e12-30d6120d25b8.jpg


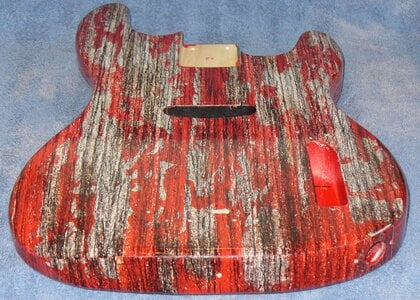
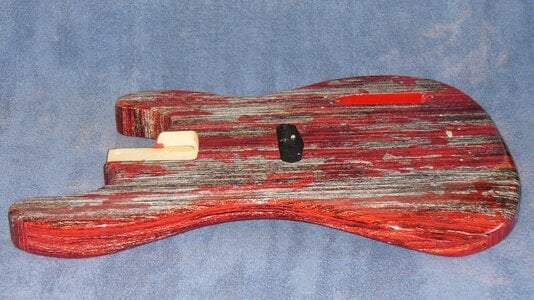
I'm going to cover primarily Dusty's Peeler P. It's a recreation of a '51 slab bodied Precision with the single coil pickup, but in Fiesta Red, that wasn't available in that body style from Fender at that time. The peeling effect wasn't painted, but rather printed on vinyl wraps. The same was carried over to the neck. In other words, the neck is wrapped in printed vinyl. It has Dusty's favorite pickup, a Seymour-Duncan Custom Shop '51 P-Stack, a.k.a., the Stinger. The unseen bridge is supposed to be a Leo Quan Badass Bridge. It wears some sort of GHS strings.

Most of the information was gleaned from this 2015 Premiere Guitar Rig Rundown:


The guitar tech in the video is Elwood Francis who, according to Billy, was chosen by Dusty before he passed to fill in for him. Billy claimed Dusty said, "Elwood knows all the songs and has the right attitude." Early on, Elwood played it a few time, but from what I understand, it's been put away for safe keeping.

In May I finally got the Fiesta Red Harley Benton PB-50. It is the foundation for this build. (I've had a three tone Sunburst and really liked it after swapping in a slightly milder pickup and a few dress up parts, ashtray covers, tug bar and the white pickguard from the FR. Aside from the 3TS finish, it's a recreation of a '54-'57 P bass.) It's not going to be an exact copy, as it has the contoured body as from the '54 and later models, I'm not doing the backside and for now, I'm using the stock bridge under the bridge cover.

I'm not going to log every step, as I've done most of that already, in the "I own a Harley Benton club" thread and a few other locations. I'm going to import the more significant posts covering the build process and all successive posts will be posted here. It might take a while to import all the posts, so please be patient until I can get to where I'm at currently.
 
May 17, 2024

This is the one I'm looking to duplicate the John Bolin/Dusty Hill Peeler Precision Bass.
https://www.talkbass.com/attachments/peeler-proto-jpg.5451091/

Wila had to inspect it and she approves.
https://www.talkbass.com/attachments/img_20240516_145238045-jpg.5451042/

Everything was as expected. One of the notable differences is between the Fiesta Red and the Vintage Sunburst is the SB made from poplar and the FR is made from Basswood. The FR weighs in at 8.4lbs and the SB weighed in at 9.2lbs. Another notable difference is the stock Roswell is much hotter (9.1kΩ) than the BootStrap Palo Alto (8kΩ) in the SB.

Between yesterday and today, I dressed the fret ends and polished the frets. They were damn near dead level! A couple with barely perceptible movement/ticking with my fret rocker There was no sprout, but the square cut fret ends were much more easily felt, then a beveled fret end, so I beveled the ends. I changed out the stock D'Addario XL Steels for a set of GHS Pressure Wounds. I replaced the stock steel saddles and installed a set of brass saddles. With the PWs, I may swap back to the steel saddles. I even have a set of the fender threaded steel saddles. I painted the pickup cavity with shielding paint and attached a ground lead.

The most notable is I made a cardstock template for the custom pickguard. See the Peeler Pickguard above.

https://www.talkbass.com/attachments/img_20240517_163934390-jpg.5451106/
Stock pickguard on tracing.

https://www.talkbass.com/attachments/img_20240517_165946976-jpg.5451107/
Cardstock pickguard attached to the body, along with the black bridge cover. (Some pics show a black late 50's-60's style cover others show an early to mid 50's chrome cover.)

I still need to reshape the headstock. I want to try to keep the Harley Benton logo on the headstock. I think it should fit on a 50's P/Tele Bass headstock shape. Then I will age the neck.

Something to note with this build, the PB50 body is like a '54-'57 body, with the belly cut, forearm bevel and a rounder radius around the edges. The peeler and Dusty's other Tele style basses are slab bodies like the '51-'53 Precision basses.
 
May 18, 2024:


I sent out the tracing of the pickguard and the order for the Peeler skin for the Fiesta Red (FR) bass. I have also been looking into hum canceling '51 P pickups. While most of them cost about as much as the PB50 (Reverb or Thomann's price + shipping to the US), to me, I think I'll be more satisfied with an appropriate pickup. The most expensive is also the same model that Dusty supposedly used, the Seymour Duncan '51 Single Coil P Bass Stack. The Bootstrap Palo Alto is much closer to the sound that Dusty had, but not quite the same. The Roswell is quite a bit hotter and darker then the Palo Alto and Dusty's tone. The Roswell 51 P single coil is actually a good pickup, it's just too hot for my taste.

I'll be keeping the Palo Alto in my SB, with the EB Cobalt Flats, while the FR will get the new pickup and ,may or may not stay with the GHS Pressure Wounds or get a set of Nickel wound rounds. During the Premier Guitar rig rundown of Dusty's and Billy's rigs, Francis Ellwood said the strings Dusty was using GHS and then he got sidetracked and didn't finish saying what series string he was using.

I have seen several videos and a few picture of Francis Ellwood playing Dusty's Peeler. It's great to know that some of Dusty's basses didn't just turn into show pieces and are being played like they were meant to be.
 
Jun 11, 2024:


My PB-50 Peeler pickguard came in. I had to finish repairing my truck, get a shower and hen I installed it.

Is this what the Peeler looked like before the flood?

P1030838.JPG


Jul 22, 2024:


....
I drew template outline on the headstock and used a Invalid Link Removed to do a rough in cut and finished with a palm sander, sanding sponges and hand sanding at progressive grits from 60 to 220. The other night I got through all of the neck except the 11th fret on up. After I finish the fret board, I'll wipe it down with a damp cloth to rise the grain and get to the ultimate finish. I am looking for more of a grayish-brown stain to give the neck more of the flood recovery look, like the original peeler has. Using the sanding sponges, I slightly rolled the edges of the fretboard. A nice side effect of this, is it rounds the ends of the frets really nicely, all of which makes for a very comfortable neck. I've had the pleasure of playing a Tru-Oiled & gun stock waxed neck. It was smooth with a nice semi-gloss to satin finish. This is what EBMM does with their necks.
 
  • Like
Reactions: Clark W
Aug 27, 2024:


Last night I gathered a number of the parts that will be in use. Yes, the knobs are different, but so are the knobs on the John Bolin/Dusty Hill Peeler P. This is the first time I'm using a CTS Push-Pull Pot and it is noticeably taller/deeper. It's 7/8" tall and the route is only 3/4" deep. No problem, I'll rout the cavity around the pot a little deeper. The CTS pot uses a different wiring connection scheme, but it feels so much better than the Alpha Push-Pulls I've used before.

https://www.talkbass.com/attachments/p1030872-jpg.7014953/

I just applied the first coat of Tru-Oil. It went from a flat light grey, with little to no detail to a slight sheen and grimy, weathered look. Exactly what I'm looking for! :thumbsup: It is supposed to look like it was left out in the weather or in a flood, just knarly, abused, neglected looking. There was very little grain detail, but what little detail is there has come out nicely. Not overly detailed, but present.

https://www.talkbass.com/attachments/p1030873-jpg.7014956/

I'll let this coat cure a couple hours, then rub it out with some steel wool, wipe it down and apply another coat. I'll likely repeat this about two more times, then apply a coat of gunstock wax and buff it with paper towel for a satin finish.
 
Last edited:
  • Like
Reactions: Clark W
Aug 28, 2024 6:27 PM:

I applied the fourth and final coat of Tru-Oil. Shortly later UPS stopped by and delivered something!

https://www.talkbass.com/attachments/stinger-box-jpg.7015892/

This will now allow me to start measuring and routing the body to ensure the pickup and push-pull pot will fit. At 29.90KΩ it's HOT! But, that's the reason for the push pull pot, so I can go from series (29.90KΩ) to parallel (7.475KΩ). It should be a beefy hot rock character to a nearly vintage one.

As for the neck, either tonight or tomorrow morning, I'll scuff it out with some #0000 steel wool, then apply a coat of the gun stock wax and buff it out with a paper towel. This will leave me with a smooth satin finish.

Last night I started on scuffing up all the surfaces of the chrome (and black bridge cover) hardware for the aging process. I hit them up with #1 steel wool, 220 and 400 grit sand paper and course fabrics (Cardura nylon and denim). The stepped coarseness is to make the wear more natural, relatively smooth in the areas that are commonly handled, but leaves some of the deeper scratches for a bit more naturally aged look. This is to break the finish on the chrome and lightly expose the substrate so when I expose these parts to the acidic vapors, they will start breaking down. The moving parts on the tuning machines already have oil on them to prevent the vapors from corroding those surfaces.

I usually don't care for reliced instruments, unless it is natural, but this one is a tribute bass to one of my favorite players. It also helps that I just think the Peeler P is one of my favorite basses, in both looks and sound. This is my most expensive, but also my most detailed build to date.


Aug 28, 2024 10:01 PM:

Mmmmmmm!
I finished the neck. I did the last scuffed and waxed it as I previously described.

https://www.talkbass.com/attachments/finished-neck-jpg.7016353/

I has the satin finish as I expected. It's not quite as grey as I expected, but it still looks weathered somewhat.

What I can say I like about it, it feels AMAZING! So smooth! This is supposedly the same finish that Music Man puts on their guitars and basses. It is by far my favorite feeling neck. The fret ends have been dressed (previously to doing this mod) and when I stripped it, I rolled the edges.

I am going to do this to more of my necks. Which one is next, I'm not sure, as I have more projects in the works aside from the Peeler P.
 
Last edited:
  • Like
Reactions: Clark W
Aug 30, 2024:

I swapped the original control plate in and drilled it to the proper size. I then scuffed it up for relicing and wired it up as much as I could without the pickup leads. I also scuffed up a few more smaller parts.

https://www.talkbass.com/attachments/p1030884-jpg.7017408/

As I've said before, the CYS Push-Pull pot is the volume and series-parallel wiring for the pickup. The other pot is the tone pot with an Orange Drop .047µF cap. The back and white cloth covered wire going to the right are going to the output jack. the black wire to the right is the bridge ground and the black wire going to the left id the ground connection for the pickup rout.

Here's the wiring diagram I worked from:

https://www.talkbass.com/attachments/1724990356991-png.7017409/


The CTS hooks up differently than the Alpa push-pull pots.

The Alpha connections as shown in the Seymour Duncan wiring diagram:
1724990759264.png


The points as marked on the CTS push-pull pot:
1724990828885.png


The pot ground is soldered to the metal body on the sides.

As I said previously, the TS push-pull pots feel so much better than the Alpha models do. The smoothness of the turn, just the right amount of resistance to the turn and the push and pull of the switch, it all just feels more quality. This isn't to put down on the Alpha pots, that I've haven't had any problems with, it's just the feel of the CTS is of much higher quality.
 
  • Like
Reactions: Clark W
That catches thing up.

Today I finally too the big step of applying the vinyl wrap. The wrap was made by Inzane Skins. They already had the graphics for a Seafoam Green Peeler, so I had them make me a Fiesta Red set with sides. They cost about half as much as the bass itself! I studied and reread, re-watched their tutorial materials and that of others. I essentially followed Inzane Skins directions.

I started by stripping everything off the bass. I made a tracing of the bass on the tracing paper they supplied with the skins. I cut that tracing out approximately a half inch (12.7 mm) oversized. I laid the tracing paper on the skin and found the orientation I wanted on the graphic. I taped it down with some clear tape and cut the skin to the paper template.

Vinyl cut wrap before.JPG
Tracing paper on bottom, body in the middle and the vinyl skin on top.

After cutting out the skin, I then took the 3M Knifeless Cutting Tape and ran the cut line around the bevel on the top, approximately half way around the bevel.

I then lined up the skin how I wanted it to sit, and used blue masking tape between the horns and the skin's backing paper to hold the alignment. I the lifted the back end, separated the backing paper, cut about 6" off the backing paper and proceeded to progressively rub the skin to the body, making sure to press out any air bubbles. I them lifted up the front end and proceeded to apply the front end as I did the back.

P1030886.JPG
Rear applied and rolling out to the front.

I finished applying the vinyl, using a heat gun (with adjustable temperature) on low heat to allow the vinyl to stretch and bend around the contours of the body. I cut part of the neck pocket out to access the ends of the cut tape. I weeded out the cut wire from the tape and proceeded to pull/cut the vinyl around the body. I pulled the fall off from the body and pulled the two halves of the cut tape from the body. The second half will still be under the edge of the vinyl and the edge need to be lifted to get to it.

P1030887.JPG
The fall off vinyl. The green strip is half of the cut tape.

Once the edge is done, I proceeded to weed out the pickup rout, the control cavity, the screw holes and the bridge ground wire opening.

P1030888.JPG

That is where I stopped for today. I still need to apply the sides, but before I do that, I had to get a preview of how it will look:

P1030889.JPG
Nothing here is attached, just placed to see how it will look.

Tomorrow, I'll see if I can pick up some muriatic acid (Kleen Strip driveway cleaner) to oxidize the chrome parts I scuffed up and want to relic. I have the 2 part matte clear spray to cover the body with after the sides are applied.

Thanks for looking. More to come soon.
 
That catches thing up.

Today I finally too the big step of applying the vinyl wrap. The wrap was made by Inzane Skins. They already had the graphics for a Seafoam Green Peeler, so I had them make me a Fiesta Red set with sides. They cost about half as much as the bass itself! I studied and reread, re-watched their tutorial materials and that of others. I essentially followed Inzane Skins directions.

I started by stripping everything off the bass. I made a tracing of the bass on the tracing paper they supplied with the skins. I cut that tracing out approximately a half inch (12.7 mm) oversized. I laid the tracing paper on the skin and found the orientation I wanted on the graphic. I taped it down with some clear tape and cut the skin to the paper template.

View attachment 7018855
Tracing paper on bottom, body in the middle and the vinyl skin on top.

After cutting out the skin, I then took the 3M Knifeless Cutting Tape and ran the cut line around the bevel on the top, approximately half way around the bevel.

I then lined up the skin how I wanted it to sit, and used blue masking tape between the horns and the skin's backing paper to hold the alignment. I the lifted the back end, separated the backing paper, cut about 6" off the backing paper and proceeded to progressively rub the skin to the body, making sure to press out any air bubbles. I them lifted up the front end and proceeded to apply the front end as I did the back.

View attachment 7018857
Rear applied and rolling out to the front.

I finished applying the vinyl, using a heat gun (with adjustable temperature) on low heat to allow the vinyl to stretch and bend around the contours of the body. I cut part of the neck pocket out to access the ends of the cut tape. I weeded out the cut wire from the tape and proceeded to pull/cut the vinyl around the body. I pulled the fall off from the body and pulled the two halves of the cut tape from the body. The second half will still be under the edge of the vinyl and the edge need to be lifted to get to it.

View attachment 7018864
The fall off vinyl. The green strip is half of the cut tape.

Once the edge is done, I proceeded to weed out the pickup rout, the control cavity, the screw holes and the bridge ground wire opening.

View attachment 7018868

That is where I stopped for today. I still need to apply the sides, but before I do that, I had to get a preview of how it will look:

View attachment 7018875
Nothing here is attached, just placed to see how it will look.

Tomorrow, I'll see if I can pick up some muriatic acid (Kleen Strip driveway cleaner) to oxidize the chrome parts I scuffed up and want to relic. I have the 2 part matte clear spray to cover the body with after the sides are applied.

Thanks for looking. More to come soon.
Cracking job with that vinyl wrap! I've been looking forward to seeing that go on. 👏👏👏👌👍
 
  • Like
Reactions: Jim C and MadJack
I'm looking forward to your experiences with the Stinger pickup in series and parallel.
I wired mine that way too. While it's definitely louder in series, I can't tell that the tone is appreciably different. My ear is not great either - some folks may be able to hear something pronounced about one way or the other.
Cool project, and great work!
 
  • Like
Reactions: MadJack and Wyrdlow
Sorry I didn't update yesterday, but life gets in the way of play from time to time. ;)

Yesterday I got the back and the front sides wrapped. Doing this, I learned to leave plenty of extra knifeless cut tap past each end and don't expect to do too small of a piece of vinyl with it, or too close to the edge. When cutting too small of a piece or close to the edge, you will have to use an X-Acto knife.

Anyways, I finished up the warp today, with the top and bottom sides. They don't look like what they should in reality, but I used as similar pieces and made the look like they carried over to the side as much as reasonably possible. If you watched the video in the original post, you can see where they just put whatever wrap on the sides. On the originals though, they have a hard edge to work with, where I'm trying to do something close to blending as I can.

I didn't do a perfect, professional job, but I think I did pretty good for a first timer. It also took longer than it should, but I was feeling my way through doing it for the first time. If you look closely, you notice there are a few minute gaps (1/32" or so) in the wrap on the edges. They won't be noticeable at normal viewing distances.

On to the pics:

Wrapped Back.JPG
I started here, doing my best to line up the patterns. I think this edge turned out about the best.

Wrapped Front.JPG
The front edge was the real PITA! That's where I ran into the most problems, due to all the curves and trying to piecemeal the remaining edge strips with the grain flow in the correct direction.

Wrapped Bottom.JPG
The bottom side.

Wrapped Top.JPG
The top side.

After all the frustration with the front edge, I took the lessons from there and used them doing the bottom and top sides. These The best matching I could do here is to match the direction of the grain. The front and back sides I just carried the direction of the grain, since there is no end grain pieces, but the same holds true of the originals.

Wrapped back side.JPG
As you can see, I didn't do anything with the back side. It will get a clear matte finish like the rest of the body.

I did get a can of the recommended clear coat, Spray Max 2K Clear Matte #368 0065. It's a two part coating in a single can. Use the plunger on the bottom of the can to release the hardener, shake well and spray. I is supposed to last a couple days before the hardener reacts in the can, but reacts normally one exposed to air. I will have to wait for a moderately cool morning that isn't so humid. I'm thinking about three coats should suffice.

I didn't get to the store to get the muriatic acid yet, but once I doo, it shouldn't take but a couple hours of exposure to the fumes to get the result I'm after.

Once those are done, I can put it together, solder in the pickup, string it up, set it up and have fun!
 
I didn't get anything done Tuesday, I had other priorities.

It's been too hot and rainy to try to paint the matte clear on the body. I'm waiting for at least a moderately dry day before I spray.

I started trying to relic the hardware, with the first attempt with the acid diluted to one part water and one part acid. No such luck. Then I looked at the mixture on the jug and it is already a 20% solution. I replaced the diluted solution and just added straight and it seems to be working now, but not as fast as with nickel hardware.

I have read that nickel hardware needs about 20-25% solution, while chrome hardware needs to be scuffed and needs a 30-35% solution. Using a 20% solutions does appear to be working, just not as fast as a stronger solution. As of this writing it's turning green in much of the more scuffed parts, while the lighter scuffed areas are starting to grey or matte finish. The black powder coat on the bridge cover is speckling, mostly along the deeper scratches.

Halfway reliced.JPG

This is about an hour and a half, I'm going to give it about another hour. The green will mostly wash off, or rub off with handling. It does contain a fair amount of the hydrochloric acid that muriatic acid is made of, so you do want to wash it off when done.

I'll update again after I wash the parts off.
 
I pulled the parts out and washed them. It has a light to moderate greying and discoloration. The chrome is dulled slightly. I think it could use more.

Reliced.JPG

I'm pretty sure I'll do more, but I'm done for tonight.

It's been raining most of this evening, so it might be a while before I could spray the matte spay.
 
I put the parts in the bin for a couple more hours and it's where I wanted it now.

I washed the parts, lubed the tuning machines and reinstalled them.

Reliced Hardware.JPG

The neck and hardware may not look as reliced as the wrap, but I'm also trying not to go overboard and keep it playable.

Yes, the domed knob on the volume pot is not reliced, as the original is the same.

Another torrential downpour today, so spraying the body is still out of the question. I won't be able to do anything else until I get the body clear coated.

I did just get in a new pedalboard that needs to be set up, and a set of new strings for one of my main players. I also have another bass waiting a rout job to install a different style pickup. So it's not like I'm hurting for projects.
 
Finally!

The humidity has been low enough to spray. The humidity got just low enough before lunch time and continued to drop. The temperature when I started was just barely in range, but soon started to exceed that recommended range.

Matte Finish Sprayed.jpg

I don't have a spray booth, so some dust found it's way onto it. At least it's a matte finish, so it won't be as noticeable. Also the random pattern on the vinyl will help hide it. The back, no such luck. The hotter, dryer weather of this afternoon will help it setup better/quicker. I'm going let it stay out in the heat for a while, then I'll bring it in. (I did bring it in for a moment and it stunk up the whole house, so it's going to outgas outside as long as possible.)

BTW, I'm using [Invalid or Expired Link Removed]. It's a two part polyurethane coating in a single can. The red button in the cap is placed on the stem on the bottom of the can and you press the can down firmly releasing the hardener. So far it has worked flawlessly on their part.

1726861090368.png

It is recommended to allow the coating to cure for a week, before installing the hardware. This is so the hardware doesn't stick or damage the finish. Once it's cured it's the same as a factory poly finish.

Now to see if I can hold out for one more week! 🫤
 
Last edited:
After the weekend update.

The matte finish was very rough/course. It was feeling like 60 grit sandpaper.

I wet-sanded the flat surfaces with some 400 grit sandpaper, then the edges and went over the flat surfaces again with some 600 grit. Gave it about three sponge baths and dried it. It no longer will strip your skin off or stick to your clothing.

I could get a can of satin finish, but it hasn't been sanded through anywhere and is thick enough to hold up. I'm just going to stay with it ass it is. It still needs a couple more days to cure.
 
Last edited: