
Enjoy the benefits of a premium membership!
Upgrade Account
-
TalkBass has been independent since 1998. Add your voice.
Create a free account to reply to discussions, view embedded media, and browse with fewer display ads.
Join free Log in
Want zero display ads or expanded classifieds tools? Compare plans.
You are using an out of date browser. It may not display this or other websites correctly.
You should upgrade or use an alternative browser.
You should upgrade or use an alternative browser.
There's another storm brewing!
- Thread starter pilotjones
- Start date
More options
Who Replied?
Thanks.
That's the funny thing - the two elements are larger and smaller versions of the same shape, pointing towards each other; but the direction of the laminations (angled in the scarfed headstock versus parallel to the front plane in the heel) produce very different effects.A quick observation; the flowing lines of the neck volute seem to conflict with the hard lines of the neck heel. It could be the way the photo was taken, but that's what I see.
Last edited:


This is coming together beautifully. When you first started I doubted it would all come together, but obviously you did and it is sweet. Bravo!


Thanks everyone.
I did a third pore fill coat. I figured that yes, there will be more sanding to do, but it should result in fewer surprises. Then I removed the masking, and started on the front.
Let me ask, does anyone else run into this predicament? I happened with the first bass, too.
- Think about doing a satin finish (especially with this one, since with all the sculpting and the neck-thru, a gloss finish would be really difficult to do)
- Apply some finish
- See it wet
- Oh jeez that looks incredible, I have to do a gloss finish
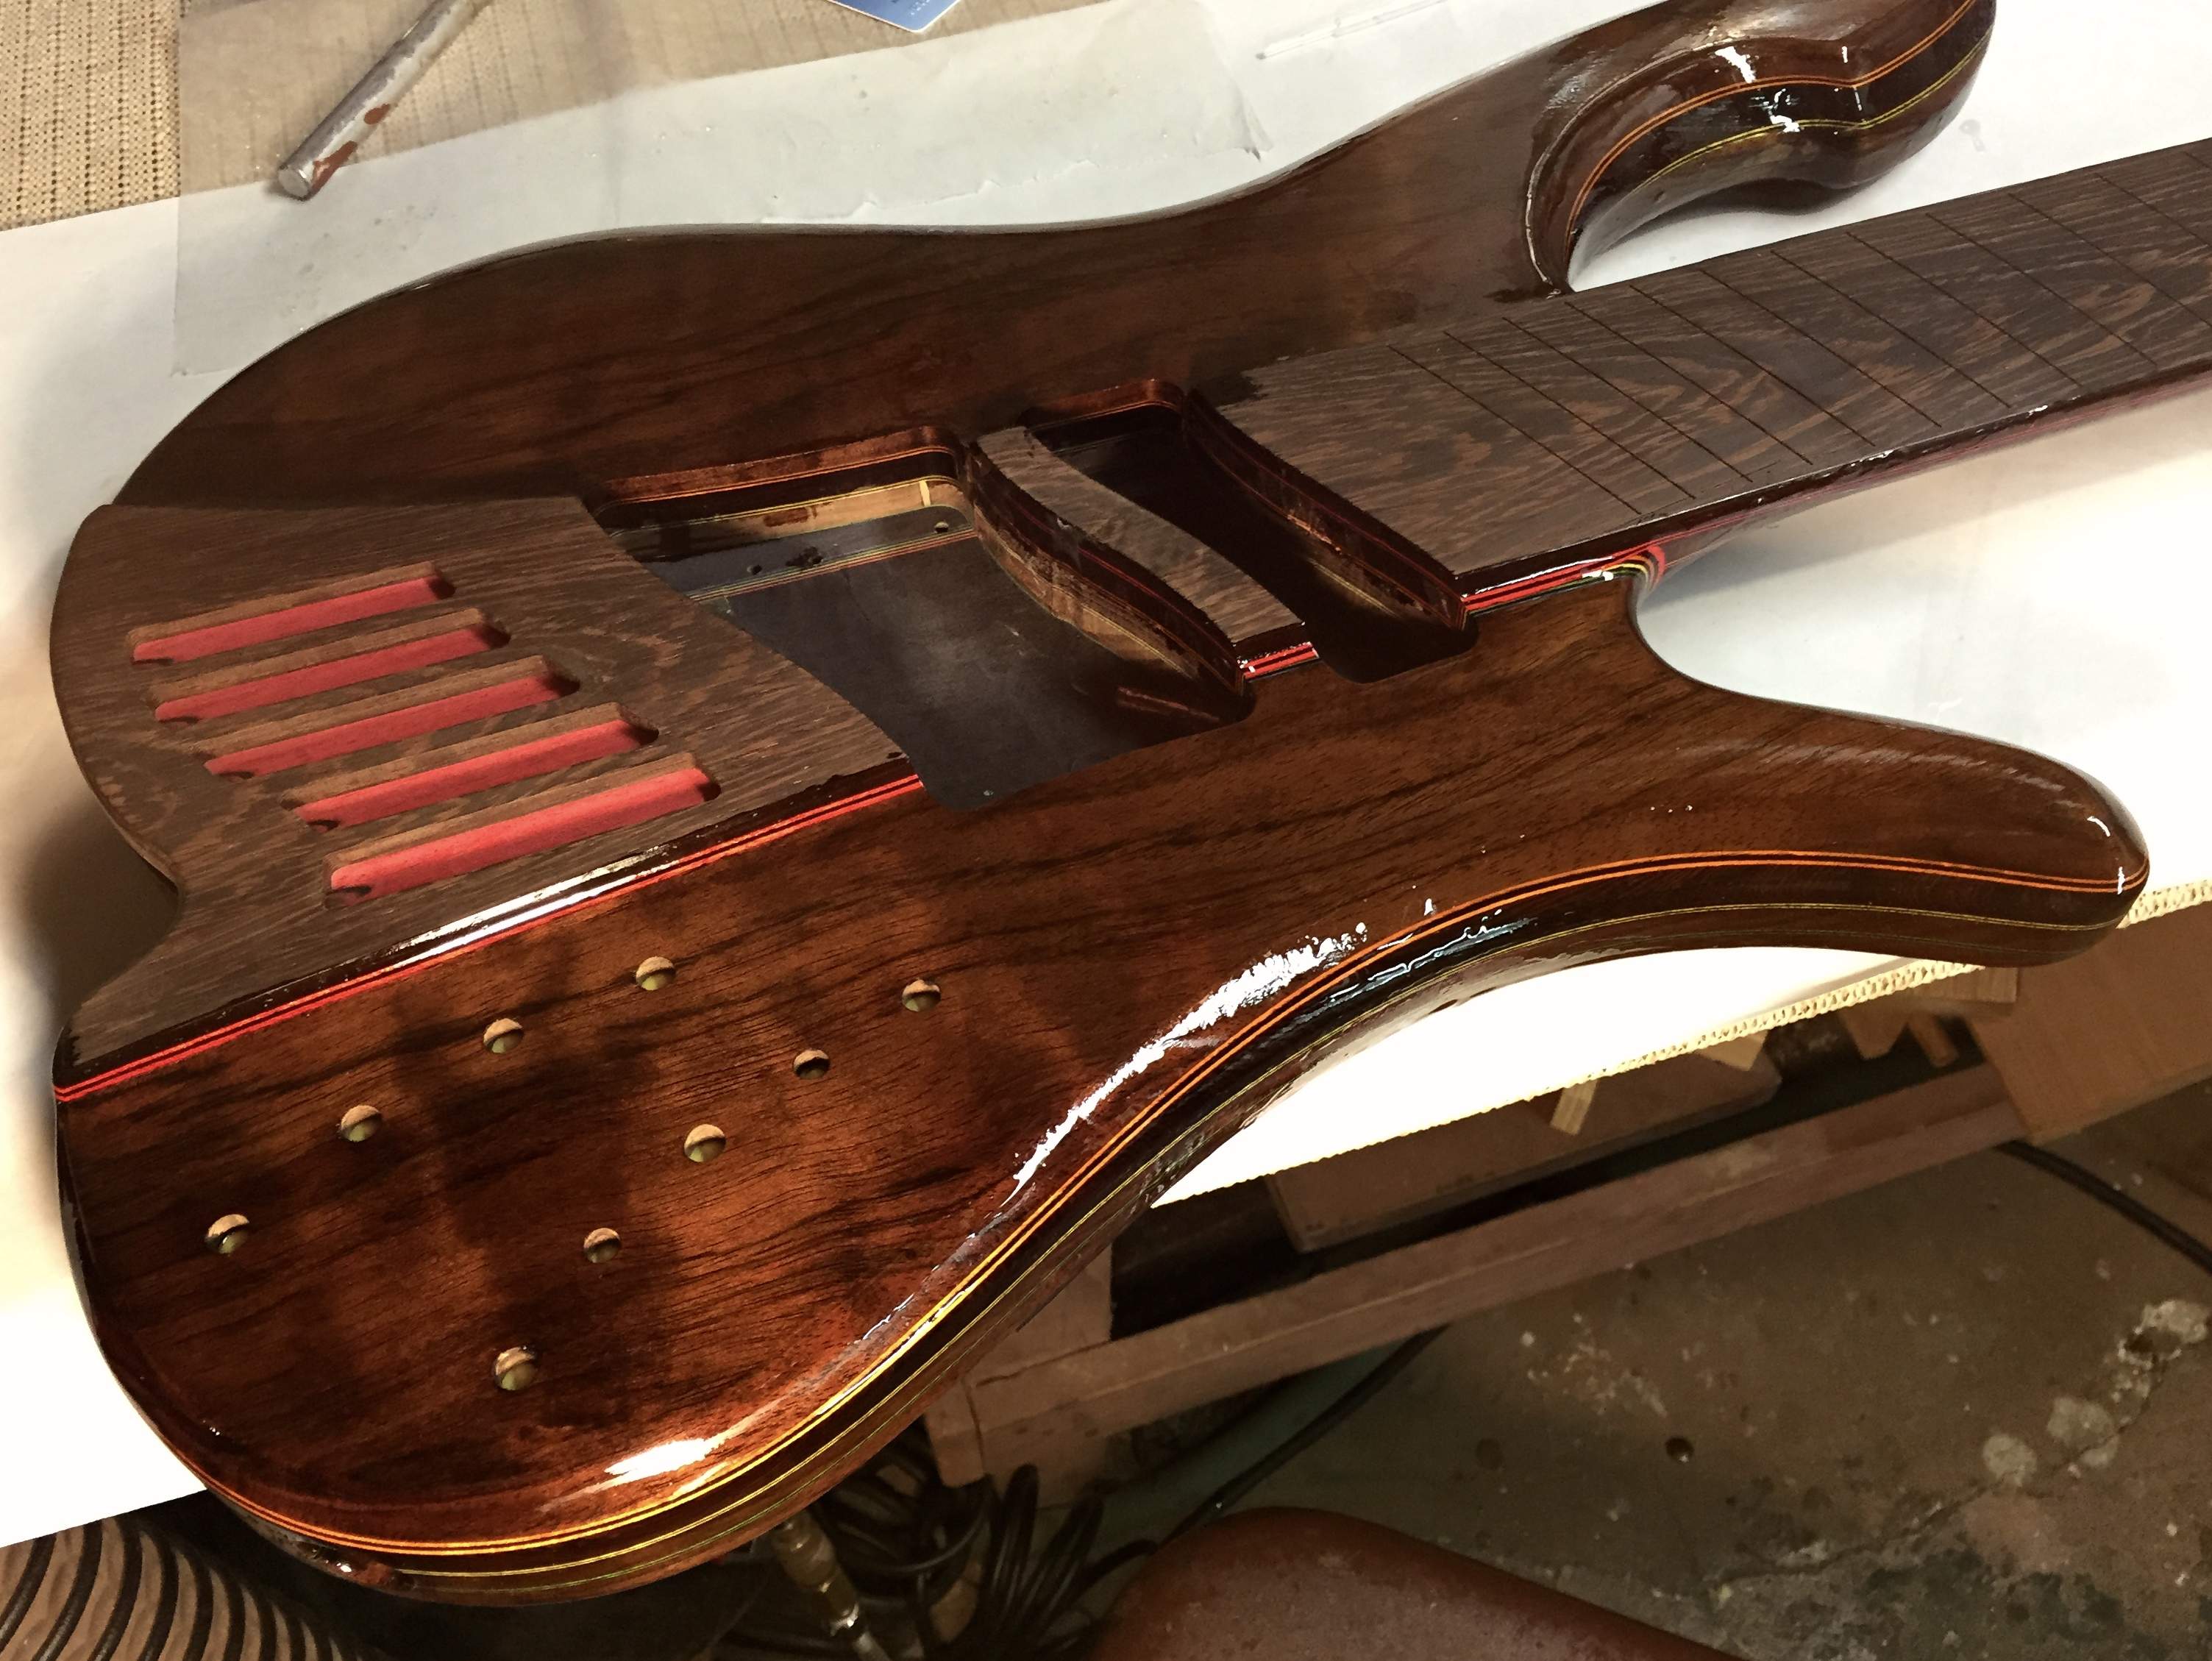
I did a third pore fill coat. I figured that yes, there will be more sanding to do, but it should result in fewer surprises. Then I removed the masking, and started on the front.
Let me ask, does anyone else run into this predicament? I happened with the first bass, too.
- Think about doing a satin finish (especially with this one, since with all the sculpting and the neck-thru, a gloss finish would be really difficult to do)
- Apply some finish
- See it wet
- Oh jeez that looks incredible, I have to do a gloss finish


Yeah, I think I'll go for the gloss, of some sort. I wouldn't tint anything amber-ish because of the blue stripes, which could easily go to green.
I did a first coat of epoxy on the fretboard last night. It was greatly complicated by the fact the board is pre-slotted, with blind-ended slots. It took about 2-1/2 - 3 hours. I'm glad second coats seem to be going faster.
I did a first coat of epoxy on the fretboard last night. It was greatly complicated by the fact the board is pre-slotted, with blind-ended slots. It took about 2-1/2 - 3 hours. I'm glad second coats seem to be going faster.
After doing the sanding and end rounding, got the first coat of pore fill epoxy onto the pickups.

The bass, meanwhile, is hanging out and achieving a full cure before I sand off all the surface epoxy, to leave the filled pores.
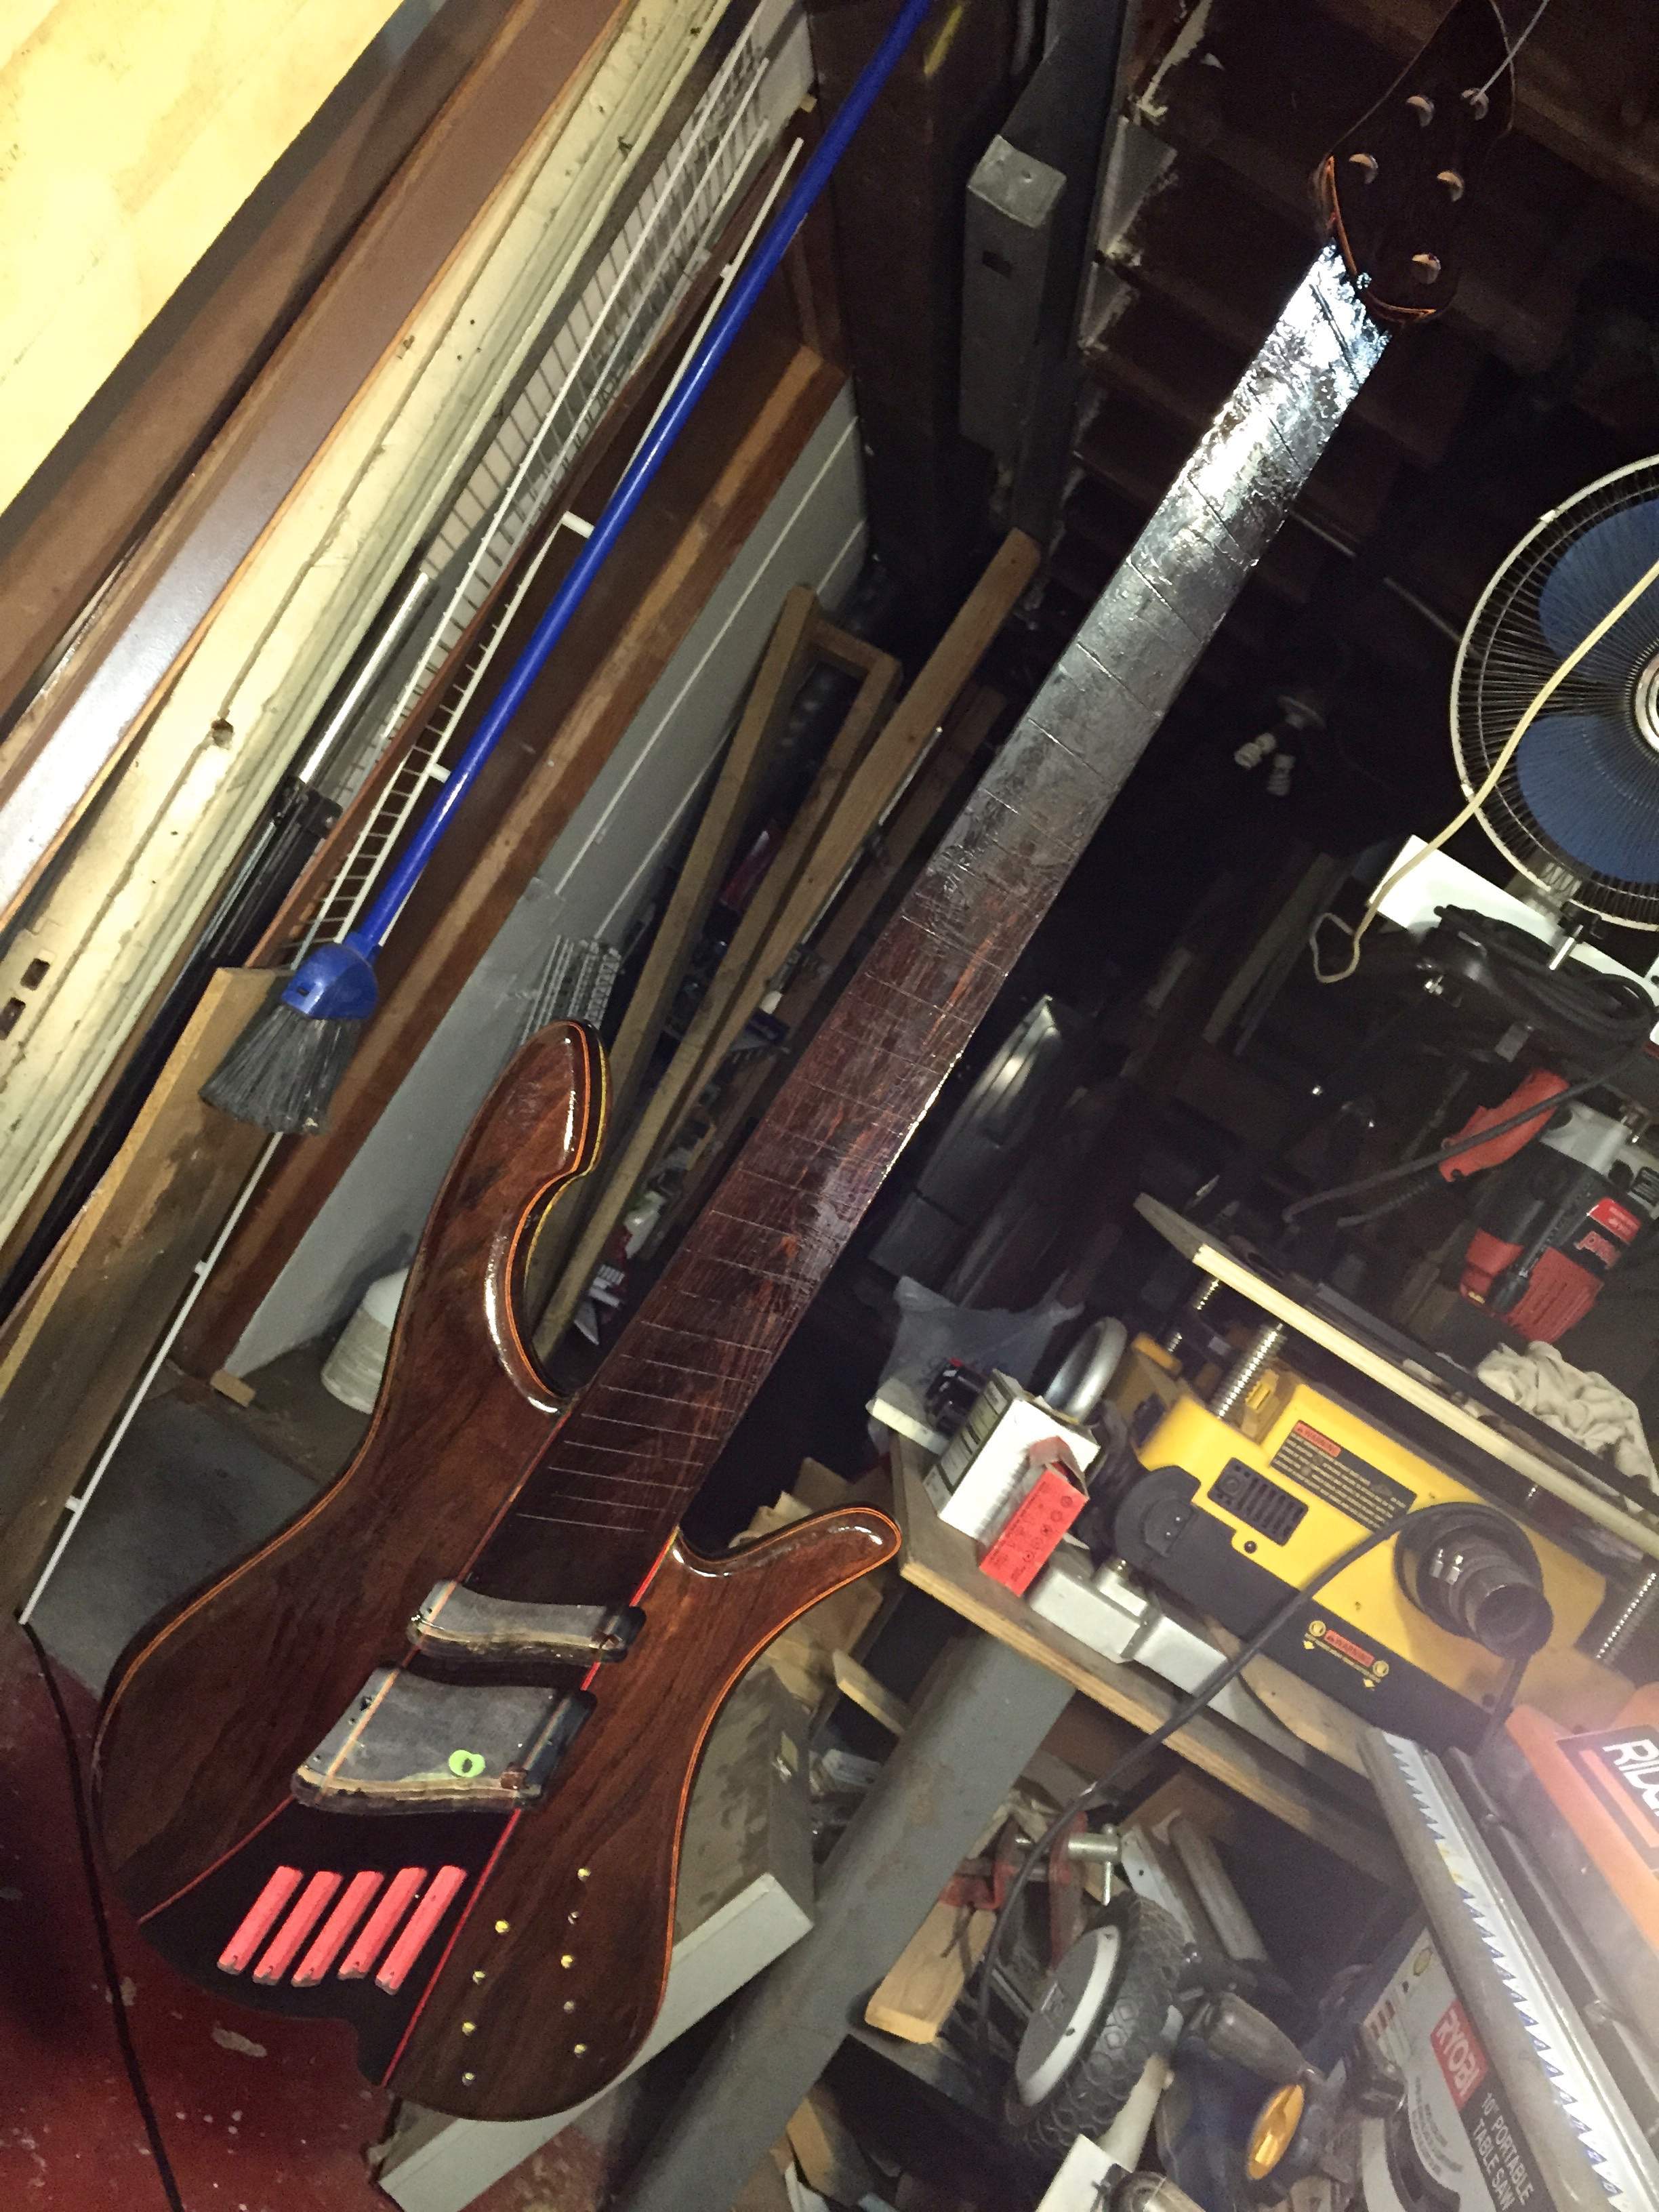
It has three coats on the wenge in back, and two coats on the wenge fretboard and the walnut front. The sides took two coats except where there was end grain wenge, which sucked it up like a straw.
The bass, meanwhile, is hanging out and achieving a full cure before I sand off all the surface epoxy, to leave the filled pores.
It has three coats on the wenge in back, and two coats on the wenge fretboard and the walnut front. The sides took two coats except where there was end grain wenge, which sucked it up like a straw.
Head banging (not the heavy metal kind)
So, I'm now sanding off the pore fill epoxy. I had done three coats, in order to hopefully fill all pores and not have to come back and do more.
The problem I've got is that in trying to sand back juuuuuust to the bare wood, I'll have hit the wood in one area and still have some surface coating adjoining. (This is with using a hard rubber or cork block wherever possible, and initially using 320 grit.) You can see it on the neck in the first pic, and on the treble side in the second.
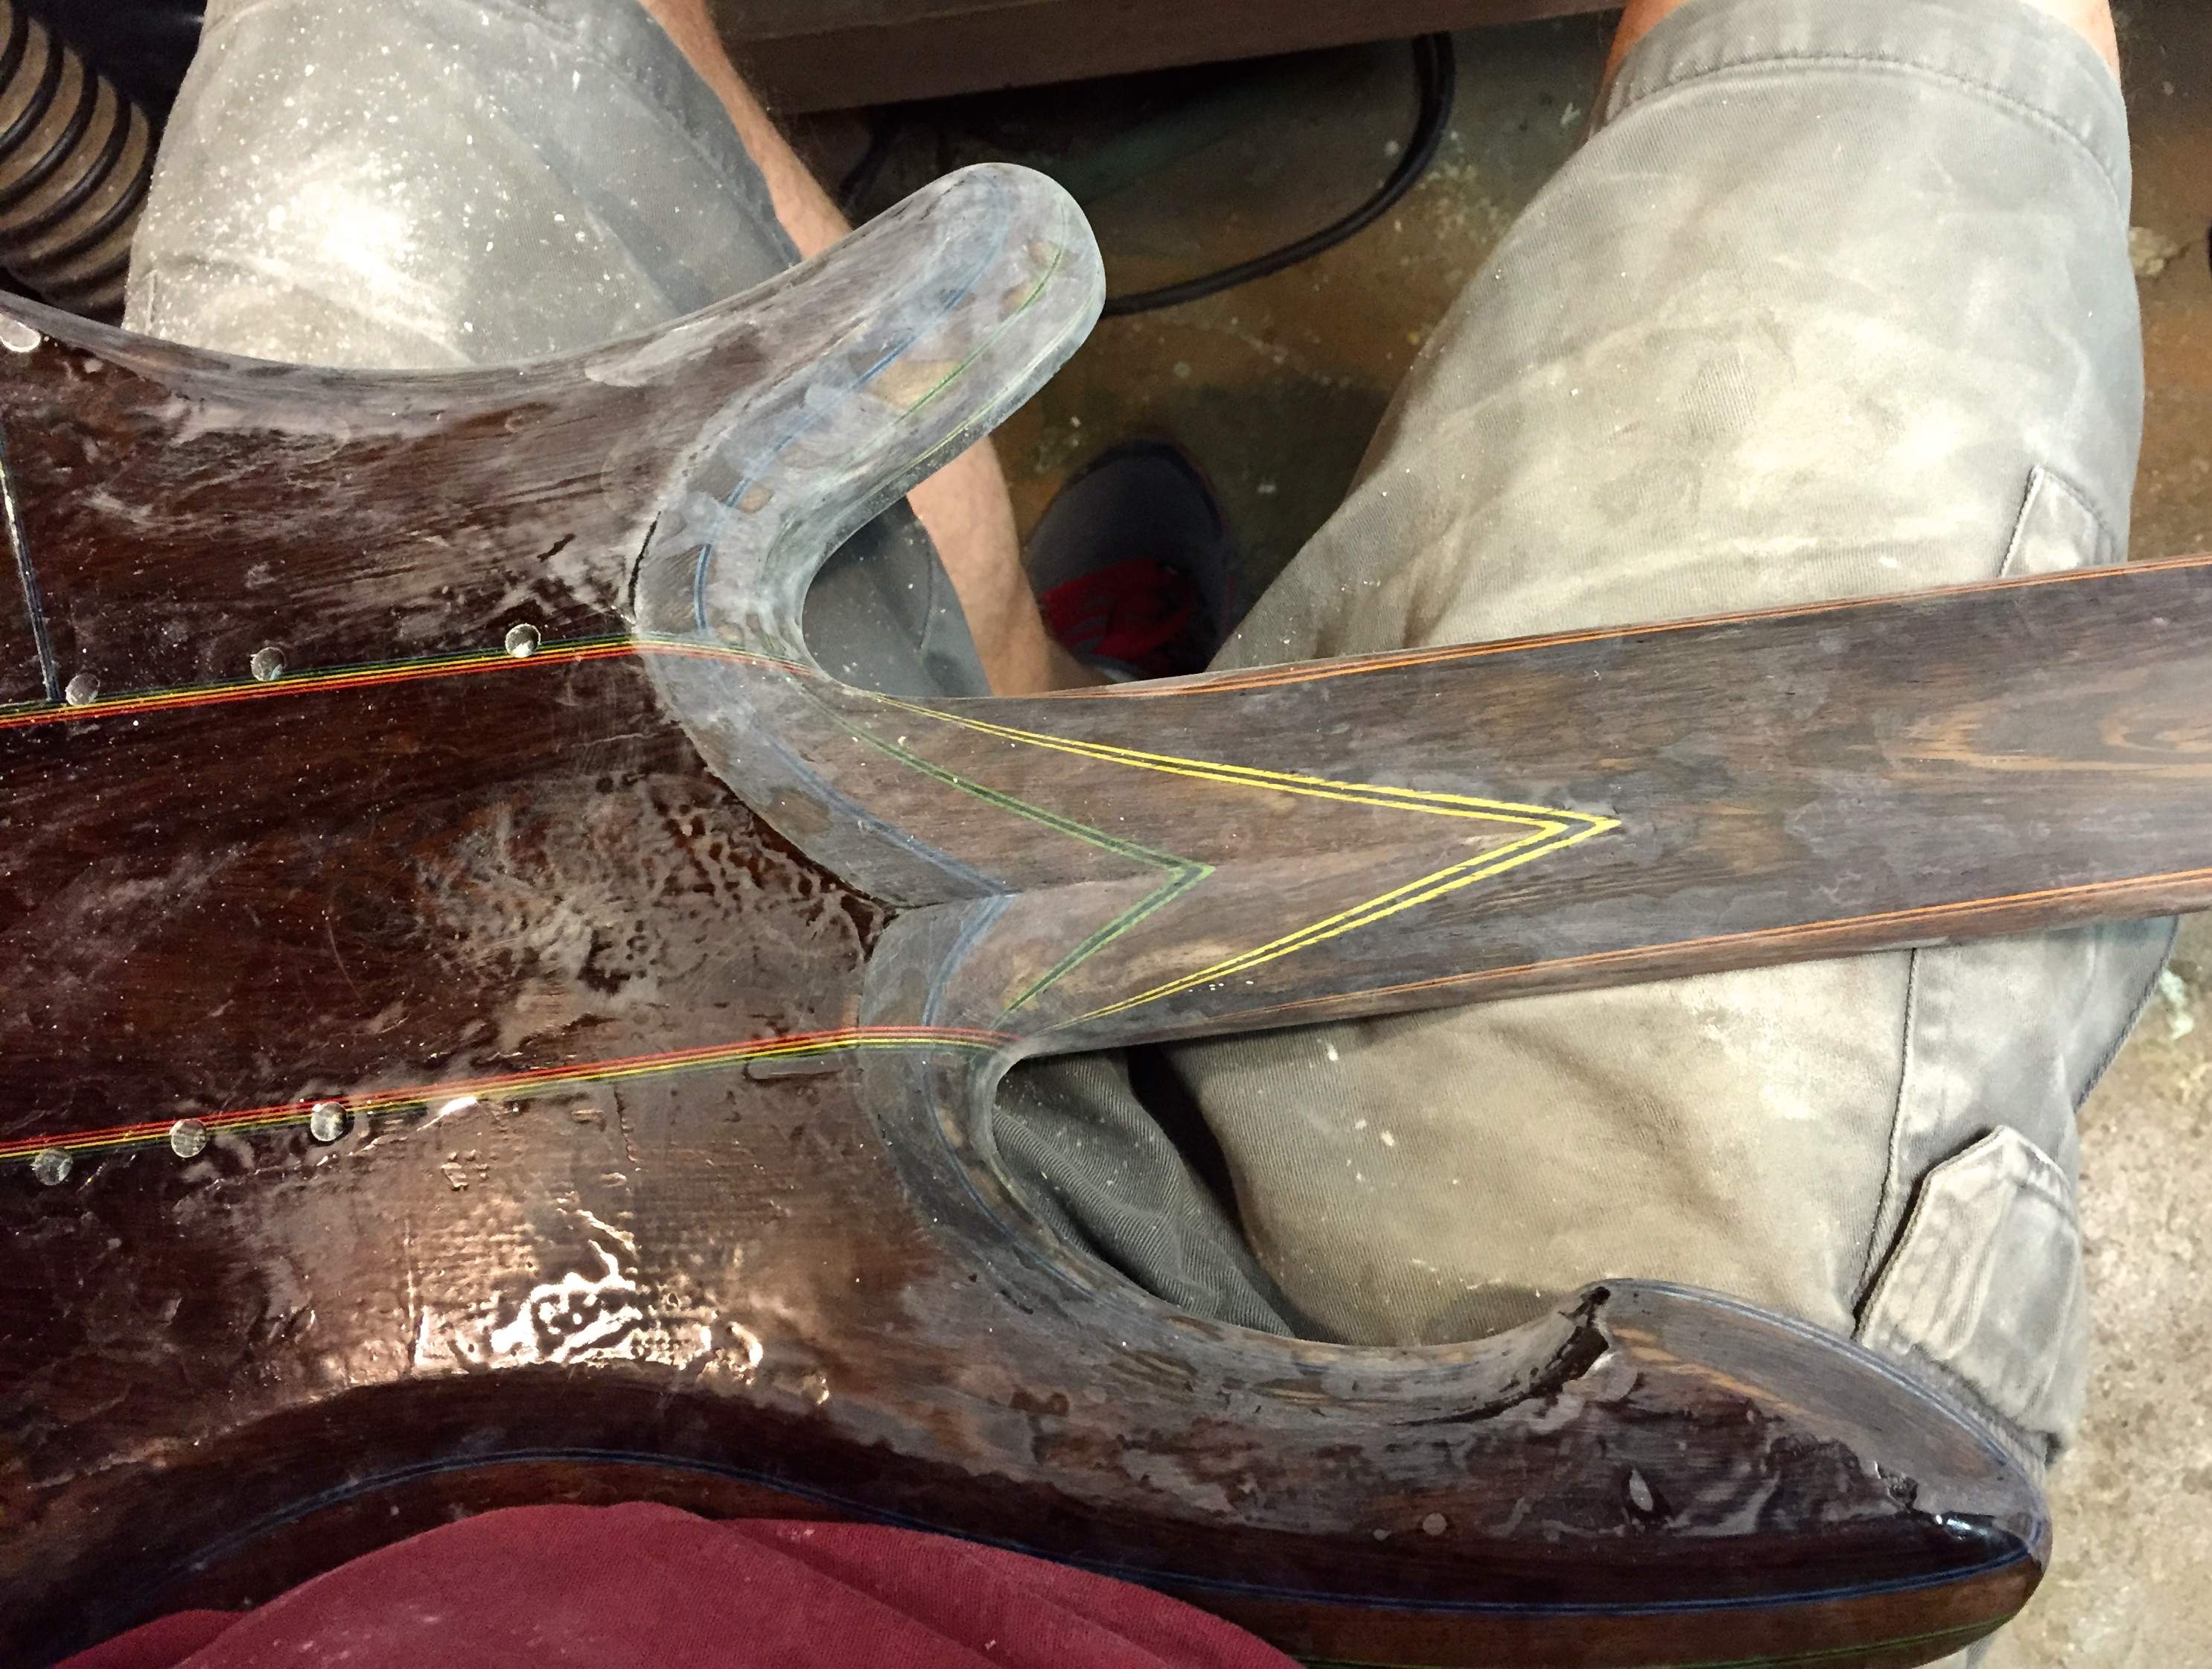
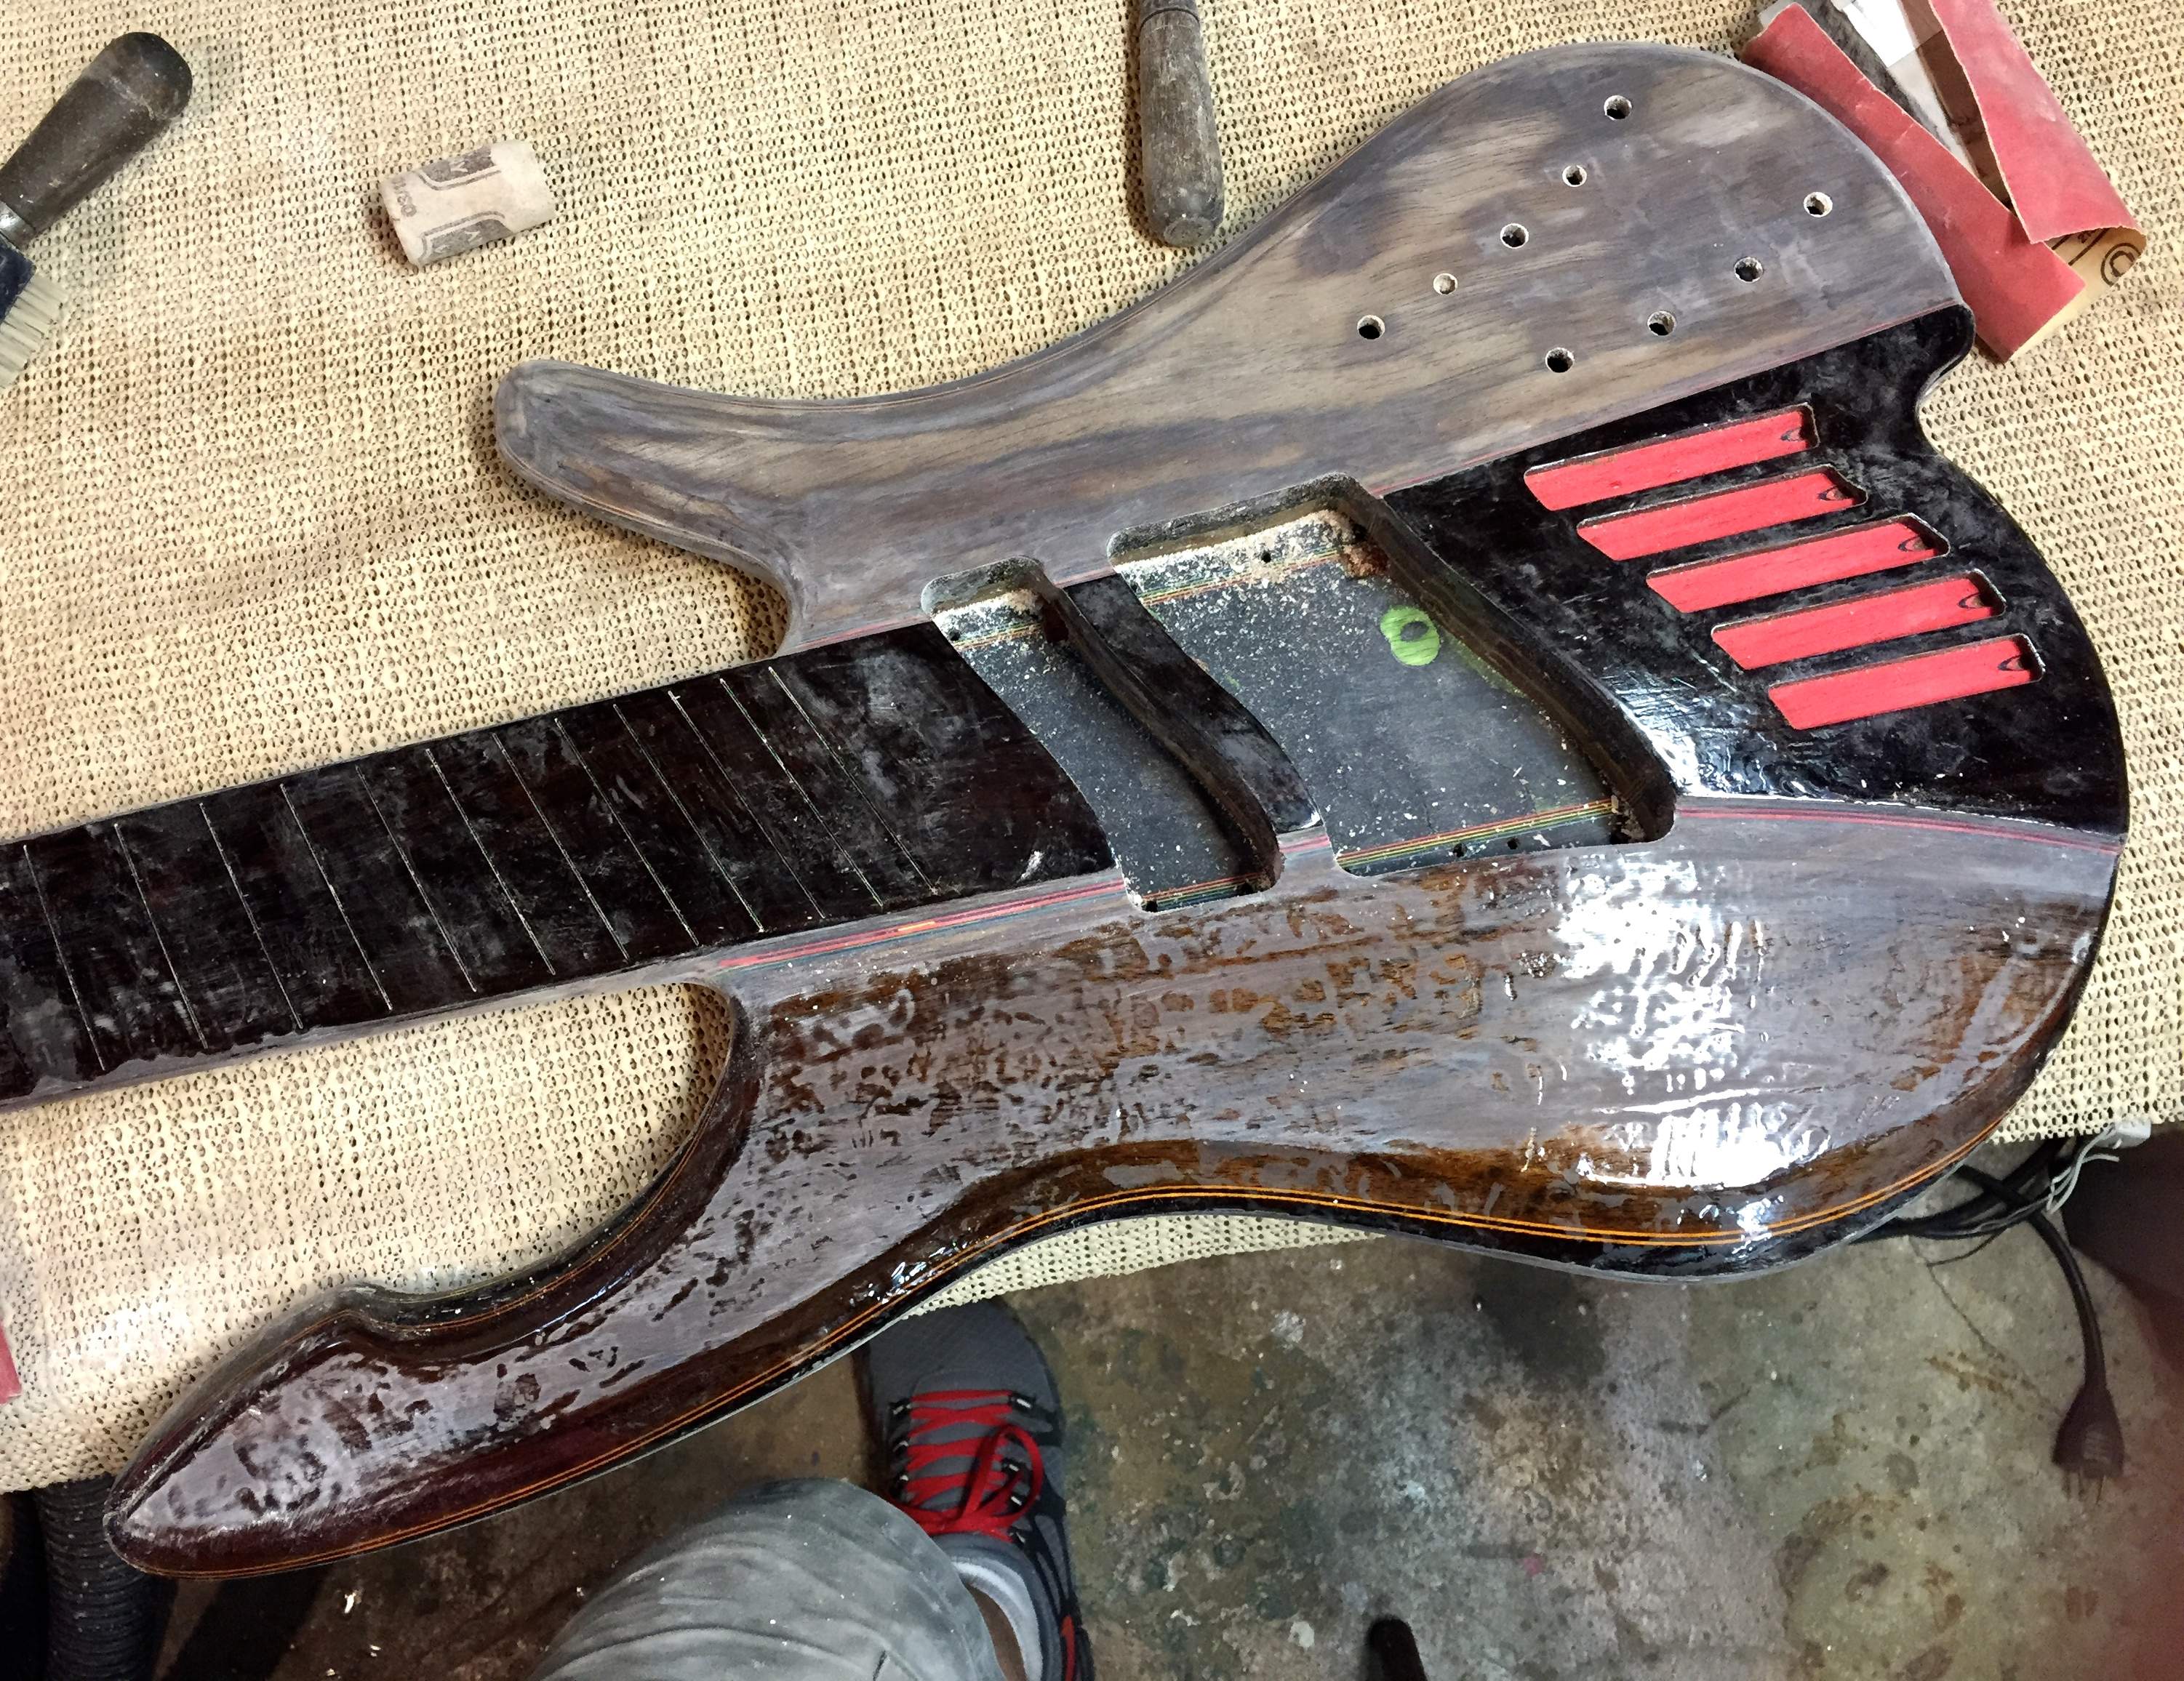
It improved since those progress shots, but there are still some non-bare-wood patches, and worse, I've sanded through to fresh, unfilled pores in some places, regardless of how careful i have tried to be. When I was getting closer I switched to 400 grit in order to slow the process further. And those pores immediately swallow up the sanding dust, and some of them don't want to release it. So more pore filling is going to be needed, and it hopefully won't be an endlessly repeating cycle.
I have been gentle with the sandpaper on the epoxy, as suggested, and that aspect has worked well--as long as you keep the pressure low, the epoxy sands nicely and doesn't clog or glaze the paper. I think some of the problem may be because the epoxy is tougher than the wood, especially the walnut, so that once the epoxy is broken through in one area there is little resistance there.
If anyone has any insight into what I am doing wrong, or could do differently. I'd love to hear it. Please. I'd also like to know if anyone has experience as to whether I might be able to leave it at less than 100% bare wood, without it looking patchy once the final finish goes on.
So, I'm now sanding off the pore fill epoxy. I had done three coats, in order to hopefully fill all pores and not have to come back and do more.
The problem I've got is that in trying to sand back juuuuuust to the bare wood, I'll have hit the wood in one area and still have some surface coating adjoining. (This is with using a hard rubber or cork block wherever possible, and initially using 320 grit.) You can see it on the neck in the first pic, and on the treble side in the second.
It improved since those progress shots, but there are still some non-bare-wood patches, and worse, I've sanded through to fresh, unfilled pores in some places, regardless of how careful i have tried to be. When I was getting closer I switched to 400 grit in order to slow the process further. And those pores immediately swallow up the sanding dust, and some of them don't want to release it. So more pore filling is going to be needed, and it hopefully won't be an endlessly repeating cycle.
I have been gentle with the sandpaper on the epoxy, as suggested, and that aspect has worked well--as long as you keep the pressure low, the epoxy sands nicely and doesn't clog or glaze the paper. I think some of the problem may be because the epoxy is tougher than the wood, especially the walnut, so that once the epoxy is broken through in one area there is little resistance there.
If anyone has any insight into what I am doing wrong, or could do differently. I'd love to hear it. Please. I'd also like to know if anyone has experience as to whether I might be able to leave it at less than 100% bare wood, without it looking patchy once the final finish goes on.

I'd go with thinner coats of epoxy. Just enough to fill the pores, not enough to make a thick layer. Then light sanding followed by another very thin coat. I use foam rolls and wipe the epoxy on the surface with them.
So, you leave a thin buy full coating of epoxy on the wood, rather than sanding back to just filled pores?I'd go with thinner coats of epoxy. Just enough to fill the pores, not enough to make a thick layer. Then light sanding followed by another very thin coat. I use foam rolls and wipe the epoxy on the surface with them.

Rôckhewer
Commercial User
- Feb 28, 2015
- 2,922
- 9,028
- Disclosures
- Owner/Builder- RockHewer Custom Guitars LLC
^^^^this ^^^ I totally feel your pain & frustration. I had the same problem with wenge...and I only had it as the body core on my last build.And those pores immediately swallow up the sanding dust, and some of them don't want to release it
I hate to think about having to pore fill as much as you got going on.
I had good luck and ease of application and easier sanding using "thick" CA glue as a pore filler. Not "jell" and not "thin".....
sands sweet!
Plays nice with finish... I was using Conversion Varnish though....not sure what your finishing with.
I would imagine it would be ok with most. But that's just a guess.
Shucks....CA buffs out so dang nice...I'm considering using it as a clear coat by itself!! If I could figure a way to spray it without killing the gun....
It stays hard enough to use on fretless fingerboards..... So..... Why not??
Rôckhewer
Commercial User
- Feb 28, 2015
- 2,922
- 9,028
- Disclosures
- Owner/Builder- RockHewer Custom Guitars LLC
Bottle says:
•Excellent gap filling capacity
•Ideal for filling holes
Also says:
•Triple distilled for purity
So maybe this is a super neato special formula of "super glue" ....
But it works very well.
& that's why I posted a pic of the bottle.

Last edited:


I can actually be useful here!  I use that stuff at work - it's a spray activator for cyanoacrylate glue. Makes it set instantly and cure water-clear.
EDIT: That looks like the glue, the activator comes in a separate can/bottle. Yeah, it's a 2-part CA glue system. Back to lurking... *shyoop*
I use that stuff at work - it's a spray activator for cyanoacrylate glue. Makes it set instantly and cure water-clear.EDIT: That looks like the glue, the activator comes in a separate can/bottle. Yeah, it's a 2-part CA glue system. Back to lurking... *shyoop*
Rôckhewer
Commercial User
- Feb 28, 2015
- 2,922
- 9,028
- Disclosures
- Owner/Builder- RockHewer Custom Guitars LLC
I don't usually use an activator /accelerator.... I have used it, but if I remember right... It may have made the CA cure a little bit milky...or kinda like crystallized?
But it has been a while since I've used that. And my memory Sucks.
Anyway.... It dries plenty fast without it for my taste.
Besides.... Most times I have found that when you accelerate any glue's normal cure rate.... It tends to make the glue weaker.
But it has been a while since I've used that. And my memory Sucks.
Anyway.... It dries plenty fast without it for my taste.
Besides.... Most times I have found that when you accelerate any glue's normal cure rate.... It tends to make the glue weaker.
On the last coat yes. Now you have an uneven, thick layer of epoxy on top of the wood. It's very difficult to sand it even without sanding thru it in some places. When you have thin layers you need just a little sanding between coats as well as final sanding.So, you leave a thin buy full coating of epoxy on the wood, rather than sanding back to just filled pores?
OK, I guess that's the next step. Re-clean pores; fill, maybe with CA it it's just a pore here or there (since using epoxy on all of them would take a long time since they're on surfaces facing different directions); and thin coat of epoxy overall.On the last coat yes. Now you have an uneven, thick layer of epoxy on top of the wood. It's very difficult to sand it even without sanding thru it in some places. When you have thin layers you need just a little sanding between coats as well as final sanding.


