

Enjoy the benefits of a premium membership!
Upgrade Account
-
TalkBass has been independent since 1998. Add your voice.
Create a free account to reply to discussions, view embedded media, and browse with fewer display ads.
Join free Log in
Want zero display ads or expanded classifieds tools? Compare plans.
You are using an out of date browser. It may not display this or other websites correctly.
You should upgrade or use an alternative browser.
You should upgrade or use an alternative browser.
Tiny House Build
- Thread starter -Shaun-
- Start date
More options
Who Replied?
What do you used to heat your water?
We have a Rinnai gas water heater. I keep 3 9kg gas bottles outside, 2 connected at a time with an auto changeover regulator, and 1 bottle spare. Each bottle lasts around a week or so. When I fill up the car, I also swap an empty bottle for a full one.
After insulation comes lining the inside in plywood. As I mentioned in the first post, we chose ply because we wanted it to look simple, we love the warm colour of a nice ply, and it was inspired by the many huts managed by the Department of Conservation that so many kiwis grow up spending time in, such as these:


We used a high-grade ply that is knot-free and attached it with small finishing nails.
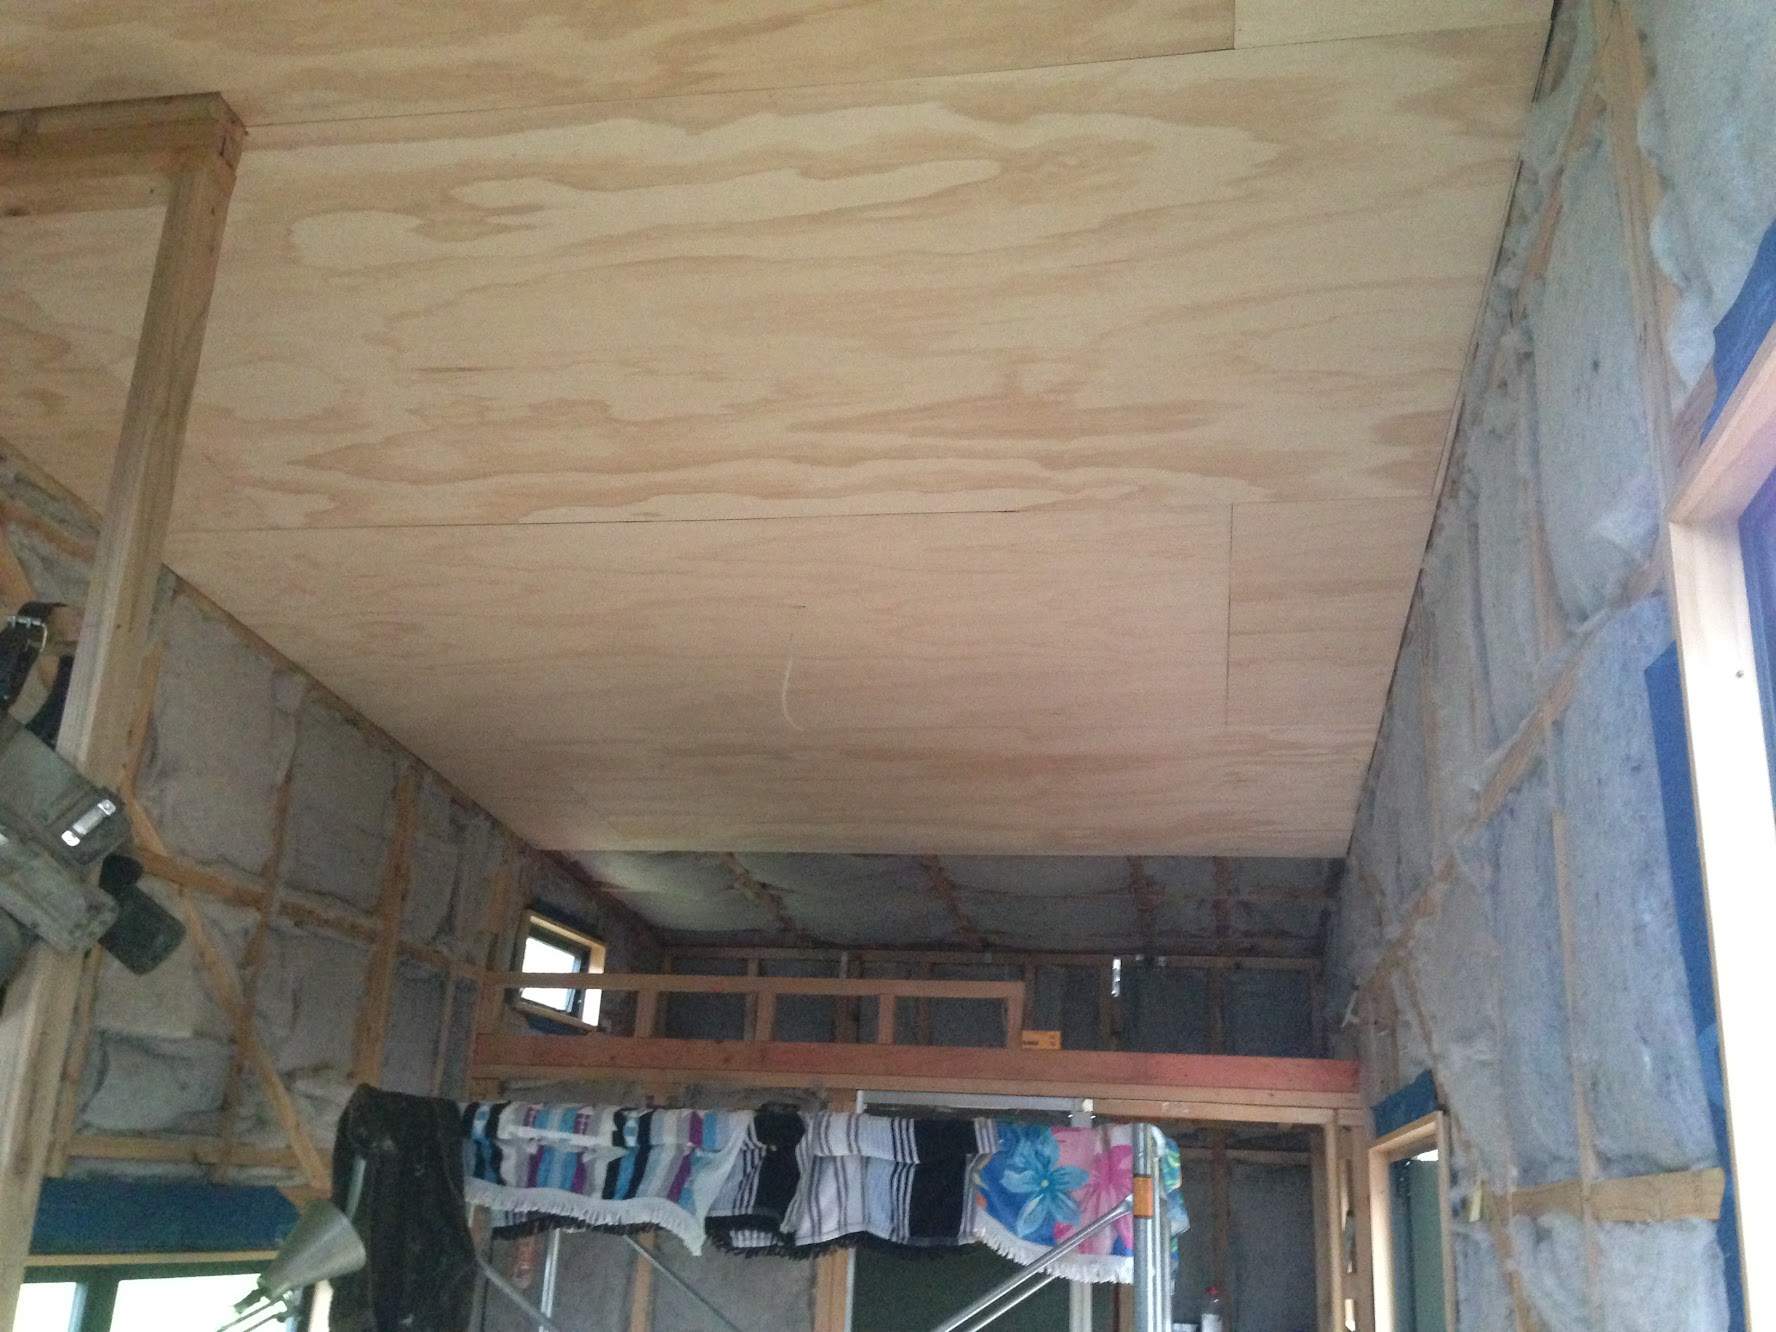
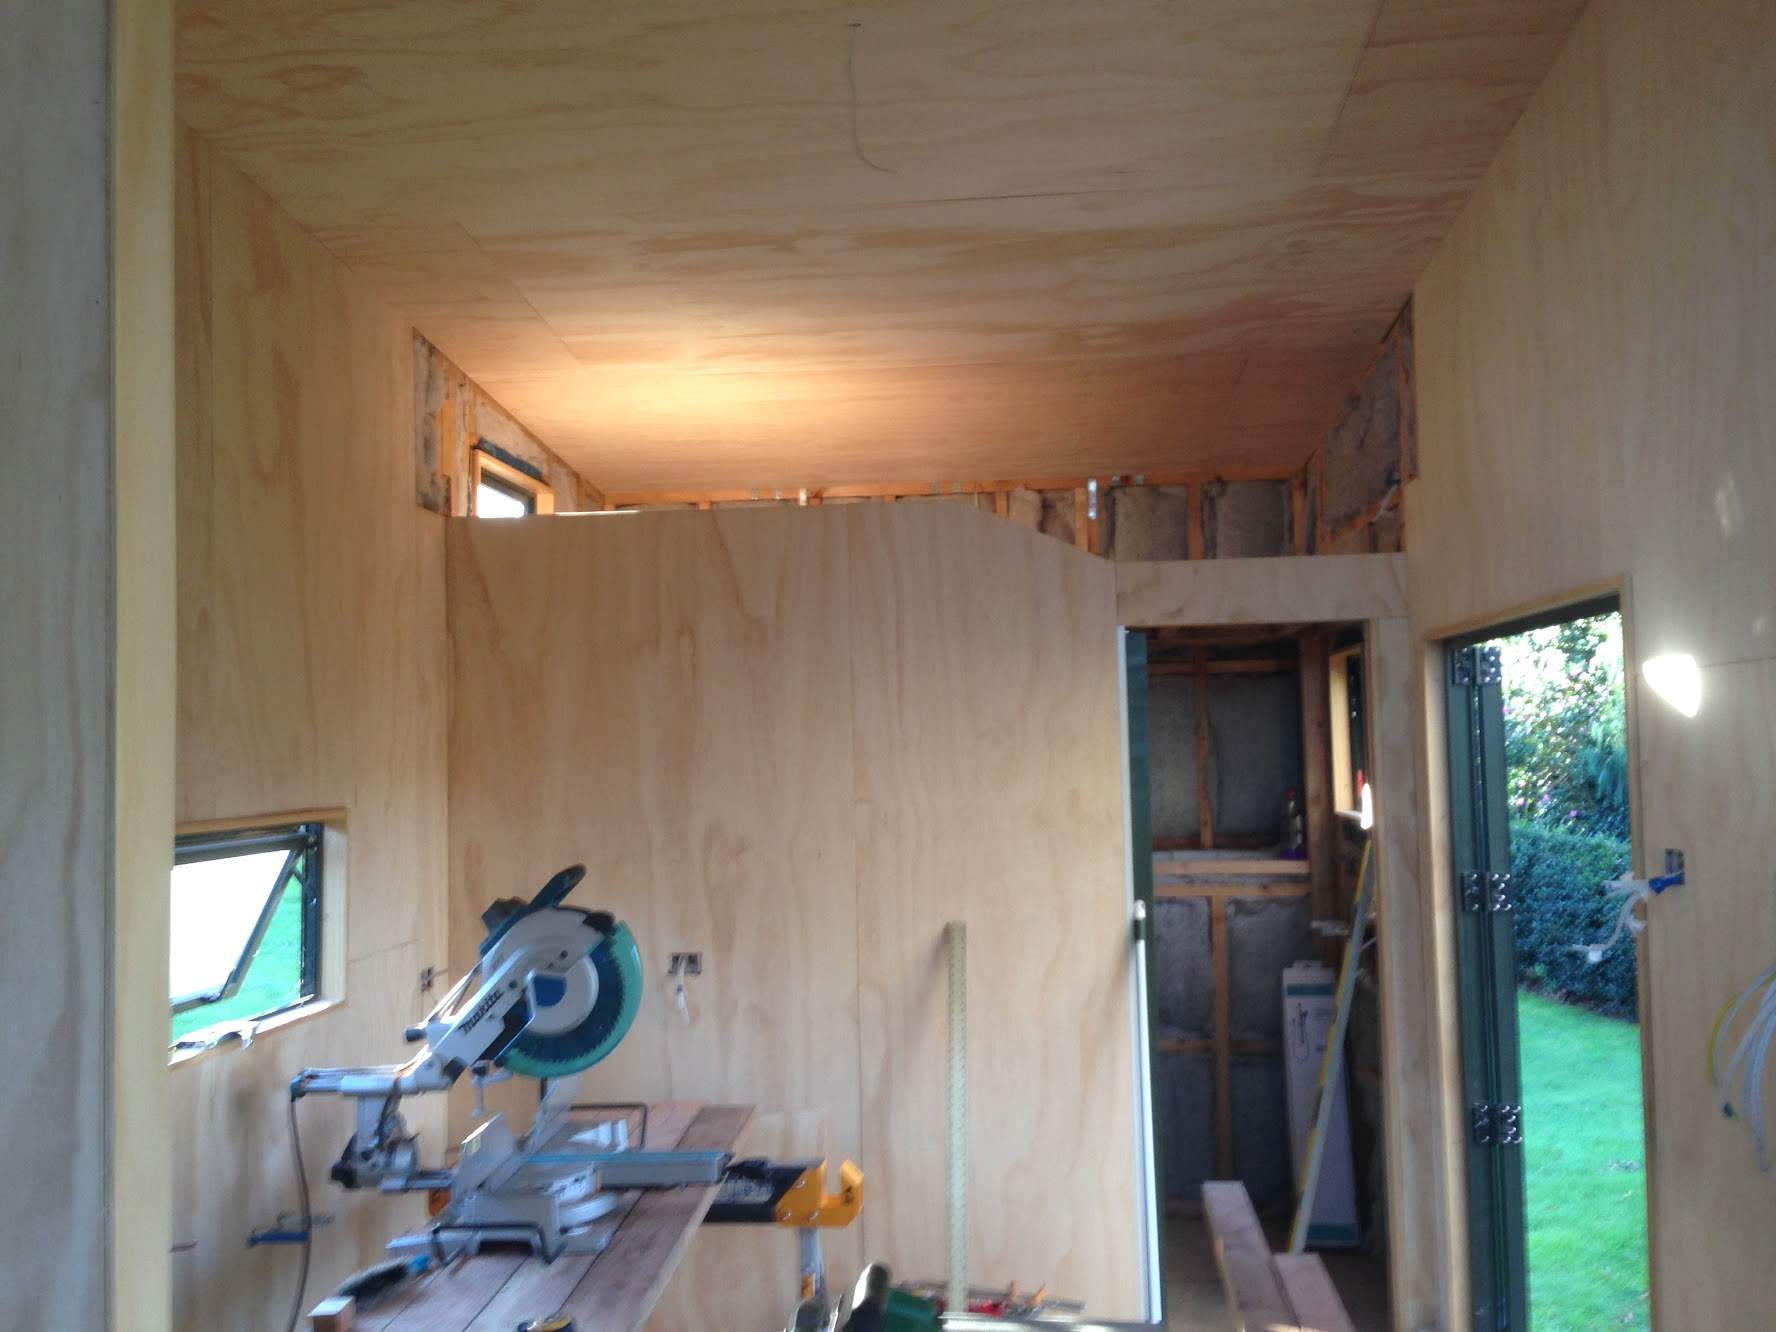
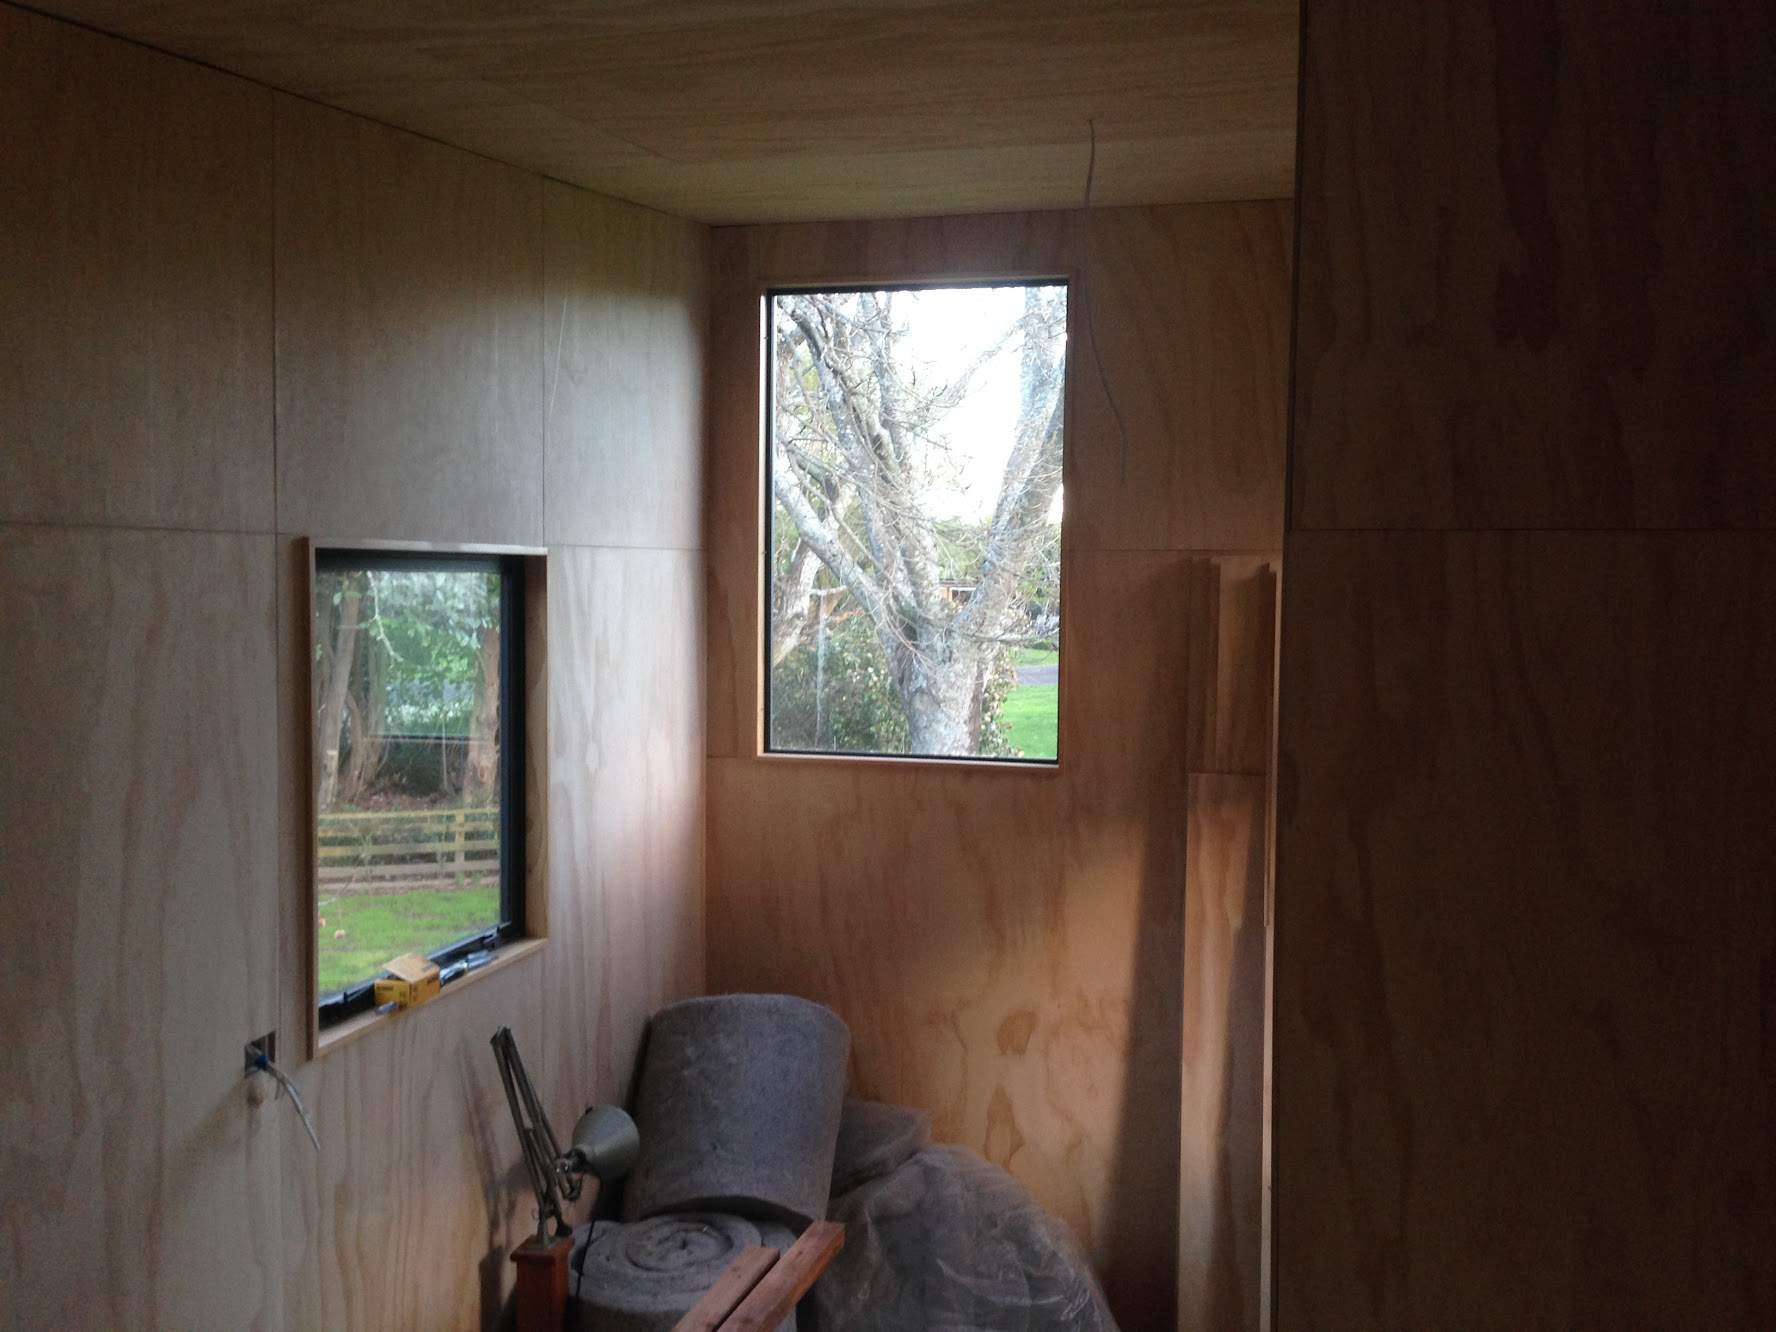
Enjoying a beer after a long day:
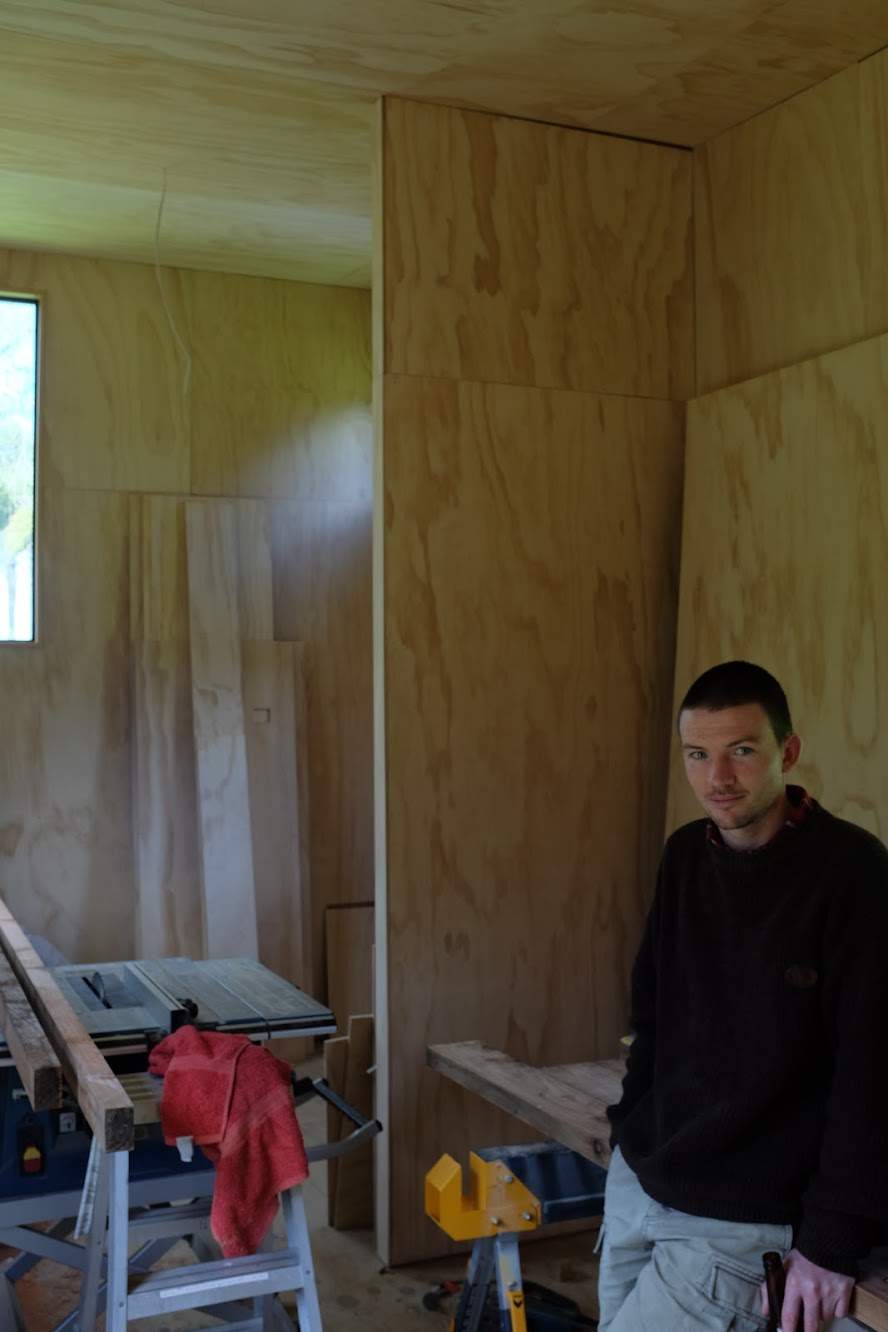
After putting up all the ply, we applied three coats of Osmo Oil. If I was to do it again, I would apply all the oil to the sheets of ply before cutting them and nailing them up. Bloody hard work rubbing oil onto a ceiling with your arms above your head all day. The plywood in the bathroom has 3 coats of polyurethane on the front and back of each sheet to maintain watertightness. Of course, we had to do that before putting them up.

We used a high-grade ply that is knot-free and attached it with small finishing nails.
Enjoying a beer after a long day:
After putting up all the ply, we applied three coats of Osmo Oil. If I was to do it again, I would apply all the oil to the sheets of ply before cutting them and nailing them up. Bloody hard work rubbing oil onto a ceiling with your arms above your head all day. The plywood in the bathroom has 3 coats of polyurethane on the front and back of each sheet to maintain watertightness. Of course, we had to do that before putting them up.
Last edited:

Next, we built the raised sleeping area and small loft above it. These were both framed with 140x45mm cedar.
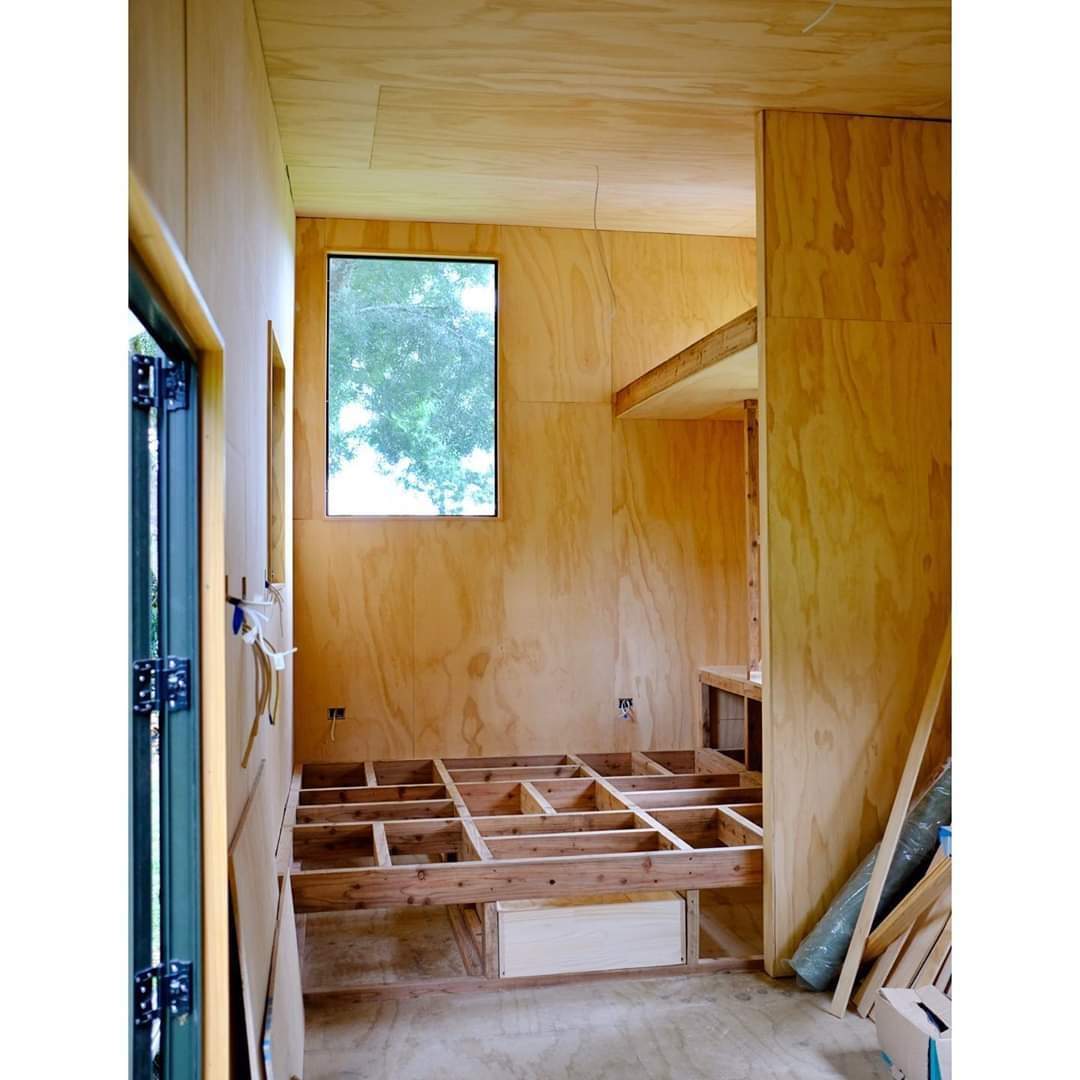
In the first photo below, you can see the 'box' of one of the drawers that would go under the sleeping area. There are two of these drawers. They run on cedar that I sanded until smooth and rubbed copious amounts of beeswax onto. Good thing we have bees!
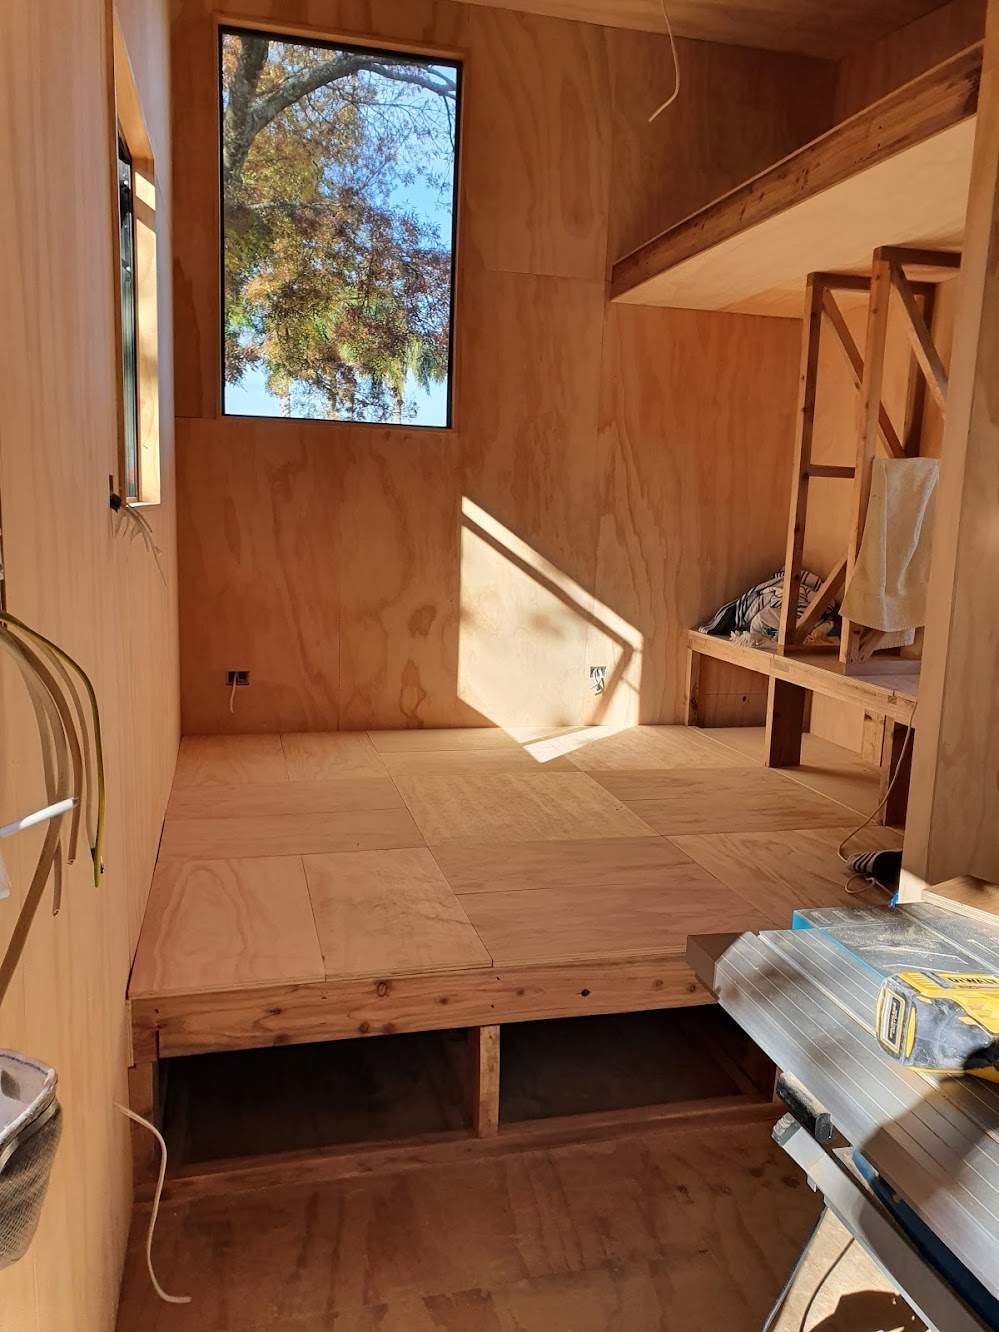
In this next photo, you can see the 18 floorboards we made. This was hard work. Over the course of building, the walls had gotten slightly out of square somehow, and this meant that none of the cells that the floorboards sit on were perfectly square. We couldn't make 18 identical panels. We had to measure each one, take into account the gaps we wanted, and make them all individually. I think we averaged 4 or 5 a day. Slow going, but happy with the result. We could have just put a couple of sheets of ply down, but we wanted each floorboard to lift individually to access the huge amount of storage below.
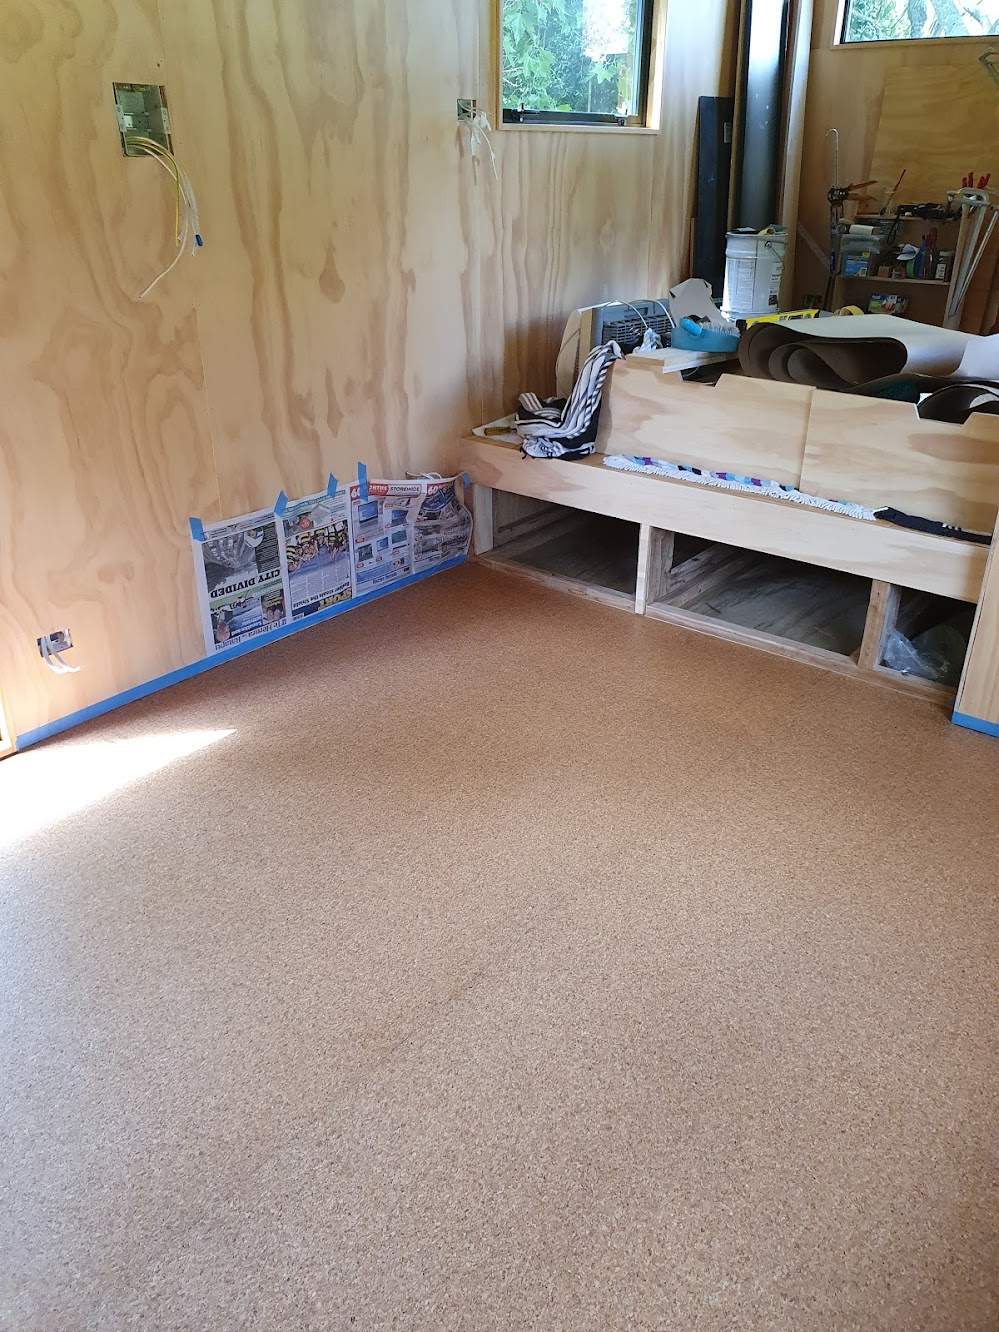
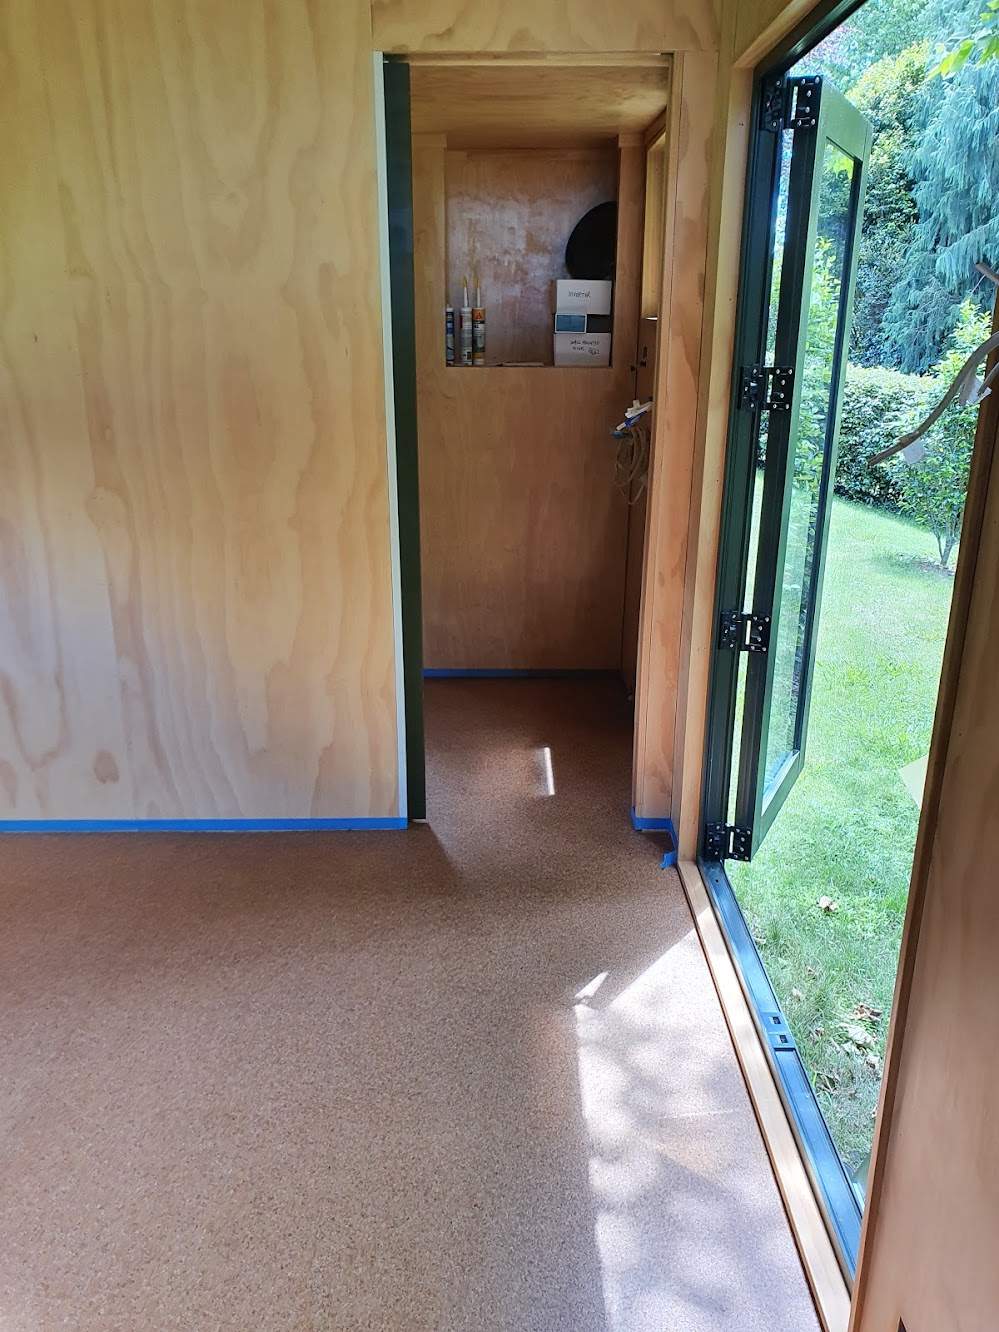
Next, we laid the cork down. The blue tape is to protect the walls from the oil we would eventually apply to the cork. In these photos, you can also see the underfloor drawers in a more complete state, with their fronts on. I cut the drawer fronts and the strip of ply above out of one piece and took some time to match the grain so that, when the drawers are closed, it looks like one piece (except for where the handles and gaps are, of course).
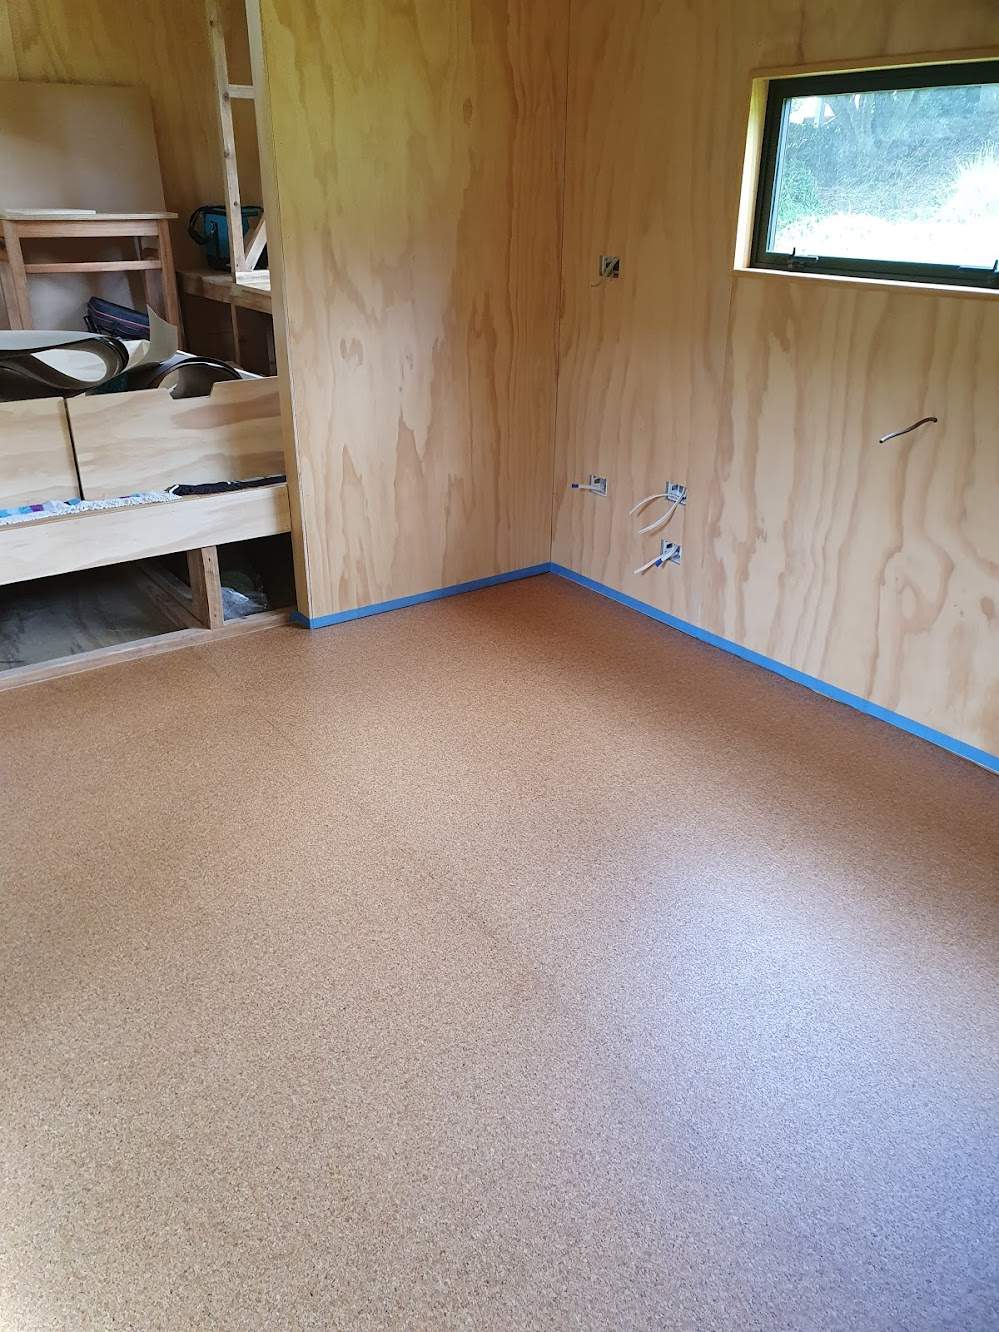
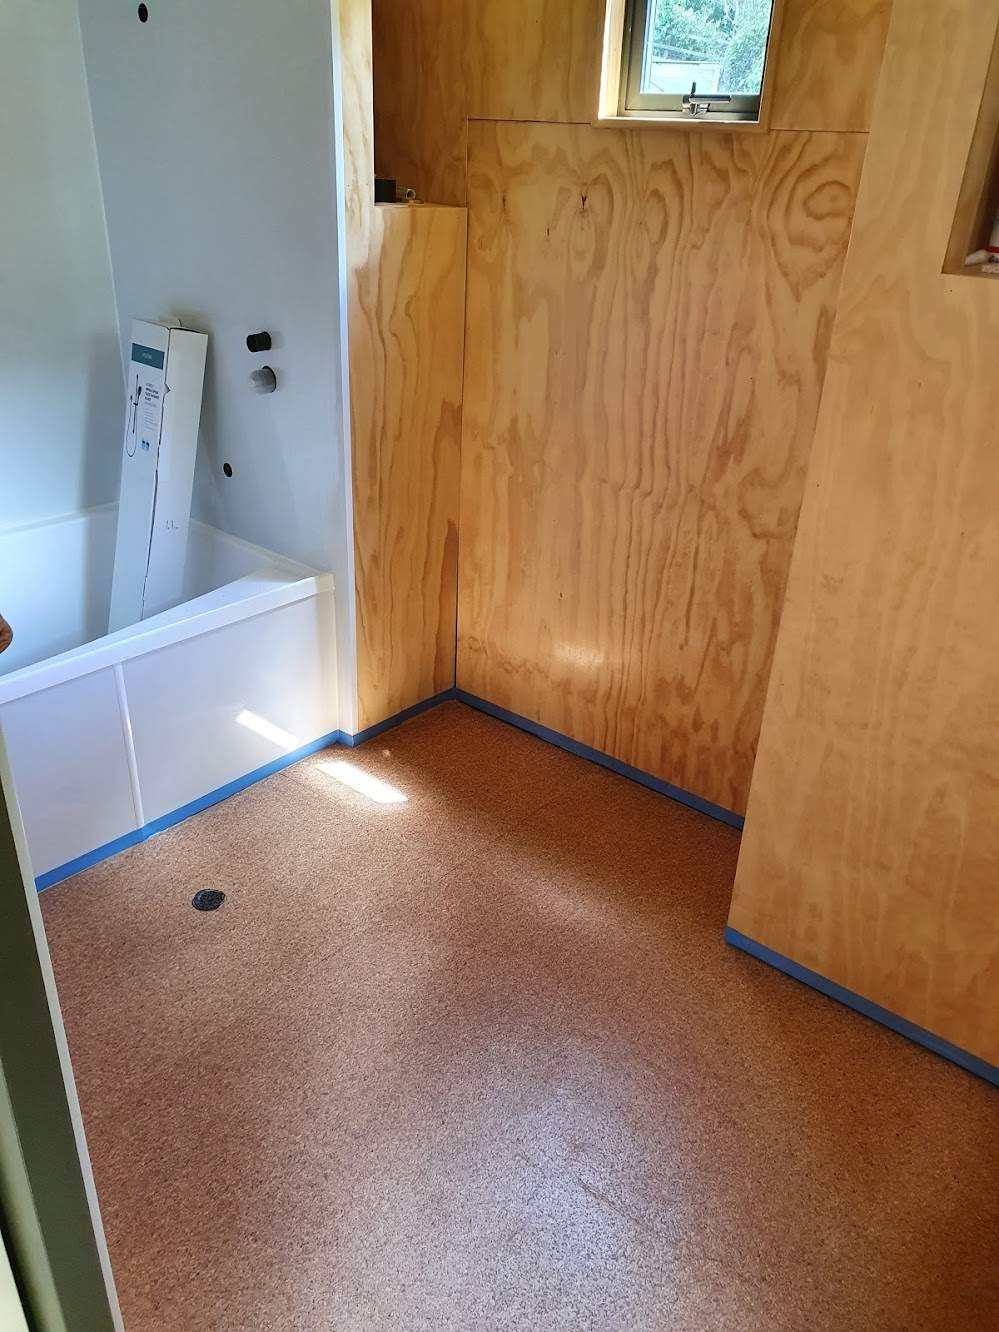
A lot of people seem to consider cork to be an old fashioned product, but I really like it. It's very soft to walk around on, has beautiful warm tones, and is a sustainable product. I'm not much of a fan of carpet.
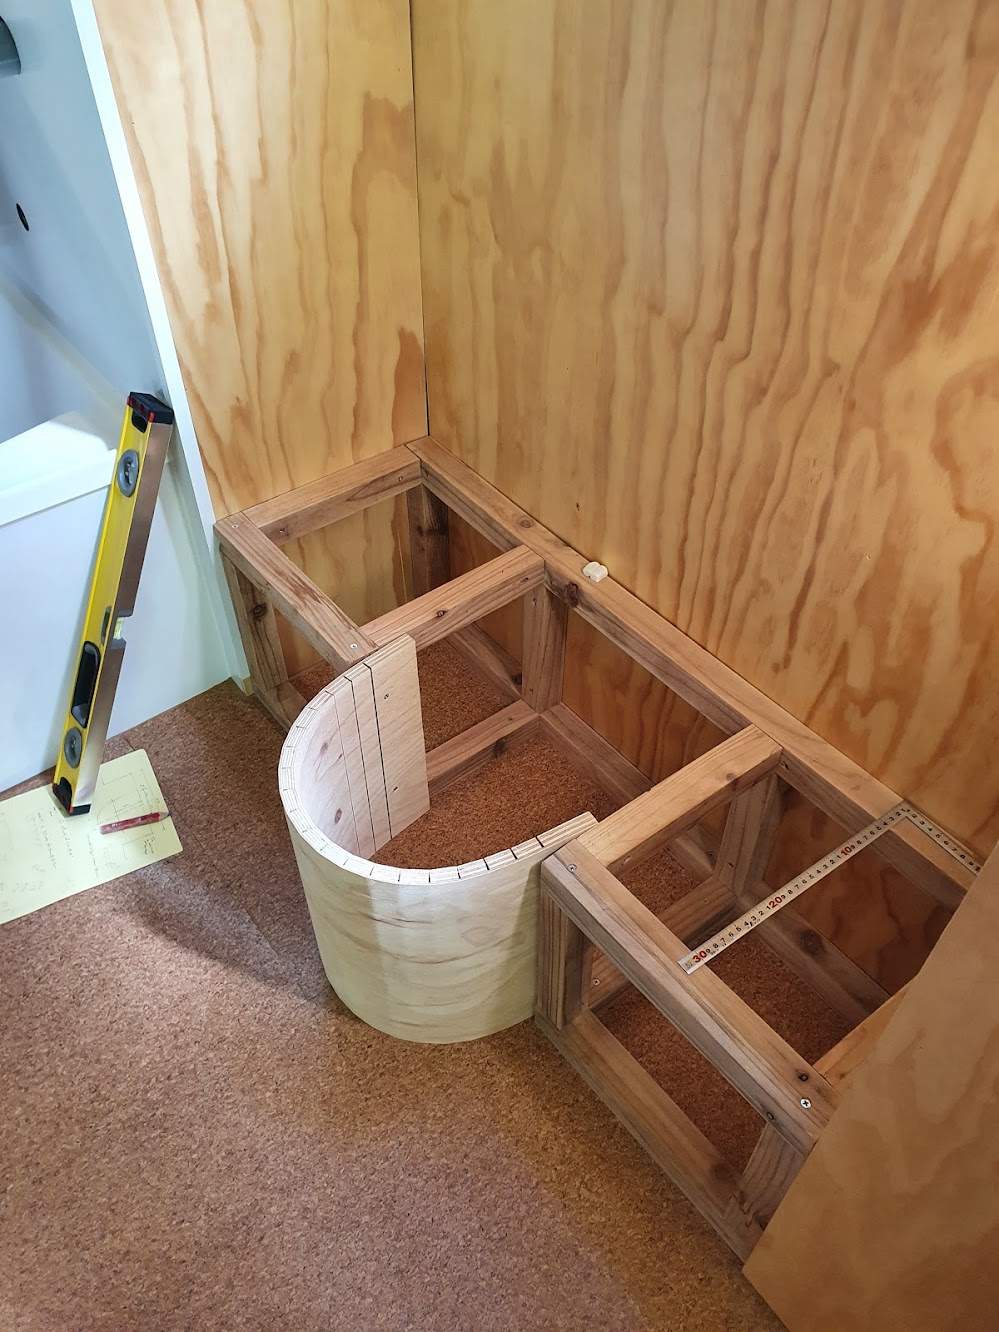
We have a composting toilet. It's a very simple system, comprised of a bucket in a box and wood chips. But we wanted it to look nice. After the cork went down and was oiled, we built the frame for this toilet, forming the front by kerfing a piece of ply.
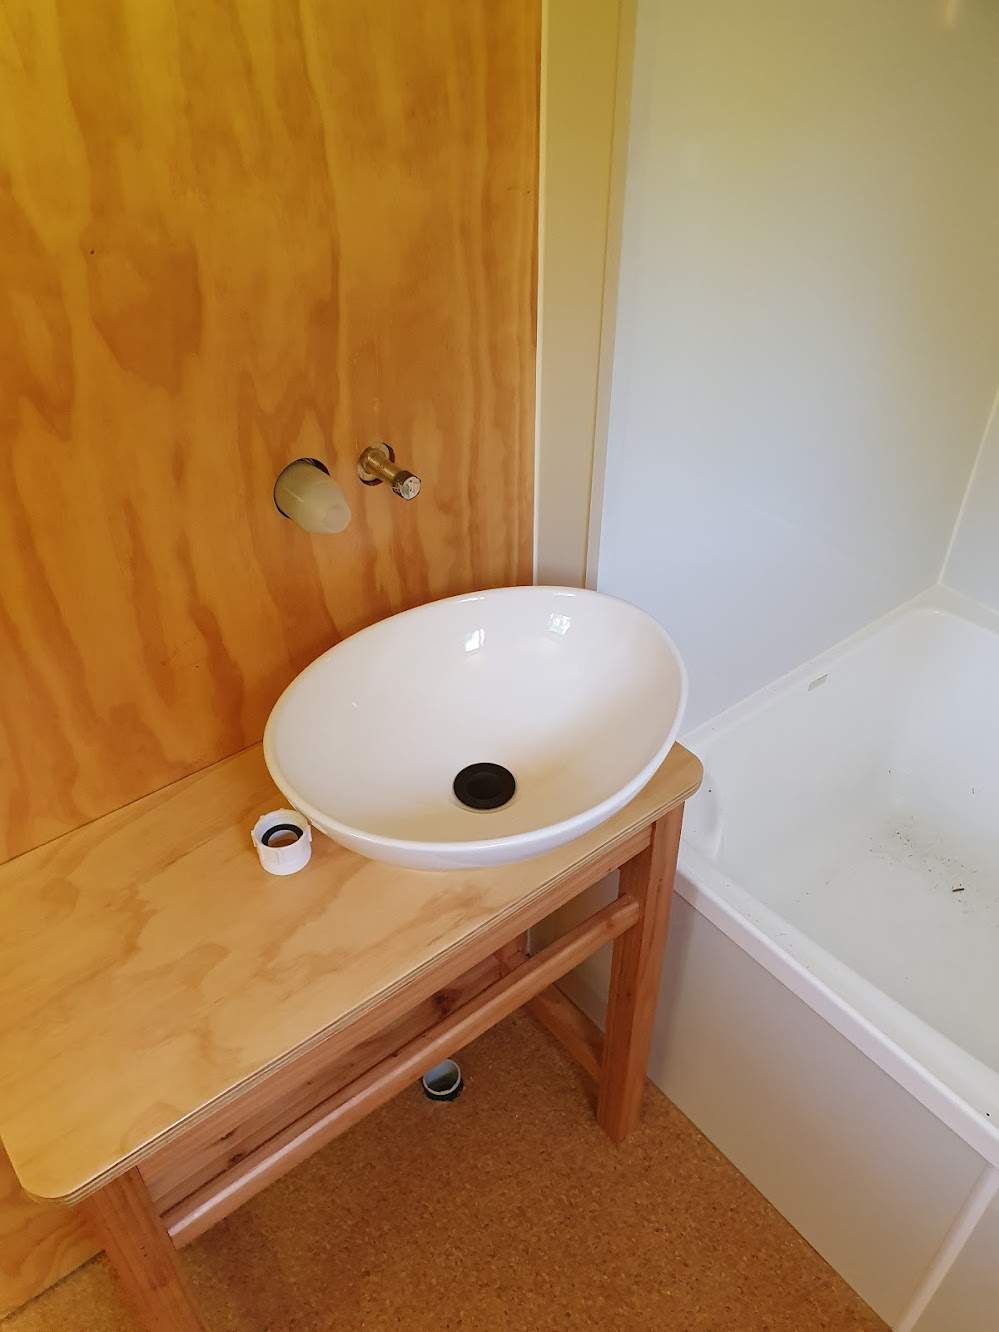
We also made this table for the bathroom basin to sit on. The top is ply coated in polyurethane, and the legs are made from scraps of cedar we had lying around.
In the first photo below, you can see the 'box' of one of the drawers that would go under the sleeping area. There are two of these drawers. They run on cedar that I sanded until smooth and rubbed copious amounts of beeswax onto. Good thing we have bees!
In this next photo, you can see the 18 floorboards we made. This was hard work. Over the course of building, the walls had gotten slightly out of square somehow, and this meant that none of the cells that the floorboards sit on were perfectly square. We couldn't make 18 identical panels. We had to measure each one, take into account the gaps we wanted, and make them all individually. I think we averaged 4 or 5 a day. Slow going, but happy with the result. We could have just put a couple of sheets of ply down, but we wanted each floorboard to lift individually to access the huge amount of storage below.
Next, we laid the cork down. The blue tape is to protect the walls from the oil we would eventually apply to the cork. In these photos, you can also see the underfloor drawers in a more complete state, with their fronts on. I cut the drawer fronts and the strip of ply above out of one piece and took some time to match the grain so that, when the drawers are closed, it looks like one piece (except for where the handles and gaps are, of course).
A lot of people seem to consider cork to be an old fashioned product, but I really like it. It's very soft to walk around on, has beautiful warm tones, and is a sustainable product. I'm not much of a fan of carpet.
We have a composting toilet. It's a very simple system, comprised of a bucket in a box and wood chips. But we wanted it to look nice. After the cork went down and was oiled, we built the frame for this toilet, forming the front by kerfing a piece of ply.
We also made this table for the bathroom basin to sit on. The top is ply coated in polyurethane, and the legs are made from scraps of cedar we had lying around.


340 square feet?? Pics??
My garage is 360 square feet and about 10x smaller than I'd like it to be.
Garages are like the opposite of a Tardis - smaller on the inside than they look on the outside!
Next, we built the raised sleeping area and small loft above it. These were both framed with 140x45mm cedar.
In the first photo below, you can see the 'box' of one of the drawers that would go under the sleeping area. There are two of these drawers. They run on cedar that I sanded until smooth and rubbed copious amounts of beeswax onto. Good thing we have bees!
View attachment 4398305
In this next photo, you can see the 18 floorboards we made. This was hard work. Over the course of building, the walls had gotten slightly out of square somehow, and this meant that none of the cells that the floorboards sit on were perfectly square. We couldn't make 18 identical panels. We had to measure each one, take into account the gaps we wanted, and make them all individually. I think we averaged 4 or 5 a day. Slow going, but happy with the result. We could have just put a couple of sheets of ply down, but we wanted each floorboard to lift individually to access the huge amount of storage below.
View attachment 4398306
Next, we laid the cork down. The blue tape is to protect the walls from the oil we would eventually apply to the cork. In these photos, you can also see the underfloor drawers in a more complete state, with their fronts on. I cut the drawer fronts and the strip of ply above out of one piece and took some time to match the grain so that, when the drawers are closed, it looks like one piece (except for where the handles and gaps are, of course).View attachment 4398317 View attachment 4398320 View attachment 4398318 View attachment 4398321
A lot of people seem to consider cork to be an old fashioned product, but I really like it. It's very soft to walk around on, has beautiful warm tones, and is a sustainable product. I'm not much of a fan of carpet.
We have a composting toilet. It's a very simple system, comprised of a bucket in a box and wood chips. But we wanted it to look nice. After the cork went down and was oiled, we built the frame for this toilet, forming the front by kerfing a piece of ply.View attachment 4398327
We also made this table for the bathroom basin to sit on. The top is ply coated in polyurethane, and the legs are made from scraps of cedar we had lying around.
View attachment 4398328
I put down cork on our kitchen floor about 20 years ago. Floating click together type. There was a layer of 1970s tile on 2” of poured concrete (!) on top of the subfloor. Started to demo the tile and concrete but would have added a week to the critical path that we didn’t have.
So, cork. I love it. Easy to maintain, warm on the feet, hydrophobic so good in a wet area. Had to put a skim coat of self-levelling concrete in the tile to eliminate some bumps and fill in grooves.
It’s not a traditional kitchen look but never fails to get a positive comment.
This is fantastic. Thanks for posting. I am a big fan of tiny houses and while your design removes the standard sleeping loft arrangement, the loss of space seems minimal while keeping it a lot more open like you said. I'm picturing a projector behind the couch on a little shelf, using the curtain as a screen for TV.
Last edited:
Sorry for the massive delay in updating this. Life can get pretty busy sometimes!
I'm pretty sure I'm up to the kitchen and bedroom. This was a challenge. We originally intended to do it ourselves, having never built a kitchen or wardrobe before. A few people advised us against it, as it really is quite a specialised job. We went on pig-headedly and pretty soon realised it was beyond us. Most kitchens are built with the carcass first, and then drawer fronts etc are done last. We didn't know this (like I said, no kitchen experience). So we bought a bunch of thick ply with high-pressure laminate faces and got it all cut out on a CNC machine. The high-pressure laminate is incredibly hard-wearing but you need pretty high spec tools to cut it. An average skill saw will chip the laminate.
Anyway, after realising we were in way over our heads, we contacted a local guy and he was pretty keen to tackle the very unconventional and challenging job of building a carcass that would suit the ply that had already been cut out. He's a one-man operation and was quite keen to have us help him out if we were interested. He had a couple of other jobs to do at the same time but he kept pretty outlandish hours, often working until the early hours of the morning with music blasting. We got the tiny house towed from our front lawn up to his workshop where it stayed for the next month or so. This was probably the busiest and most stressful point of my life so far. I was still working full time as a teacher, working on the house until midnight most nights, recording my band's EP on weekends (link in signature) and trying to pack up our life before making a big move, house in tow.
Lots of head-scratching went into this, as well as a lot of altering of our already-cut-out ply for the kitchen. Luckily we chose the right man for the job. Although it would have been nice to have it done a bit more quickly and without staying up all night, he is very skilled and rather creative.
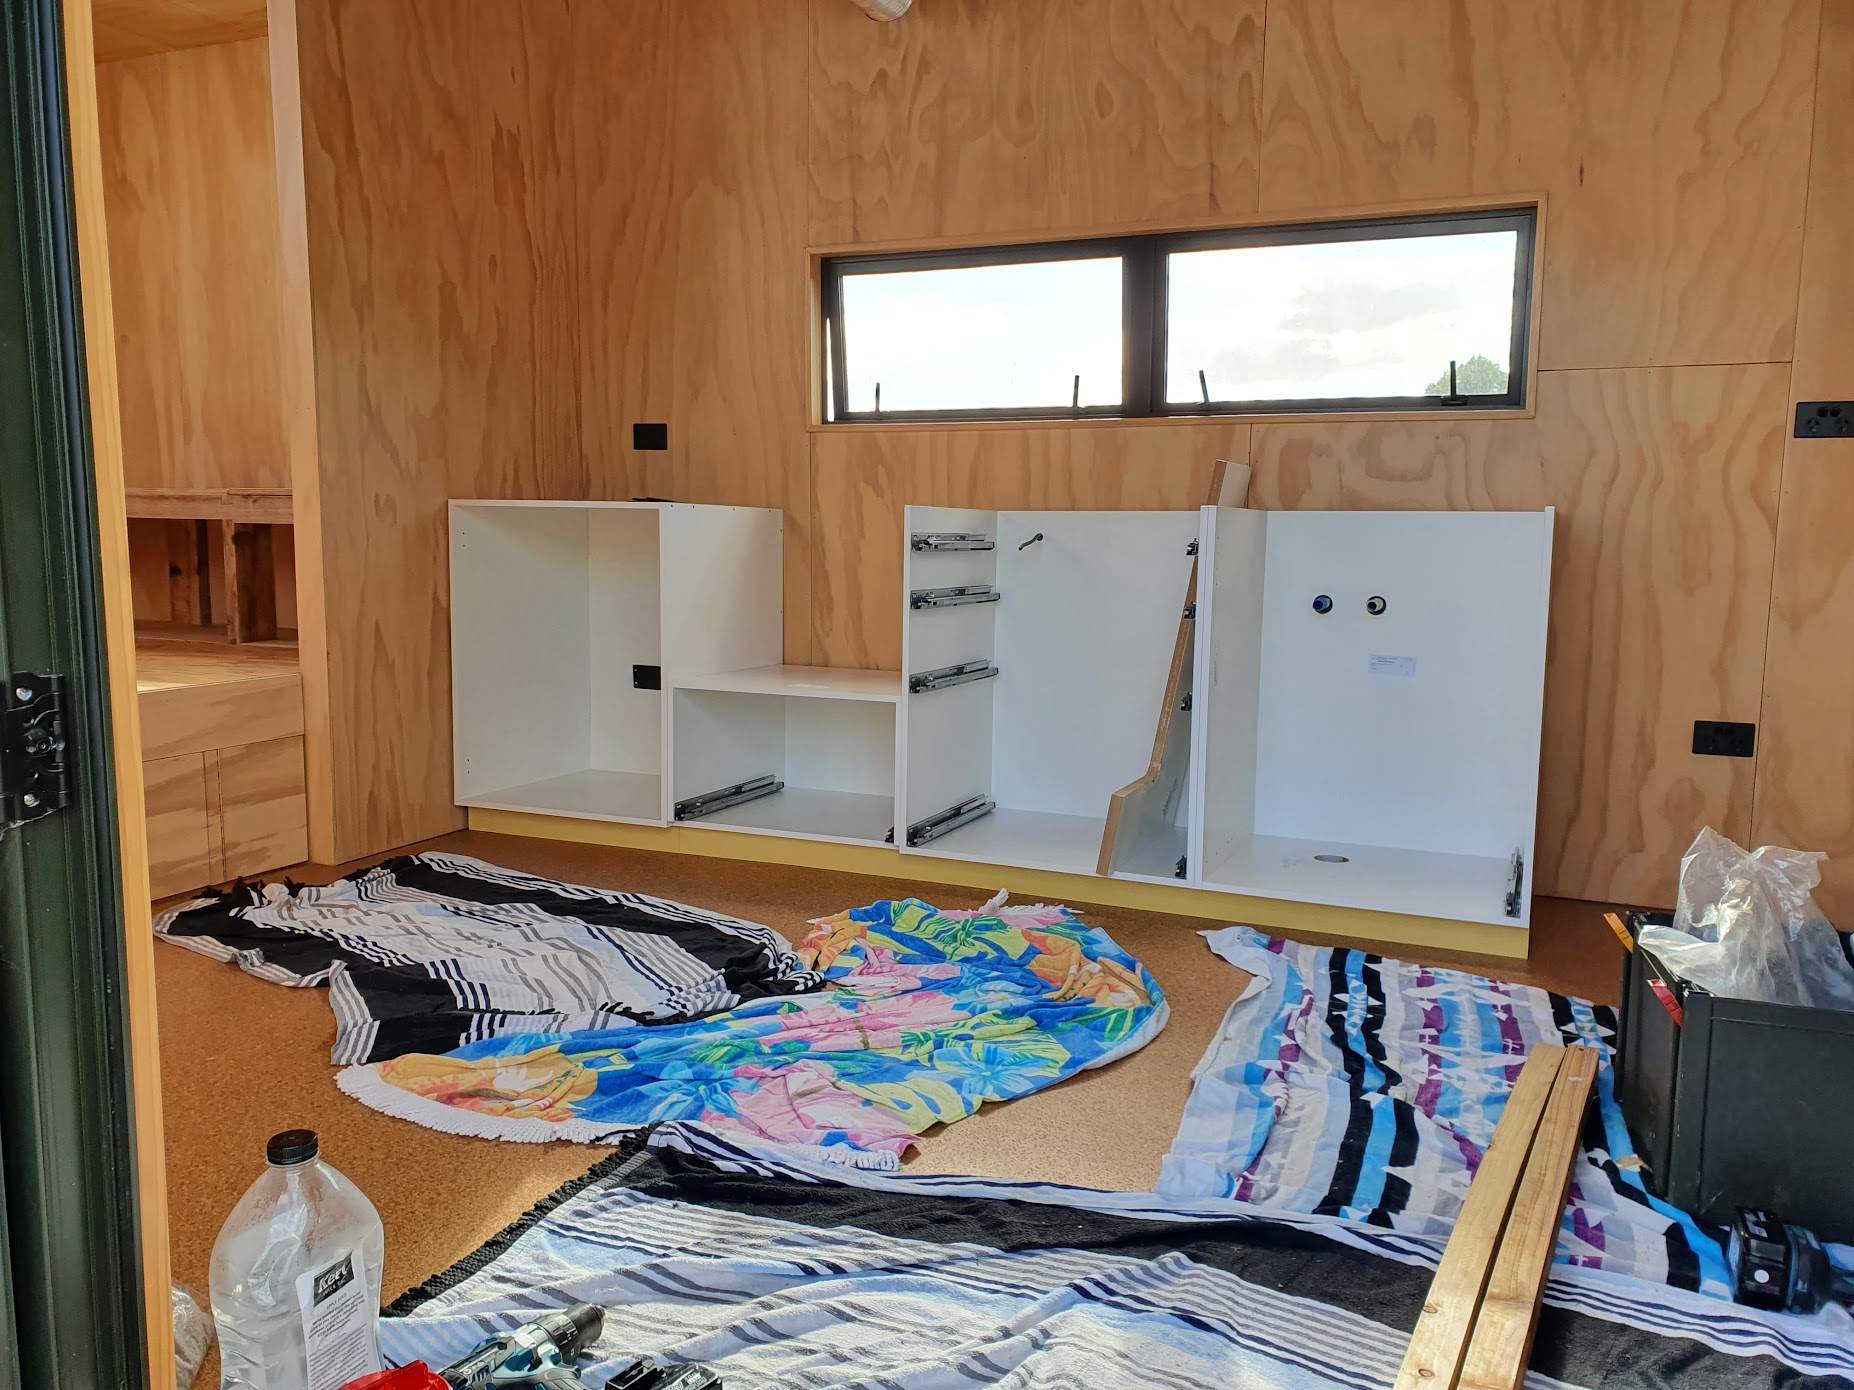
As you'll see in the photos below, we chose two colours that we thought complemented each other and made each one the dominant colour in the kitchen and bedroom, with the opposite colour as accents. I think it came out rather well.
Carcass in place:
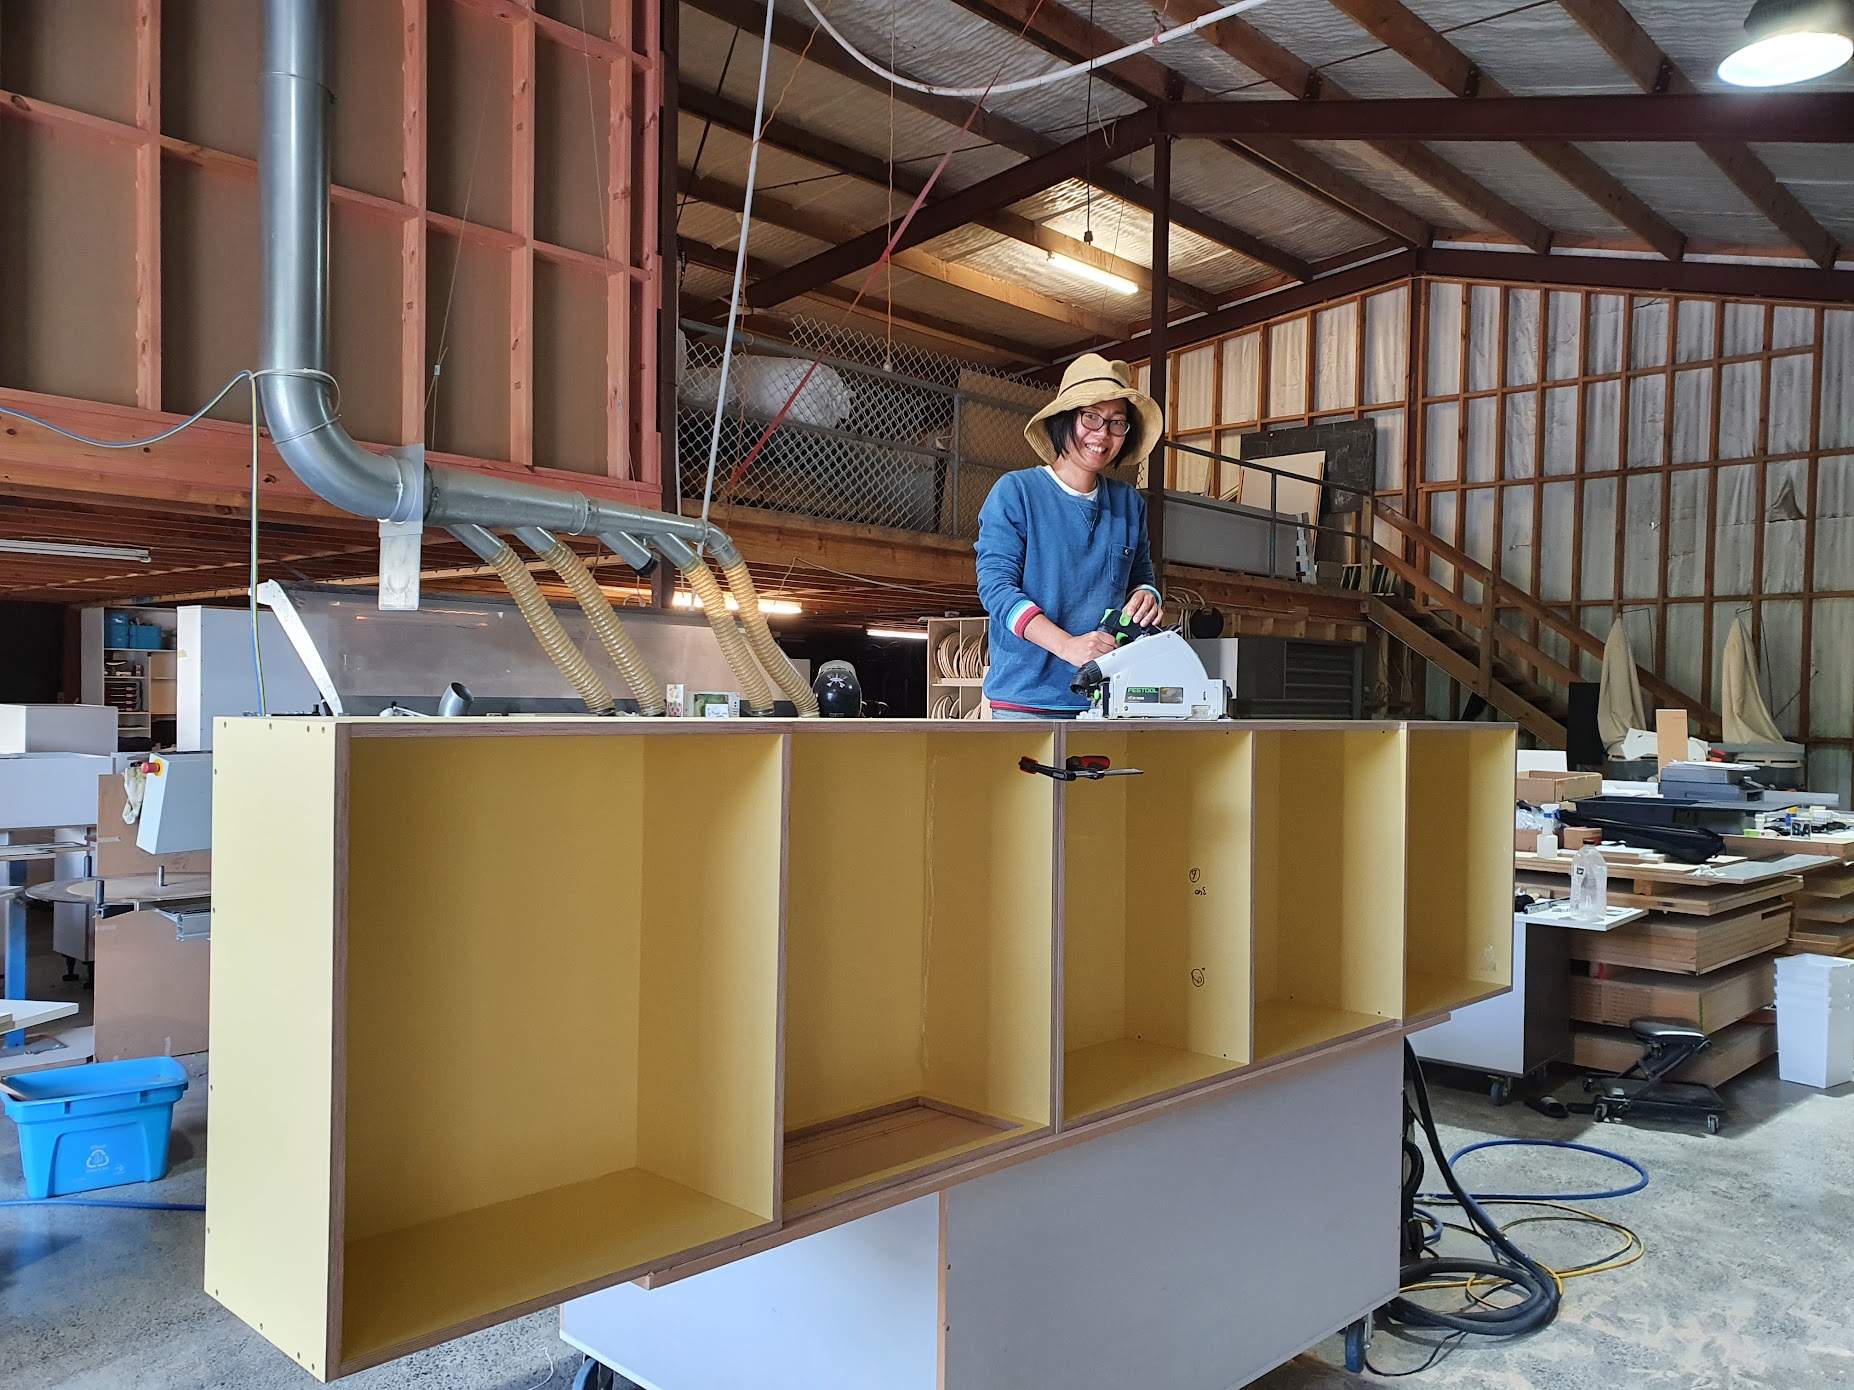
We wanted to show some perspective of how big these overhead cupboards are. Big kitchen for a tiny house.
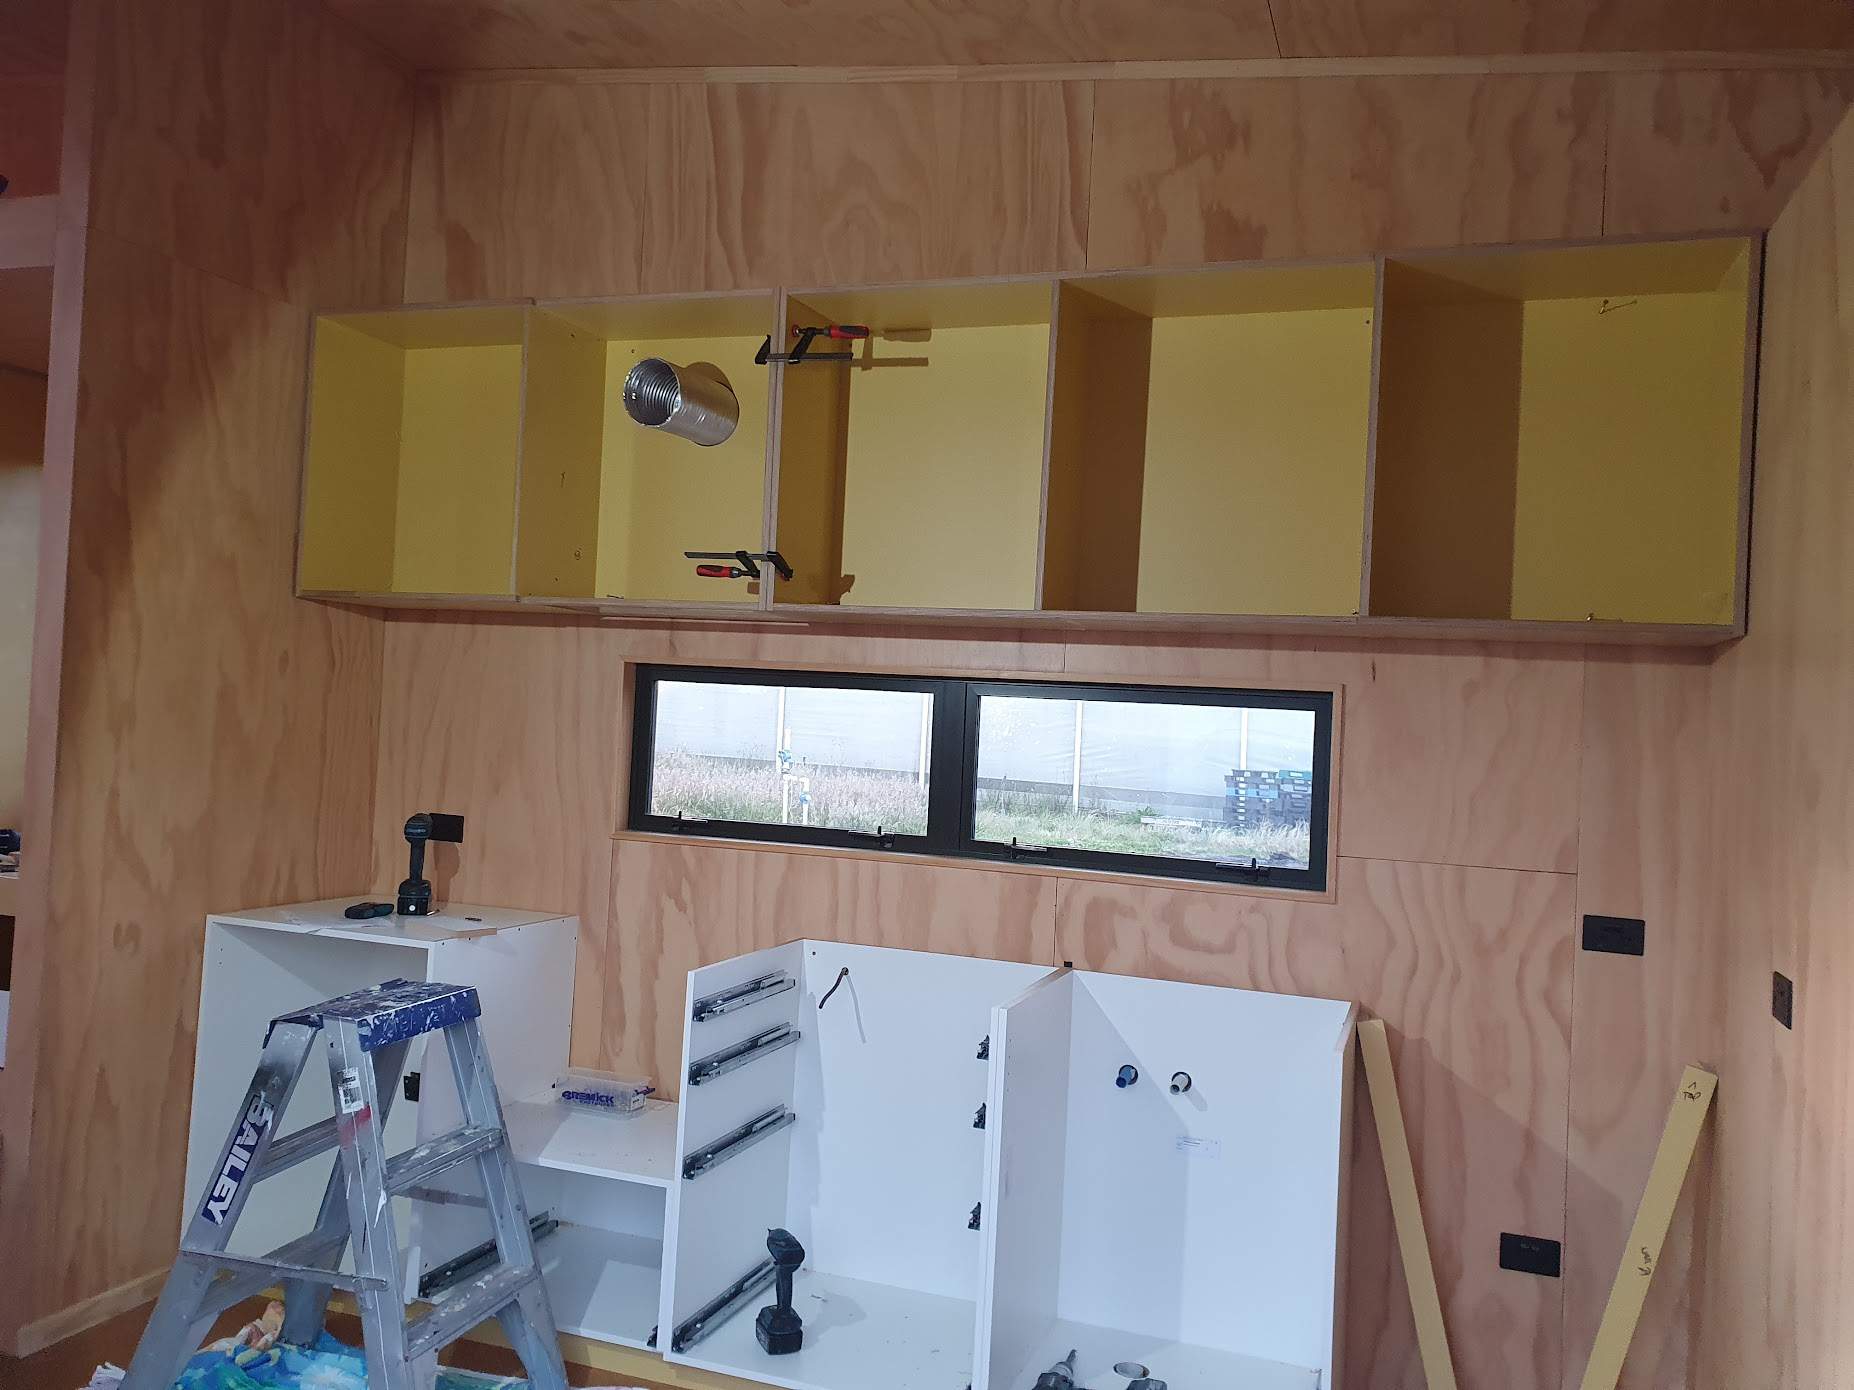
Overhead cupboards in place:
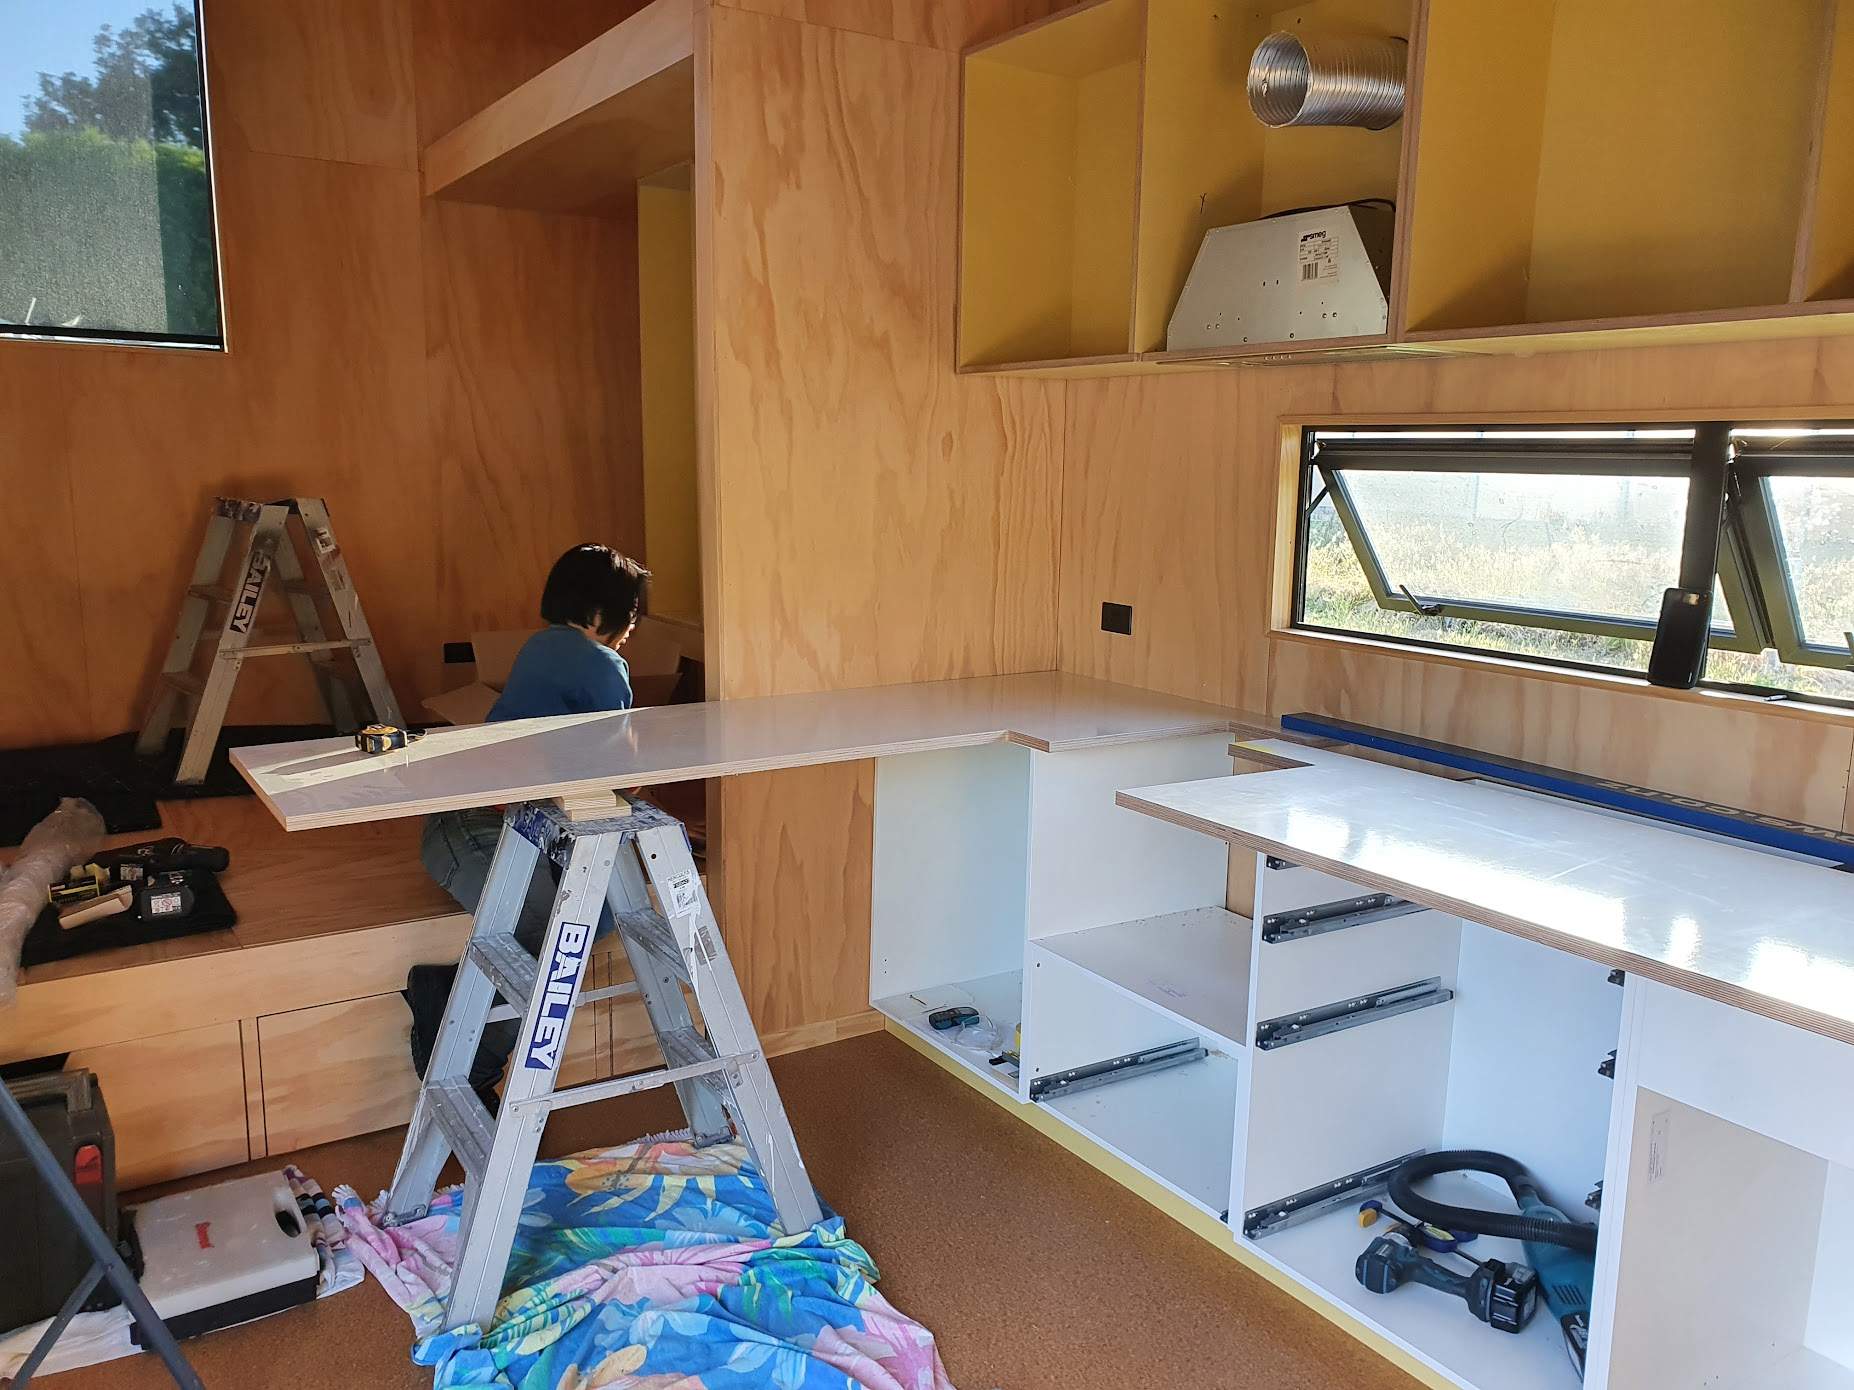
Sorting out the benchtop. A lot of scribing and trimming here. Straight benchtop + not-so-straight walls = some pretty big gaps.
The finished kitchen and bedroom:
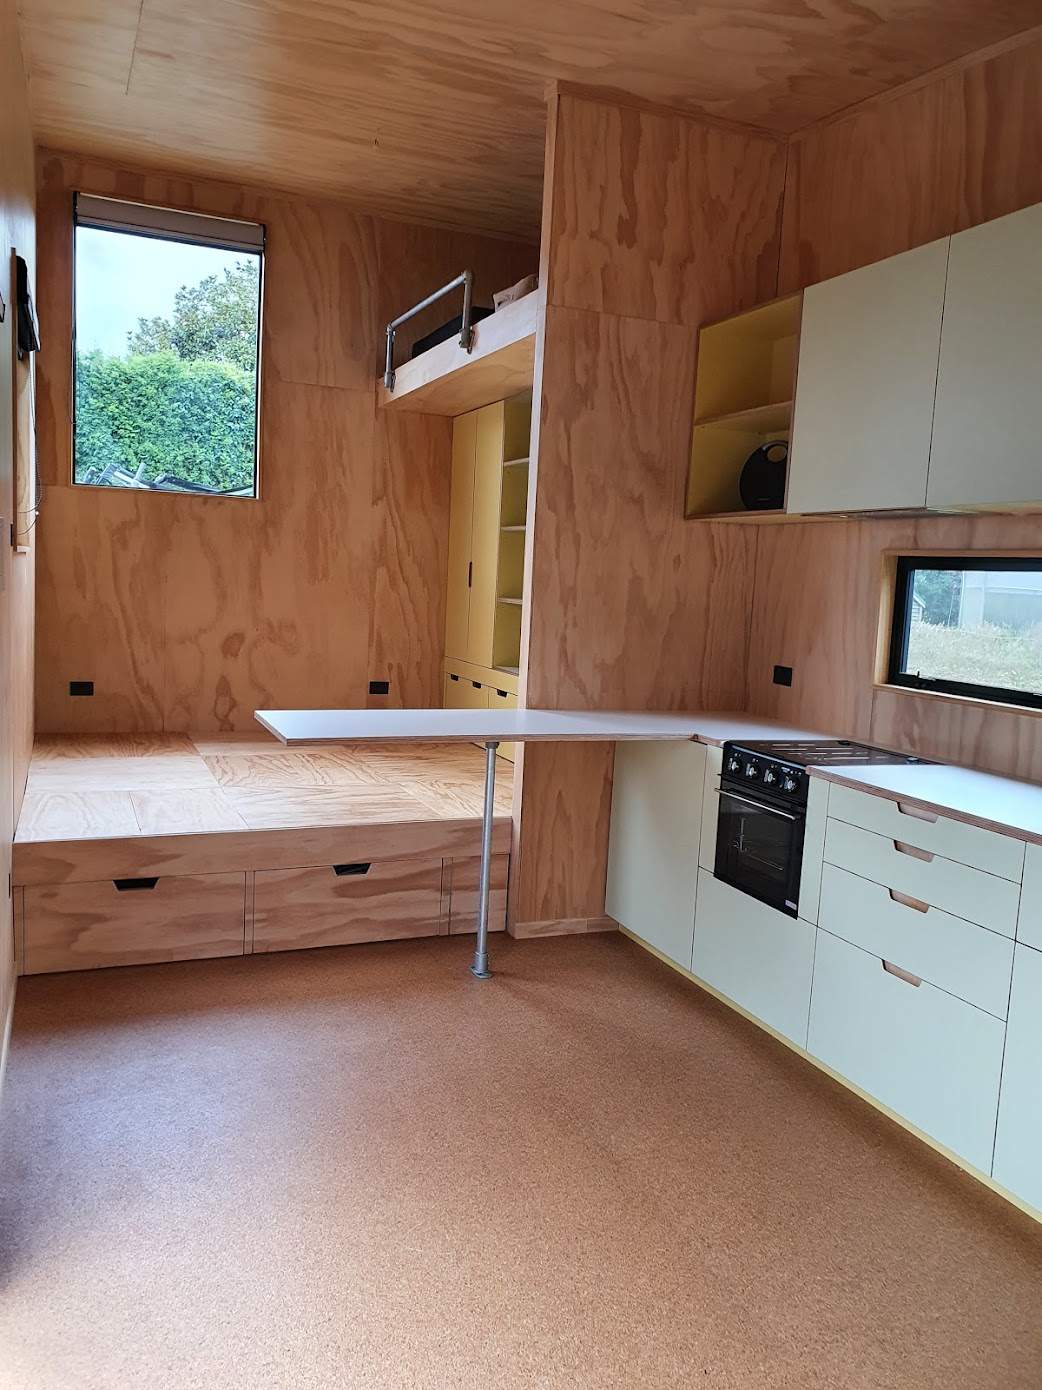
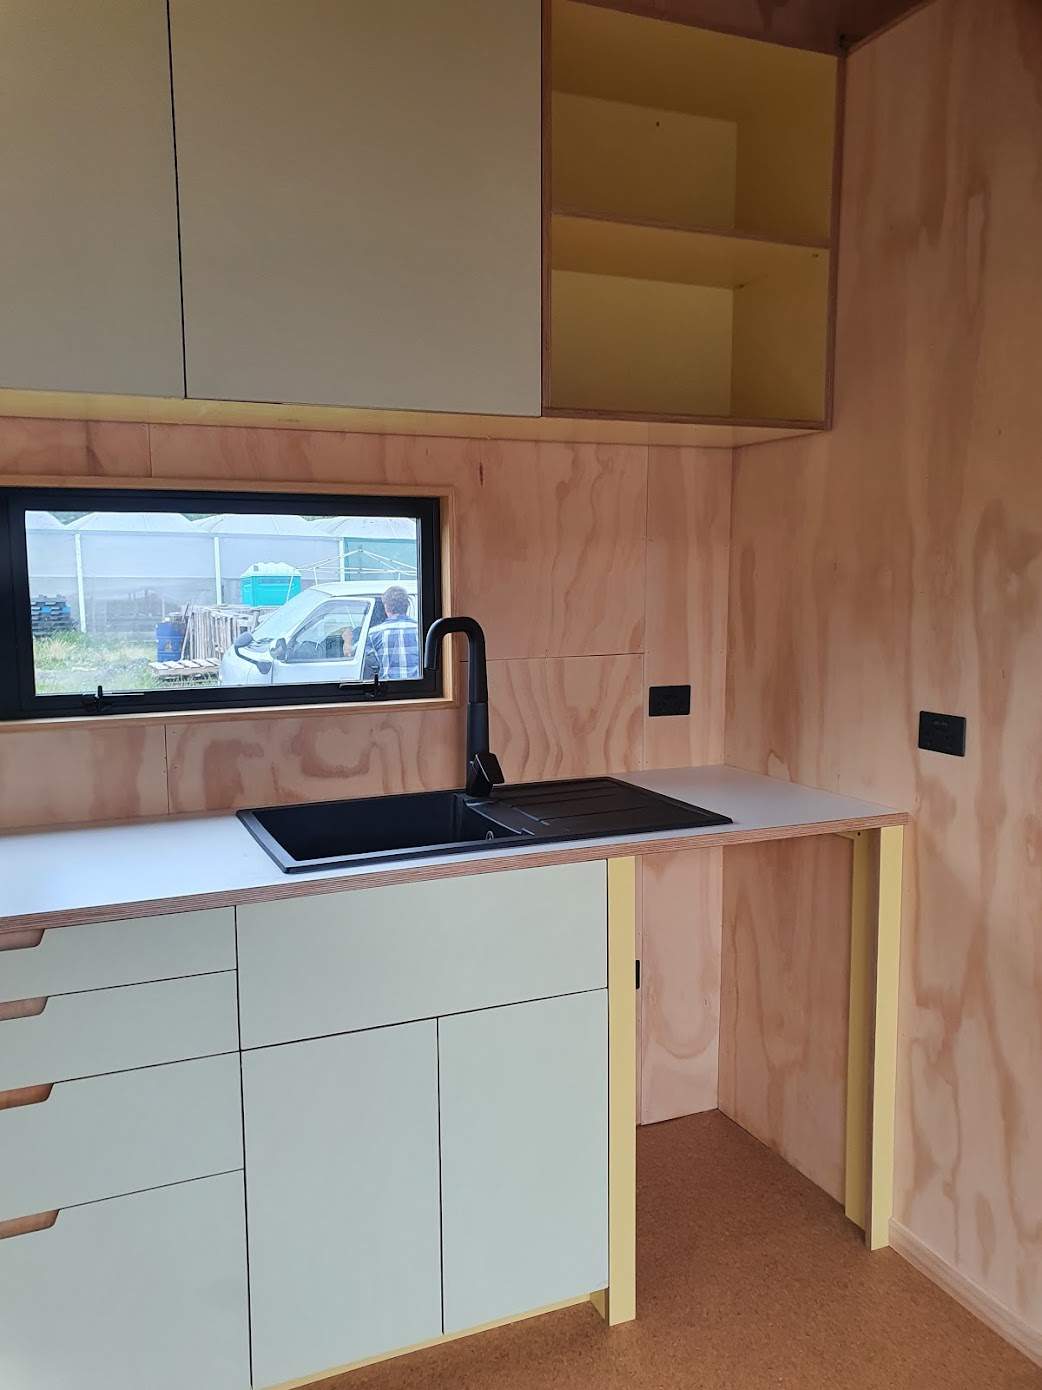
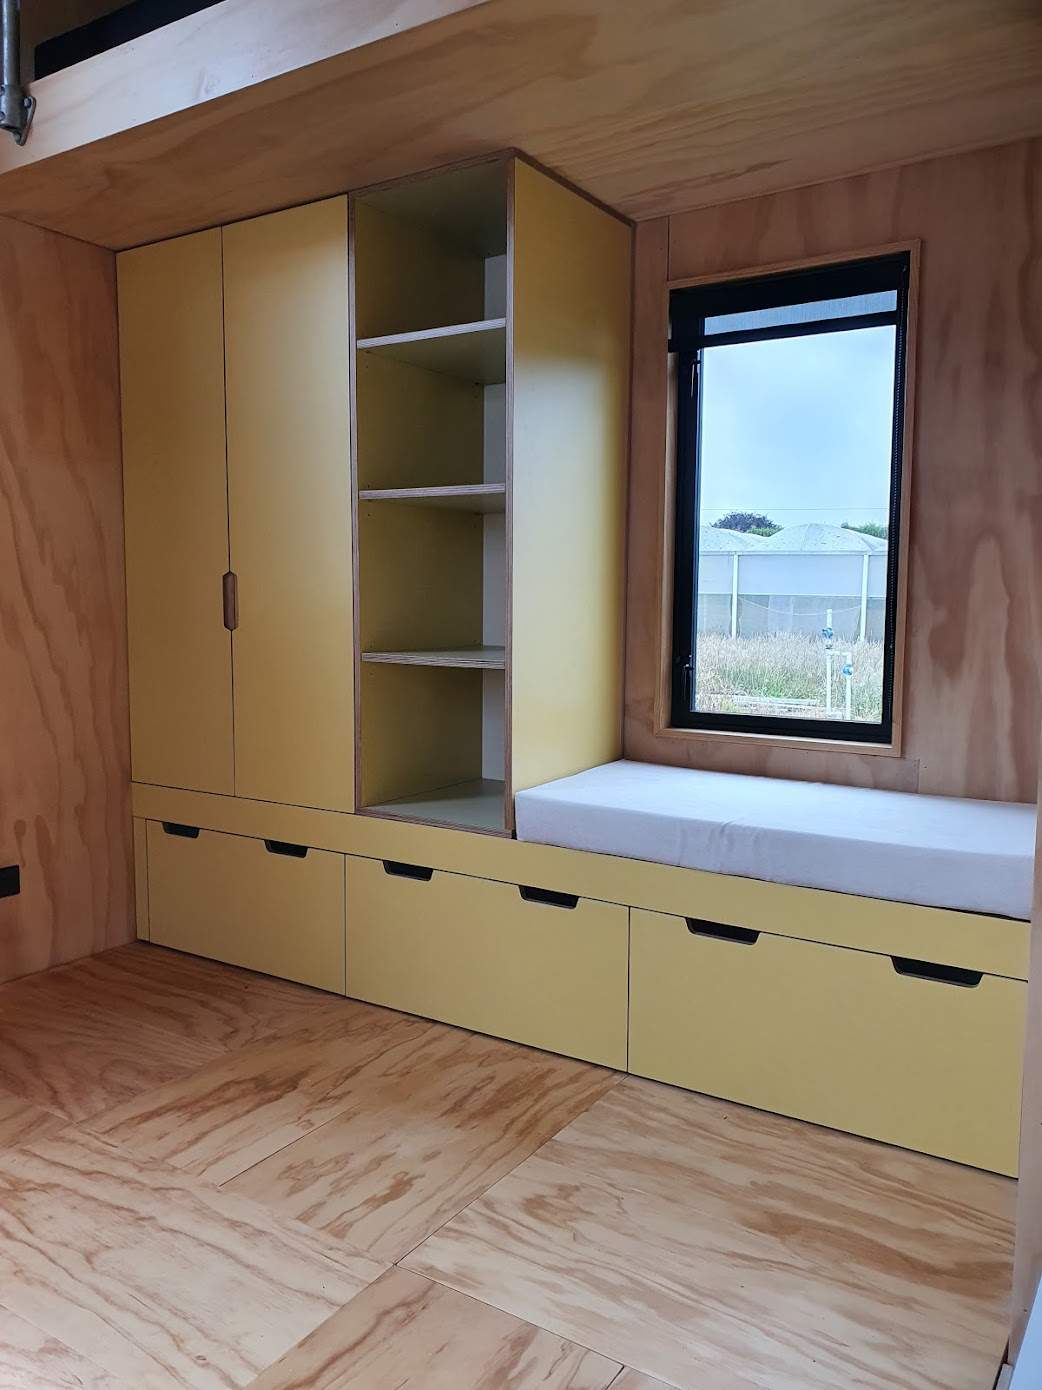
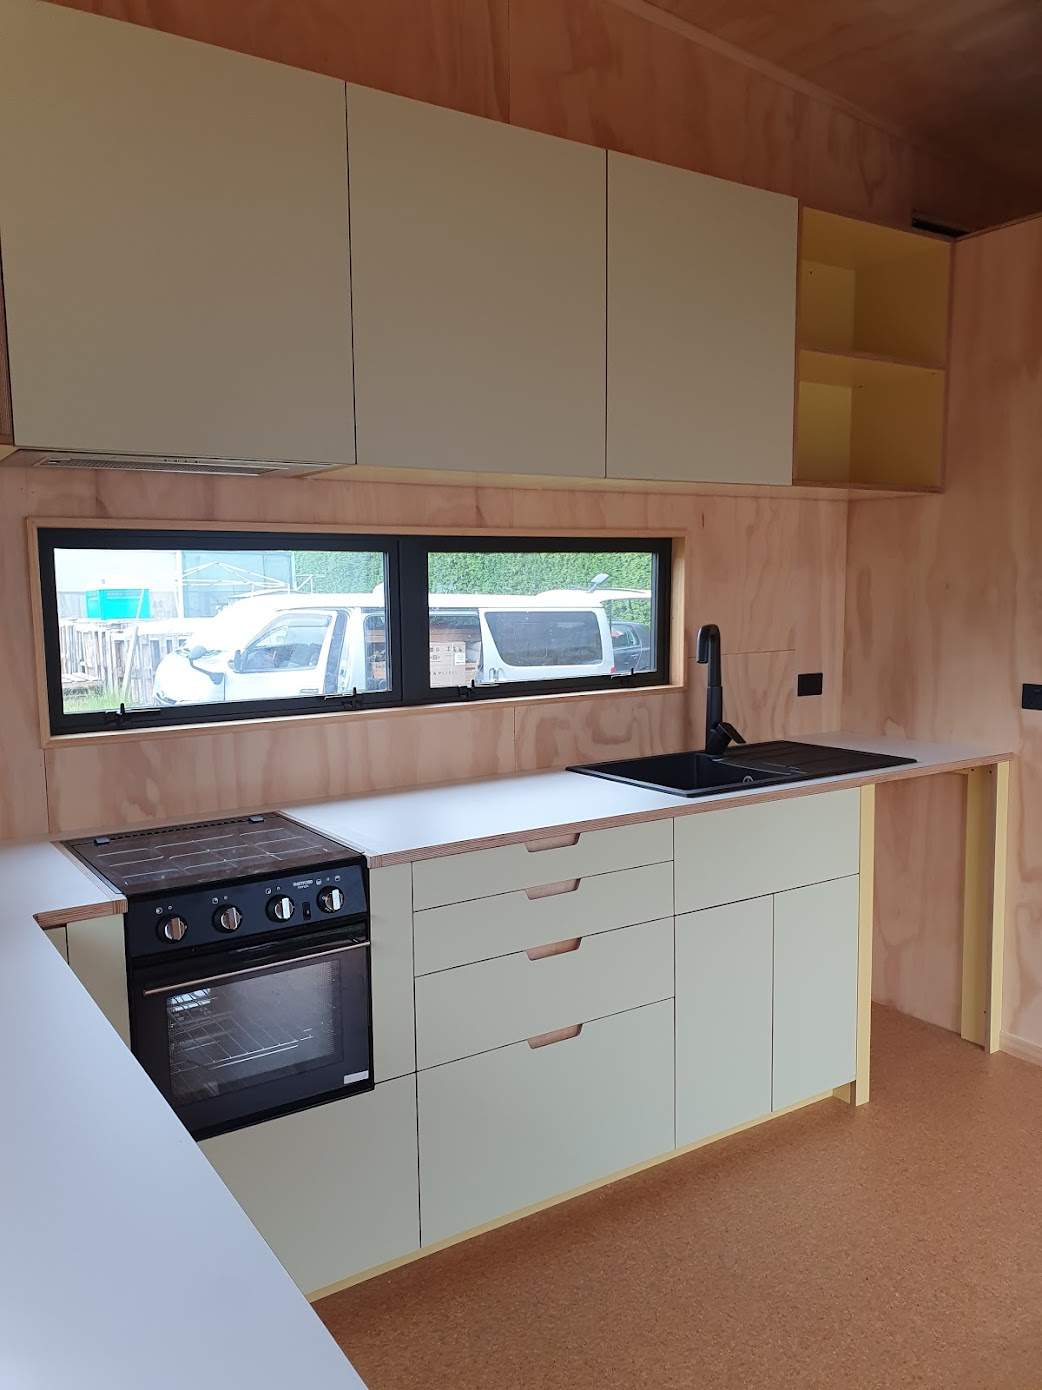
These photos above were taken on moving day. The next (and I think final) update will show the move and how we've settled into it.
I'm pretty sure I'm up to the kitchen and bedroom. This was a challenge. We originally intended to do it ourselves, having never built a kitchen or wardrobe before. A few people advised us against it, as it really is quite a specialised job. We went on pig-headedly and pretty soon realised it was beyond us. Most kitchens are built with the carcass first, and then drawer fronts etc are done last. We didn't know this (like I said, no kitchen experience). So we bought a bunch of thick ply with high-pressure laminate faces and got it all cut out on a CNC machine. The high-pressure laminate is incredibly hard-wearing but you need pretty high spec tools to cut it. An average skill saw will chip the laminate.
Anyway, after realising we were in way over our heads, we contacted a local guy and he was pretty keen to tackle the very unconventional and challenging job of building a carcass that would suit the ply that had already been cut out. He's a one-man operation and was quite keen to have us help him out if we were interested. He had a couple of other jobs to do at the same time but he kept pretty outlandish hours, often working until the early hours of the morning with music blasting. We got the tiny house towed from our front lawn up to his workshop where it stayed for the next month or so. This was probably the busiest and most stressful point of my life so far. I was still working full time as a teacher, working on the house until midnight most nights, recording my band's EP on weekends (link in signature) and trying to pack up our life before making a big move, house in tow.
Lots of head-scratching went into this, as well as a lot of altering of our already-cut-out ply for the kitchen. Luckily we chose the right man for the job. Although it would have been nice to have it done a bit more quickly and without staying up all night, he is very skilled and rather creative.
As you'll see in the photos below, we chose two colours that we thought complemented each other and made each one the dominant colour in the kitchen and bedroom, with the opposite colour as accents. I think it came out rather well.
Carcass in place:
We wanted to show some perspective of how big these overhead cupboards are. Big kitchen for a tiny house.
Overhead cupboards in place:
Sorting out the benchtop. A lot of scribing and trimming here. Straight benchtop + not-so-straight walls = some pretty big gaps.
The finished kitchen and bedroom:
These photos above were taken on moving day. The next (and I think final) update will show the move and how we've settled into it.
Last edited:
I should also add that we spent hours sanding and oiling every edge of the ply in the kitchen. Each edge needed to be arrised (I think that's the correct spelling - rounded out with sandpaper) so that they were safe and felt nice, the exposed ply needed to be sanded and then oiled (3 coats). We also had to do this in the tricky handles you can see in the kitchen. The overhead cupboards have hidden handles cut out in the back. I'm really glad we spent so many hours on this. The smooth ply edges and details in the kitchen are some of my favourite things about the whole house.
Around these here parts the term is eased. We did this on all trim and mouldings during our renovation projects (a whole lot of edges to sand!).I should also add that we spent hours sanding and oiling every edge of the ply in the kitchen. Each edge needed to be arrised (I think that's the correct spelling - rounded out with sandpaper) so that they were safe and felt nice, the exposed ply needed to be sanded and then oiled (3 coats). We also had to do this in the tricky handles you can see in the kitchen. The overhead cupboards have hidden handles cut out in the back. I'm really glad we spent so many hours on this. The smooth ply edges and details in the kitchen are some of my favourite things about the whole house.
Around these here parts the term is eased. We did this on all trim and mouldings during our renovation projects (a whole lot of edges to sand!).
Two nice sharp block planes, one low angle and one standard, will make short work of breaking all those sharp edges (you've still got to come in with a good sharp chisel or card scraper to get into inside corners). And plane shavings clean up easier than sanding dust.
I wanted them rounded off a bit so the sanding was how we did it. It went pretty quick, really. Some edges also have more radius, depending on the application of the particular piece of trim, usually 1/8"; for those we used a router. And, yes, there was plenty of planing and chiseling, too.
Here is a cool video about someone's tiny house they had built (not as tiny as your but still very cool).

I think she's stretching the limit of the definition of a tiny home.
-Mike
-Mike
Well, she does say as much in the video. It is probably much smaller in the "wood" than the extreme wide-angle lens on the camera intimates.I think she's stretching the limit of the definition of a tiny home.
-Mike
Well, she does say as much in the video. It is probably much smaller in the "wood" than the extreme wide-angle lens on the camera intimates.
Indeed. When she started raving about the full size appliances and overly abundant kitchen cabinets, she started losing me. Although I did chuckle when she mentioned the lack of closet space for clothing.
For me, I would take the totally differently. I don't have a lack for closet space, I have too much clothes.

But hey, there aren't any hard and fast rules. I just think the concept starts to get lost on people when they begin stretching the boundaries.
-Mike


