
• TalkBass has been independent since 1998. Add your voice.
    Create a free account to reply to discussions, view embedded media, and browse with fewer display ads.
    Join freeLog in
    Want zero display ads or expanded classifieds tools? Compare plans.

Virgin voyage (first build)! 6 string "P Style" bass

I could no longer resist and have decided to have a go at a bass build myself!

After many hours of research, and borderline harassment of Talkbass's LonnyBass for weeks on PMs (Thanks Lonnybass!), I took the plunge and ordered a bunch of wood.

I've no woodworking experience (beyond school) and no workshop...but I'll be using my dad's (skills and workshop) to get me up to speed.

On to the build...

I'm keen to build something fairly conservative looking...with a twist: I always wanted a P bass for its tone, but didn't like the feel of them, and also the fact that I play mostly 6 strings. Easy decision then: a 6 string P style bass! 34" scale, 24 frets.

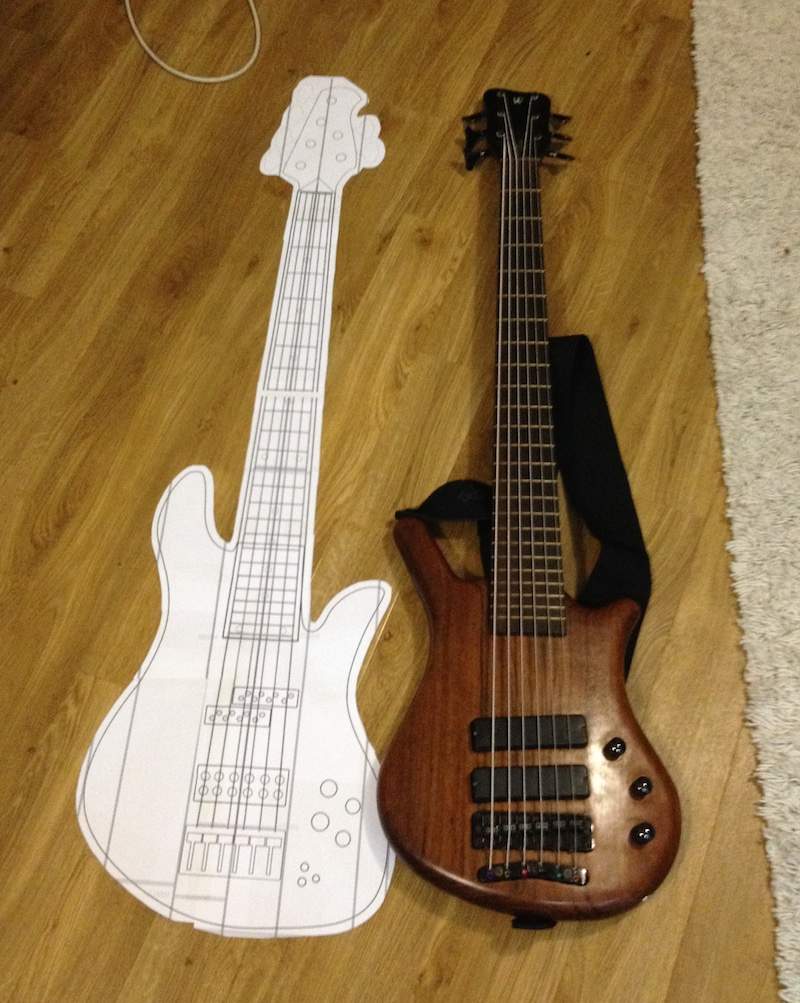
I spent considerable time making a to-scale (1:1) illustration (I used http://www.ekips.org/tools/guitar/fretfind2d/ to get started) which I've attached a sized-down line drawing. As you can see I've gone for a trendy 4:2 headstock tuners..probably a balance nightmare but let's see. Pickups/controls/bridge in this are just for spatial awareness.
outline.png

Here's that drawing printed out to scale next to a 3d bass (I based my neck dimensions and string spacing on the one in the pic and they match up perfectly).
IMG_7417.JPG


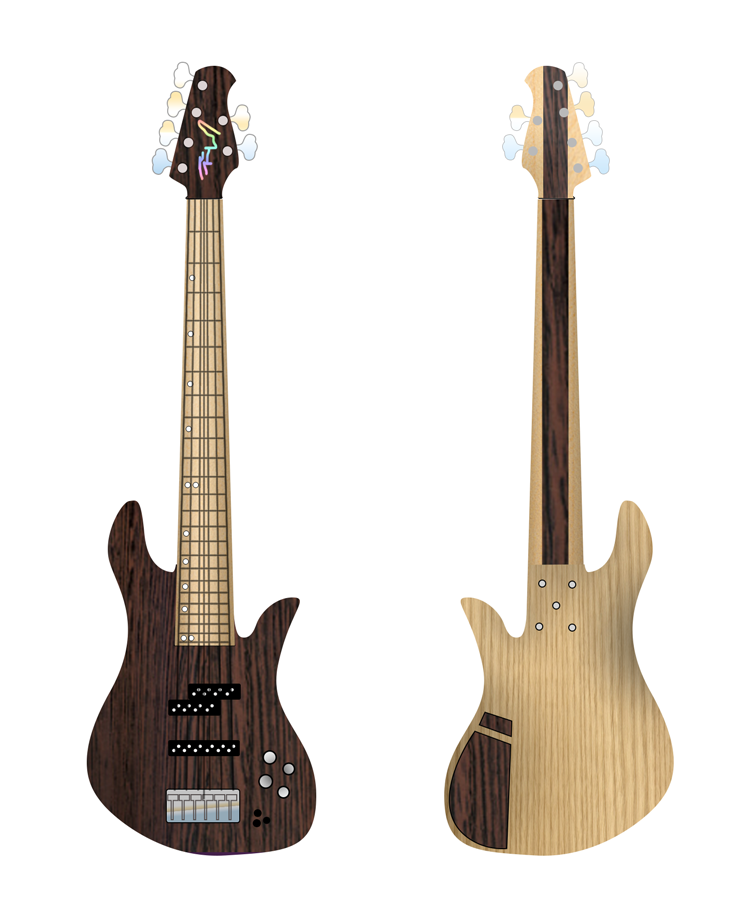
And here's the obligatory "I have no wood, no workshop, but I do have photoshop" mockup (likely to change...I've actually done about 15 variations!!). "logo" is just a colourful scribble at the moment. The darker top would be a laminate: keen to keep the wood on show after all the sweat and tears that will go into this (I deliberately left out blood from that list...wishful thinking).
browns-silver-hw.png


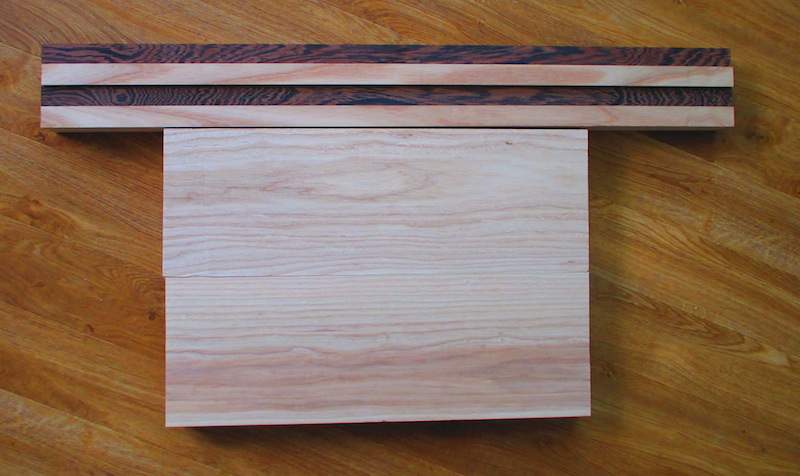
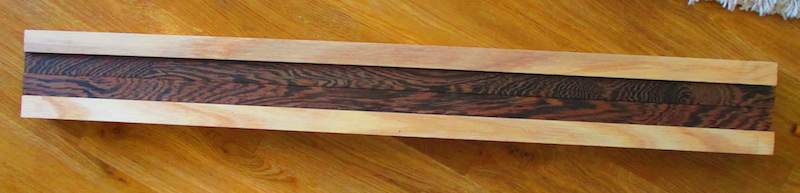
As for wood, I've gone with a 2 piece Ash body and a neck that will comprise of 2 pieces ash, 1 piece wenge. Here's that very wood (no, not the flooring!):
IMG_1270.JPG
IMG_1282.JPG

And the body pencil outline on the body pieces! It's really coming to life...!
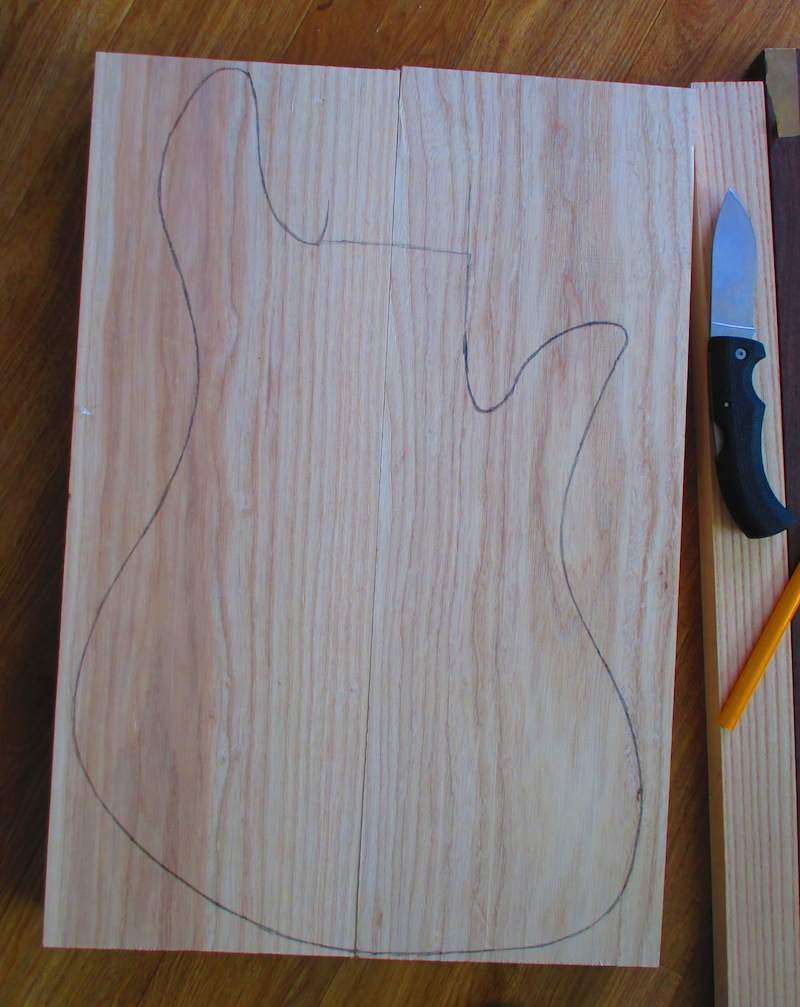
IMG_1280.JPG

The fingerboard will be maple. Hardware will be silver "Chinese Cheapies" to begin with. No idea about pickups/electronics yet.

Anyway, I hope this is the start of a long and fulfilling relationship with bass building. It's going to be a slow 'n' steady project (most of the work I'll have to do at my dad's on designated weekends out of the city). No worries - a good excuse for some father-son-beers I suppose (post workshop, of course).

Thanks for your time and thanks a lot to everyone that's already helped me with all thier posts, photos, ideas and insights.

Watch this spot! Feedback welcome in all shapes and sizes!
 
Nice job on the photoshop dsign. Have you thought about neck reinforcement? Two trussrods or one plus CF stiffeners? With 6 tuners you might want to spring for hipshot ultralights to avoid neck dive, though your body looks pretty big. I usually have no idea how a bass will balance until I put it together. I did a quick and dirty plywood mockup for my first build to see if it was roughly balanced and comfortable to play standing or sitting, definitely worth the extra time. I used the mockup (two sheets of 3/4" plywood glued together) to practice stuff like routing neck and pickup pockets, belly cut techniques, bandsaw practice, etc. I made lots of mistakes I didn't have to repeat on my expensive actual lumber. You can use the Warwick as a guide for elbow relief and belly cut, they are very well designed ergonomically. Good luck, sub'd!
 
Hi all. Slow updates, but progress is happening! I've recently made a full scale MDF template of the body, neck and head:
IMG_20150518_201800369.jpg

I have also cut out the fretboard from a lovely piece of maple. The picture is pretty mundane, but I'm uploading it as proof-of-work-done nonetheless. I'm actually super happy with how this came out; it's spot on! I left space either end for clamping and so on.
IMG_20150518_201707546.jpg


I'm thin on tools and workspace, so have been chipping away slowly in my apartment/balcony with a jigsaw and my improvised workbench. Really enjoying it! The next plan is to glue up the 3 piece neck billet as shown in post one, and glue the 2 body boards. I'll then have to wait until the end of june to use my dad's band saw for the neck cutting.

Is it feasable to cut the body using a jigsaw? The wood is Ash, 45mm thick (1.7inches) and me jigsaw has a max depth of 80mm, 530watt.
 

Attachments

  • IMG_20150518_201707546.jpg
    IMG_20150518_201707546.jpg
    130.2 KB · Views: 164
  • Like
Reactions: Lonnybass
Looking good! I think you might as well wait to cut the body on the bandsaw rather than attempt it on a jigsaw - bass bodies are a bit on the thick side to be able to get a nice clean cut all the way through using a jig saw. The cleaner the cuts are coming off the machine, the less work needs to be done by hand doing final production woodwork.

If you look through the various build threads on TB you can see a lot of examples where folks skipped steps or took shortcuts to advance their bass build closer to completion - but in the process, they've inadvertently created multiple extra weeks of steps and additional work on the back end before their instruments would be ready.

So, the trick is to figure out what is going to be a true step forward in the build...and what could represent a detour. I've been there many times. :thumbsup:

Lonnybass
 
  • Like
Reactions: josiah goldfish
Some progress on the fret board, specifically fretting it: I've taped a full scale printout to the fretboard, got a fret saw, and cobbled together a basic slotting-rig (yes, the base of the jig is indeed half of my bass's body!). It works really well - so far I've done 7...that's 17 to go. And yes, I am doing the sawing on my apartment floor.

IMG_1756.JPG

I just hold the saw up tight to the edge of the clamped wood barrier (which I manually relocate each fret - no worry, I'm enjoying this!).

IMG_1755.JPG


I'm doing each slot about 1.5mm deep. I've not yet got fret wire (oops?) so will probably have some tweaking to do once I get that. I'll try to buy wire that matches this thickness too - hopefully I've not ruined the build flow in my enthusiastic haste.
 
Finished the fretting! Unfortunately the last 3 or 4 frets (frets 21, 22, 23 and 24) seems to have staggered and been cut 1.5mm too far up (i followed the template, but assume I did something wrong). Is it worth filling them in with wood glue + sawdust then recut 1.5mm down?

by the way, the fretboard is 10mm thick, so if needs be I could plane it down and start over, put the first lot down to practice!
 
Last edited:
Finished the fretting! Unfortunately the last 3 or 4 frets (frets 21, 22, 23 and 24) seems to have staggered and been cut 1.5mm too far up (i followed the template, but assume I did something wrong). Is it worth filling them in with wood glue + sawdust then recut 1.5mm down?

by the way, the fretboard is 10mm thick, so if needs be I could plane it down and start over, put the first lot down to practice!

Ben-

Do you know what radius you're planning to put on the fingerboard? You can use that to figure out what the crown (center) of the fingerboard height needs to be in order to have sufficient fingerboard thickness along the outer edges. My guess is that you have just barely enough to plane down and start over- which is what I would do if I were you :-)
 
I'm planning on keeping the radius rather flat indeed, so I think this could work. I think the main error was caused by low resolution printing and not being thorough on lining up cut lines. Next time I'll mark them on in pencil using measurements from the nut...which will be triple checked!
 
Ive been cutting fret slots by hand also. What ive been doing is marking them out in pencil directly on the board. I first mark all the lines measuring distance from the nut. Then i go back and measure the distance fret to fret to confirm that they are all correct. Then i recheck from the nut and fret to fret a few more times each (i'm a bit paranoid :laugh:). Then after all that i start cutting.

Good luck! cant wait to see how it turns out!
 
I'll plane it down then. I'll have a go with a hand plane (the slots are about 1mm deep, so not too far to go). If it all goes wrong, at least I got to practice fret-slotting and planing, and can order a new board for £15 (and next time NOT cut the taper before slotting...). What a learning curve!

As for desired radius, I'm basing it on my 6 string warwick thumb. I looked online and it says, in the spec: Fingerboard Radius: 47"
(not sure if that's correct as I don't know anything about it). It seems very flat though; the deeper edges are maybe 2.5mm lower than the central peak, at the bridge. The nut area seems completely flat.
 
I'll plane it down then. I'll have a go with a hand plane (the slots are about 1mm deep, so not too far to go). If it all goes wrong, at least I got to practice fret-slotting and planing, and can order a new board for £15 (and next time NOT cut the taper before slotting...). What a learning curve!

As for desired radius, I'm basing it on my 6 string warwick thumb. I looked online and it says, in the spec: Fingerboard Radius: 47"
(not sure if that's correct as I don't know anything about it). It seems very flat though; the deeper edges are maybe 2.5mm lower than the central peak, at the bridge. The nut area seems completely flat.
You can cut the taper prior to slotting, but many choose to do it after the fact to make an easier workflow for themselves. ;)