
• TalkBass has been independent since 1998. Add your voice.
    Create a free account to reply to discussions, view embedded media, and browse with fewer display ads.
    Join freeLog in
    Want zero display ads or expanded classifieds tools? Compare plans.

Winter Build Off 2023 - Yve

Jan 19, 2016
102
288
CA
After long deliberation on whether to participate and if I there is any chance to complete build on time, I came to conclusion that deadline itself is a good motivating factor. It's my first scratch build and to keep things simple I've opted towards building a guitar.

I plan the following specs for my non-bass:
  • Body shape is inspired by Yvette Young signature model YY20 (thus the project code name)
  • Neck-through and angled headstock
  • 25" scale (matches notched straight edge I've got)
  • T-style (I have a bridge and bridge pickup already)
  • 45mm width at nut (because I can)
  • Neck profile similar to Dingwall (the intent is to learn and copy profile)
  • Small vintage frets (it's a must have)

I've nerded out extensively on modeling guitar in Fusion 360. It's also my first time doing non-trivial CAD modeling.
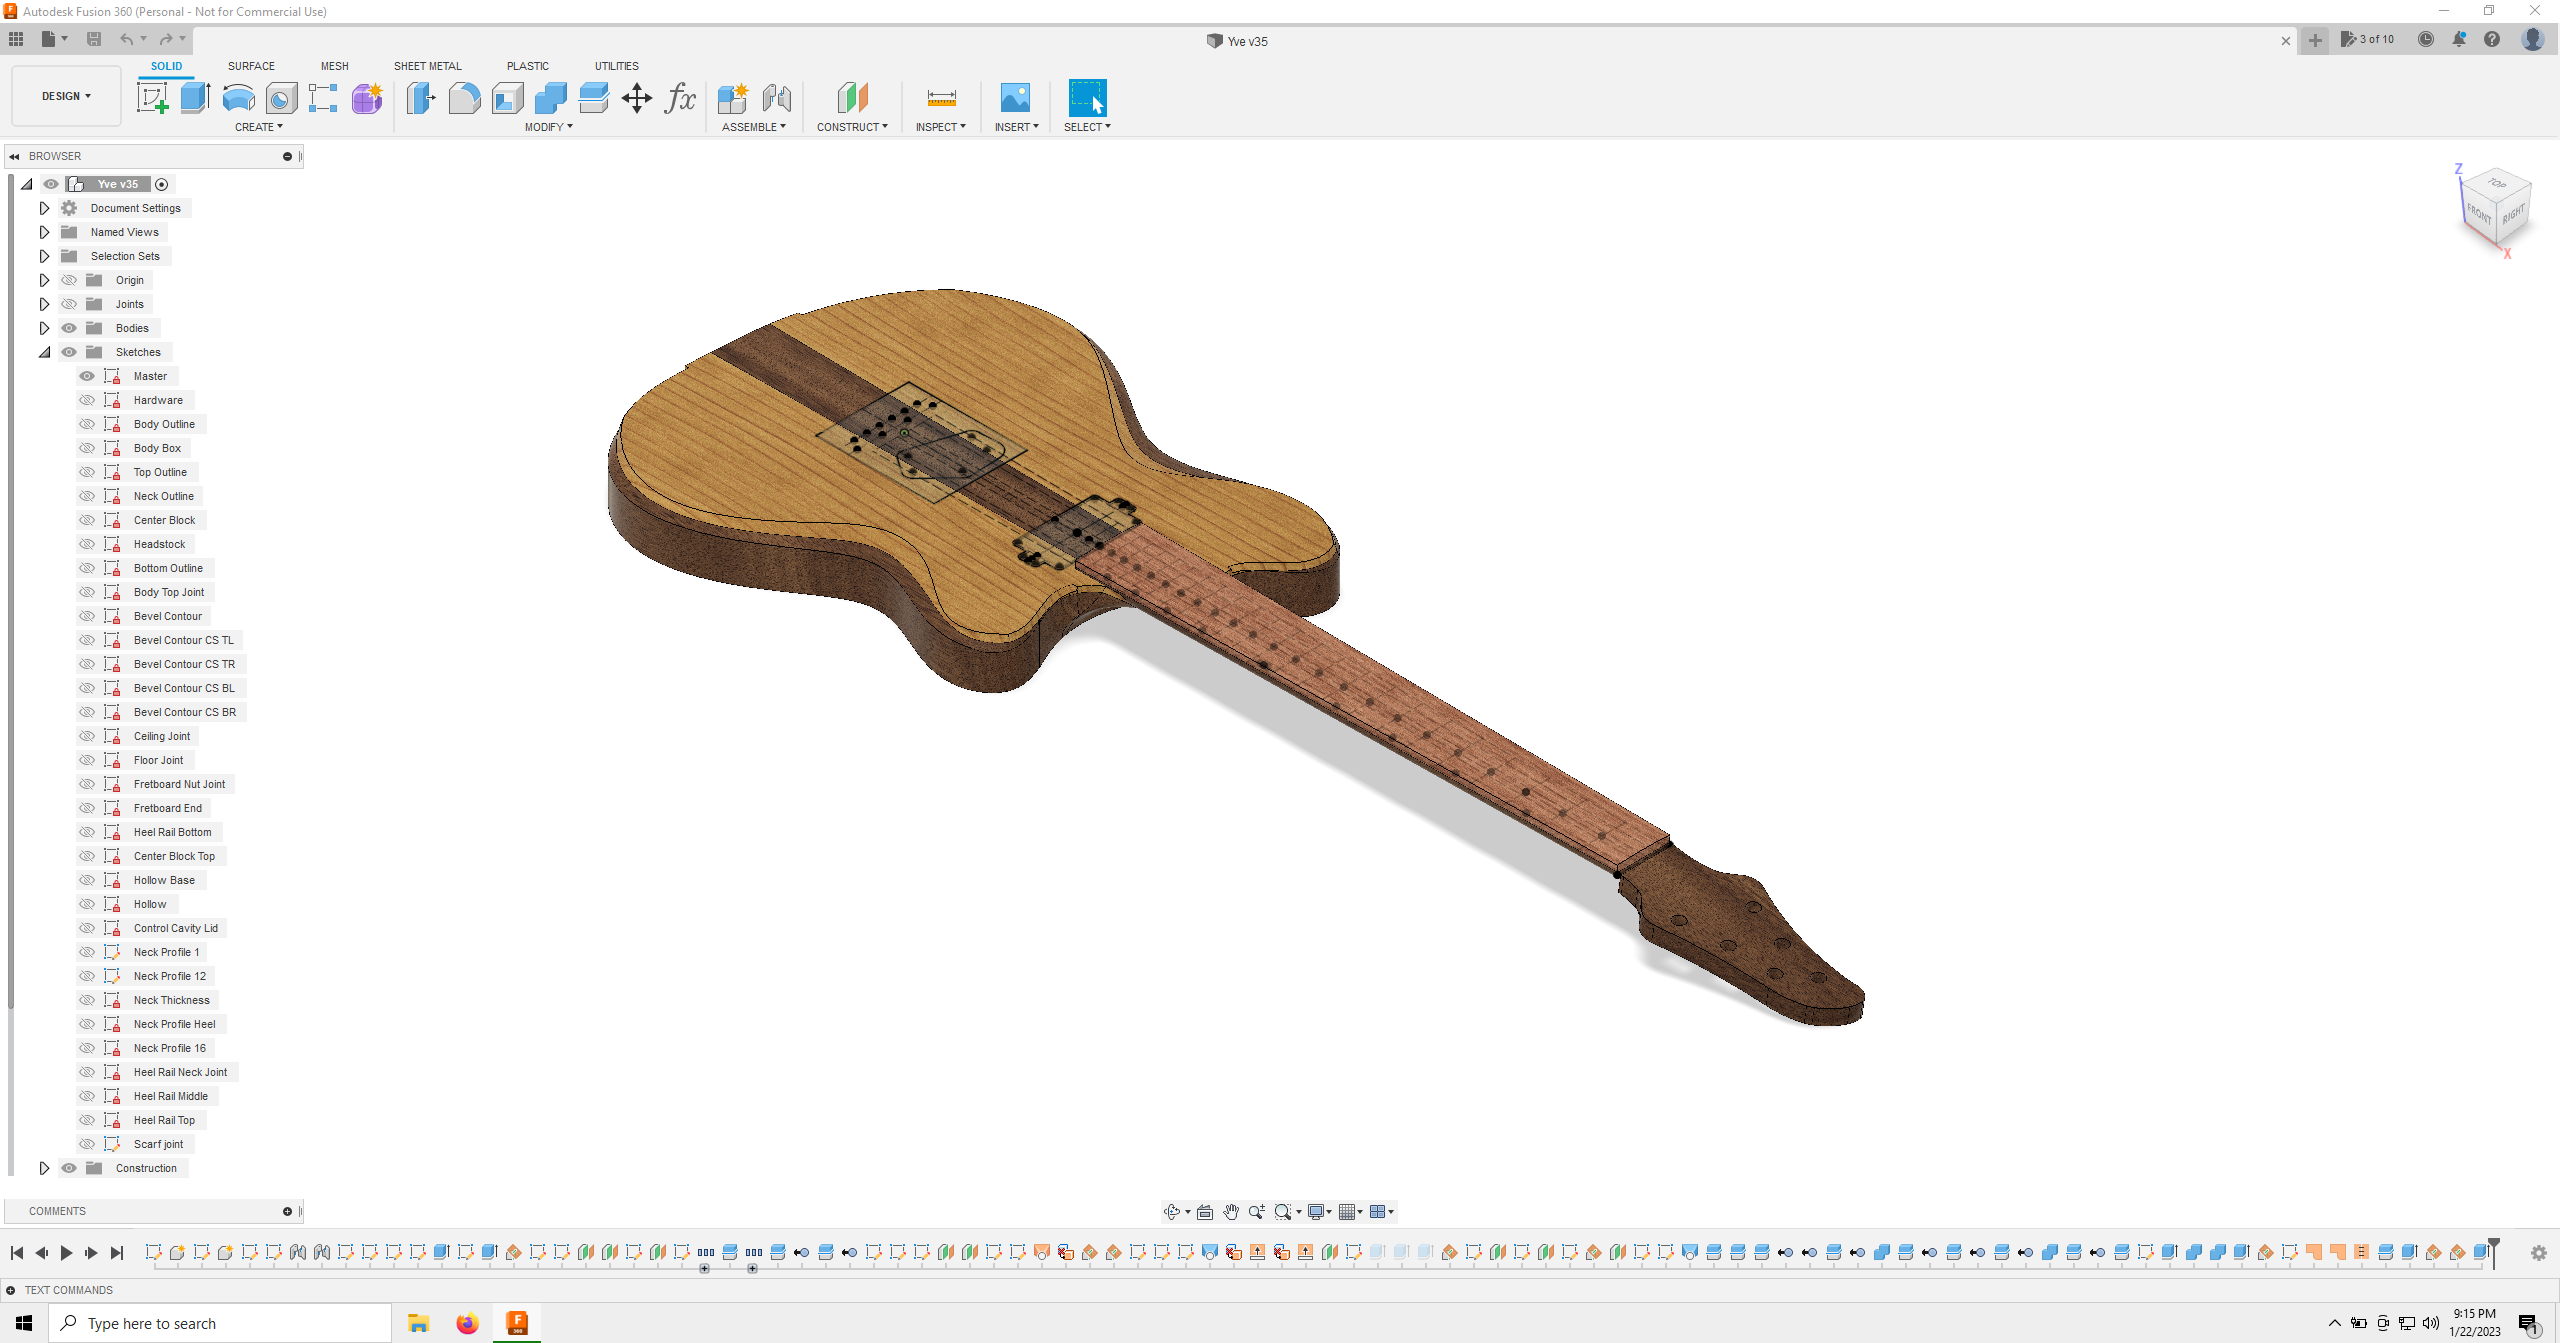
fusion 360 screenshot.png


What can possibly go wrong ;)

PXL_20230124_061613890.jpg
 
My progress so far is limited as I wasn't able to devote much time to the project.

I've finished router planer jig today. It was surprisingly easy to operate once I remembered to lubricate rails ;)

PXL_20230223_035543103.jpg


I've also used laser cutter to create wing templates a while back. 10W laser can't cut through plywood thicker than 1/8", thus I may actually use those as templates for templates to reduce room for error. At the same time I'd rather not deal with MDF dust. Need to conduct an experiment.

PXL_20230223_044650187.jpg
 
I've routed wings without hiccups. There are a few shallow bit router dings, but those will be sanded out.

Not building master templates was the right choice. There will be design changes. I should have added proper fillet for internal cavities, instead of assuming 1" bit would take care of it. 1/2" bit I've actually used made the process a bit more annoying than it has to be.

PXL_20230226_070519673.jpg


I have a tooling question question for people building in a tight space. What do you use to cut curves when band saw is not an option?

I've used a hand saw for straight lines and a coping saw for curves this time. Neither is adequate as both leave large margin for router to chew on and are time consuming. I've initially planned to use a jigsaw for cutting but gave up on the idea as "hardwood blade" I have failed to handle 2" piece. I've ordered Bosch T344DF blade missed earlier, and will give it another try. Tbh, my expectations are low. Meanwhile, I plan to use 4/4 lumber for builds looking forward, because 8/4 is too wasteful. Is it reasonable to expect to be able to cut curves in 1" hardwood with less than 1/4" error margin using a jigsaw? My main concern is the blade bending at the bottom of the piece, rather than being able to make tight curves.

Another option I'm considering is a scroll saw. Unlike band saw, I should be able to fit it in a garage and stow on a shelf. There are claims about specialized blades capable of handling 2" hardwood. Is it a path worth taking?
 
  • Like
Reactions: Reedt2000 and TFM94
I have a tooling question question for people building in a tight space. What do you use to cut curves when band saw is not an option?
I too work in a small space and have to stow away all my power tools when they're not in use. Some years ago I bought a cheap Scheppach HBS20 bandsaw with a 140cm/55" blade that is small and light enough to lift it on my workbench and put it back in a closet. It's not a precision tool by any means, but it's doing just fine for cutting hardwood bodies up to 2" and the outlines of necks and headstocks.

Still, it's a bit of a compromise. I have to cut further outside the line than with a larger bandsaw and sometimes it struggles with super hard woods like wenge or purpleheart.
 
I had a bench top Delta bandsaw for quite a while that, while not a freestanding resaw capable unit worked well enough. I still have a 3 wheel Craftsman saw that I keep a fine tooth blade in for brass and aluminum. It’s also what I used to rip, so to speak, the binding in my thread. They both worked until I could get a better saw and both stored under my bench with the lunchbox planer and chop saw.
 
It's been a while since I've posted updates. Truth be told, I've been procrastinating a bit by changing headstock shape and building smaller and more precise version of a router planer jig. As a result, nothing new is complete.

It all started with me revisiting earlier decision to use figured maple piece for the top. Maple seemed too good piece of lumber to mess up in the first build (photo in the first post). After careful eyeballing, I've realized that other pieces of curly maple I have are too small. I went on with a curly cherry (tbh i'm not sure, i know it's not maple) board. Board had a large knot on one face, thus I kept resawing tolerances low in hope to get better bookmatched result. If you've read that far, you've probably guessed by now, that my skills of resawing with a handsaw may be lacking :) Meanwhile, grain inside the board turned out to be good. I was able to get 6mm (almost 1/4") out of it at the cost of slight changes to the center block stripes design. Another week forward, I found out that one the top pieces has warped. I didn't decide how to proceed with the top and focused on neck and fretboard instead.

PXL_20230228_045033332.jpg


If you are anything like me, you spend a ton of time to achieve straight lines and right angles with the help of jigsaw and router :D Here is snapshot of the scarf joint angle plane jig assembly process incorporating alignment panels.

PXL_20230315_040805334.jpg

Completion of the scarf joint remains my top priority.

Fretboard work is currently blocked by the 1/4" template router bit. I have Amanatool 1/4" template bits. The problem is that they have large gap between cutter and bushing which doesn't work with 1/8" thick template. It's a bummer, as I rely on 1/2" bits by Whiteside.
 
I got back to the build ~3 weeks, but failed to keep you guys updated ;)

After messing up resawing of the top plates, I've built a kerf plane. It's 3 pieces of wood with a saw blade sandwiched in between. The tool is rather finicky to use and adjust, but makes resawing possible in my case. I'm using a ryoba blade, the same saw I do the cut with. It also work on pull stroke.

PXL_20230502-3.jpg


PXL_20230502-2.jpg
 
Last edited:
  • Like
Reactions: Matt Liebenau
10° scarf joint glue up. According to my prediction 10° headstock and 42mm body thickness should result in the tip of the headstock being slightly above the bottom of the body. This way guitar can be placed on a horizontal surface. In practice, I've slightly changed headstock design since then. No idea if original intent remains valid.

PXL_20230624_041303444.jpg


Neck blank has never been straight in my case and router guide wouldn't have worked. Thus I've used used 2 different templates. Here are weight-relief-plastic-carbon rods glued in with epoxy:

PXL_20230628_024638092.jpg
 
Last edited:
Truss rod has followed suit shortly afterwards. I mean I've glued in truss rod with epoxy as well :D

I don't have a photo after epoxy has cured, but it looks very much the same. My truss rod was fully wrapped in plastic cover. I've also applied wax to the plastic cover. I hope it went in all OK. It turns slightly, I'm afraid that any non trivial pressure would yank the truss rod out of epoxy. I guess we'll find out once fretboard glue drys up. I don't have fretboard ready yet.

PXL_20230629_043741561.jpg


I won't even bother cutting out wider slot for the truss rod adjustment with the template next time. Embedding one of the drill bits into the slot for alignment worked out well.

PXL_20230629_030049827.jpg
 
Doh.. there was that sad moment when I realized that I'm going to learn how to patch router tear out much sooner than I was hoping for.

PXL_20230628_025052311.jpg


I've also used router instead of the 10mm drill bit to create tuner holes. No drill bit tear out here. I didn't have that much luck with a hand drill the other time.

I'm going to switch to the jig building mode next. I need a shooting board, miter box for cutting fret slots, top glue up contraption and a way to deterministically radius a fretboard.
 
Last edited:


