• TalkBass has been independent since 1998. Add your voice.
    Create a free account to reply to discussions, view embedded media, and browse with fewer display ads.
    Join freeLog in
    Want zero display ads or expanded classifieds tools? Compare plans.

Double Bass First EUB build - ZEUBI

The Plan:

  • Mahogany and maple core
  • Purpleheart fingerboard + Epoxy
  • Scale: 41.5"
  • Body front, back (and sides?) covered with some decorative wood - Birdseye Maple or some other figured wood.
  • Piezo transducers
  • Maple Bridge
  • Hipshot Ultralight Tuners
  • 5 String - EADGC

IMG_2892.jpg


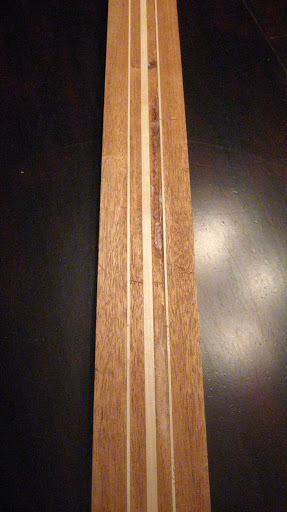
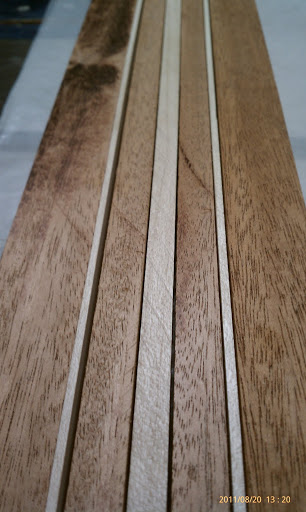
Core woods - mahogany with maple stringers:
IMAG0345.jpg
IMG_2858.jpg


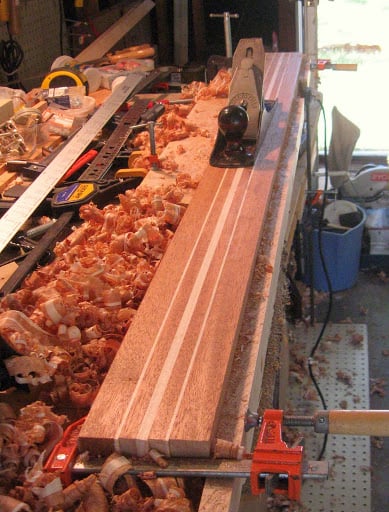
Cleaning up the core:
IMG_2885.jpg


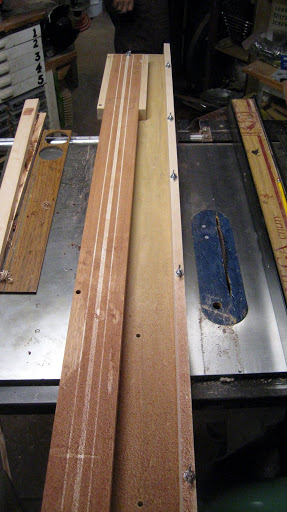
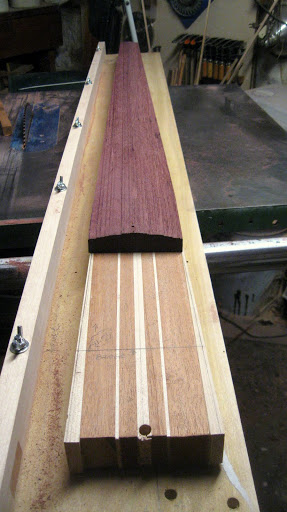
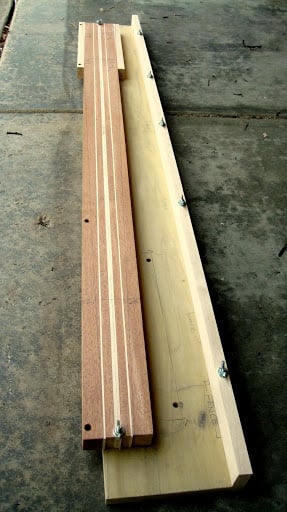
Added maple to the bottom end to add width to handle the taper - mounted entire core blank on a table saw sled/jig.
IMG_2923.jpg


Cutting the taper:
IMG_2946.jpg


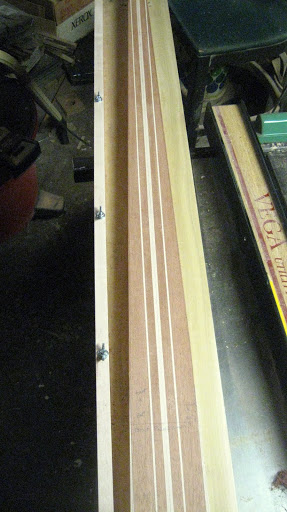
Taper cut:
IMG_2948.jpg


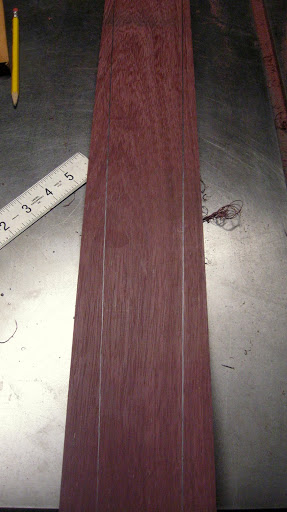
Prepping the purpleheart:
IMG_2953.jpg


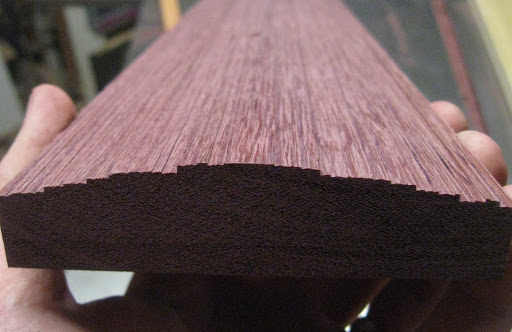
Cut the fingerboard radius (5"r):
IMG_2955.jpg


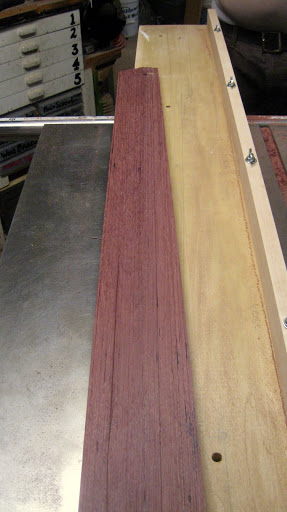
Cutting the fingerboard taper:
IMG_2957.jpg


Fingerboard on core:
IMG_2958.jpg


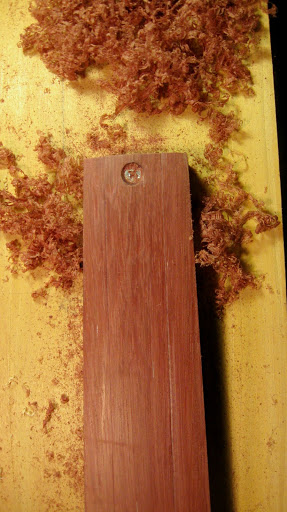
OK - I am from the EB side where we tend to share our beers of choice as a part of our build threads. I settled in with my hoppy APA from our local Schlafly brewery preparing to clean up the fingerboard with hand planes and scrapers.

IMG_2963.jpg


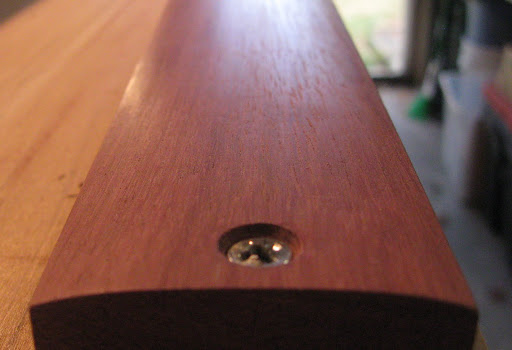
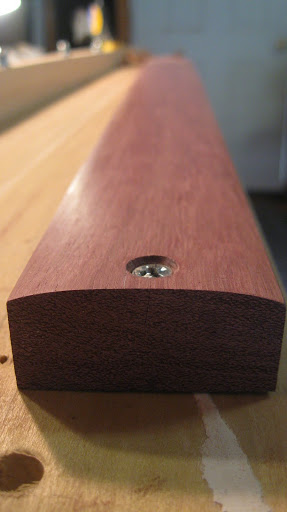
Cleaning up the fingerboard:
IMG_2965.jpg


IMG_2977.jpg


IMG_2982.jpg


Maple bridge blank on piezo filled pickup block with a very simple pre-amp (probably not needed - the piezos are very sensitive and have a pretty high output):
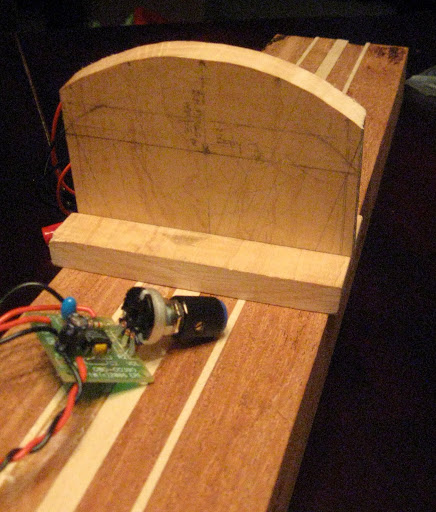
IMG_2862.jpg


Under the pickup block showing the felt buffer under piezos:
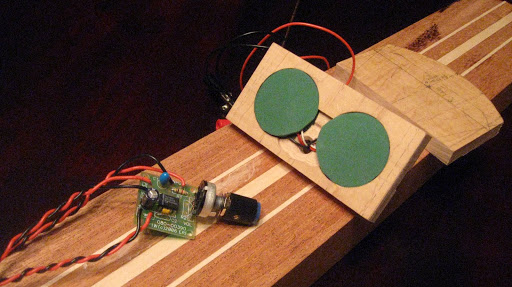
IMG_2863.jpg


More to come! Looking forward to your feedback, comments and insights!
 
Looks really sweet! Interested to see it develop. I bet planing the fingerboard is fun.

I see in your profile you've built a couple BGs...did you have much woodworking experience before that?

Winston, Thanks!

I used a simple, sharp scraper to shape the fingerboard. After trying to use planes and other tools I found the scraper to be the easiest to control - especially after I found my stance and got my stroke down.

As for woodworking experience prior to my bass builds goes, my dad's always had a really nice little shop in the basement. While I never had any wood shop classes in school, I apparently did absorb some woodworking knowledge via osmosis.

I learned a ton of stuff here (on the BG side) when I first decided I wanted to build a bass. There is no shortage of experts at TB and I take full advantage of that!

Also - credit where credit is due - my dad helps me with my bass builds. I don't have a table saw (yet - one is coming my way very soon, however!) - so when I need planks ripped and resawed and all those table saw-centric operations, I pay dad a visit.


scojack said:
Looking very good, whats the string length?

Scale/string length = 41.5"

Glad you asked. I realized I forgot to add that little detail in my initial post.
 
Just as a matter of interest what made you decide to use 2x piezo's ? I just remember the phasing problems I experienced while using a underwood dual piezo pickup . I had to move the to piezos around until they where in phase.
I know this could be a dumb question but I've always wondered the best way to install a piezo into a URB :).Most aftermarket pickups seem to have a single element .
 
Just as a matter of interest what made you decide to use 2x piezo's ? I just remember the phasing problems I experienced while using a underwood dual piezo pickup . I had to move the to piezos around until they where in phase.
I know this could be a dumb question but I've always wondered the best way to install a piezo into a URB :).Most aftermarket pickups seem to have a single element .

Why 2? Because they are cheap! LOL! I picked up 10 for $.50 each from my local electronics shop.

I have zero experience with piezos and have no idea what to expect and assumed there would be a lot of trial an error with amplifying my ERB. I noticed that most other piezo systems seemed to only have one transducer under one or the other foot of the bridge. But for the sake of symmetry, I thought I'd put two - why? No clue. I'm just winging it here.

But I did wire them to an output jack and plugged 'em in to my amp and they were loud! So I have no doubt that one will be more than enough.

The bridge and piezo system won't be created until the bass is built and strung. Then I'll start experimenting with the best way to make it speak to my amp. I am crossing my fingers that it will sound good but something in the back of my head says, "Yeah... dream on..." We'll see.
 
Weather and family schedule permitting, this week and weekend should show some nice progress. I need to order my tuning machines and (gulp) strings... Geez... who knew upright strings were so expensive! Especially a 5-string set! Man - I about swallowed my tongue when I saw the prices! Hands down, the strings are going to end up being the most expensive component on the entire instrument!! :eek:

I just need to select my body face and back woods - some sort of very nicely figured wood. I was originally thinking birdseye maple, but I was looking at some lacewood today thinking that might look nice against the purpleheart fingerboard.

The front won't be showing much - just what's left from where the fingerboard ends to the bottom - only about 9 inches or so... The back is will have much more surface - from the shoulder, which is about 17" down from the nut/headstock to the bottom - so interestingly, the back will be the 'big show'! so to speak... But whatever wood I select, it will also be used as a lam on the headstock... Decisions, decisions...
 
Brilliant to see someone else having a crack at this !...how did you rough out the fingerboard ?

Ian

Thanks!

Here's how we rough-cut the fingerboard radius:

1. We started with a piece of very flat, squared purpleheart that was 1" thick x 5" wide x 40" long.

IMG_2951.jpg


2. Mark the center of the board and about 1/2" on each long edge designated as a "no cut zone". These no cut zones act as a 'sled' as the cutting progresses. We also scribed the neck taper on the back/opposite side of the radius so it could be mounted onto the taper sled after the radius cuts were made.

fb_marked_up.png


3. Set the table saw blade depth for the first 2 passes which would be starting just off of the centerline of the board.

setting_blade_depth.jpg


4. Make 2 passes - pass 1 makes a very shallow cut just off of the centerline, turn board 180 degrees and run it again cutting a mirror image at the same depth.

plan_view_table_saw.jpg


5. Stop saw (very important!), raise blade using depth gauge, adjust fence in the width of the blade make 2 more passes.

6. Lather, rinse, repeat. We made a few more passes beyond the max width of the FB end. This is what the purpleheart board looked like when we were finished:

End_of_FB_post-cuts.jpg


7. The taper sled is just a long, squared jig with a rail to ride the table saw fence.

fb_post-cut_on_taper_sled.jpg


IMG_2957.jpg


Flip the sled bottom side up, slide the rough-cut fingerboard underneath and use the taper that was scribed on the bottom to align the fingerboard - clamp it - flip it - screw it down and cut first taper.


fb_post-cut_on_taper_sled2.jpg


Stop the saw (very important) - unscrew the fingerboard, turn it around, align it, clamp it, flip it, screw it down and cut the second taper.


When it's all done - this is what you end up with.

IMG_2955.jpg


IMG_2958.jpg


I then screwed it down to my work surface and went at it with a sharp scraper. It really didn't take long to get it all nice and clean.

IMG_2983.jpg
IMG_2982.jpg


Make sense?
 
Looking good, TZ. Nice use of the table saw for profiling. Although, what's this, a TZ build with no padauk? Can't be! ;)

Nice to see someone else pick up the beer tradition.

I like the beer tradition!

And I almost used padauk for the fingerboard but found that piece of purpleheart - it seemed to be asking me to take it home and use it. I couldn't refuse.

But man - purpleheart is some brittle stuff, innit? Don't go rubbing your bare hand down the board until it's been sanded really smooth... ouch!
 
Yesssssss! Very sharp, and very timely (I'm in the early planning stages of an EUB build, too, which should be fun, since I know squat about uprights....).

Subscribed!

[Invalid or Expired Link Removed]
 
Yesssssss! Very sharp, and very timely (I'm in the early planning stages of an EUB build, too, which should be fun, since I know squat about uprights....).

Subscribed!

eat%20popcorn.gif

I don't want to jinx anything, but an EUB seems pretty straightforward - especially when compared to a real upright. I am a little concerned that I am in for a big surprise/disappointment - so far it's so rudimental it's a little scary. Basically a big, sturdy stick with strings.

I am expecting that I'll string it up - plug it in - and it'll sound like doo doo. Come on... piezos @ $.50 each + another few pennies for wires and an output jack? Really? There's no way that's enough to make a believable upright sound...

But we'll see. I expect I'll end up having to invest in a preamp/eq of some kind when it's all said and done, but my goal is to go as basic and simple as possible and see what happens.

BTW - if anyone has any specs, plans or insights into bow making, please share!
 
I'm following this thread partly because I'd like to build an EUB as my next project. I just finished my first stick-built electric bass (out of Home Depot lumber) after having done a lot of modding and a few builds from parts. I've never played an upright for more than a few minutes so I'm intreagued by a few things. For example, no truss rod? Is that because the neck blank and fingerboard are typically thicker than that on an EB?

I'll probably do mine from the HD oak (worked well on the EB) which I'd imagine would be stiff enough without a truss at EUB thicknesses, right?
 
For example, no truss rod? Is that because the neck blank and fingerboard are typically thicker than that on an EB?

That's my assumption. The neck of an upright is much thicker - and shorter than an electric bass. A double bass neck is approximately 17" from nut to 'shoulder' where it connects to the body. The fingerboard is also quite thick to support a small radius (to make bowing possible) and usually made from a very dense wood - like ebony. These factors combine to make a very sturdy neck that doesn't require any internal reinforcement - to the best of my knowledge.

Some EUBs are modeled after uprights (like mine) - following the short neck, shoulder, small fb radius scenario. Others emulate BGs with thin neck profiles, flatter fingerboards and no shoulder - and some even go with bass guitar scale length - 34 - 35". These may need some reinforcement in the neck - especially if they are going with a 41" + string length.

But because I want to get back into arco playing and get a more genuine upright sound (which I believe has a lot to do with the 41.5" scale/string length) my design includes a thick, short neck and a 5" fingerboard radius. The fingerboard is purpleheard and feels VERY sturdy. I am confident that when it's affixed to the neck, which is more like a baseball bat than an electric bass neck in profile, that it will be plenty strong.
 
Hey tZer, I too like some of the others am in the planning stages of an EUB. I am encouraged by an electric cello build I completed, so here's a pickup tip for you...

I also used two piezo buzzer transducers for the pickup system ($1.28 ea at Radio Shack), along with a Fishman single channel preamp. I routed a rectangular cavity under the bridge, the width of which was just bigger than the piezo elements width, and I routed it deep enough to accept a wood rectangle that would slip down into the channel I routed (with rounded corners, of course). The cello bridge (one I bought on line somewhere) stands on top of the wood rectangle, which sits on top of the piezo's, located at either end of the rectangular cavity.

Then I put it all together and it sounded like crap!

It sounded real honky and nasaly, like there was way too much upper midrange, almost no bass, bleh! :atoz: Disgusted, I put the thing away for almost two years, and moved on. Then, one day I came across the Palatino EUB mod pages here in TB, and voila! :hyper: I put a small circle of rubber under each piezo element, and a rectangular strip on top of the piezo's the same size as the wood rectangle on top of them, effectively isolating the two elements in rubber.

I strung it back up, and what a HUGE difference it made! I love the sound now, I've played to for some friends and they loved it too, just amazing the difference! So, I suggest that you may have better success if you give that approach a try. Btw, not only does the arco sound come across real nice, but the pizz is very impressive too!