- Mar 22, 2000
- 1,156
- 86
- 46
- Disclosures
- owner: J. Kennedy Guitar Repair, Guitar tech for Walk the Moon
So I don't typically like to gloat, but this one turned out so good and I haven't seen anybody document any serious work with a graphite neck fretless conversion I thought I'd post a quick run down of the work.
The story: Ubado here on TB wanted a fretless graphite neck bass with 19mm spacing. A tall order to say the least. Luckily for him Ascovanner (also here in Cincy) had a fretted clover with a graphite neck and 19mm spacing for sale. For a modest fee I agreed to de-fret it for him. Here's the run down of how the job went:
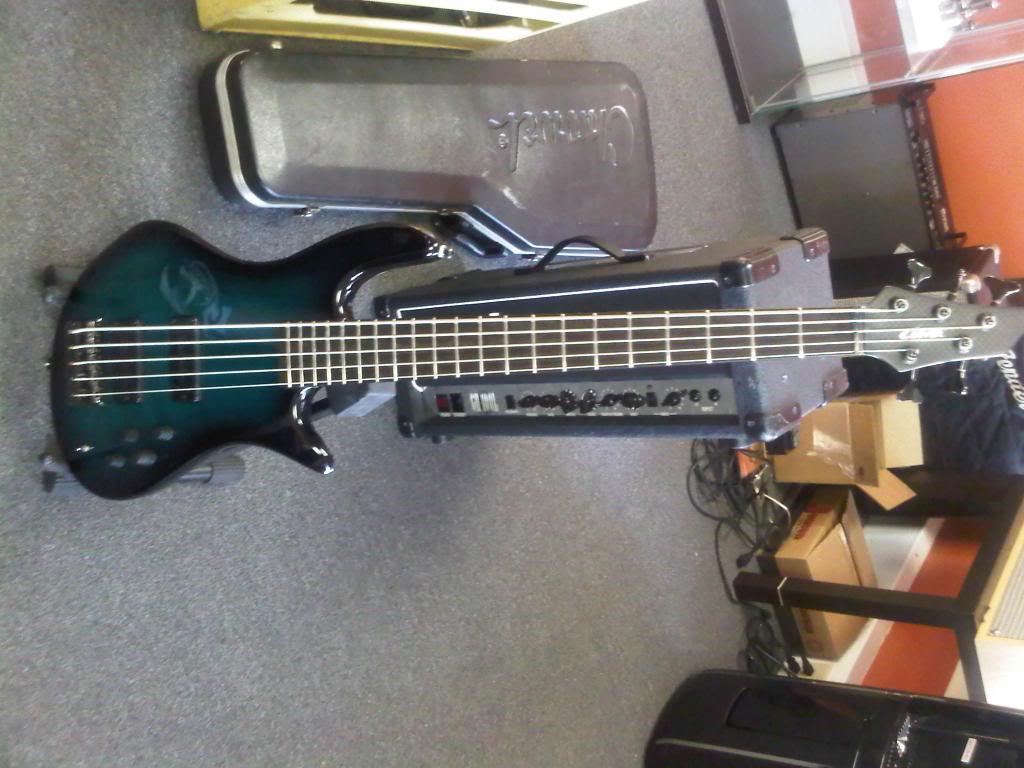
The bass when it started:

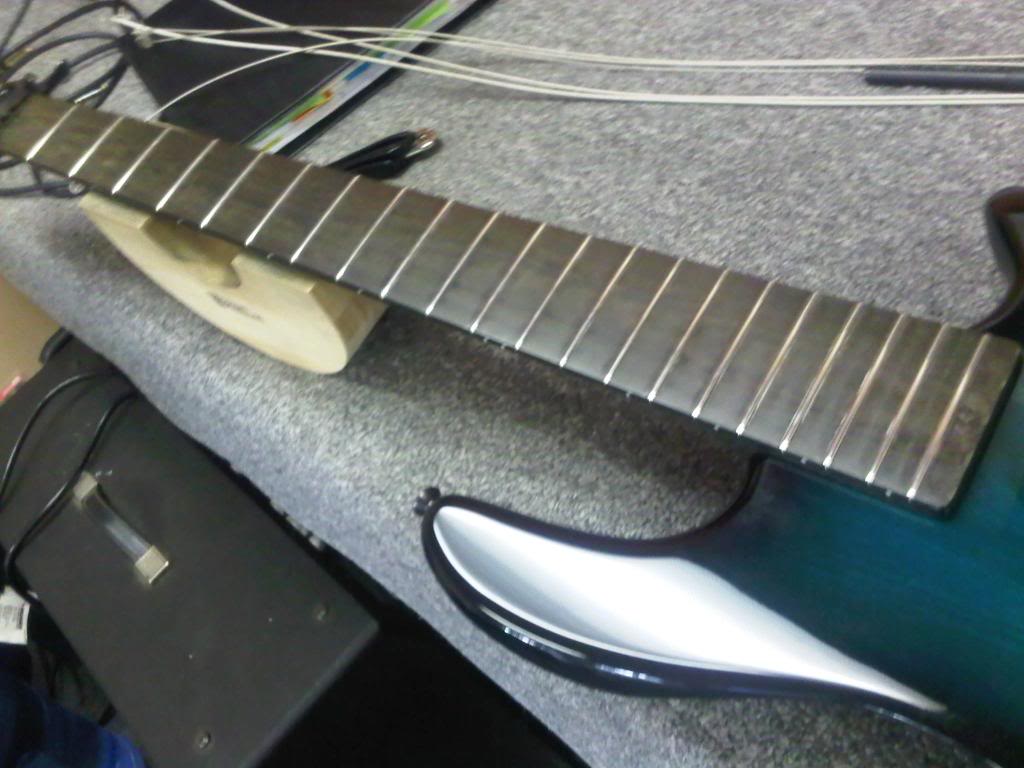
I started by removing the nut and then went to town pulling the frets using my stew mac fret pullers. I work VERY SLOWLY since phenolic can chip like crazy. I don't heat the frets just to be safe. I don't want to cook up any sort of chemical that will kill me, I'll leave that to the dust later After I got the frets out I test fit a few fillers and ended up with a maple veneer that was within .002" of the width of the fret slot.
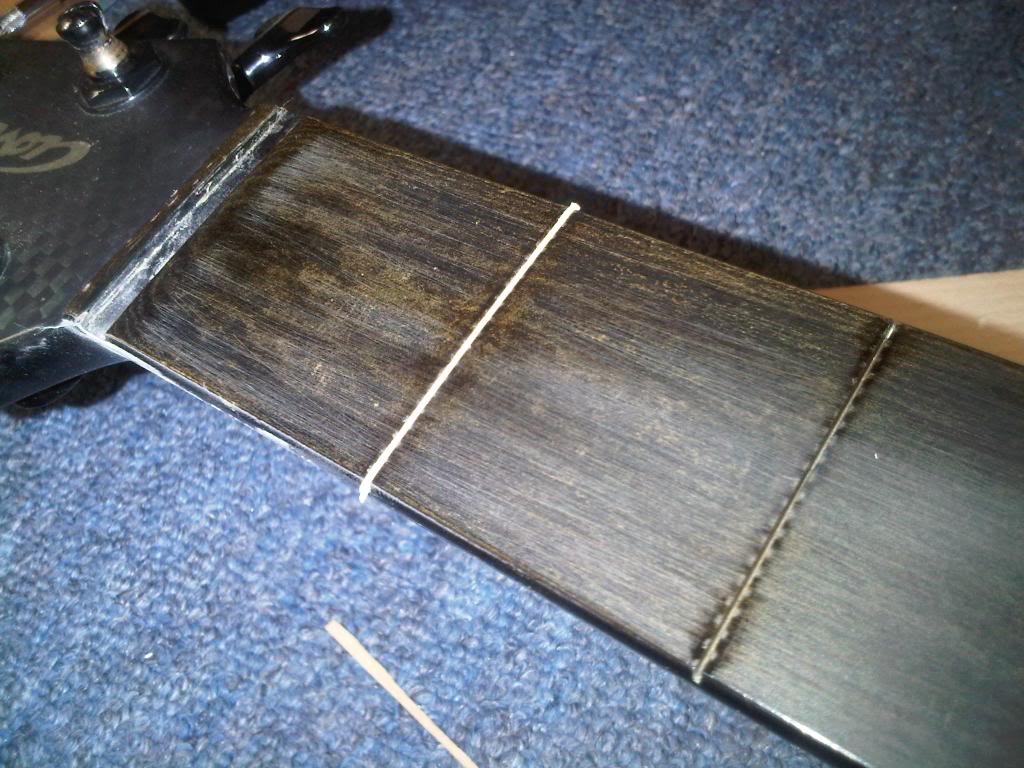
I then planed the board using my dressing bar and a 20" radius block starting at 320 and moving up to 500 before I installed the fretlines. I wrapped the edges of the fingerboard with masking tape to prevent any glue run off from getting on the finish. I cut slits in the tape where the fretlines would stick out. For each line I sanded down the bottom to be square and sit flush in each slot (check the stew-mac dressing bar with 320 grit sandpaper on it just below the neck in the pics). I used stew-mac black super glue under the lines and along the sides to fill in any remaining chip out. The black fills any gaps nicely and matches the fingerboard material better then using the dust would (phenolic dust takes on a grey/orange type color).

after I cut the lines down to fingerboard level I planed them further with 500 grit. then I went through and dropped water thin Hot Stuff glue into any micro gaps (I'm way too anal retentive) and continued with the 500. Side note: Periodically through this whole process I vacuum off the board and use naptha to clean off dust. It's always a good idea to wear a respirator mask when doing this as phenolic dust is EVIL on the nostrils.
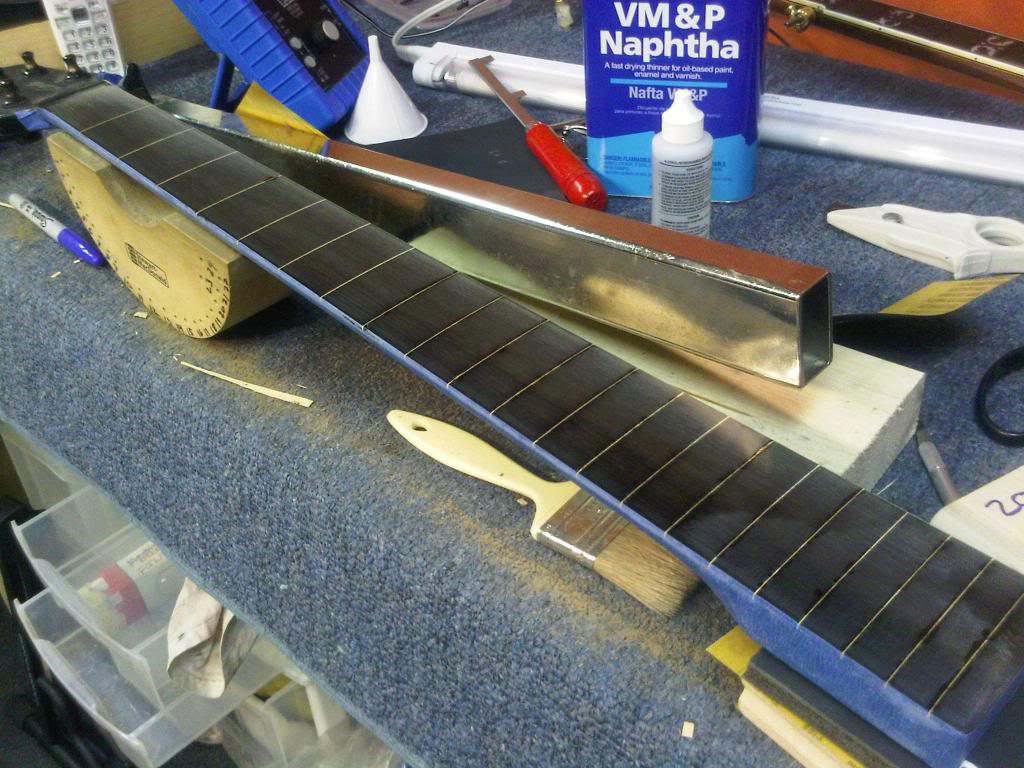
After that I moved up to 1000 and 1200 grit wet sanding then started on the buffing wheel with medium grade compound. Doing a job on graphite is next to impossible without a buffing wheel to bring it back up to sheen. In this pic I've started buffing the treble side to show the difference between the 1200 grit and what a buffing wheel does to phenolic.
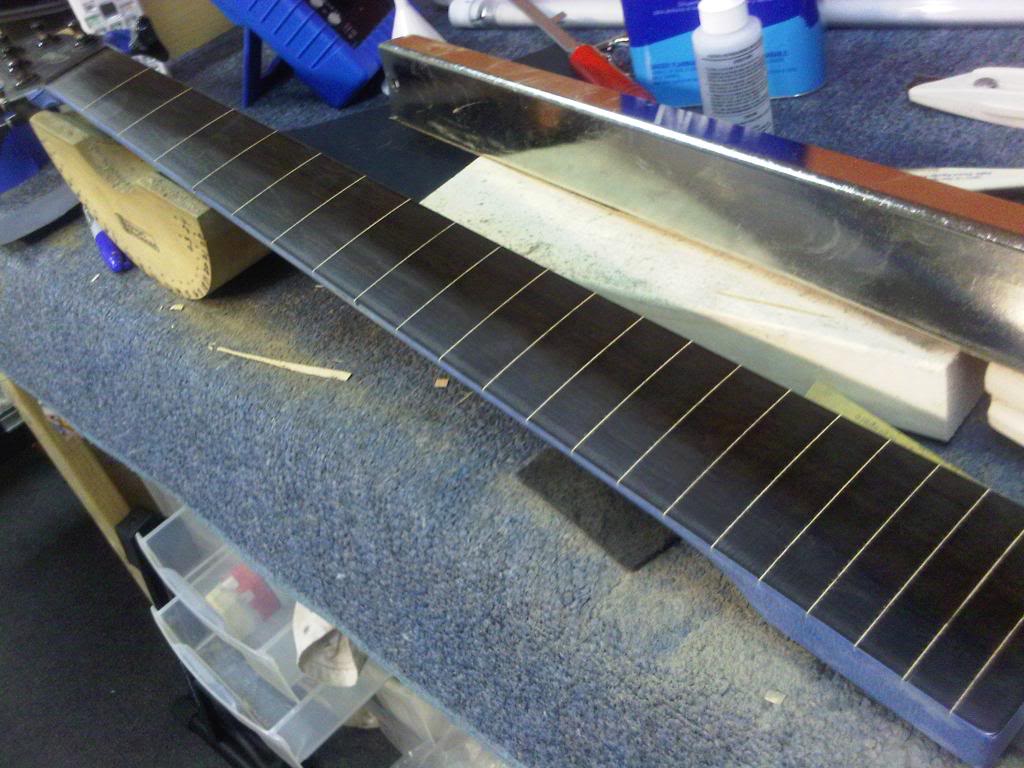
After buffing the whole thing with medium and fine compound this is the result:
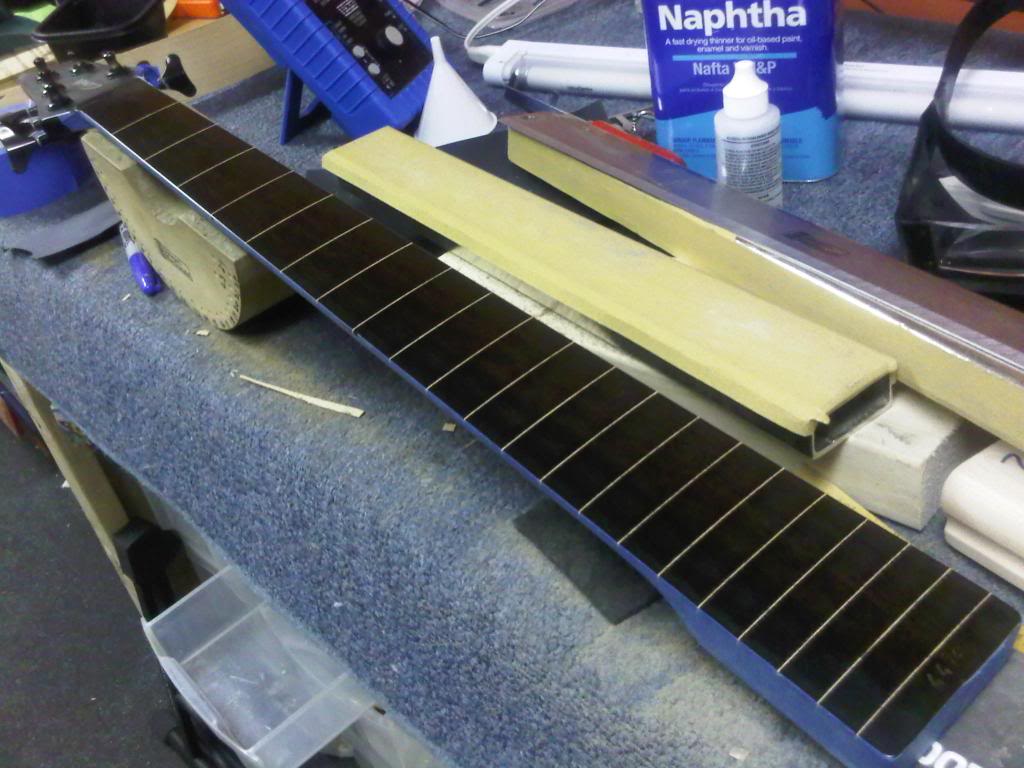
After I got the fingerboard taken care of I moved onto the sides. The ends of lines were cut flush with the masking tape I was using to protect the finish, but still had a little overhang. I then taped off all but the line ends and used 500, 1000, then 1200 strips to get them flush. I then buffed the sides out.


After all that I reassembled the bass, re-installed the nut, recut the nut slots, and set it up. The Final result looked pretty nice if I don't say so myself.

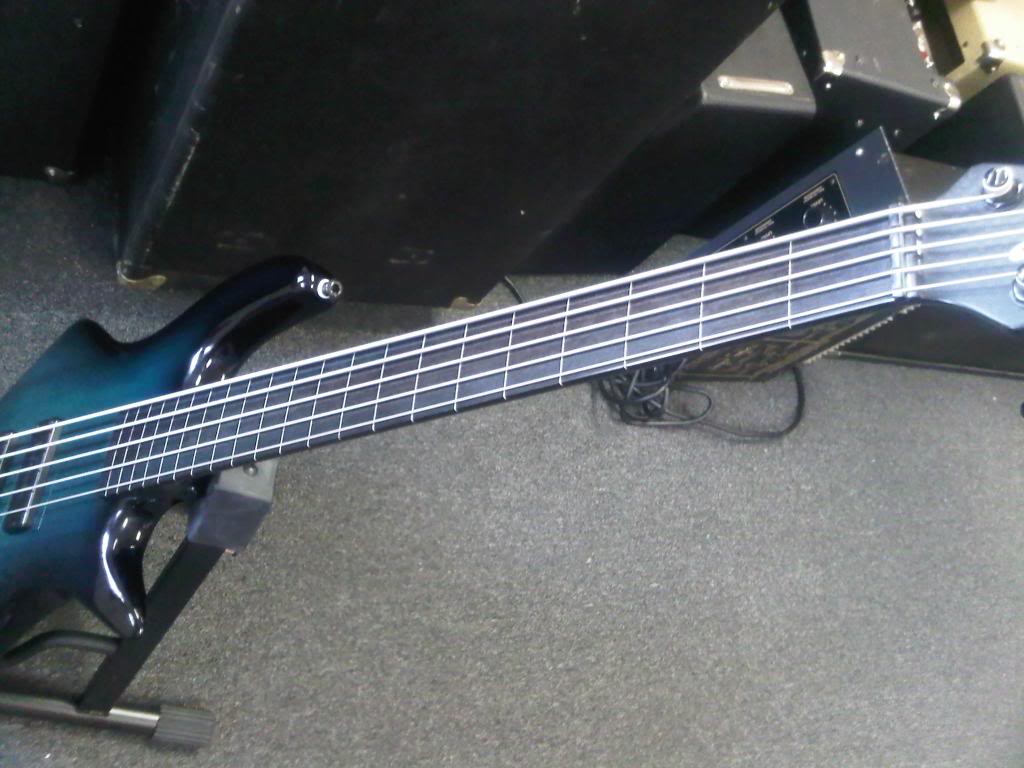
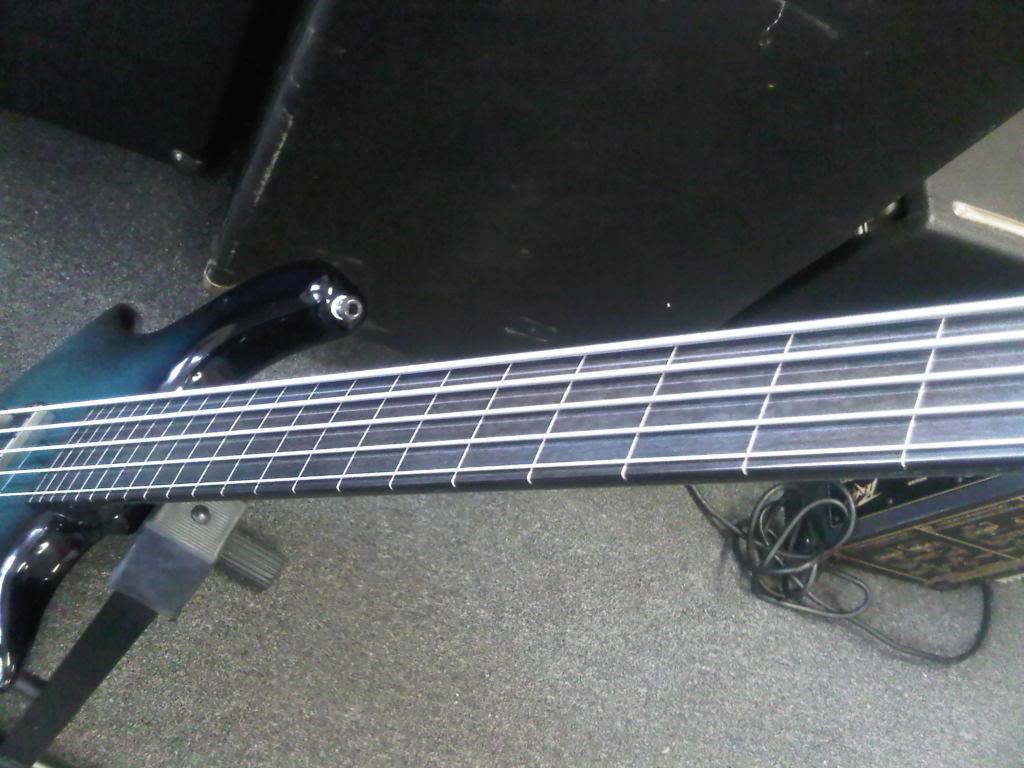
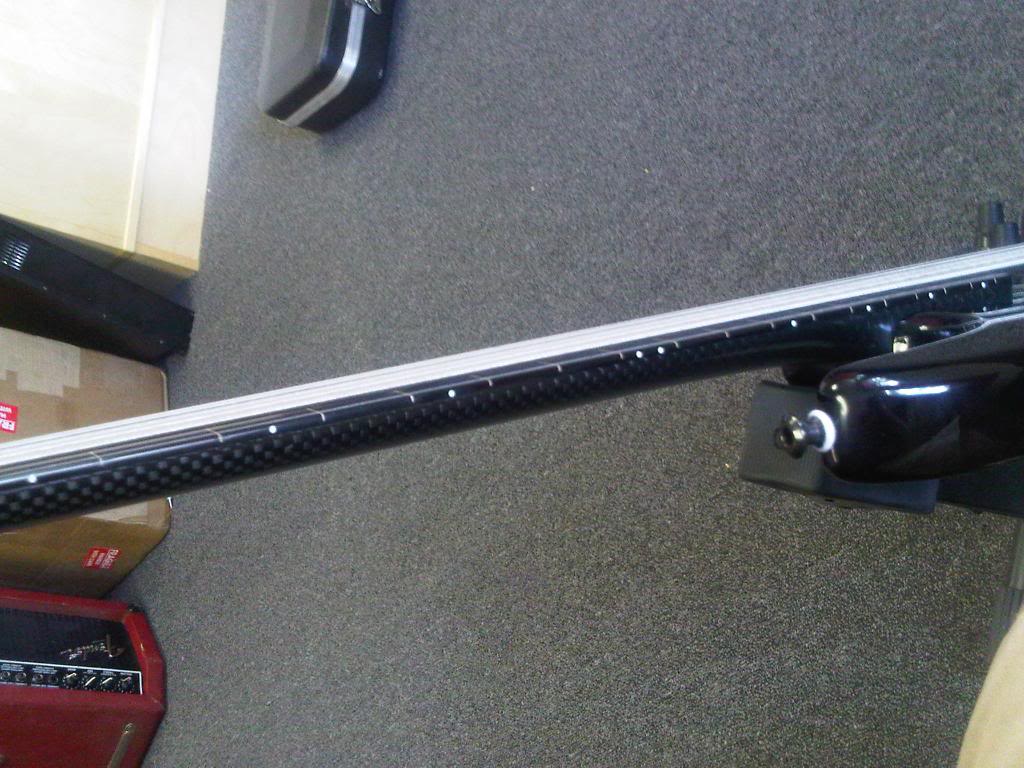

Ubado should have the bass in 2 days so the final verdict is yet to arrive, but I'm pretty happy with it!
The story: Ubado here on TB wanted a fretless graphite neck bass with 19mm spacing. A tall order to say the least. Luckily for him Ascovanner (also here in Cincy) had a fretted clover with a graphite neck and 19mm spacing for sale. For a modest fee I agreed to de-fret it for him. Here's the run down of how the job went:
The bass when it started:
I started by removing the nut and then went to town pulling the frets using my stew mac fret pullers. I work VERY SLOWLY since phenolic can chip like crazy. I don't heat the frets just to be safe. I don't want to cook up any sort of chemical that will kill me, I'll leave that to the dust later
After I got the frets out I test fit a few fillers and ended up with a maple veneer that was within .002" of the width of the fret slot. I then planed the board using my dressing bar and a 20" radius block starting at 320 and moving up to 500 before I installed the fretlines. I wrapped the edges of the fingerboard with masking tape to prevent any glue run off from getting on the finish. I cut slits in the tape where the fretlines would stick out. For each line I sanded down the bottom to be square and sit flush in each slot (check the stew-mac dressing bar with 320 grit sandpaper on it just below the neck in the pics). I used stew-mac black super glue under the lines and along the sides to fill in any remaining chip out. The black fills any gaps nicely and matches the fingerboard material better then using the dust would (phenolic dust takes on a grey/orange type color).
after I cut the lines down to fingerboard level I planed them further with 500 grit. then I went through and dropped water thin Hot Stuff glue into any micro gaps (I'm way too anal retentive) and continued with the 500. Side note: Periodically through this whole process I vacuum off the board and use naptha to clean off dust. It's always a good idea to wear a respirator mask when doing this as phenolic dust is EVIL on the nostrils.
After that I moved up to 1000 and 1200 grit wet sanding then started on the buffing wheel with medium grade compound. Doing a job on graphite is next to impossible without a buffing wheel to bring it back up to sheen. In this pic I've started buffing the treble side to show the difference between the 1200 grit and what a buffing wheel does to phenolic.
After buffing the whole thing with medium and fine compound this is the result:
After I got the fingerboard taken care of I moved onto the sides. The ends of lines were cut flush with the masking tape I was using to protect the finish, but still had a little overhang. I then taped off all but the line ends and used 500, 1000, then 1200 strips to get them flush. I then buffed the sides out.
After all that I reassembled the bass, re-installed the nut, recut the nut slots, and set it up. The Final result looked pretty nice if I don't say so myself.
Ubado should have the bass in 2 days so the final verdict is yet to arrive, but I'm pretty happy with it!