• TalkBass has been independent since 1998. Add your voice.
    Create a free account to reply to discussions, view embedded media, and browse with fewer display ads.
    Join freeLog in
    Want zero display ads or expanded classifieds tools? Compare plans.

Winter Build Off 2024 - Best Bass for Having a Contingency Plan

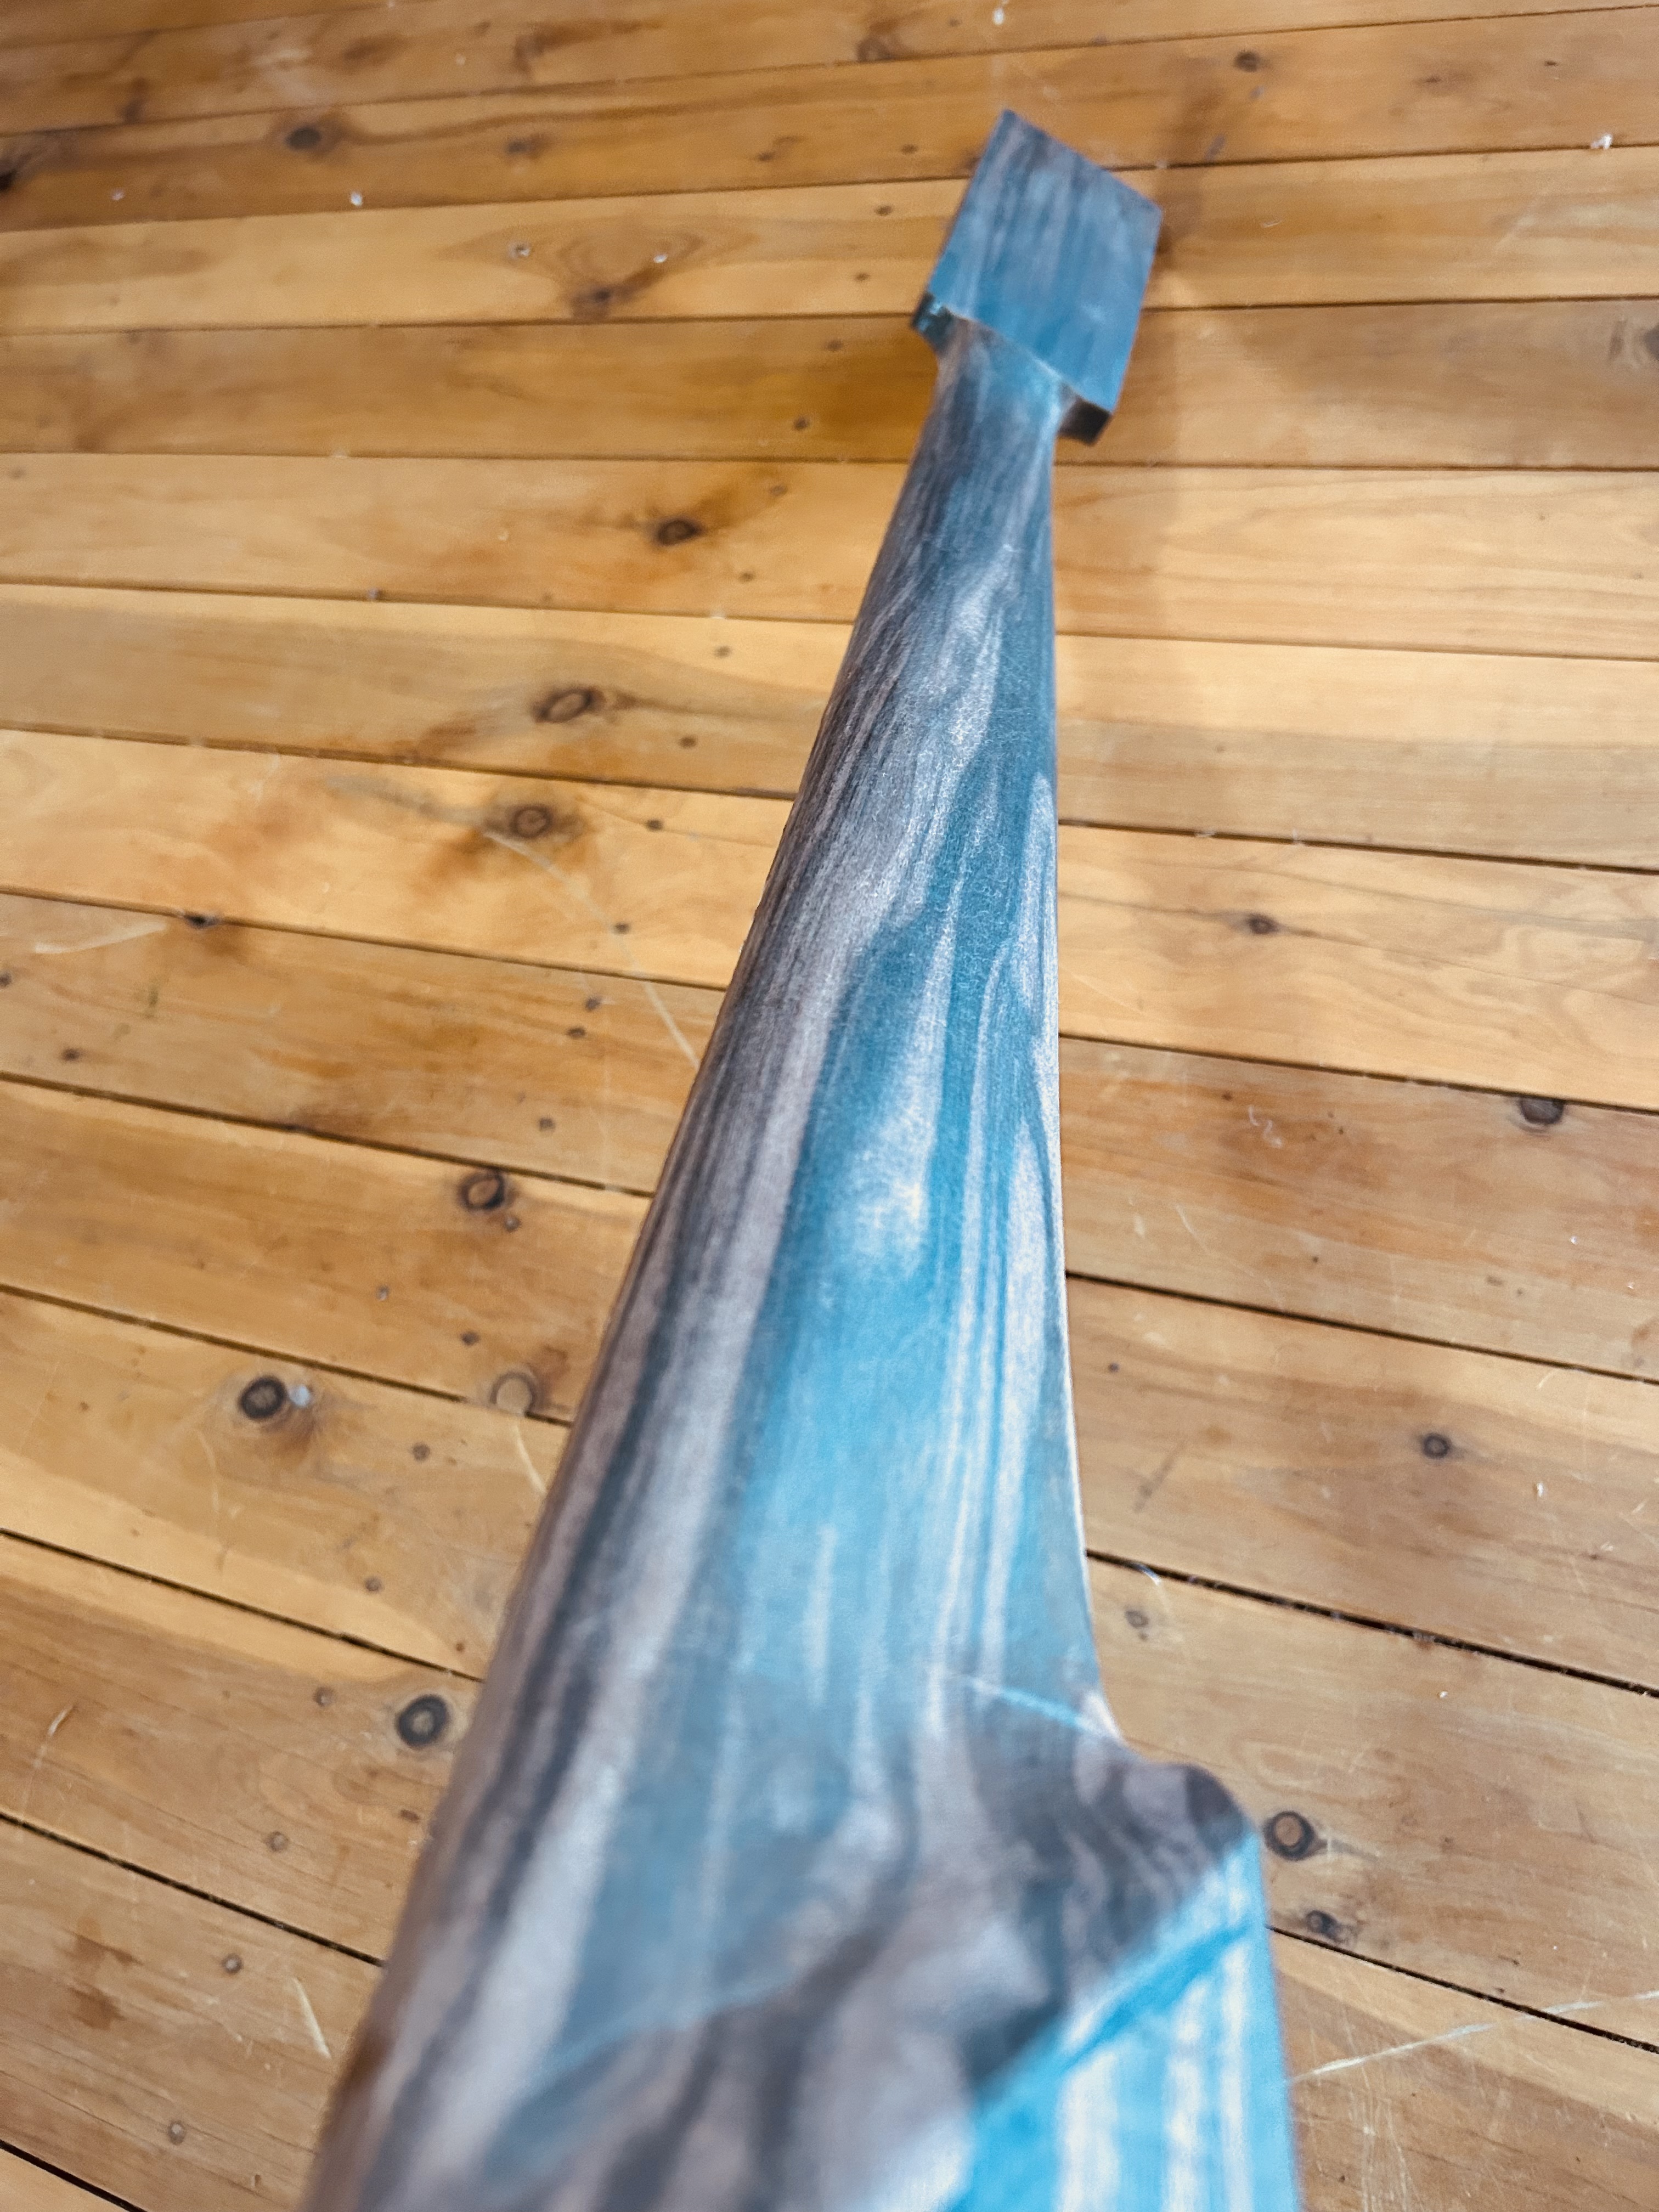
Neck carving proved to be not super difficult in the end.

Pictures don't really do this justice. A one piece macassar ebony neck really is a thing of beauty.
29F14F3A-4C30-4DFA-8BF5-B5FA96B05111.jpeg


This is currently only sanded to 80 grit. Ill sand to 240 after the wings are glued on, which I should be able to do tomorrow.
 
Yesterday I glued on the bass side wing. A very easy glue up.

8CEF75E6-D083-4D82-B64F-3BAC869D793A.jpeg


For the treble side wing, I really should have made up some cauls of some persuasion. This was a bloody tricky arrangement of clamps. Crossing them over each other meant that I was able to use differential pressure to move the wing forwards and backwards, but I really needed about 5 hands to do it.
B88F84AB-8414-4AEA-A581-B034225E1D9F.jpeg
 
It's out of clamps, and looking pretty sweet, if I do say so myself.
718A994C-2174-4494-91C1-6AC1BD2ADF58.jpeg


It's surprisingly light, owing most likely to the tiny body.

I was going to use a fairly large Washburn OEM 6 string bridge on this, but I wanted something tighter than the 15.5mm it offered. A little less than 15mm (say, about 14.7) was where I am aiming, and I also didn't like the big chunk of black metal.

While an ebony floating bridge would have been a simple answer, I wanted something a little more flashy and stable. The solution was to take a piece of 6mm x 6mm stainless, rotate it 45 degrees and glue some ebony to it.

B860A75D-18ED-48A3-BF31-4BD623380047.jpeg


I'm hopeful that I will be able to get this to intonate well. After all, most good acoustic guitars intonate well with a fixed bridge, and this one will float.

This bass will have a very narrow nut to accompany the narrow bridge spacing. It's all about fast fingerstyle. Perhaps "best bass to p*ss off your guitarist" may have been a more appropriate title!

It needs some polishing and finish work, but I'm kinda digging it.


Next up was the control cavity. There is very, very little room on this undersized body for a control cavity. Thankfully my controls are just a volume and nothing else.

The shavings from my Forster bit were probably the prettiest shavings I've ever made. If I did any amount of epoxy art, I'd be saving them for casting.

F817271E-C373-4430-BDE5-9603588E367E.jpeg


As this gets closer to completion, I'm hoping it's more on the "inspired by Carl Thompson" and less "building a Carl Thompson replica". I'll let talkbass be the judge when it's all in one piece.
 
The bass looks great.... but what is going on over here? o_O

View attachment 5333691
Well...

I have a fairly decent collection of Fostex full range speakers, from FE87s, right up to 206 and everything in between.

We had friends visiting one weekend, and in the space of a couple of hours, their toddler pushed in the dust caps or creased the whizzer cones on nine (yes nine) different drivers. The response of the parents was "oh yeah, he's done that to our speakers, too", without knowing how much I was dying inside.

Anyway, I took the opportunity to dope the whizzer cone on the 206 in question and install a ghetto phase plug, which is simply a socket of the right OD, held in place by the driver's magnet. It's supposed to stop interference of mid and high frequencies that are bouncing around near the centre of the cone. Does it work? Dunno - I haven't an unbroken 206 to compare it to!
 
Well...

I have a fairly decent collection of Fostex full range speakers, from FE87s, right up to 206 and everything in between.

We had friends visiting one weekend, and in the space of a couple of hours, their toddler pushed in the dust caps or creased the whizzer cones on nine (yes nine) different drivers. The response of the parents was "oh yeah, he's done that to our speakers, too", without knowing how much I was dying inside.

Anyway, I took the opportunity to dope the whizzer cone on the 206 in question and install a ghetto phase plug, which is simply a socket of the right OD, held in place by the driver's magnet. It's supposed to stop interference of mid and high frequencies that are bouncing around near the centre of the cone. Does it work? Dunno - I haven't an unbroken 206 to compare it to!

Arghhh! What a nightmare!
 
  • Like
Reactions: Alex Xander
It's strung up for a quick check that everything functions.

The observant among you will note the omega cut in the butt. This was not intentional, rather a way to rescue the build after my string through body holes ended up very much out of alignment on the back side. I couldn't deal with the ferrules not being perfectly spaced, so I devised this to solve the problem.

A6271427-BC35-4062-AB48-D4487AF5BEF1.jpeg


8B6628C5-F2EB-485D-BF3E-06C36A776330.jpeg


It almost looks like this was the plan from the beginning. Strings load from the top, just behind the pickup, then wrap around the omega cut.

One big advantage of this is that I can use long scale strings without cutting windings. A pretty massive benefit in a short scale sixer. Yep... Totally deliberate...


After playing a gig last night with one of my 39" scale builds, this thing feels like a toy.

Here's a comparison of last night's gig weapon and today's build.

D3A33ECA-99FA-4259-8961-B6E5F94FA9DC.jpeg


One minor problem I have is that with the trussrod tightened as far as I dare, the neck has a slight backwards bow without strings on. With the tension of the strings, it's pretty well perfect,but it has me wonderimg how in the heck I am going to do a fret level.

Anyone got any bright ideas? @Bruce Johnson , please tell me that you have a magic trick.

It's funny that it was dead flat until putting the frets in, and after fretting, the backwards bow appeared. Maybe that's normal, but it's a first for me.

I figure I leave it string up for a week and see if things creep forwards a bit under the tension of the strings.
 
Last edited:
One minor problem I have is that with the trussrod tightened as far as I dare, the neck has a slight backwards bow without strings on. With the tension of the strings, it's pretty well perfect,but it has me wonderimg how in the heck I am going to do a fret level.

Anyone got any bright ideas? @Bruce Johnson , please tell me that you have a magic trick.

It's funny that it was dead flat until putting the frets in, and after fretting, the backwards bow appeared. Maybe that's normal, but it's a first for me.

I figure I leave it string up for a week and see if things creep forwards a bit under the tension of the strings.

Hey Alex;

It doesn't sound to me like you have a problem. The normal process that I recommend is to tighten the truss rod to about 50%. With the strings off, and the truss rod at 50%, you'd like the neck to be pretty close to flat. That's when you level the frets.

It sounds like you are close to that. Just back off the truss rod about halfway, and the neck should go to about flat, right? Then level the frets.

That's a nice looking little bass! Some clever design ideas and nice craftsmanship.
 
Last edited:
Hey Alex;

It doesn't sound to me like you have a problem. The normal process that I recommend is to tighten the truss rod to about 50%. With the strings off, and the truss rod at 50%, you'd like the neck to be pretty close to flat. That's when you level the frets.

It sounds like you are close to that. Just back off the truss rod about halfway, and the neck should go to about flat, right? Then level the frets.

That's a nice looking little bass! Some clever design ideas and nice craftsmanship.

G'day Bruce,

Thank you for chiming in, and thank you for the kind words. If I'm understanding you correctly you are inducing a little bit of back bow before levelling. I have always got a fretboard as close to level as possible, then hit it with a beam about 2 feet long. While this bass has super jumbo frets, I'd be worried about how much material I would remove in the middle of the board using my 2 foot beam and my not quite flat board.

Would you recommend using something shorter for levelling in this scenario?
 
G'day Bruce,

Thank you for chiming in, and thank you for the kind words. If I'm understanding you correctly you are inducing a little bit of back bow before levelling. I have always got a fretboard as close to level as possible, then hit it with a beam about 2 feet long. While this bass has super jumbo frets, I'd be worried about how much material I would remove in the middle of the board using my 2 foot beam and my not quite flat board.

Would you recommend using something shorter for levelling in this scenario?

Hey Alex;

I think you are misunderstanding the process. The point isn't to induce a backbow before leveling. The important thing is to tighten the truss rod up enough that you can see that it is loading up the neck and just beginning to make it bend. Wherever it ends up in flatness, that's the state you want the neck to be in when you do the leveling. That's what makes sure that the truss rod will work efficiently to hold the neck stable and make the neck adjustable through the right range.

You aren't trying to adjust the neck to flat, or to backbow. You are adjusting it to have the truss rod applying load to the neck, while you do the leveling.

If you've built the neck right (which I think you have), when you load the truss rod up to about 50%, with the strings off, the neck is approximately flat. That's when you do the final fret leveling. And it will be good. With minimal removal of height off the frets.
 
Last edited:
Hey Alex;

I think you are misunderstanding the process. The point isn't to induce a backbow before leveling. The important thing is to tighten the truss rod up enough that you can see that it is loading up the neck and just beginning to make it bend. Wherever it ends up in flatness, that's the state you want the neck to be in when you do the leveling. That's what makes sure that the truss rod will work efficiently to hold the neck stable and make the neck adjustable through the right range.

If you've built the neck right (which I think you have), when you load the truss rod up to about 50%, with the strings off, the neck is approximately flat. That's when you do the final fret leveling. And it will be good.
G'day Bruce - I think I have explained my problem badly.

For some reason that I don't understand, with the truss rod at 50%, I would have a huge amount of backwards bow (opposite of relief) with no strings on. Turning the dual action rod in the relief inducing direction as far as I am game to go still leaves me with perhaps 0.5mm to 1mm of backwards bow (convex shape). This is as close to as flat as possible as I can get with the strings off.

With the strings on and the trussrod at this setting, it induces just the right amount of relief.

Looking along the profile of the neck, it's as flat as a tack until about the 7th fret(ish), where it starts to droop if it were lying on its back. Perhaps not coincidentally, this is where my stainless reinforcement bars end.
 
Last edited:
Strung up and wired up for a test run, prior to finishing.

B6D56E6A-950B-4088-9911-35ADCA37FAEE.jpeg

I got the neck just flat enough to do a fret level, and it plays pretty damn well. I think a set of custom strings from Newtone are in my near future as the lack of tension on the B string is ridiculous.


The pickup is very dark. It has a DC resistance of 18k ohms, so I'm not sure what else I was expecting. Not quite mudbucker dark, but there's very little high end going on. It's not a bad thing, as I was wanting to put flats on this build, but was looking at a very expensive custom set to make it happen. As it is, with this pickup, my brand new round wounds sound like a very well worn in set of rounds.

The downside is that I planned to use the other pickup from this two pickup set in my 10 string fretless build. I'm not convinced that it offers the right tonal palette for that build.l, so I'm on the hunt for an affordable 6 string pickup now.
 
I have the contingency plan apart and have started applying finish.

I was worried that the finish may just turn everything into a very dark brown or black, but my concerns were ill founded.

Here's a sneak peak before assembly

2B297B75-7CD3-4D2F-A179-C7D65BDF08C9.jpeg


There's still a few more coats of oil to be applied, and the string grooves need refining. Aside from those two little jobs, it's basically an assembly job now.
 
Finished.

This is my second submission for the 2024 Winter Build-Off:
The best bass for Having a contingency plan.

With my main build being fairly fiddly with many, many steps I needed a contingency plan in case I didn't finish.

Specs
14.5mm spacing 6 string
Macassar ebony neck (one piece)
Macassar ebony body
Macassar ebony fretboard
Macassar ebony pickup cover
Macassar ebony bridge
Wilkinson tuners
31" scale
6 strings
String "through and around" body, allowing the use of normal long scale strings
Highlights made from swamp mahogany/silver ash/ebony laminates
Washburn OEM pickup

This is very difficult to photograph and impossible not to get smudges from my hand all over it. With those caveats, here's some photos.


639CBAD1-EED3-482A-9592-683C84BCC8F4.jpeg

B8913EC5-DCC8-4CE4-9961-368CE706FAE9.jpeg

8C044FF7-8111-44D6-9461-CC866292D114.jpeg

2E2B5DAF-C42D-434C-9826-8B066E348A73.jpeg

AA14F5F3-32BA-45DD-AB88-A9AF31A7AF1B.jpeg

740BCF80-3811-4424-95FA-1EA6D0486A2F.jpeg

4CC5C78D-711F-4042-AFFC-74BF35977A19.jpeg

1EABCAF4-2C9B-4BD6-8EA1-F765149F3CCC.jpeg


As passionate as I am about Australian Timbers, this ebony is lovely stuff. I have enough left for three one piece necks and two tops. I'll probably use it sparingly, though.
 

Attachments

  • 78B5362C-89C4-4B30-A8B6-DB8EAD01A9D4.jpeg
    78B5362C-89C4-4B30-A8B6-DB8EAD01A9D4.jpeg
    2.2 MB · Views: 20

Latest posts