• TalkBass has been independent since 1998. Add your voice.
    Create a free account to reply to discussions, view embedded media, and browse with fewer display ads.
    Join freeLog in
    Want zero display ads or expanded classifieds tools? Compare plans.

100 year old Pine P bass build

Hi! Thought I'd share a P bass build. There may not be a lot of interest in this thread, since I'm a beginner(3rd instrument from scratch), and since this is a straight ahead P Bass build, not something more unique. But I figured I'll share, and whomever wants to view, can.
The wood for this comes from a very old piece of antique furniture. My mother-in-law, who used to be in the antiques trade, gave it to me. She says it's at least 100 years old. I believe her. I've never seen or worked a more well seasoned( very dry) piece of wood in my life. It also weighs next to nothing.
I had to laminate the body to make a blank thick enough to use. The wood was slightly over 3/4" thick. After glue up and level sanding of both sides, it comes in a 1.5" thick. A little thin, but good enough for me. I won't bore you with pics of that process(since I don't have any, lol). Here it is with the body shape drawn on the blank.
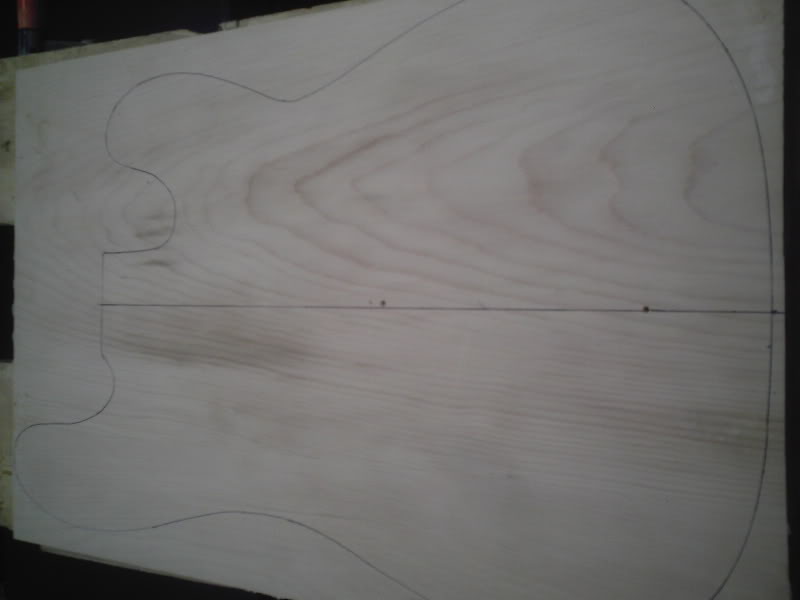
100yopineP002.jpg


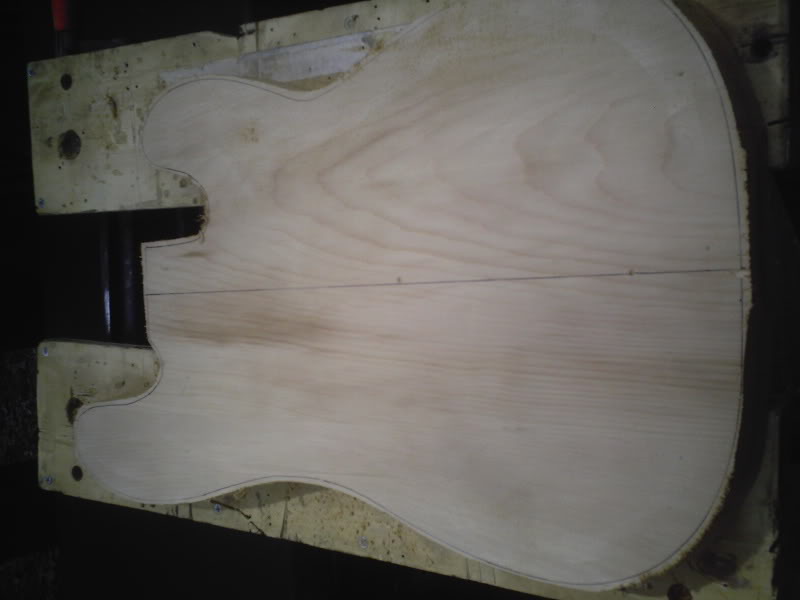
After rough cutting with the jigsaw.

100yopineP004.jpg


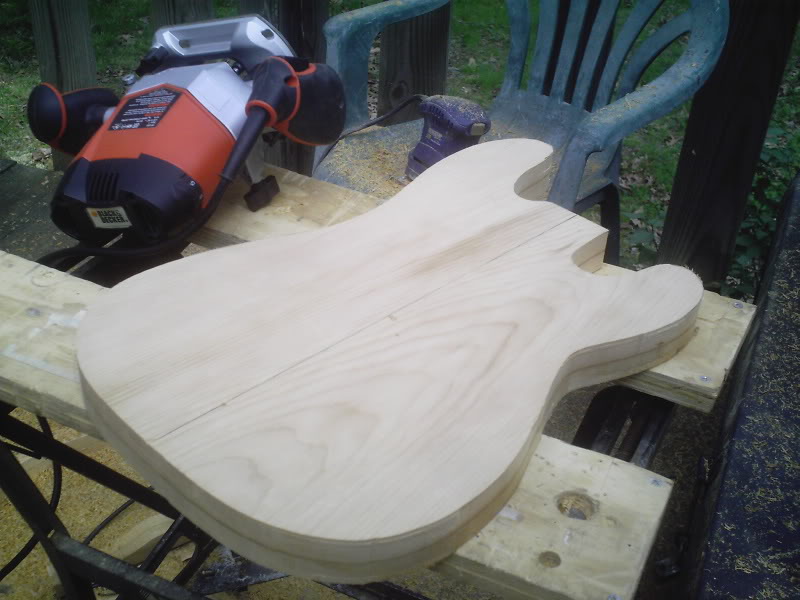
After routing to the template.

100yopineP007.jpg


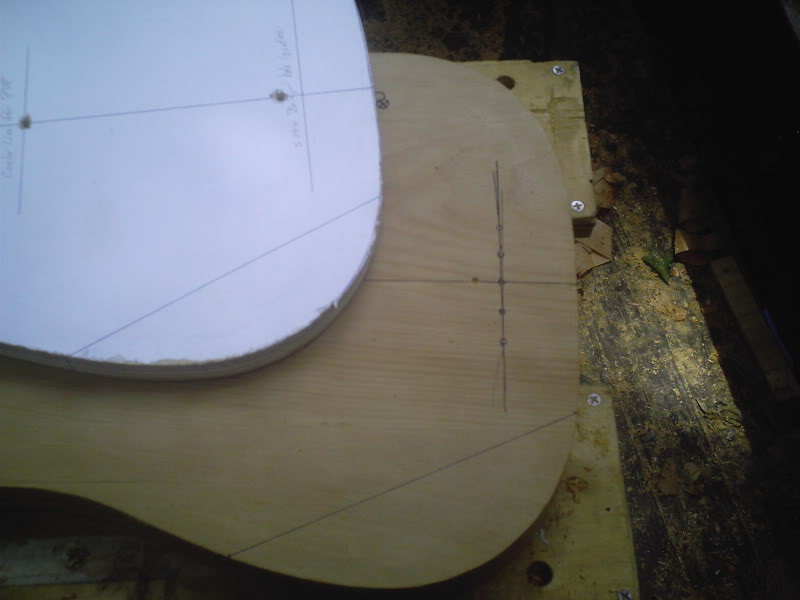
Using the template to mark the location for the forearm contour.
100yopineP008.jpg
 
Sweet radiusses! What sanding process did you use to not cut into the soft veins, leaving harder wood standing proud?

That has been the biggest problem I've had on shaping the body so far.

I used some shaped sanding devices like wrapping cans with sandpaper and even using tongue depressors - which work very well I'll say up front!

At this point I am almost finished with the radius sanding and the cutaways are all smoothed out now - so since I'll be gone most of the next 3-4 days, I can't get to work on my body until about Tuesday, next week. <sob>
 
SurferJoe46, thanks! I hand sanded the radius using 60 grit Free-cut. The flat areas of the body, of course, will be block sanded for the final time right before finish.
I feel for you, not being able to work on your project for the next few. Once I get started on one, it's pretty much all that's on my mind. If I can't get to it, it's difficult to deal with, lol. What i usually do is go over and over in my mind whatever the next step in the process is. Essentially, do the work over and over in my mind. Helps me get a better result once I do get back to it.
 
Good Job!

I can only image that wood is gonna sound awesome.

Don't know what you had in mind for a pickup,
but let me suggest my favorite pickup - Fender '57 reissue.

That's the only pickup I use in a 4 string P bass...
 
I'm using the 3M long and medium hard rubber sanding blocks and even my air-powered long boards to keep everything flat as an iron.

[Invalid or Expired Link Removed][Invalid or Expired Link Removed]

Invalid Link Removed

Link Removed

It's just those damned radiusseseses that are driving me nuts. I'll manage, but it's hard to make something round, radiused and all with a flat sanding block.

I used a high-build lacquer-based primer and it works well. It also keeps the use of nitro-lac spot putty to a minimum.
 
Thanks, all. SurferJoe, you've got a lot more than I do to sand with. I just use my hands for the radius, and a flat block of wood with sandpaper wrapped around it for the flat surfaces.
Supertanker, I already bought the pickup, and the rest of the hardware I have laying around. This is sort of a budget build(truth be told all of mine are, lol.), so I'm using the GFS PB Pro P Bass pickup.
Chuck, as to the finish, I haven't really made up my mind. I had originally intended on a burst, but I use aerosol cans, and it's too cost prohibitive for this build. Instead, I had planned on using Duplicolor lacquer and going with a Chrysler color, Intense Blue Pearl, to hide the join line of the body.
Now, I'm contemplating doing a stain and then hitting it with clear coat. That way, the grain will still show. If anyone asks about the join line, I'll explain to them that it's a 100 year old piece of wood that began life as a piece of furniture. It would kind of give me a talking point to share with others.
I still in the end will probably go with a solid color, but at this stage in the game, it's all up in the air.
 
100yopineP034.jpg


Follow that up with the proper sized bit.

100yopineP036.jpg


I drill part way through from the front, then flip it and drill the rest from the back.
Here's the neck after rough cutting with the jigsaw.

100yopineP037.jpg


Once it is rough cut to shape, I take a pencil and mark hash marks on the side.

100yopineP038.jpg


Then i take a long sanding beam with some sandpaper attached, and use it to sand the edges of the neck down level and to the line.

100yopineP040.jpg
 
Looks good but pine is not a good choice for a guitar or bass. It is very light and doesn't resonate the way swamp ash or alder do.

I've built several pine instruments (basses and guitars), and found it to be a very GOOD tonewood. The only real disadvantage to pine is its' softness.

In fact, "pine" has become one of the "go to" tonewoods for many builders - Tele players especially love it.

For some sweet pineys, check out ... Creston Electric Instruments | HOME


To the OP: Nice work so far - looking forward to seeing this build progress !
 
Looks great! I too have some old pine from the 1850s, which I intend to do something with. Its a completely different colour to yours though (more orange). It is also quite heavy and hard which I find interesting when comparing it to modern stuff. I guess it must be slow grown, they dont make em like they used too :). Good luck with it, you cant beat old wood....or so I was told once, by a tramp at a bus stop....I will stop now.
 
Looks great! I too have some old pine from the 1850s, which I intend to do something with. Its a completely different colour to yours though (more orange). .

This stuff was a nice red/ orange before cutting and sanding. I though at first it might be cedar because of the color. I think that was oxidation of the top layers of the wood. Once I started planing it, the color ended up like what you see here.