
Enjoy the benefits of a premium membership!
Upgrade Account
-
TalkBass has been independent since 1998. Add your voice.
Create a free account to reply to discussions, view embedded media, and browse with fewer display ads.
Join free Log in
Want zero display ads or expanded classifieds tools? Compare plans.
You are using an out of date browser. It may not display this or other websites correctly.
You should upgrade or use an alternative browser.
You should upgrade or use an alternative browser.
100 year old Pine P bass build
- Thread starter gitlvr
- Start date
More options
Who Replied?
The first bass I built used the GFS Paulownia body wood that is about 1/2 step softer than balsa.
It was so easy to work with - but since I have never believed that wood does anything to the tone of a bass - it was proven factual to me once more in that this body sounds like any other P-style bass that I've heard.
The whole bass came out at 6lbs 0ozs - so it's light beyond belief. Now, the pine body that I made is just under 4lbs 2 ozs without the paint and hardware, so I know it too ultimately will be light.
Don't let the tonewood guys scare you - it's not something about which to worry. I have one more wooden bass project in the works, and then I'm trying a totally different man-made products bass. I don't wanna let it out yet, but the final planning is all in my head and soon to go into action.
It was so easy to work with - but since I have never believed that wood does anything to the tone of a bass - it was proven factual to me once more in that this body sounds like any other P-style bass that I've heard.
The whole bass came out at 6lbs 0ozs - so it's light beyond belief. Now, the pine body that I made is just under 4lbs 2 ozs without the paint and hardware, so I know it too ultimately will be light.
Don't let the tonewood guys scare you - it's not something about which to worry. I have one more wooden bass project in the works, and then I'm trying a totally different man-made products bass. I don't wanna let it out yet, but the final planning is all in my head and soon to go into action.

For some sweet pineys, check out ... Creston Electric Instruments | HOME
Unreal! I love those Sarah Ryan's!!!

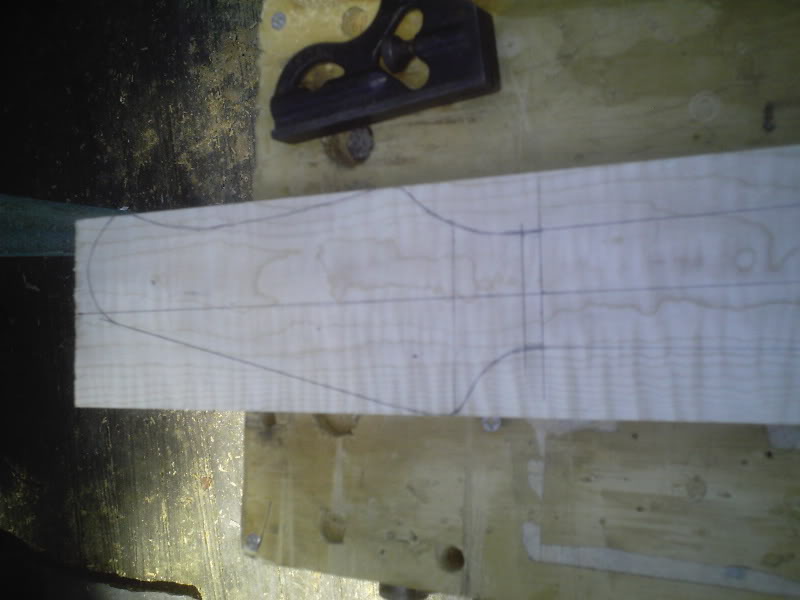
love the headstock shape. nice solid mix of modulus and MM. i've seen many builds that were perfect to me until i saw the headstock. this one is all good!
gitlvr said:This stuff was a nice red/ orange before cutting and sanding. I though at first it might be cedar because of the color. I think that was oxidation of the top layers of the wood. Once I started planing it, the color ended up like what you see here.
Interesting, thanks. I haven't done anything to mine yet, so maybe it will end up paler. I would be surprised If it turns as yellow as yours based on the other Victorian pine I have worked with, but I could be in for a shock!
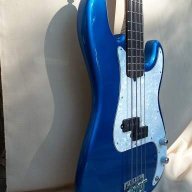
I'm baaack!
So after getting the headstock shaped properly, it was time to thin it down to proper thickness. So I broke out my trusty handsaw...
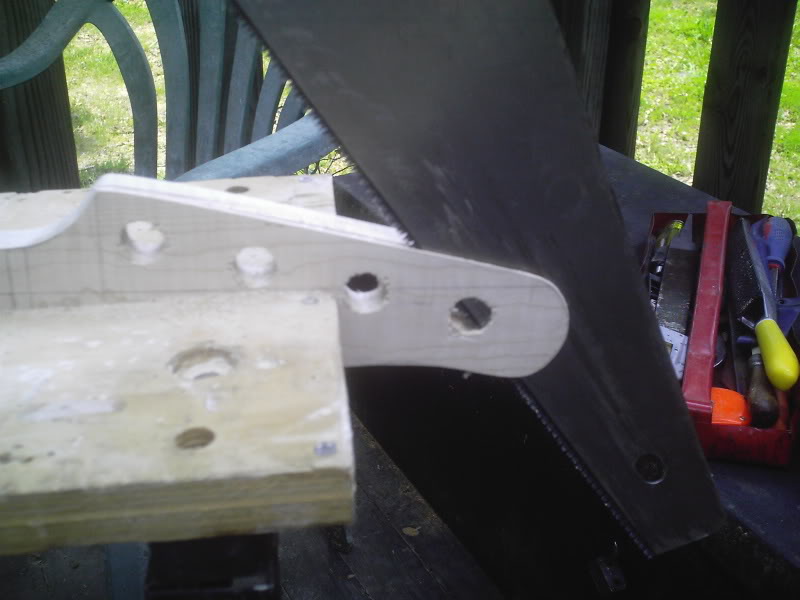
...and got rid of anything I didn't need.
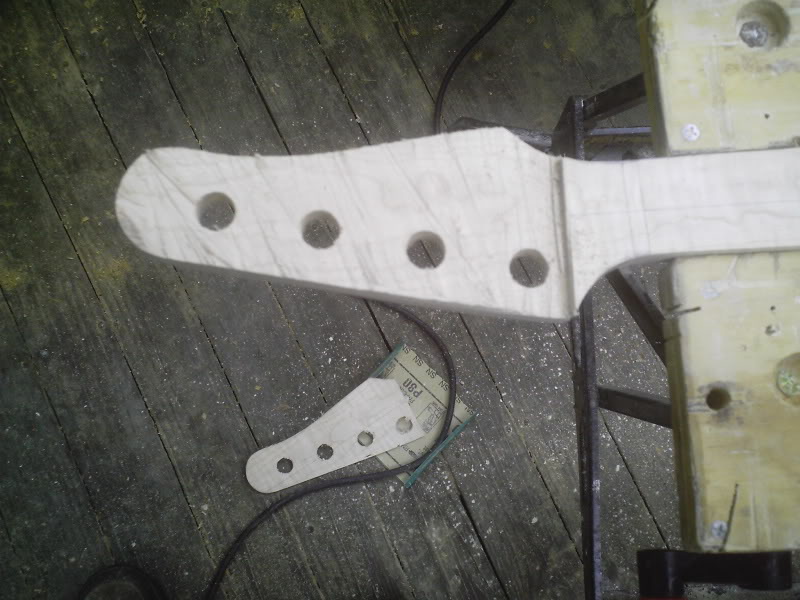
I spent some time on how I would get the transition from the headstock to the fretboard plane. I don't have a sanding station, or a drill press with a robo sander or luthier's sanding station.
My first thought was to use a half round rasp or file. But then, roaming around Lowes, I spotted this.
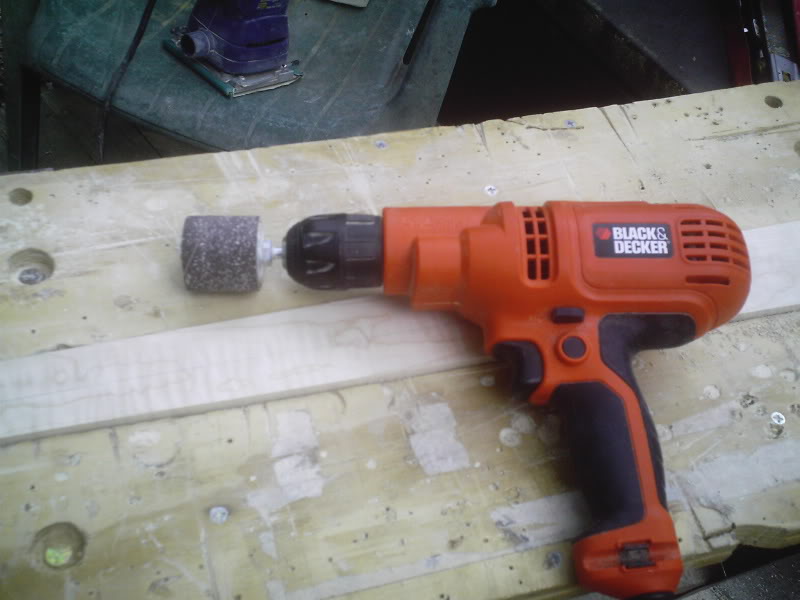
Worked like a charm!
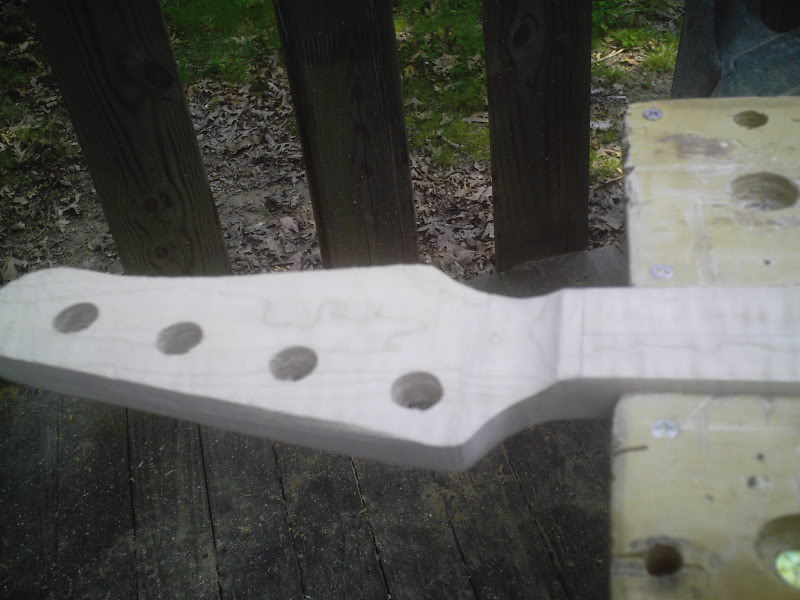
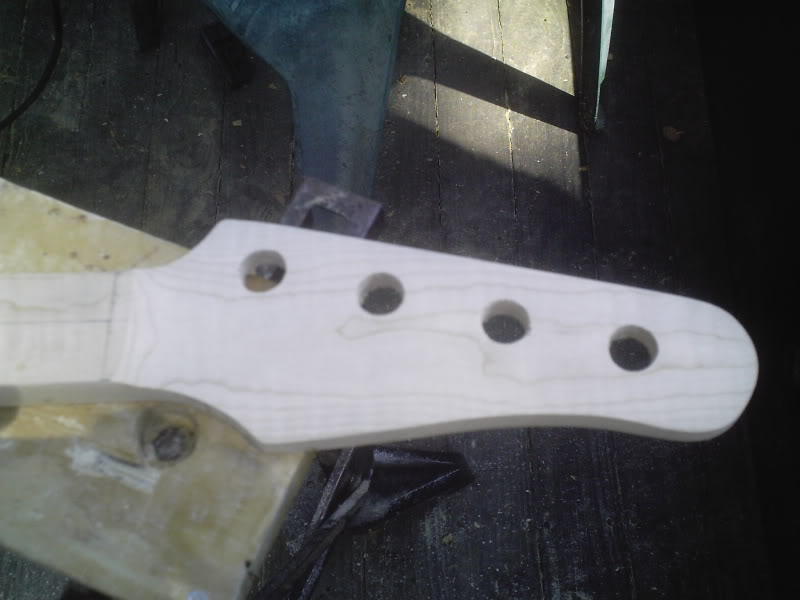
So after getting the headstock shaped properly, it was time to thin it down to proper thickness. So I broke out my trusty handsaw...
...and got rid of anything I didn't need.
I spent some time on how I would get the transition from the headstock to the fretboard plane. I don't have a sanding station, or a drill press with a robo sander or luthier's sanding station.
My first thought was to use a half round rasp or file. But then, roaming around Lowes, I spotted this.
Worked like a charm!
Necessity if the mother of ---- something or other!
Good on ya! Very innovative.
And it pays to roam around Lowes, lol.
Now it's time to rout the neck, pickup and electronics cavities. If you look at some of my earlier posts in this thread, you'll see the pup cavity already routed. Originally I had planned for this to be a non pickguard build. Perhaps it's personal bias, but the P Bass is, at least to me, the quintessential bass. When I think of or hear bass, the P is the image that immediately enters my mind. The more I thought about it, the more I realized that, at least for me, the pickguard is a huge part of the bass's look and design. And since this build is to be my personal instrument......
Template attached...
...and cavities routed.
Time to rout for the truss rod slot.
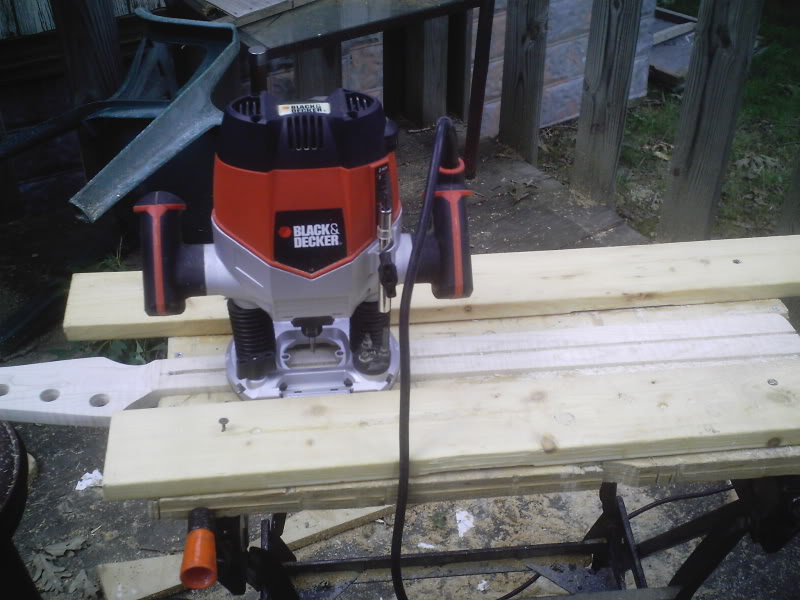
Adjustment will be at the heel.

Glueing up the fretboard.

and routed for truss rod access at heel.
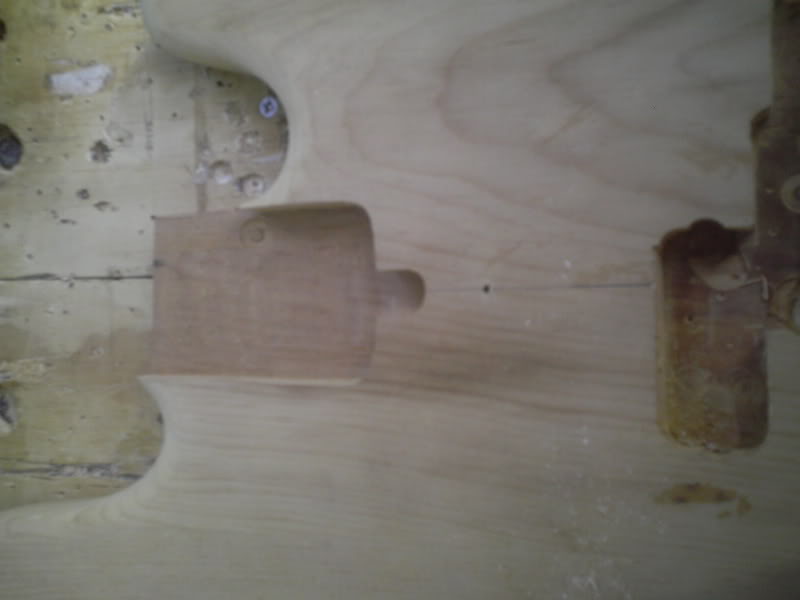
That's all for today. Thanks for looking. Hope you've enjoyed it so far.
Adjustment will be at the heel.
Glueing up the fretboard.
and routed for truss rod access at heel.
That's all for today. Thanks for looking. Hope you've enjoyed it so far.

Outstanding work... please tell me you aren't going to cover such a beautiful piece of wood with paint.... keep the pics coming!


- Jul 11, 2005
- 3,113
- 1,456
- Disclosures
- Gecko Leatherworks
Wow - you floored me with the total simplicity of the neck work so far.
I'm in the process of purchasing another neck - but the way you show it, this may be my last neck purchase.
Are you using a pre-fab fretboard though?
I'm in the process of purchasing another neck - but the way you show it, this may be my last neck purchase.
Are you using a pre-fab fretboard though?

Thanks for all the encouragement, all of you.
Gecko 5, yes. This is my 3rd build from scratch. The other two were electric guitars, which are my main instrument. If you're familiar with the TDPRI, I have the same username over there. I built my second scratch build in this years Tele Build Challenge. If you're interested, I'd be pleased if you took a look. I usually build set necks, but for a bass guitar, for me at least, it's hard to improve on a good, solid P bass. So that's what I'm building here.
I used a pre slotted and radiused board on my first one. The last one I hand slotted and radiused a fretboard blank. I'll be doing that here, as well. You can't see it in the pic, but it's a flat, oversized blank. After the glue sets, I'll trim it to the neck, slot it and radius it, in that order.
I'd encourage you to try building a neck. They are not that difficult. You just need to use care that they go together well(which you should be doing in every other part of a build as well, no?)
Jungy, no, the neck is curly maple.
BrianVengeance, most likely I will. This is a personal build, and I kinda want a solid color. But others have mentioned a clear or transparent finish as well, so I am considering it. But I'm fairly certain I'll go with the solid color anyway.
Gecko 5, yes. This is my 3rd build from scratch. The other two were electric guitars, which are my main instrument. If you're familiar with the TDPRI, I have the same username over there. I built my second scratch build in this years Tele Build Challenge. If you're interested, I'd be pleased if you took a look. I usually build set necks, but for a bass guitar, for me at least, it's hard to improve on a good, solid P bass. So that's what I'm building here.
Wow - you floored me with the total simplicity of the neck work so far.
I'm in the process of purchasing another neck - but the way you show it, this may be my last neck purchase.
Are you using a pre-fab fretboard though?
I used a pre slotted and radiused board on my first one. The last one I hand slotted and radiused a fretboard blank. I'll be doing that here, as well. You can't see it in the pic, but it's a flat, oversized blank. After the glue sets, I'll trim it to the neck, slot it and radius it, in that order.
I'd encourage you to try building a neck. They are not that difficult. You just need to use care that they go together well(which you should be doing in every other part of a build as well, no?)
Jungy, no, the neck is curly maple.
BrianVengeance, most likely I will. This is a personal build, and I kinda want a solid color. But others have mentioned a clear or transparent finish as well, so I am considering it. But I'm fairly certain I'll go with the solid color anyway.
Sorry there have been no updates lately. I have been pretty busy with other things, and haven't had time to return to work on this. Hopefully I'll be able to get some more work done on it tomorrow, weather permitting. This build is still in progress. Stay tuned!
One question that occurred to me: does the truss rod need a little bend or bow in it to make it effective?
I see you've just cut a single-depth slot for it in the neck under the board. Or am I not seeing a detail there?
I see you've just cut a single-depth slot for it in the neck under the board. Or am I not seeing a detail there?
One question that occurred to me: does the truss rod need a little bend or bow in it to make it effective?
I see you've just cut a single-depth slot for it in the neck under the board. Or am I not seeing a detail there?
If its a double action rod they should be mounted into a flat slot. If single curved, but some people have used flat before, and there is bound to be exceptions. But double action = flat.
Oh yeah...dont paint that body!
One question that occurred to me: does the truss rod need a little bend or bow in it to make it effective?
I see you've just cut a single-depth slot for it in the neck under the board. Or am I not seeing a detail there?
The rod I'm using is a single action rod, but it has a flat bar on top with the round truss rod bar underneath. It's designed similar to the way the two way rods are, and does not need a curve. i prefer this design for simplicity of installation. This one as well allows me to rout a shallower slot (5/16") as opposed to most two way rods, which require a 7/16" slot. I can get a thinner neck, if I want it.
As for the simple single action rods, such as the ones Fender and Gibson use, they work because the wood behind them(back of the neck) is thinner in cross section than the wood in front(fretboard), so it compresses the wood in the back of the neck more than the fingerboard, thus forcing a back bow in the neck. There's a good discussion of them here.
[Invalid or Expired Link Removed]
They do not need a curved channel, and will work fine in a straight one as well. But the curve is there because it makes the truss rod more efficient, so it works "better".
Were I to use one, I personally would install it in a straight channel. There should be enough adjustment without the curve. IMHO, if you have to adjust a truss rod past about a full turn, there's something wrong anyway. Necks should be built with enough attention to detail that they don't need anywhere near so much adjustment. I think Leo installed a curved rod for basically the same reason he went with a bolt on neck. Warranty issues. The bend just gives the rod much more adjustment range, to get a finnicky neck in line without having to resort to the factory warranty for satisfaction.
Yeah, I know. I'm gonna get tons of more experienced builders telling me how full of malarkey I am. So be it. There are plenty of examples of other builders beside Fender, and many of them install a compression rod in a straight channel. In fact, this type of rod is probably the most common rod there is, and many thousands of guitars have been fitted with them, in a straight channel, and they're functioning just fine. And many of them are very old as well.
Latest posts
-

-

-

-
 What I am finding out with regards to playing as I grow older
- Latest: pyrat56host
