• TalkBass has been independent since 1998. Add your voice.
    Create a free account to reply to discussions, view embedded media, and browse with fewer display ads.
    Join freeLog in
    Want zero display ads or expanded classifieds tools? Compare plans.

32" Fully hollow Archtop Bass - build diary

I'm working on a semi-hollow Rickenbacker-Inspired 4005-ish bass design now, you seem like the guy to ask for a bit of advice on top thickness. I was thinking either 1/4" or 3/16, but want to make sure the top is strong enough. it will have posts under the bridge, so it won't have to support full string tension transferred through the bridge. Does 3/16" seem like enough?
Sorry this has taken a while for me to reply, apologies.....Ummm...3/16 (4.7mm) sounds like plenty. And if there's support under the bridge then even that is probably overkill. Is there a build thread?
 
I'm a little late to this discussion, but another option I'll suggest is a recessed metal neck plate, which has its own decorative insert.

Here's what I do on my Scroll Basses:

View attachment 7068494


This neck plate is 1/4" thick aluminum, thick enough that standard socket head cap screws seat flush in it. Then there's a pocket milled in the center, where I put in an engraved aluminum name plate.

You could do something like this, putting in an insert of wood matching or contrasting the body back. And you could set the outside shape of the overall plate to whatever you wanted, even if the screw holes are in asymmetrical locations within it. This is very strong functionally, and gives you some flexibility in the visual design.

Here's another approach, from one of my Series 1 models in 1999:

View attachment 7068495

This neck plate is 1/8" brass with 3/16" of ebony epoxied on top. All you see are the heads of the socket head cap screws, but they are bearing down on a big plate. This is a way of making invisible ferrules. You could do this, using a piece of matching or contrasting wood.

Here's another approach that I used on my early SSB models:

View attachment 7068496

These are aluminum bars, 1/4" thick x 1/2" wide, with the recessed stainless cap screws. Another way that you can get more creative with the shape and the visual look, while making it stronger than individual ferrules.
Thanks Bruce, those all look great! Once I've carved the top and glued it on I'll do some mock-ups to see what looks best.
 
Here's a quick neck update, quite a lot of progress.

First up, the headstock, which is a ridiculous amount of work!

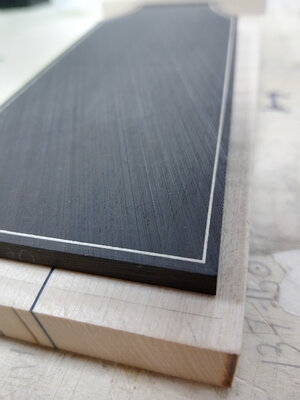
I bind the headstock in the same way as the fretboard:
IMG_20241029_123258.jpg

This is why I like binding, when you get a corner like this:
IMG_20241029_152114_HDR.jpg

The lines on the fretboard go thorugh the nut and round the headstock:
IMG_20241029_152208_1.jpg
Rout the slots:
IMG_20241030_173257.jpg

Then glue on the back veneers. I use epoxy for all my veneers, usually in a vacuum bag. You can see what a mess it is when it first comes of the bag.
IMG_20241105_093307.jpg
Normally I use clear packing tape on all adjacent surfaces for easy clean up. This time I...forgot. Epoxy is not forgiving. It did clean up nice, but..it..took..a..looong..time:
IMG_20241105_192223.jpg
I don't know why, these veneers remind me of Bassett's liquorice allsorts......
Screenshot 2024-11-07 22.24.56.png

Finally, all the parts together:
IMG_20241106_100959.jpg

Phew!
 
Here's a quick neck update, quite a lot of progress.

First up, the headstock, which is a ridiculous amount of work!

I bind the headstock in the same way as the fretboard:
View attachment 7072012

This is why I like binding, when you get a corner like this:
View attachment 7072008

The lines on the fretboard go thorugh the nut and round the headstock:
View attachment 7072006
Rout the slots:
View attachment 7072009

Then glue on the back veneers. I use epoxy for all my veneers, usually in a vacuum bag. You can see what a mess it is when it first comes of the bag.
View attachment 7072010
Normally I use clear packing tape on all adjacent surfaces for easy clean up. This time I...forgot. Epoxy is not forgiving. It did clean up nice, but..it..took..a..looong..time:
View attachment 7072011
I don't know why, these veneers remind me of Bassett's liquorice allsorts......
View attachment 7072018

Finally, all the parts together:
View attachment 7072007

Phew!
Wow! That is really coming together!
 
  • Like
Reactions: honza992
I've come round to the idea that changing string height using shims is just not going to work. And the micro-tilt system is appealing in some ways, but is going to need a bit more work.

Sooo....that means sticking with a standard archtop bridge with thumb adjusters. I don't like them because they introduce slop at the most important anchor point of the strings - where the vibrations pass from the strings into the top of the guitar. The standard archtop bridge looks like this:

IMG_20240208_160115~2.jpg

Also what I don't like is that the total string tension is being supported by this narrow piece of ebony. At the yellow line it's only 6mm or something thick, and a clear stress riser. So, I've made a bridge which is reinforced with carbon fibre.

I made the rough shapes from ebony as usual.
IMG_20241111_102332.jpg

I then routed a channel in what will become the upper part of the bridge, wide enough to epoxy in a 4x4mm carbon fibre rod. On top of the rod will be another strip of ebony to hide the carbon fibre:
IMG_20241107_140844.jpg

They'll be glued together, then the ebony strip can be cut away and everything sanded.

IMG_20241107_140920.jpg

Here's the saddle and the base roughly shaped. You can see the square carbon fibre rod from the side:
IMG_20241111_121304_HDR.jpg

Here's the final bridge before shaping. It'll get fitted to the top once that's been carved.

IMG_20241111_121207.jpg
Next time I'd probably use a carbon rod with higher profile - 6mm or even 8mm high rather than 4mm, but that was what I had to hand. As a first try I think it's worked out ok.
 
I've come round to the idea that changing string height using shims is just not going to work. And the micro-tilt system is appealing in some ways, but is going to need a bit more work.

Sooo....that means sticking with a standard archtop bridge with thumb adjusters. I don't like them because they introduce slop at the most important anchor point of the strings - where the vibrations pass from the strings into the top of the guitar. The standard archtop bridge looks like this:

View attachment 7081804

Also what I don't like is that the total string tension is being supported by this narrow piece of ebony. At the yellow line it's only 6mm or something thick, and a clear stress riser. So, I've made a bridge which is reinforced with carbon fibre.

I made the rough shapes from ebony as usual.
View attachment 7081800

I then routed a channel in what will become the upper part of the bridge, wide enough to epoxy in a 4x4mm carbon fibre rod. On top of the rod will be another strip of ebony to hide the carbon fibre:
View attachment 7081799

They'll be glued together, then the ebony strip can be cut away and everything sanded.

View attachment 7081802

Here's the saddle and the base roughly shaped. You can see the square carbon fibre rod from the side:
View attachment 7081803

Here's the final bridge before shaping. It'll get fitted to the top once that's been carved.

View attachment 7081801
Next time I'd probably use a carbon rod with higher profile - 6mm or even 8mm high rather than 4mm, but that was what I had to hand. As a first try I think it's worked out ok.

If those thumbwheels give you trouble, another option is to use shims within the bridge, between the upper and lower blocks. Similar to what you've done now, with the upper block sliding vertically on two pins. But put shims in the gap, rather than the thumbwheels. The shims would be held in place by the string download. And you could change the shims by just loosening the strings.

Getting rid of the thumbwheels would reduce the weight and complexity.
 
  • Like
Reactions: joover and EliasA
If those thumbwheels give you trouble, another option is to use shims within the bridge, between the upper and lower blocks. Similar to what you've done now, with the upper block sliding vertically on two pins. But put shims in the gap, rather than the thumbwheels. The shims would be held in place by the string download. And you could change the shims by just loosening the strings.

Getting rid of the thumbwheels would reduce the weight and complexity.
This is another really nice idea, thanks Bruce.
 
This last build I did had a completely metal tailpiece:

IMG_20241214_144237_HDR.jpg

It works ok, but I don't love the look. So on this build I'm going to do a wooden string retainer. Rather than jump straight in with ebony, I've learned the hard way to always build a prototype in something soft (and cheap) first. So with a scrap block of spruce I made a string retainer to test out how I'm going to do it for real. And here it is. A somewhat fiddly process, but it's definitely workable.

IMG_20241217_105001.jpg

Given I've made it, I thought I might as well chuck it on the bass and see what happens to it under string tension. Spruce is about a third of the density of ebony, so if the spruce holds up ok, the ebony definitely will.

And here it is. No explosion of spruce-y splinters, so I think I'm good to go with the ebony....

IMG_20241217_113141.jpg
 
Your work is impeccable.
Thanks, I really appreciate the compliment. And really wish it were true:laugh: I really strive for clean work, but it's a struggle. I can always hear the voice in my head tempting me, saying "it's good enough...go on...move on....no one will notice". Guitar building is a bloody business......;)
 
  • Like
Reactions: Gilmourisgod
Some progress with the top. The on-going quest for the invisible join. Here I'm jointing with my No. 4 which is taking lovely, full length shavings. IMG_20241206_110356.jpg

For clamping I've found these panel clamps that put pressure in four directions to be really useful. It means you can put more pressure on without the boards beginning to rise up, which will immediately give a visible glue line. You can of course do the same with normal clamps, but these aren't expensive and do a really good job. WoodRiver make them.
IMG_20241213_124349_HDR.jpg

Cut out, here's the top and the body.

IMG_20241219_110131.jpg

First job is I use a disc cutter to cut a channel for the outer permiter. Like most of the techniques I use this is directly stolen from Ken Parker. I use this one in the router table. It works perfectly:
61Ns2CPKRxL._AC_SX679_.jpg
And the channel cut:
IMG_20241219_124519.jpg


There are plenty of builders who carve freehand. I'm not that skilled, I need all the help I can get. Last time I used a series of templates to rout out 'contour lines'. It worked ok, but the templates took an age to make. So this time I thought I'd try out a different technique. Using some software designed for violin making I printed out curves for the top. One longitudinal curve, and 5 cross curves.
IMG_20241219_164333.jpg
I then used those to measure our a series of holes drilled to the correct depth on the drill press:
IMG_20241219_173903.jpg

Then, grab the gouge and start hacking. This is not a quick process, but is definitely the best of guitar making. With a sharp gouge, carving spruce is like shaping an enormous lump of butter with a butter knife. I know why people use CNC, but for me it's this process of building by hand which makes the hard work worth while.

There's still a long way to go......
IMG_20241220_101355.jpg

Edit: In case anyone is interested, the violin top drawing software is here:
https://jpschmidtviolins.com/cycloid.html
It's a great tool, and free.
 
Last edited:
The other technique I've seen is concentric rings of graduated depth done with a router and mutiple templates, or just freehanded, a lot of Les Paul builders using that process. Cutting wood like butter with a sharp gouge is probably more satisfying! I kinda covet one of those little violin makers "finger planes" too, though having never carved a top, hard to justify.
 
The other technique I've seen is concentric rings of graduated depth done with a router and mutiple templates, or just freehanded, a lot of Les Paul builders using that process. Cutting wood like butter with a sharp gouge is probably more satisfying! I kinda covet one of those little violin makers "finger planes" too, though having never carved a top, hard to justify.
Hold on, are you suggesting that buying tools needs to be....justified?! You mean, with a real, actual, valid reason? But...that's crazy talk. I started this thread in good faith. This is Luthier's Corner! You can't go spreading heresy like that. I'll have you reported to the mods......
 
If those thumbwheels give you trouble, another option is to use shims within the bridge, between the upper and lower blocks. Similar to what you've done now, with the upper block sliding vertically on two pins. But put shims in the gap, rather than the thumbwheels. The shims would be held in place by the string download. And you could change the shims by just loosening the strings.

Getting rid of the thumbwheels would reduce the weight and complexity.
I've made a couple of D'Aquisto style bridges with a sliding wedge for height adjustment. They work well.
 

Attachments

  • blue bridge.PNG
    blue bridge.PNG
    183.8 KB · Views: 14
I've made a couple of D'Aquisto style bridges with a sliding wedge for height adjustment. They work well.
Lovely work!

How do you think the sliding wedge compares with the thumb wheels?

SInce you're here, can I ask what sort of height of dome you use? The first archtop bass I made was 16mm total plate thickness, this one will be 18mm. I'm keeping the dome low because I think that will help with bass response.

Edit to ask yet another question: My first two were oval hole, this one will have f-holes. You've done both as well I notice. Benedetto seems to suggest an oval sound hole makes for a stronger bass response. Any thoughts?

PS, I may start a thread for the technical aspects of acoustic guitar building, so as not to confuse the build diary. There's so little info online about building acoustic basses, it would be good to get a thread going that takes a deep dive into all the fun stuff!
 
Last edited:
  • Like
Reactions: Matt Liebenau
Lovely work!

How do you think the sliding wedge compares with the thumb wheels?

SInce you're here, can I ask what sort of height of dome you use? The first archtop bass I made was 16mm total plate thickness, this one will be 18mm. I'm keeping the dome low because I think that will help with bass response.

Edit to ask yet another question: My first two were oval hole, this one will have f-holes. You've done both as well I notice. Benedetto seems to suggest an oval sound hole makes for a stronger bass response. Any thoughts?

PS, I may start a thread for the technical aspects of acoustic guitar building, so as not to confuse the build diary. There's so little info online about building acoustic basses, it would be good to get a thread going that takes a deep dive into all the fun stuff!
I really like the sliding wedge. You have to loosen the strings just like you would on the thumbwheels for adjustments. Very easy to adjust. If it worked for Jimmy, I figured it was a good idea if a little unconventional. I used Benedetto's dimensions for the spruce and maple wedges so 1" at the dome for a 17" archtop (1 1/4" for the 20" bass ones). For the oval hole six string and the two 20" bass ones I built, I X braced them. It definitely provides more bass than any of my parallel braced ones but it's a pretty small sample. Check the archives on the old MIMF and there is a fair bit of very good advice from Bill Moll on building the 20" archtop ones.
 
Last edited: