This was inspired by the Stega basses made by French luthier Paul Lairat. There are several small differences between his basses and this one. Mine has fanned frets, a bolt-on neck, controls on the treble side, a different shape, etc., but the basic idea is the same.
The scale lengths are 876 to 914mm (34 ½" to 36"). My last bass was 33 ½" to 35" and although I was quite pleased with it, I thought the low B could still be better. I decided on 34 ½ to 36 as, after much measuring and drawing of plans. 36" was the longest I could make the B string without having to order special strings. Sheldon Dingwall obviously did more research than me, which is probably why his 5-strings are 34" to 37".
I was well into making the body when I had a sort of "Duh!" senior moment, realising that I hadn't taken any photos. At that point I'm afraid I thought "bother it" (censored) so there are no work-in-progress photos. Sorry. Here's a full frontal.

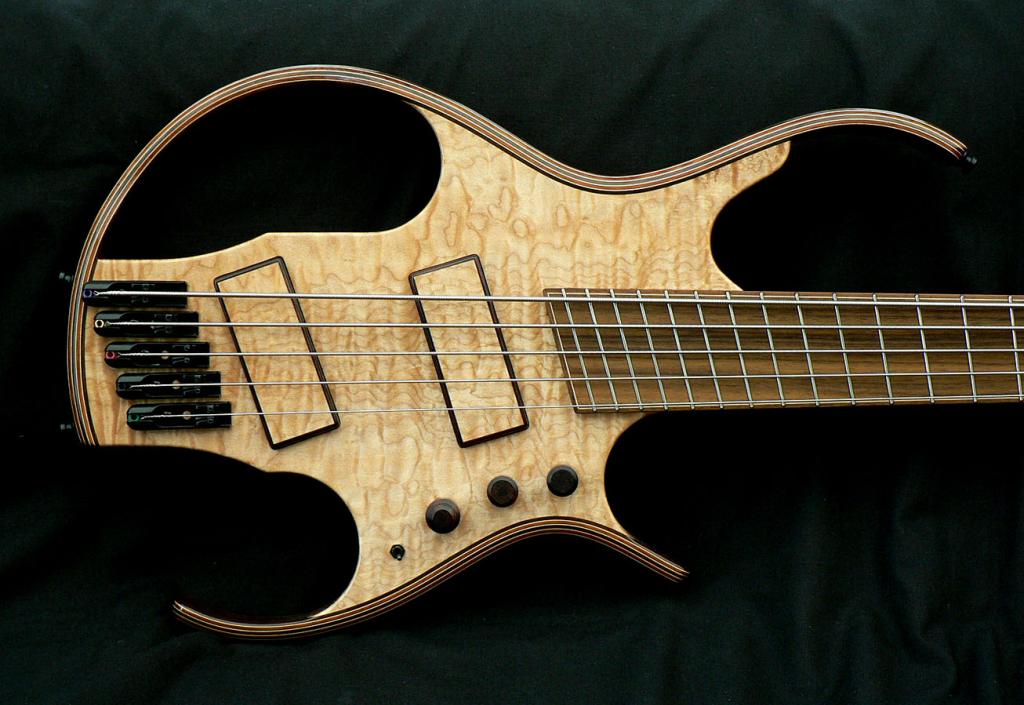
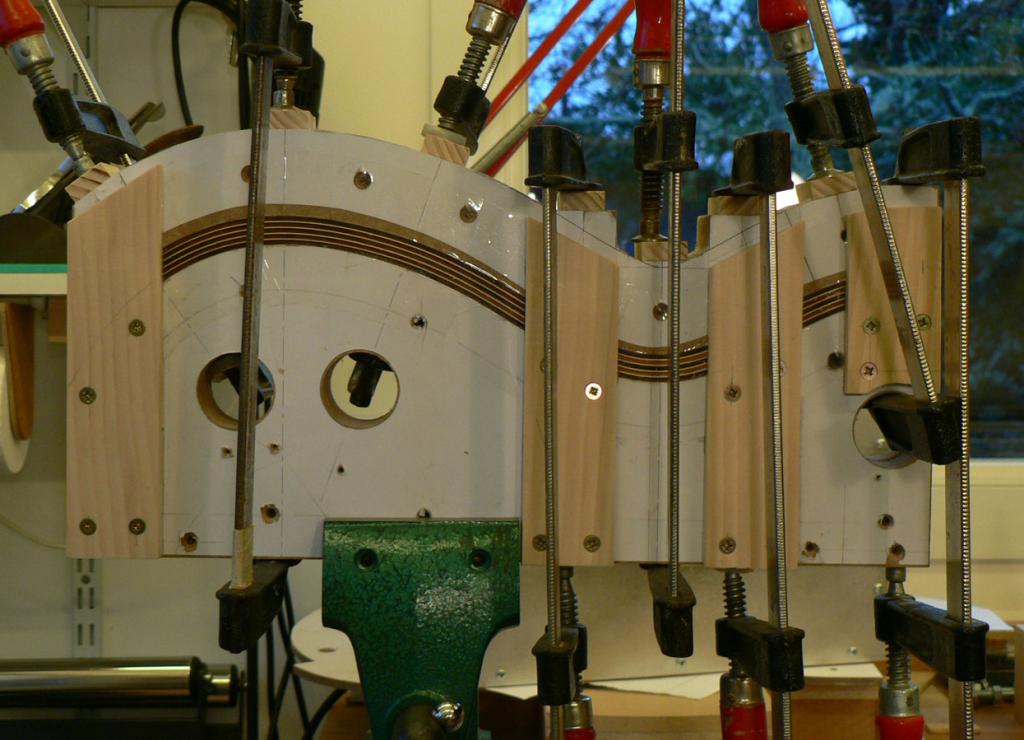
The whole thing is made from maple, mahogany and rosewood. Pity I didn't frequent the forum when the 3-wood challenge was on. The laminated 'ribs' (that's what you'd call them if it were an acoustic, and I can't think of another word) are a 9-piece sandwich of 2mm thick rosewood and mahogany with maple veneer in between. I had to pre-bend them in a Fox-type bender before laminating them.
The pickup covers are rosewood and maple, the maple being the pieces that were sawn out of the drop-top before it was glued to the body. The pickups are off-the-shelf Kent Armstrong humbuckers bought a few years ago from WD in the UK. The covers are only about 1.5 to 2mm thick but the pickups are embedded into them in epoxy so they become solid units. The preamp is a John East BTB01 with stacked treble and bass controls, volume and balance and an active/passive switch.
All the rosewood is East Indian (bass fingerboard blanks) from a UK supplier. I was a little disappointed by the quality and rather pale brown colour but as the supplier had already replaced the original order without question (they were thinner than advertised and had some worm holes) I couldn't complain.
The bridges are much cheaper copies of ABMs from Bezdez on Ebay. They seem to work fine to me.
The frets are stainless steel banjo frets and the fingerboard is flat. (There's no such thing as a zero radius. If you have to call it a radius, it's an infinity radius. )
)
Oops, I told a fib! This is the one-and-only construction photo. Getting all those bits of wood, covered in sticky fish glue lined up and clamped involved quite a lot of perspiration and expletives of Anglo-Saxon origin. I spent a long time on the plans trying to get both ribs out of the same mould, but in the end it didn't look right, so I had to make 2 bending forms and 2 laminating forms.
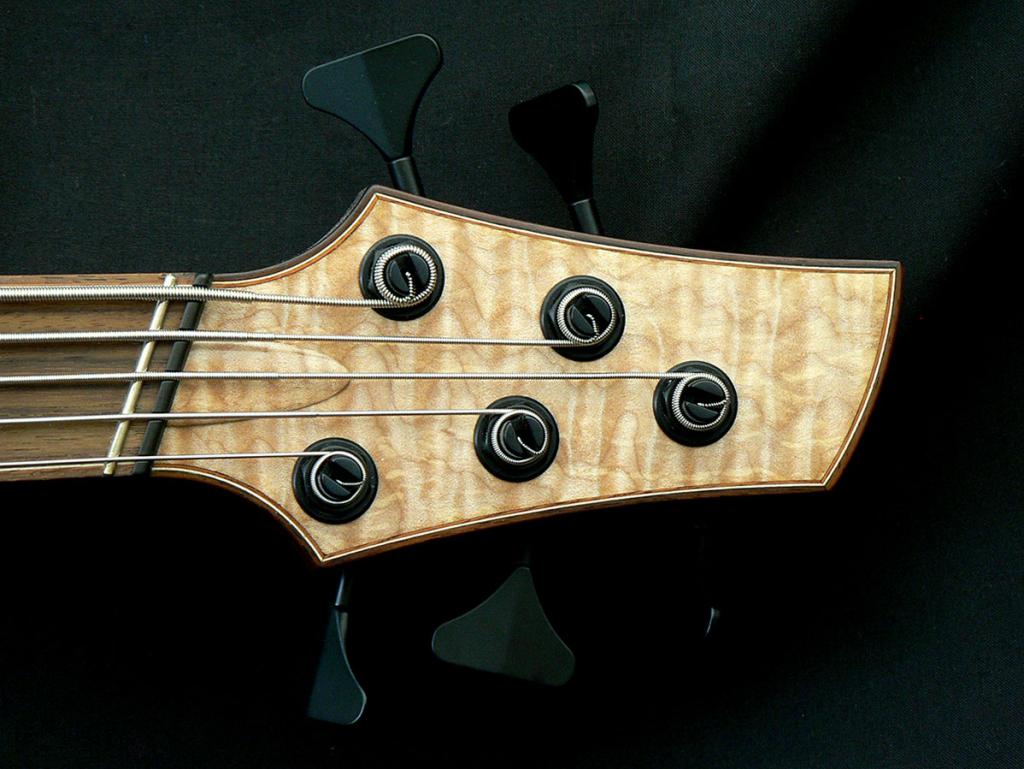
I can't think of any good reason for not having a zero fret. It makes life that little bit easier.
You can see how the extra-long-scale D'Addario B-string was only just long enough. The observant among you will also notice that I seem to have miscalculated the tuner positions. The B string isn't quite a straight pull and the G tuner is too near the nut. I don't know how that happened but with the headstock sloping back at a cockeyed angle because of the nut not being square to the neck centre line, it's not all that surprising. The tuners are Hipshots and the truss rod cover is held in place by magnets.

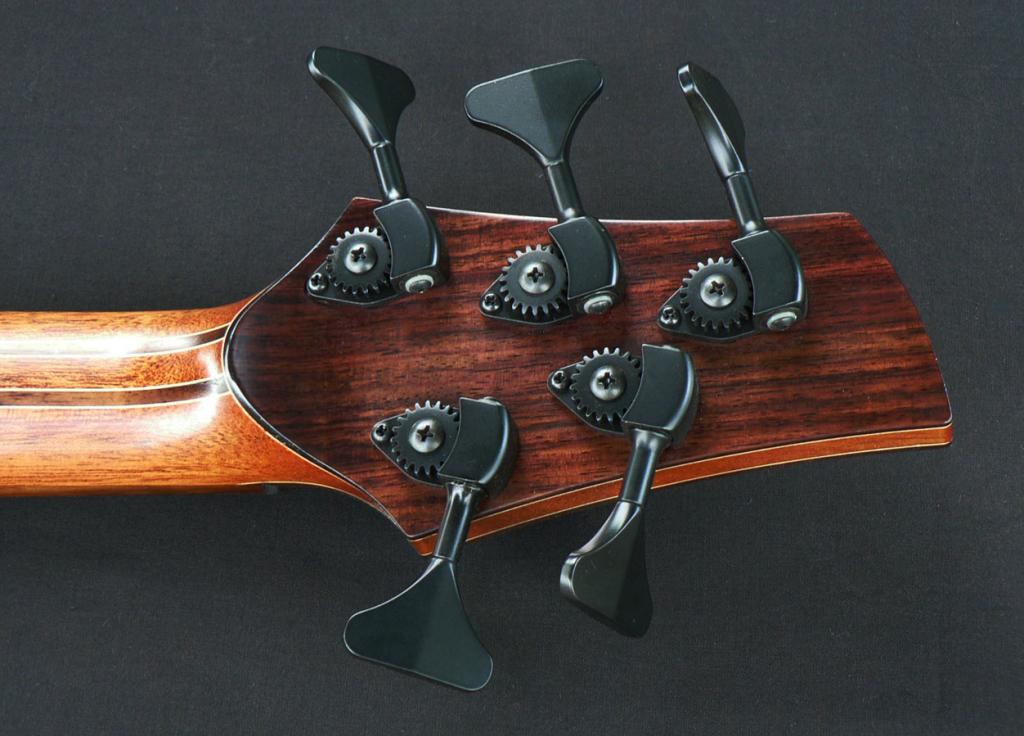
The head plate, used for the backstrap, was part of the same order and was lovely close grained purple stuff; pity the rest wasn't the same. I actually had to carve a partial recess in the volute to make a flat surface for the G string tuner.
The neck is Honduras mahogany, laminated with rosewood and maple veneer to match the ribs but I think the body is probably khaya (African mahogany). There are cavities in the body between the pickups and in the upper bout to reduce weight to a minimum.
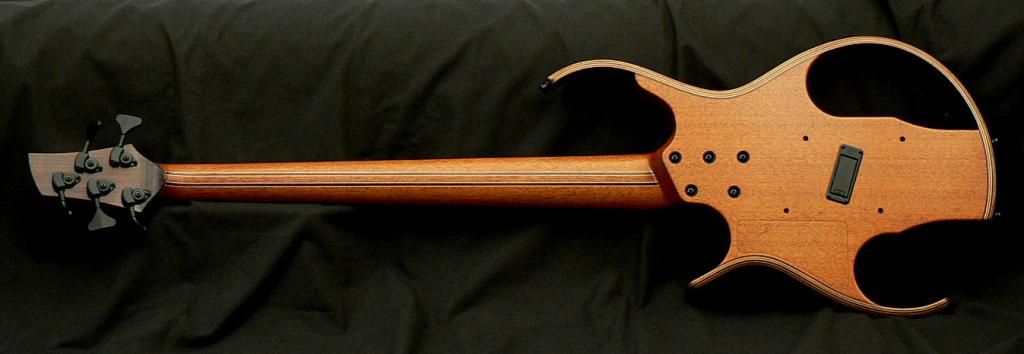
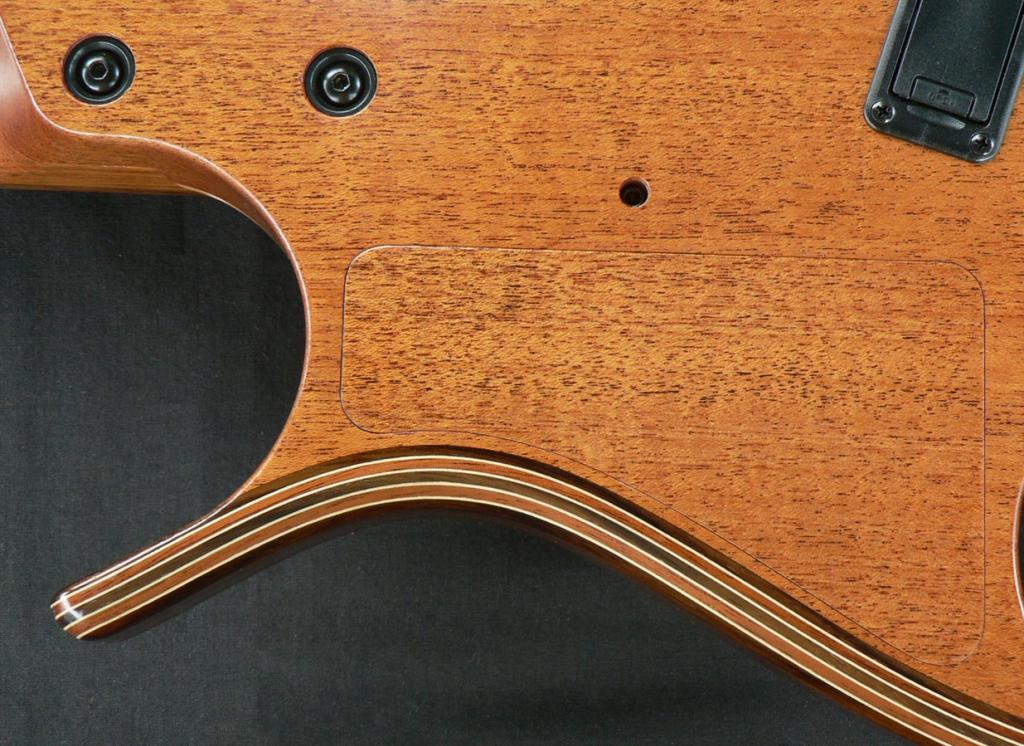
The control cover is held in place by magnets and shouldn't ever need to come off as I installed a battery box this time but, if it does, it's the suction cup trick again.
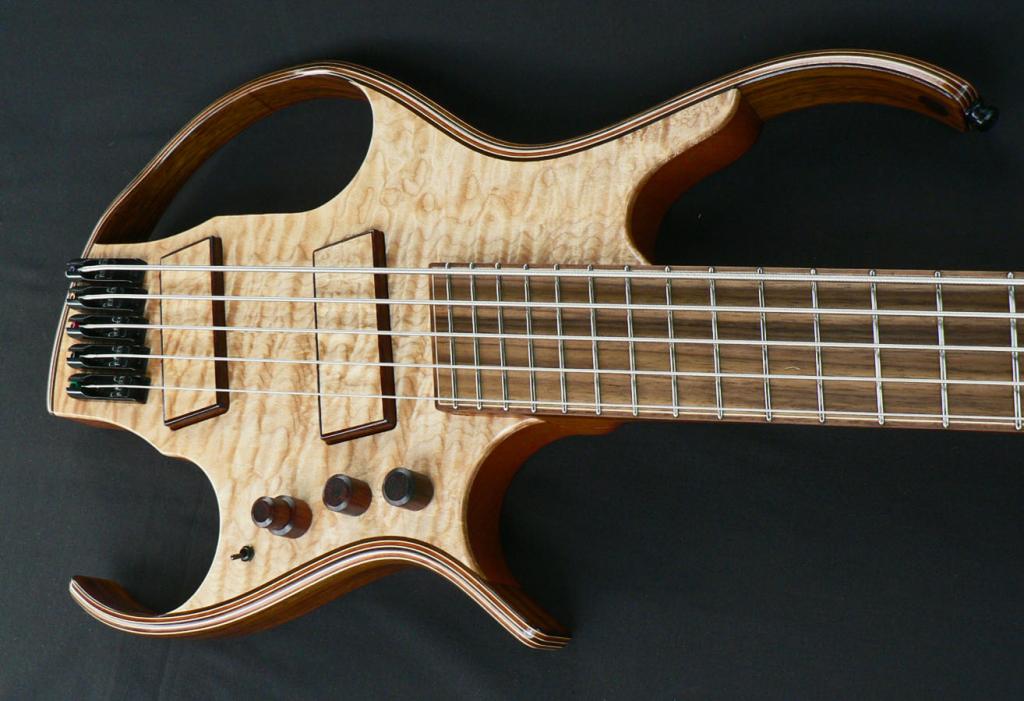
I find it very difficult taking photos of the maple top to show up the quilt figure. It's more striking in reality than in the photos
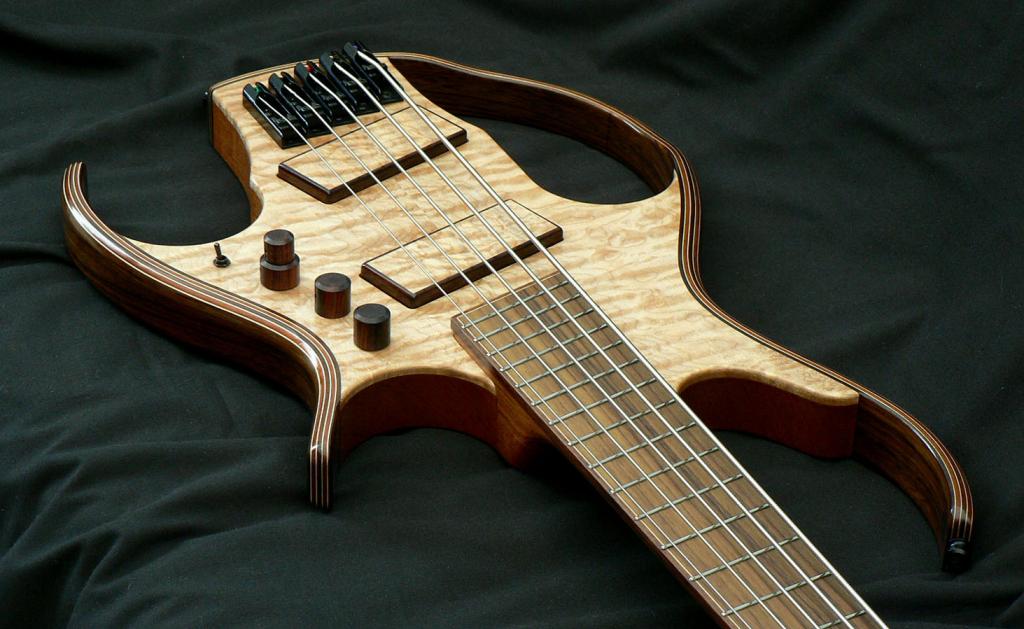
This photo shows the figure a little better. It came from the German supplier who has stunning maple but the prices are quite stunning too. This wasn't too expensive as it was rather small and had some defects but as a lot of this body 'isn't there' I was able to work around them.
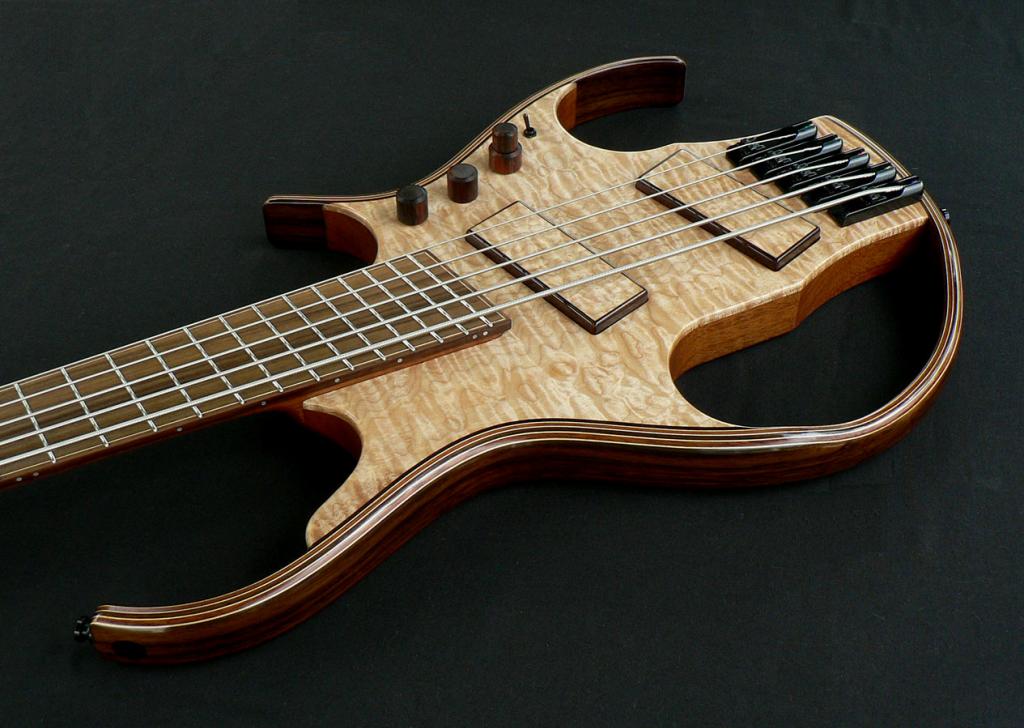
I took this photo with the reflections to show that you CAN get a gloss finish using Tru Oil. It's not a 'dipped in plastic' gloss, but it is shiny.

I tried to show the skewed headstock angle in this photo but the fanned frets make everything look wonky so it doesn't even look as if there is one.

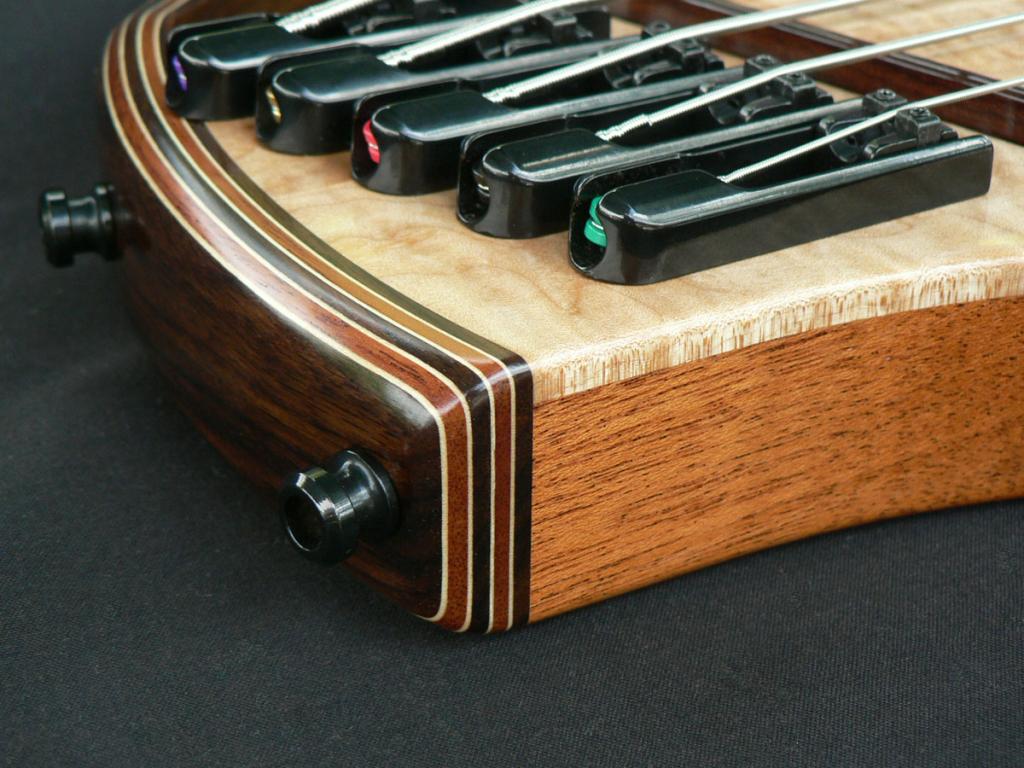
The twin strap buttons serve two purposes. I swapped the crappy screws they supply with strap buttons for very long chipboard screws to reinforce the glued joint between the rib and the end grain of the body. The buttons also stop the bass falling over if you stand it up, although I always put it on a stand. In fact I hardly ever use a strap as I play sitting down and the bass balances perfectly on my knee. It's the most comfortable to play of the basses I've made. What probably helps is that the body is only 40mm (1 9/16") deep and it only weighs 6lbs. I like electro-sockets with Switchcraft jack sockets.

This is a fairly accurate photo of the fretboard colour (on my monitor) which would be fine if it were walnut but I find a bit disappointing for EIR.
A close-up of the rib laminations.
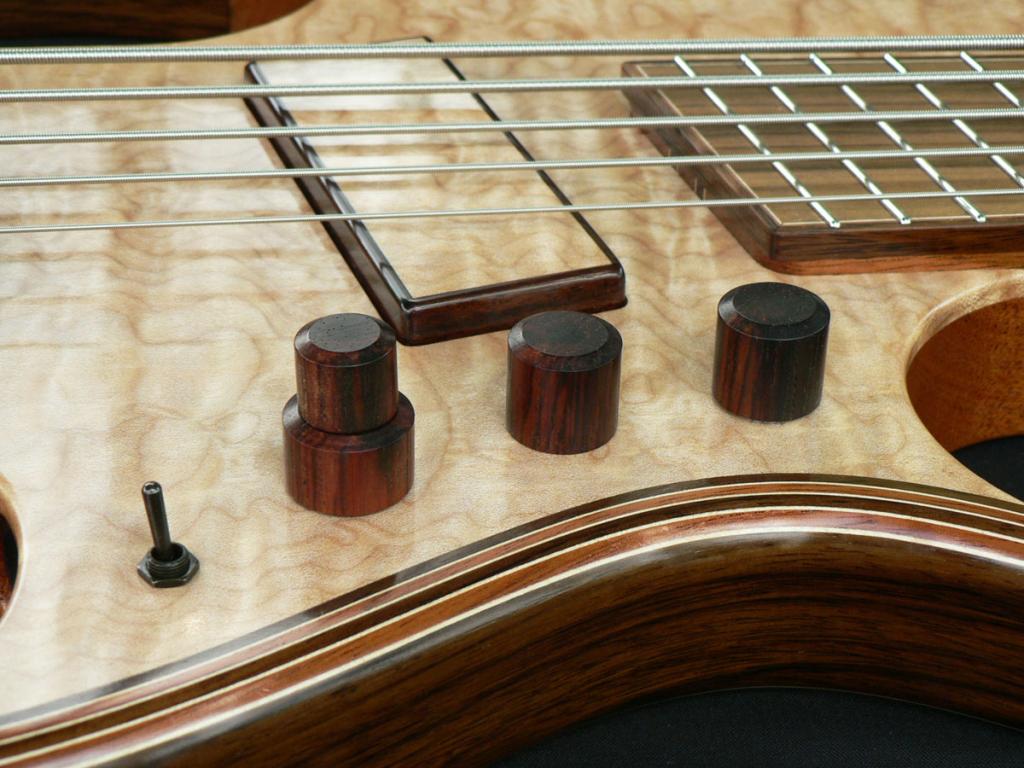
The control knobs aren't EIR, they are what, it seems, is now becoming known as 'South American Brownwood'. You may notice, after what I said about getting a gloss finish with Tru Oil, that in this and the last photo the ribs have a satin finish. I found that varying the time I left a coat of true oil before wiping it off again, varied the degree of gloss when it was dry. To get the gloss finish on the front I polished it up with Brasso! Nothing makes quilted figure pop like a gloss finish.
That dark circle on the upper horn is a rosewood plug. It's there so that the strap button screw (again, a longer woodscrew) isn't just screwed into the end grain of the laminates and should also help to solidify the end of the laminated rib.

That's all folks Thanks for looking.
The scale lengths are 876 to 914mm (34 ½" to 36"). My last bass was 33 ½" to 35" and although I was quite pleased with it, I thought the low B could still be better. I decided on 34 ½ to 36 as, after much measuring and drawing of plans. 36" was the longest I could make the B string without having to order special strings. Sheldon Dingwall obviously did more research than me, which is probably why his 5-strings are 34" to 37".
I was well into making the body when I had a sort of "Duh!" senior moment, realising that I hadn't taken any photos. At that point I'm afraid I thought "bother it" (censored) so there are no work-in-progress photos. Sorry. Here's a full frontal.
The whole thing is made from maple, mahogany and rosewood. Pity I didn't frequent the forum when the 3-wood challenge was on. The laminated 'ribs' (that's what you'd call them if it were an acoustic, and I can't think of another word) are a 9-piece sandwich of 2mm thick rosewood and mahogany with maple veneer in between. I had to pre-bend them in a Fox-type bender before laminating them.
The pickup covers are rosewood and maple, the maple being the pieces that were sawn out of the drop-top before it was glued to the body. The pickups are off-the-shelf Kent Armstrong humbuckers bought a few years ago from WD in the UK. The covers are only about 1.5 to 2mm thick but the pickups are embedded into them in epoxy so they become solid units. The preamp is a John East BTB01 with stacked treble and bass controls, volume and balance and an active/passive switch.
All the rosewood is East Indian (bass fingerboard blanks) from a UK supplier. I was a little disappointed by the quality and rather pale brown colour but as the supplier had already replaced the original order without question (they were thinner than advertised and had some worm holes) I couldn't complain.
The bridges are much cheaper copies of ABMs from Bezdez on Ebay. They seem to work fine to me.
The frets are stainless steel banjo frets and the fingerboard is flat. (There's no such thing as a zero radius. If you have to call it a radius, it's an infinity radius.
)Oops, I told a fib! This is the one-and-only construction photo. Getting all those bits of wood, covered in sticky fish glue lined up and clamped involved quite a lot of perspiration and expletives of Anglo-Saxon origin. I spent a long time on the plans trying to get both ribs out of the same mould, but in the end it didn't look right, so I had to make 2 bending forms and 2 laminating forms.
I can't think of any good reason for not having a zero fret. It makes life that little bit easier.
You can see how the extra-long-scale D'Addario B-string was only just long enough. The observant among you will also notice that I seem to have miscalculated the tuner positions. The B string isn't quite a straight pull and the G tuner is too near the nut. I don't know how that happened but with the headstock sloping back at a cockeyed angle because of the nut not being square to the neck centre line, it's not all that surprising. The tuners are Hipshots and the truss rod cover is held in place by magnets.
The head plate, used for the backstrap, was part of the same order and was lovely close grained purple stuff; pity the rest wasn't the same. I actually had to carve a partial recess in the volute to make a flat surface for the G string tuner.
The neck is Honduras mahogany, laminated with rosewood and maple veneer to match the ribs but I think the body is probably khaya (African mahogany). There are cavities in the body between the pickups and in the upper bout to reduce weight to a minimum.
The control cover is held in place by magnets and shouldn't ever need to come off as I installed a battery box this time but, if it does, it's the suction cup trick again.
I find it very difficult taking photos of the maple top to show up the quilt figure. It's more striking in reality than in the photos
This photo shows the figure a little better. It came from the German supplier who has stunning maple but the prices are quite stunning too. This wasn't too expensive as it was rather small and had some defects but as a lot of this body 'isn't there' I was able to work around them.
I took this photo with the reflections to show that you CAN get a gloss finish using Tru Oil. It's not a 'dipped in plastic' gloss, but it is shiny.
I tried to show the skewed headstock angle in this photo but the fanned frets make everything look wonky so it doesn't even look as if there is one.
The twin strap buttons serve two purposes. I swapped the crappy screws they supply with strap buttons for very long chipboard screws to reinforce the glued joint between the rib and the end grain of the body. The buttons also stop the bass falling over if you stand it up, although I always put it on a stand. In fact I hardly ever use a strap as I play sitting down and the bass balances perfectly on my knee. It's the most comfortable to play of the basses I've made. What probably helps is that the body is only 40mm (1 9/16") deep and it only weighs 6lbs. I like electro-sockets with Switchcraft jack sockets.
This is a fairly accurate photo of the fretboard colour (on my monitor) which would be fine if it were walnut but I find a bit disappointing for EIR.
A close-up of the rib laminations.
The control knobs aren't EIR, they are what, it seems, is now becoming known as 'South American Brownwood'. You may notice, after what I said about getting a gloss finish with Tru Oil, that in this and the last photo the ribs have a satin finish. I found that varying the time I left a coat of true oil before wiping it off again, varied the degree of gloss when it was dry. To get the gloss finish on the front I polished it up with Brasso! Nothing makes quilted figure pop like a gloss finish.
That dark circle on the upper horn is a rosewood plug. It's there so that the strap button screw (again, a longer woodscrew) isn't just screwed into the end grain of the laminates and should also help to solidify the end of the laminated rib.
That's all folks Thanks for looking.