• TalkBass has been independent since 1998. Add your voice.
    Create a free account to reply to discussions, view embedded media, and browse with fewer display ads.
    Join freeLog in
    Want zero display ads or expanded classifieds tools? Compare plans.

A short scale 4-string headless

As you may have gathered from the last photos, I more or less finished the neck without taking any. The last things to do were cutting the nut slot.
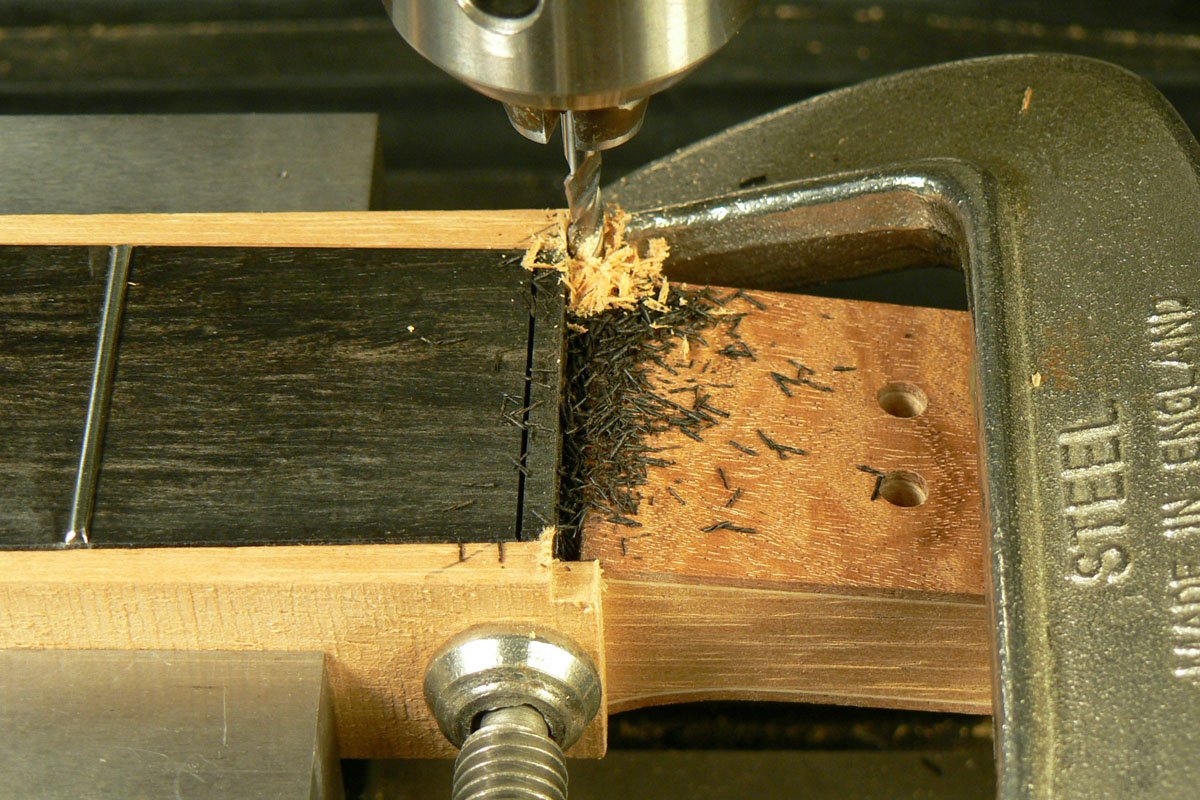
N030.JPG


And enlarging the holes for the string anchors.
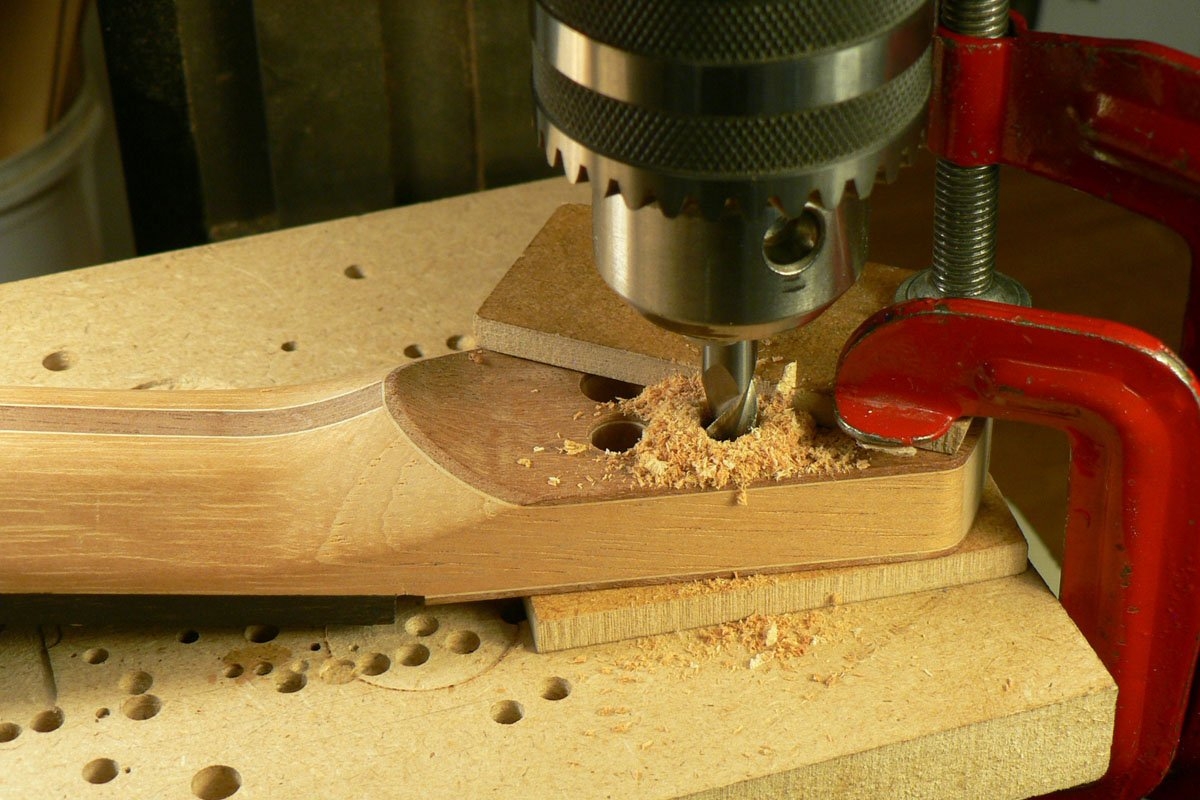
N031.JPG


I made the string anchors and grommets. I didn’t take photos but they would have been duplicates of the ones I took 13 years ago (where does the time go?).

https://www.talkbass.com/threads/5-string-fanned-hybrid-headless.898958/page-9
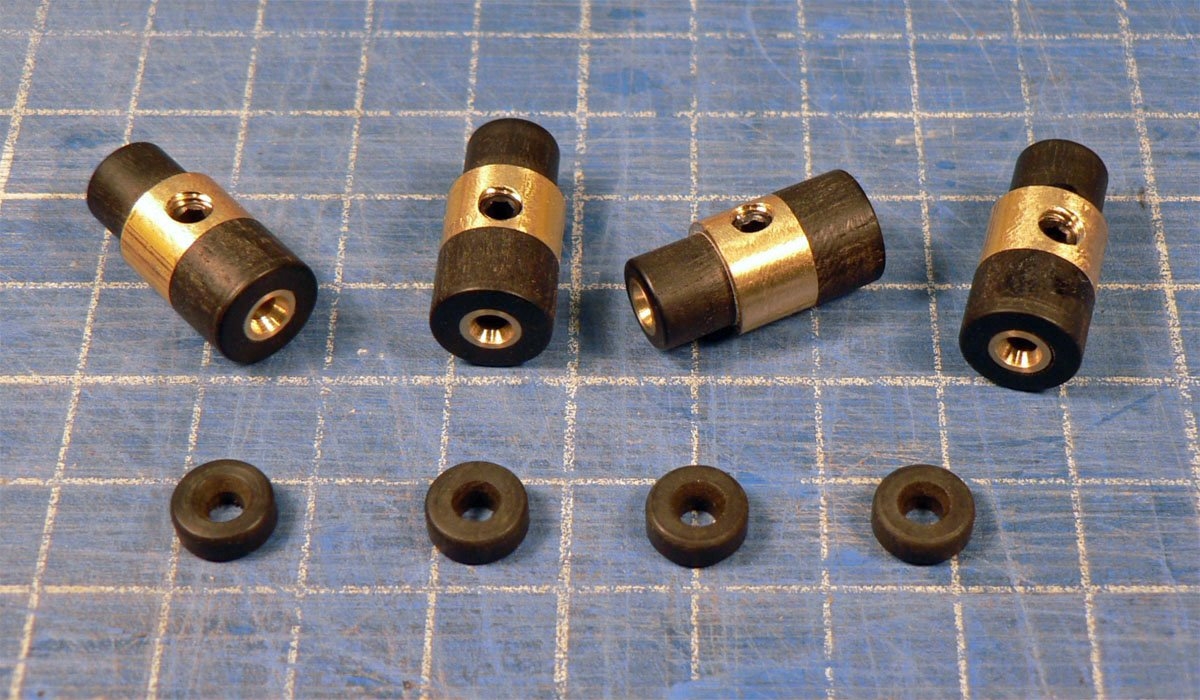
N032.JPG


Now I need to apply some finish to the wooden bits and put it all together.
 
Last edited:
So I finally got all the bits together. Here’s the full frontal. The top and the front and back of the ‘headstock’ are pore-filled with Z-poxy Finishing Resin and French polished.

01.JPG


The back and the neck just had two coats of satin Osmo.

02.JPG


As I thought it might, the resin pore filler got into the joint between the repair plug and the body and showed it up. It’s not too bad and I think that if you don’t know where to look, you’d have trouble finding it.

03.JPG


The closer you look, the more obvious it becomes but I’ve decided to leave it alone as it doesn’t bother me and it’s a reminder to take more care next time.

04.JPG


Again, you see it if you look for it, but you don’t if you don’t.

05.JPG
 
I mentioned that the neck protrudes out of the body ‘more than usual’, and this is what it looks like. I don’t mind it. It feels slightly different but doesn’t bother me. Thanks again to TB members for their advice on doing the droopy drop-top arm bevel.

06.JPG


The string anchors are a bit of a fiddle to make but there are no exposed string ends. Has anyone torn their clothes (or their person!) on them?

07.JPG


Although it doesn’t photograph well under natural daylight, the neck profile is trapezoidal. I had two goes at it. At first it was symmetrical like the drawing on the left, but it felt a bit chunky under my thumb so I took it all apart again and shaved the bass side down a bit more so that now it’s more or less like the drawing on the right.

08.JPG


Newtone strings made to measure.

09.JPG


When I ordered the Guyker tuners I thought I may be able to modify them and add thrust bearings but that’s not possible as the knobs are in fact threaded tubing so the male thread on the brass component is much too big for a bearing. I applied a smear of grease to the threads and the nylon (?) thrust washer and they work fine but when the strings are nearly up to tension they are a bit too much for my arthritic old thumbs. Fortunately there are notches in the knobs so I made a tuning knob.

10.jpg


Here it is in use. I just have to make sure it’s in the case with the bass. Perhaps I’ll make another so the one in the case stays in the case.

11.jpg


That’s all folks, except that I can’t finish without saying an enormous Thank You to TB stalwart Todd Mullins @ctmullins for his help, patience and generosity when I pestered him with questions about pickup wiring problems.

If you have been, thanks for watching.
 
Last edited:
This bass has many features I'm not the biggest fan of (natural finish, wooden pickup covers...), but the here all the details come together in a whole that's more than the sum of the component parts. Really nice!

Would there be enough wood left under the bridges to make a recess for the tuning knob behind the bass and use magnets to keep it in place?
 
Last edited:
I mentioned that the neck protrudes out of the body ‘more than usual’, and this is what it looks like. I don’t mind it. It feels slightly different but doesn’t bother me. Thanks again to TB members for their advice on doing the droopy drop-top arm bevel.

View attachment 7222498

The string anchors are a bit of a fiddle to make but there are no exposed string ends. Has anyone torn their clothes (or their person!) on them?

View attachment 7222499

Although it doesn’t photograph well under natural daylight, the neck profile is trapezoidal. I had two goes at it. At first it was symmetrical like the drawing on the left, but it felt a bit chunky under my thumb so I took it all apart again and shaved the bass side down a bit more so that now it’s more or less like the drawing on the right.

View attachment 7222500

Newtone strings made to measure.

View attachment 7222501

When I ordered the Guyker tuners I thought I may be able to modify them and add thrust bearings but that’s not possible as the knobs are in fact threaded tubing so the male thread on the brass component is much too big for a bearing. I applied a smear of grease to the threads and the nylon (?) thrust washer and they work fine but when the strings are nearly up to tension they are a bit too much for my arthritic old thumbs. Fortunately there are notches in the knobs so I made a tuning knob.

View attachment 7222502

Here it is in use. I just have to make sure it’s in the case with the bass. Perhaps I’ll make another so the one in the case stays in the case.

View attachment 7222503

That’s all folks, except that I can’t finish without saying an enormous Thank You to TB stalwart Todd Mullins @ctmullins for his help, patience and generosity when I pestered him with questions about pickup wiring problems.

If you have been, thanks for watching.


I ran into the same thing with guitar tuners that look like that, I think I got them from Guyker. The inside of the knurled knob on those was a 4mm(6 maybe?) hex and I just used a hex wrench to tune up. The outer brass tubing didn’t seem to be threaded very deeply and I had a couple that the threads pulled out of either the tubing or the knob. I ended up going through about 9 to get 6 good ones. There were some other issues with that guitar so I scrapped it and am making a new body with Nova tuners.
 
I've come back to look at this more than a few times and there's just something absolutely right about it. I think it's the overall proportions and how well all the details come together. I guess that's called great design, maybe?
 
The level of precision and craftsmanship on display here is truly humbling. If I ever get feeling a little cocky on one of my builds, re-reading this one will set me straight as to my relative hackery and inexperience. The router slip repair alone is as close to perfection as anyone has a right to expect, and how we deal with the inevitable mistakes is the true measure of a Craftsman. A pleasure watching this build, Sir.
 
BTW, I'm totally stealing your method for drilling the electrosocket hole. :thumbsup: I've always free-handed it, and more than once with disastrous results.

As I've said before,, my build threads aren't 'how to do it', they are 'how I did it' and if there's a better way I'm all ears. But if something I did helps someone else, I couldn't be more pleased. Feel free @Gilmourisgod .
 
No Matt, the finish isn't done yet and that's another good suggestion. But here's the next episode.

I left it overnight and the next day skimmed it down flush with the surface. The result was very disappointing. I'd used epoxy to glue it in (I don't really know why) and perhaps this was a mistake because there was a dark brown circular glue line that was shouting "this is where he messed it up"! Perhaps the epoxy soaked into the wood; I don't know, but I decided I'd have to have another go at it (and forgot to take a photo).

So I needed a bigger Forstner bit and the only place I had a chance of getting one in a hurry was Amazon. Like 'em or hate 'em, it was in my post box the next day.

This time I made a sacrificial block which I wedged hard into the corner before using the new Forstner bit, made the plug slightly tapered, put a smear of Titebond around the part of the hole that the plug needed to be glued to and rammed the plug in.
View attachment 7194229

When the glue was dry I took it apart and started skimming it flush and it looked much more promising.
View attachment 7194230

Finally I re-routered the cut-out and this is what it looked like. It's not quite invisible but I don't think you see it if you don't know it's there. Of course I may have a problem when it comes to finishing because I gave it a wipe with alcohol and a very thin line showed up. If anyone knows how to avoid it becoming visible under finish I'm all ears. If it is too noticeable I might go back to the ramp or thumb rest idea.
View attachment 7194232
Wow that repair turned out ... just wow.
 
Wow. My father taught me woodworking, and I have a full shop being constructed in the next few months for all his tools he left me. I can only hope to develop the skills I see here before my life ends. I enjoyed reading this thread immensely. Very inspiring.
 
  • Love
Reactions: ctmullins