• TalkBass has been independent since 1998. Add your voice.
    Create a free account to reply to discussions, view embedded media, and browse with fewer display ads.
    Join freeLog in
    Want zero display ads or expanded classifieds tools? Compare plans.

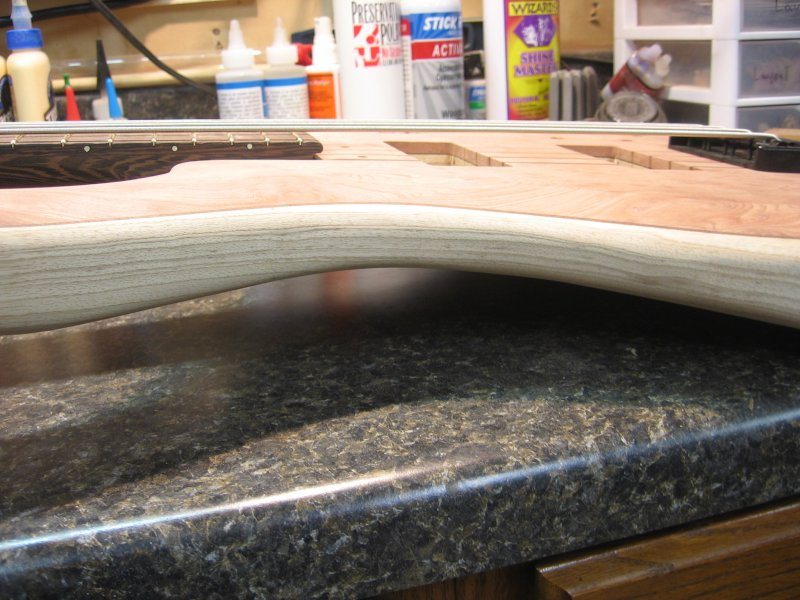
An MTD style 4 string, Redwood, Ash, Wenge

Thanks for all of the feedback guys. It really gives me confidence in what I am doing here.
2200j-012.jpg

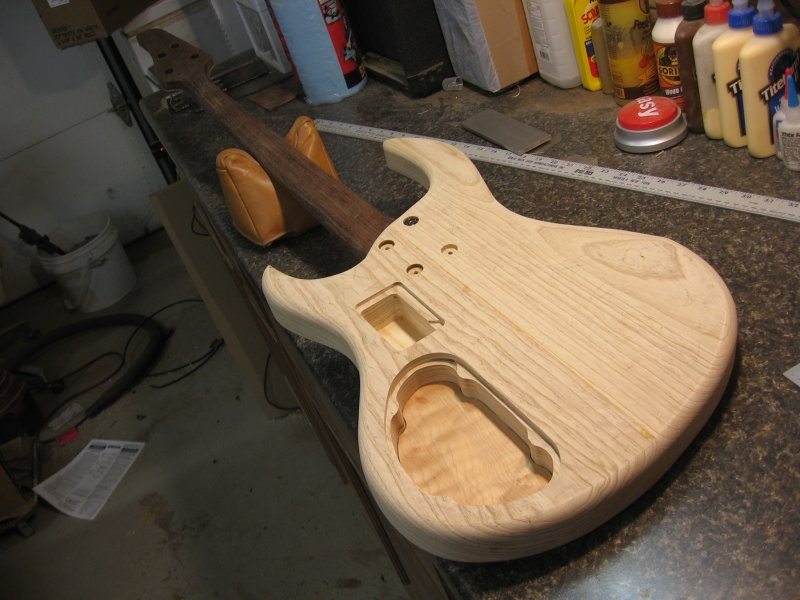
I have cut the electronics cavity using my templates made of 1/2 inch plywood. I redesigned the interior of the electronics cavity to add another point for the magnets so that the cover will not tip and wobble. I used my standard cover template to cut the recess. Once I got the Pope preamp, I discovered that some of the wiring will need to go straight up out of one of the modules. I needed to make my cavity a little deeper. This got into the Redwood top so to strengthen it a bit, I laminated a thin veneer on the inside to help solidify the control area. The Redwood we used is pretty solid but I feel better with a little backing on it.
2200t-018.jpg

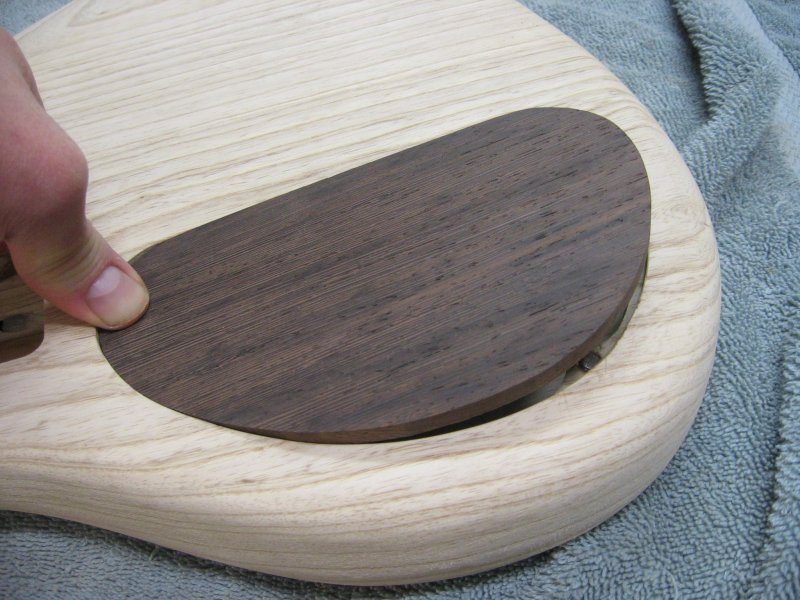
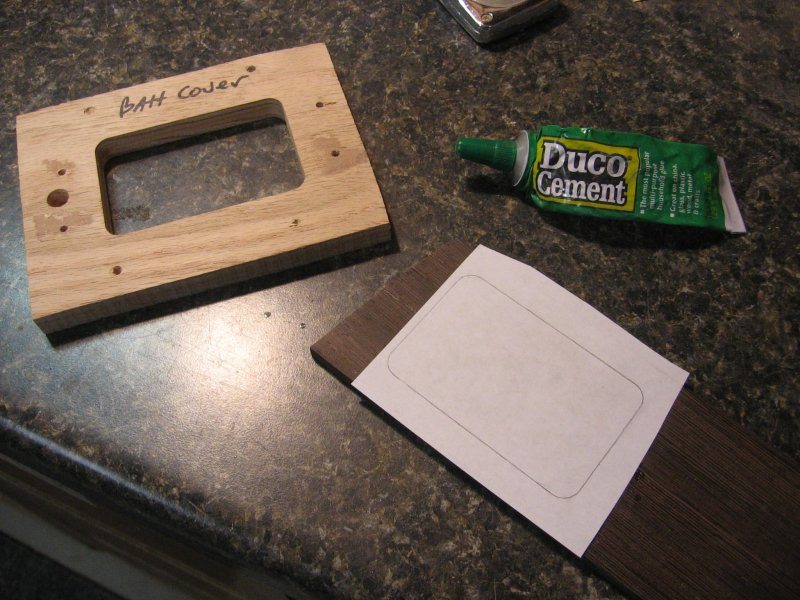
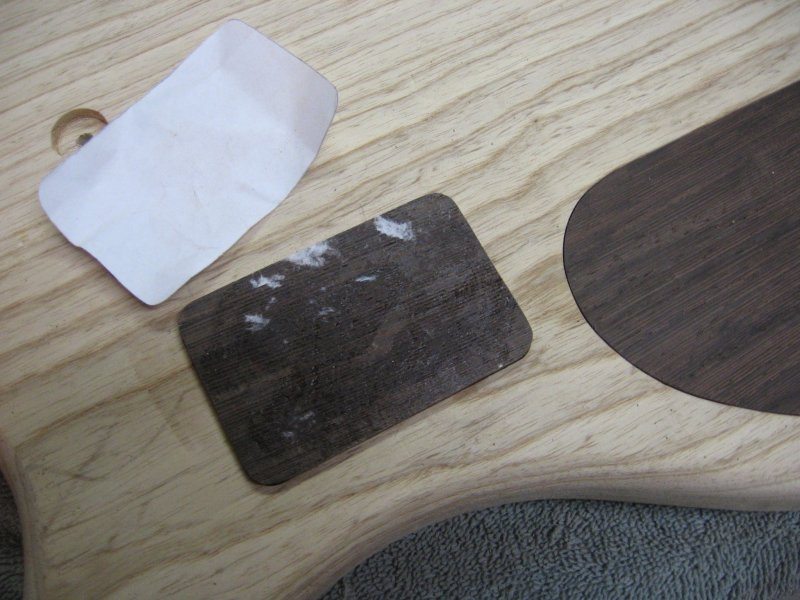
The covers will be Wenge. To cut the covers as accurately as possible, I needed to be able to see the lines better. Wenge is very tough to see pencil lines on when using the band saw. I decided to trace the shape, using the templates, onto some paper. I then applied a thin coat of Duco to the Wenge and pressed the paper onto the wood. Now I have a clear view of the lines to cut the covers out with. I always cut the covers thicker so I can sand them back to fit into the body well. This will remove any glue residue along with the paper.
2200t-023.jpg

You can see that the cover is taller than the recess at this time.
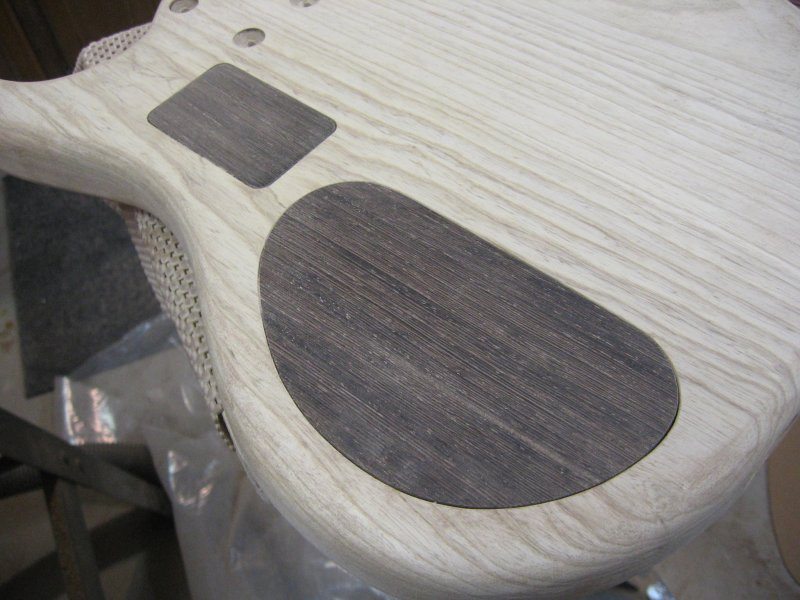
2200t-001.jpg

2200t-025.jpg

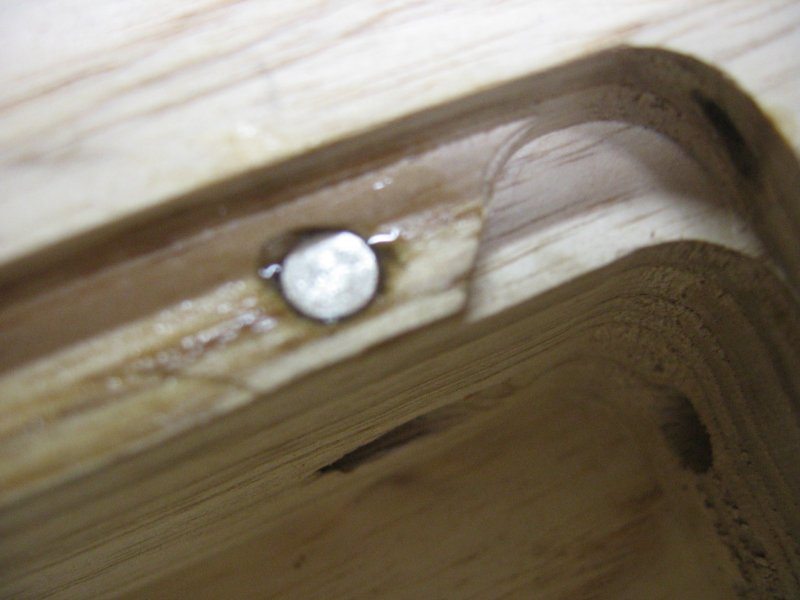
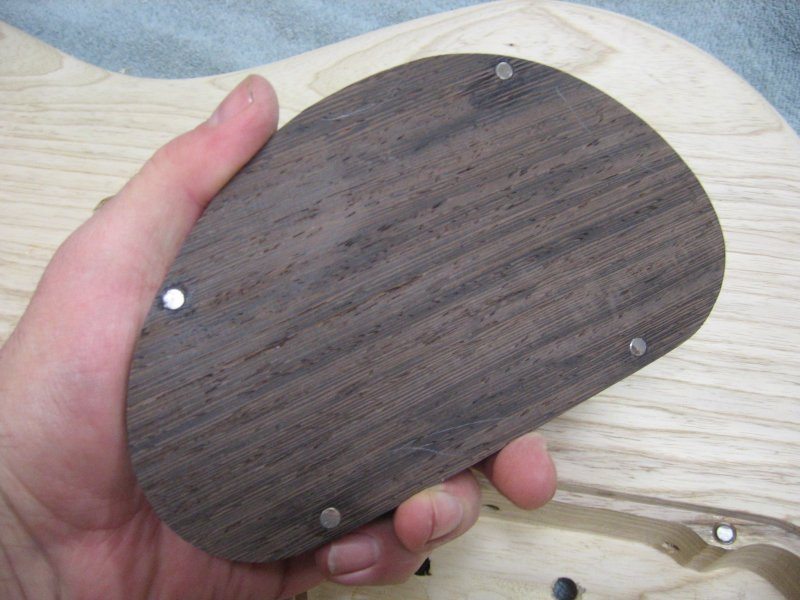
I used epoxy to glue in the magnets into both the covers and recess cavity. I only messed up one of the magnets where I got the poles switched. I put the cover in and it flew back out. after I fixed that the cover snaps right into place. You can see that I left a low spot next to the magnet. This is the area that you press to pop the cover out.

like this....
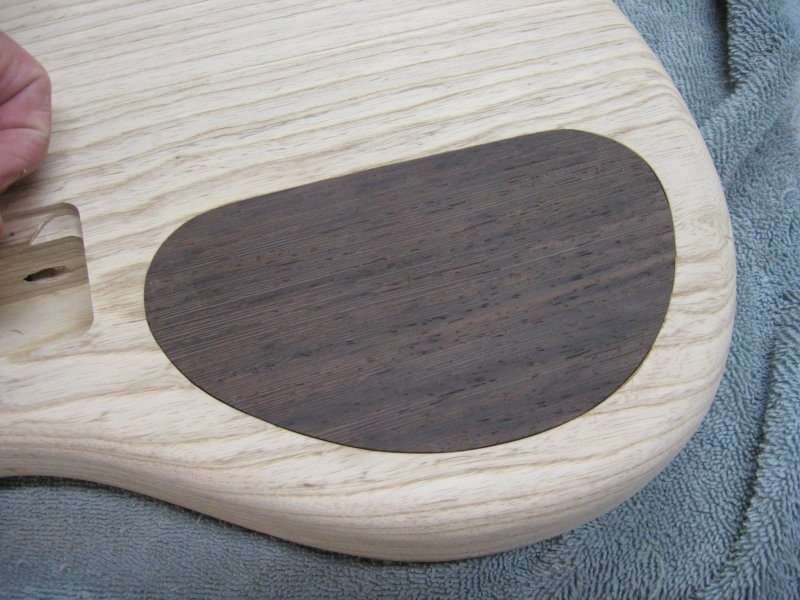
2200t-020.jpg

2200t-021.jpg

2200t-019.jpg

Next....

2200z-017.jpg

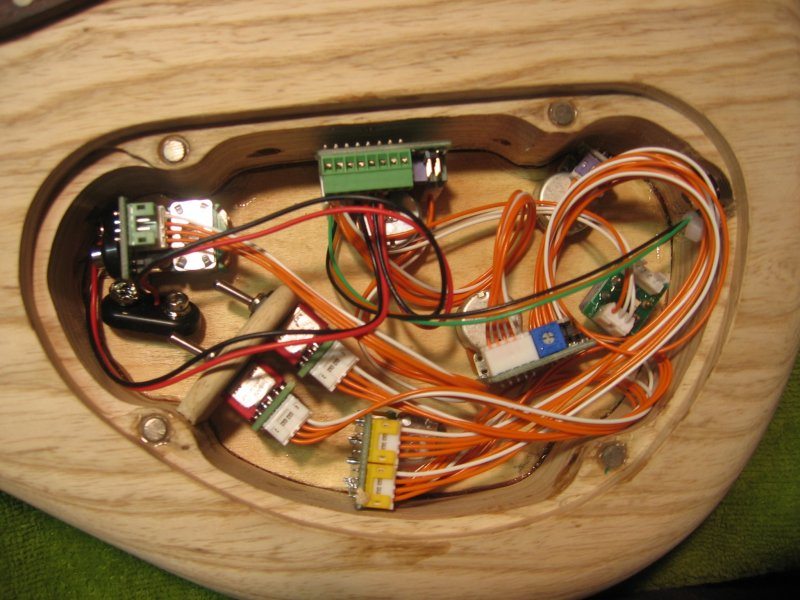
I added a little wall to support two mid-control switches and then dry fit all of the preamp into the cavity. We will be shielding the cavity with conductive tape but for now I just want to see that it all fits. The battery connectors with be in the battery compartment.
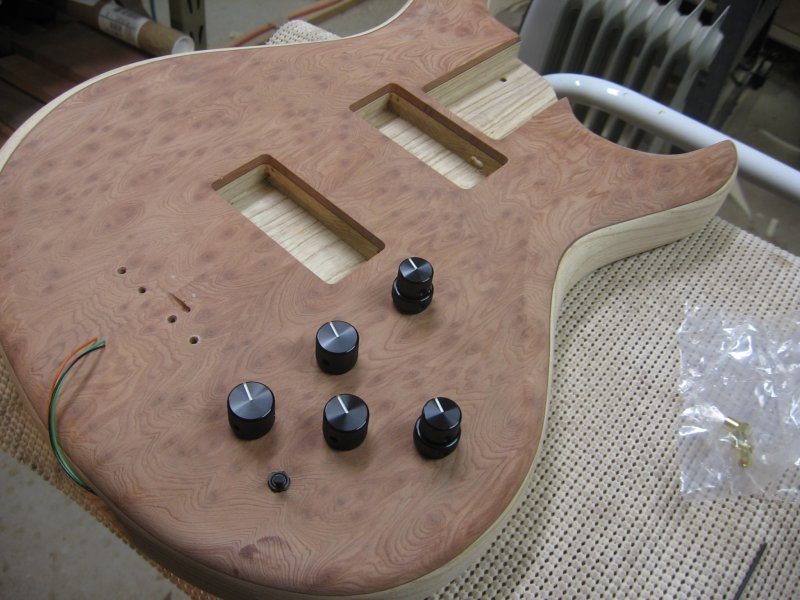
2200z-011.jpg

Here is the front with what we have been calling the "Gucci" knobs as they are rather costly. They do function well and have two set screws to help take out some of the wobble. The little switch is an active/passive switch.
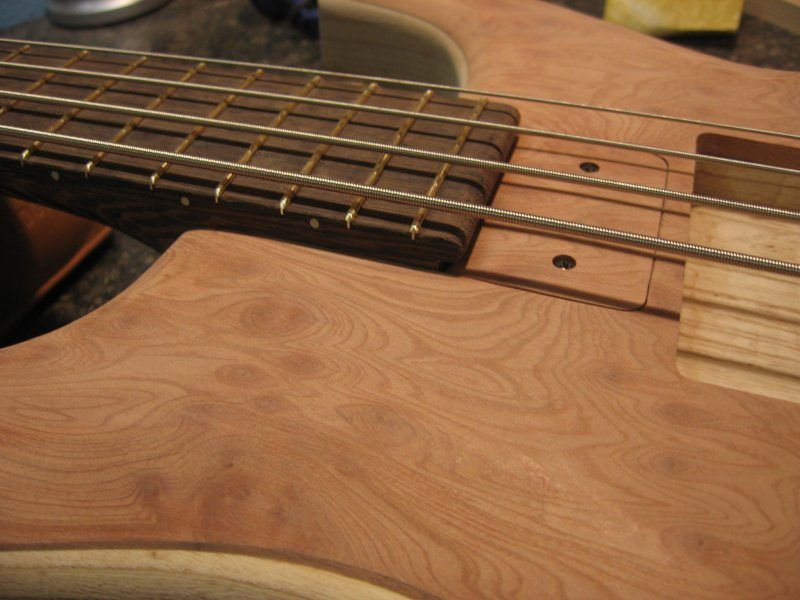
2200n-006.jpg

2200n-007.jpg

2200n-008.jpg

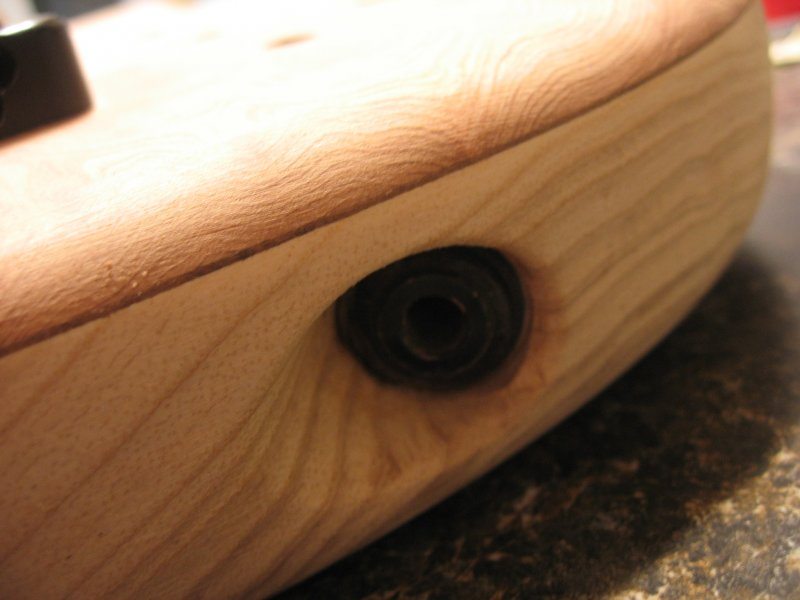
Next I refined some of the detail parts and deepened the belly cut before putting some strings on to check the action again. The customer wants to be able to get under the strings so I wanted to make sure the neck angle allows for that. I cleaned up the output jack recess and made a cover for the neck tongue.

Next time I will show the logo inlay and some shots of the pre-finish assembly.

Thanks for looking and for the nice comments.

 
How is the weight and/or neck-dive concerns with a wenge 5er neck? This build intrigues me as I’ve been thinking about building a 5 string, wenge neck + swamp ash with inspiration from warwick (fortress), callowhill (obs), and heavily contoured jazz bass. Considering making it 33" for playability and to reduce neck-dive if I were to go with a heavy neck wood.

With the warwick being the only builder I am familiar with using the wood, and they not being known for their concern with top-heavy basses (thumb) I would love your thoughts on how that influences this build.
 
How is the weight and/or neck-dive concerns with a wenge 5er neck? This build intrigues me as I’ve been thinking about building a 5 string, wenge neck + swamp ash with inspiration from warwick (fortress), callowhill (obs), and heavily contoured jazz bass. Considering making it 33" for playability and to reduce neck-dive if I were to go with a heavy neck wood.

With the warwick being the only builder I am familiar with using the wood, and they not being known for their concern with top-heavy basses (thumb) I would love your thoughts on how that influences this build.

Thanks for the question.
I am not at all concerned with neck dive on this bass. Most neck woods I use are heavier (I never use light weight woods like Mahogany for bass necks) but the trick is where the upper horn lands and the weight of the body. I try to always extend the upper horn out to reach the 12th fret location. That usually seems to balance the bass pretty well. If the body is super light, and the upper horn does not reach the 12th, as with a tele style, you will have neck dive. As you can see, the upper horn on this bass reaches the 12th. I also have a brass bridge and will place the bottom strap button toward the bass side as that is what the customer wants. Both help in balancing the bass. I use Hipshot Ultra-lite tuners as well. They are made of aluminum and weigh less than Gotohs.
I really have not noticed a difference in weight between Hard Maple necks and Wenge necks. Both are hard and dense woods . The bass with the electronics, hardware, strings, and batteries installed weighs 8 pounds according to my scale. Finish may add some weight but not much.
 
I have been busy correcting a few issues that came up during the finish stage. I will elaborate later on those issues.

So, as we left the bass last time she looked like this.
2200z-014.jpg

I had put some old strings on to see that everything is copasetic. I am happy with how she plays and everything functions as it needs to.
I need to prep for finish, but first she needs a logo. After I pass an instrument as being up to my standards, I give her a logo. In this case she is getting a Drake script style logo as opposed to a standard D logo. We cut the pieces out of real shell and inlay them into Ebony.
2300a-013.jpg

Then we trim the Ebony to mimic the basic shape of the inlay.
2300a-024.jpg

Then we can easily inlay that whole mess into the headstock. With soft light colored wood such as this Redwood, sharp corners or pointy shapes would be problematic. Since we do not use CNC machines to cut the shell or pocket, we can't get super fine with detail. By doing the inlay this way, we can produce a nice logo and then decide if it is worthy of going into an instrument. If not we make another inlay. Better to screw up the inlay and re-make it than replacing the peg head veneer if we screw up inlaying directly into it. The outer perimeter of the whole piece (Ebony and shell) is much more rounded and easier to cut the recess for with a larger down cut bit to minimize fuzz in the soft Redwood. Ebony dust and some thin super glue applied over virtually hides the gaps and fill areas. We don't do stickers here.
2300d-016.jpg

And here the logo is after I have added some Ebony dust and thin super glue. All filled and smooth. Next I applied some Seal-A-Cell oil/varnish from General Finishes. Well, I should say that I tried Minwax Wood Hardener first to try to A) harden up the wood so that I could sand out any of the small dings that you get from even just looking at the Redwood. And B) to pop the grain. Well after days of sanding and regret, I will never use the Minwax crap again. It worked beautifully on the test pieces but in real practice on a real bass, CRAP. I scraped and sanded out the deep blotchy spots in the Ash and Redwood. The stuff never hardened and remained gummy after a week. Bad day out, that.
Anyway, I decided that the best results have been from applying a thin layer of the GF Seal-A-Cell and let it dry for 4 days. Then I lightly scuff off any shine with the super fine grit 3M sanding pads. I break them in before using them on the instrument. Deep scratches would be a bad thing.
2300d-011.jpg

Here is a shot of the body with a coat of Seal-A-Cell on it. It is a very thin varnish that penetrates deep into the wood so you can clean up any imperfections without too much risk of cutting through the oiled wood. If I was to sand with coarse grit or put a lot of pressure on the sanding pad, then I would cut through. Just lightly sand just enough to remove any shiny areas and remove dust nibs. I then use the air compressor to blow the dust off.
This sealer is compatible with the water based finish I use in spite of what some may say about oil and water. General Finishes has endorsed me using the sealer and then the water based over top as long as the sealer is fully cured. The sealer does in fact cure hard if applied thin. If you make a thick puddle then it will be an age before it cures. Also, if applied over oily woods like Cocobolo or Rosewood it seems to take forever to cure. Those particular woods seem to look OK with just the WB finish applied directly to them. Seal-A-Cell is not a filler and should not be used as one. I used to use a sealer filler but have left that practice behind as I was getting too much shrink back and shiny spots under the finish. I now just pop the grain and fill any pores with the actual finish. A note here: When I first read about using the water based finish I did not see too much said about how WB finish does not pop grain or make the wood look very life like. In fact the WB by itself is pale and lifeless looking. A piece of beautiful Walnut will look pasty and will not pop. The Seal-A-Cell makes the wood look as if it is finished with an oil based product. Once cured, clear coats of WB protect the wood but do not change the nice color and grain showing. It is not a secret but it does not seem to be advertised either. If you are new to finishing and looking at WB finish, be aware of this. I do not know if KTM-9 or Target brands products do this as I have not seen anything saying that you need to pop the grain with a solvent based product first, but every other WB finish I have messed about with has had the same problem of not looking to good by itself.
2300g-009.jpg

Thought the Seal-A-Cell is not a finish and will not last very long as a finish, it does seal the wood fairly well and makes a great raw neck finish. This Wenge neck really does not need a finish but I like the wood to look nice and dark so I apply just enough to seal the wood without feeling finished, if that makes any sense. I actually sand the oil into the wood so that some of the deeper pores get filled by the sealer and dust slurry. Only the peg head will get the actual finish coats. I may do two or three light coats with some sanding in between to achieve a satin raw look that feels smooth. The sealer prevents skin oil and sweat from getting into the pores and turning gray. You know, the Mojo. As I have said before.....mojo=DNA, yuck. The sealer will get down into the pores and will make it easier to clean. If the wood ever shows some wear, the owner can clean by wiping the neck down with naphtha and then applying some more oil to revitalize the appearance.
2300g-004.jpg

This is a picture, all be it blurry, with a look at the sealer when wet. The sealer dries to a more satin sheen and soaks in more. This shot was right after application. You can see that the grain popped but the color is not as rich as I would like it. Redwood is actually more pinkish than anything, though I have had Redwood look more brown naturally.
2300h-008.jpg


By mixing some Color Tone or Trans Tint (same stuff different label) with some clear gloss water based finish, I was able to enhance the color of the Redwood to bring out a more rich color. I am leaving the Ash un-tinted as per request of the customer. the tinted finish was applied days after the sealer as the sealer needs to cure properly.
2300h-006.jpg

So there you have the color coats. I will start spraying coats of water based urethane soon. Only a couple of weeks away from being wired up.

Thanks for looking at the build.
 
Hey PJ. I applied the tinted finish by using a folded up piece of blue shop towel. I mixed just a little bit of finish and tint as mixing enough to spray is wasteful. If you are careful and use just the edge of the towel, you can dab the finish right up to the accent line. I suppose you could mask off along the accent line with tape, but that takes time and I was careful. I did the same to the peg head avoiding the logo as to not color it. This is one reason why I like accent lines around top perimeters. it allows you some grace when coloring certain parts. If you get some tinted finish on the dark accent line, it does not show. If I got anything on the Ash I used a razor blade to remove it after it dried. I scrapes off easily until fully cured.
I like applying color coats by hand when I am trying to blend patchy colored woods. It allows more control and I can blend it better. The coats are thin and do not build very thick.

I have started using a spray gun for the clear coats and you will see my set up later in this build.
 
Ok, time to wrap this bass up. I have been inundated with custom work and new orders so TB posts had to take a back seat for awhile.

Last time I had applied the color coats to the top and peg head face. During this build I decided to buy and use a HVLP gun to finish my instruments with better results in less time. I quickly assembled this handy dandy spray both out of .75 inch pink ridged foam used to insulate buildings. It is light in weight and went together in rapid fashion. I placed two layers of furnace filter and a standard box fan, behind the booth, to pull the overspray away from the instrument. Works well. It did not need to be explosion proof fan as I am only going to spray water based finish.
2300p-008.jpg


Obviously this is not the neck I am using in the current build.

2300p-003.jpg


Here I have sprayed about 5 coats of the clear gloss urethane finish.

2300p-004.jpg


I coated the whole body and face of the peg head. The Wenge neck and fret board will just get some light oil that will not build on the surface.

I let the finish set overnight and then sanded it all back so that all pores and any little imperfections were sanded out. I used 500 grit paper on a cork block to knock back the finish.

Two days later I sprayed 6 coats on in rapid sequence. I only let the finish stand for 40 minutes between coats. Then I let the finish set for two weeks to harden up. This finish will be a matte style so I do not need to let it go as long as if I was going for a glossy high polished look, but I want the finish to cure a bit anyway for durablility.

2400f-009.jpg

I started out with 500 grit sand paper and a rubber block to knock back the dust nibs or any spray texture. You can sand quite a bit with the 500 grit as the finish is hard enough that you have to really try to cut through accidentally.

2400f-007.jpg

Next, I used some 3M sanding pads to smooth out the sanding scratches.
2400f-008.jpg

The pads are about 400 grit, which would leave more scratches than the 500 grit had I not used old broken in pads.
2400f-006.jpg

I applied a little Dr. Ducks Axe wax to the pad to help keep deep scratches from forming. This stuff is great as a string lube, cleaner, and fret board oil. It has no silicone in it and is safe for freshly finished surfaces.

After some touch up work with some 3M synthetic wool I was able to assemble the bass.

2400k-015.jpg

The customer specified that the cavity be shielded so I went about doing that.
2400k-018.jpg


I then installed the hardware and electronics. We used Reed James pickups and a Michael Pope Flexcore preamp in this bass. I will cover the specs and all in the next post.

You can see how the finish turned out. Soft looking and smooth. This finish will not show finger prints or the basic wear and tear that the bass will go through. It is also easy to repair.

Thanks for checking in. I will have the finished pictures to post this weekend.
 
I was able to get the bass tested and delivered last Friday and have yet to hear from her new owner. He was going into the studio the next day but I am not sure he will use the new bass or not. I imagine he will chime in here with a review at some point.

The specs of this bass are:
33 inch scale
Wenge on Wenge neck and fret board.
22 frets plus zero fret
vintage gauge EVO gold wire
Swamp Ash body with Redwood top. (Matching peg head veneer)
Hipshot brass B style bridge with .750 spacing
Hipshot Ultra Lite tuner including the D tuner.
Reed James reversed P pickups.
Pope Flexcore preamp with two mid range control switches located inside the cavity,
4 band EQ, and a bypass switch on the top of the bass. 18 volt
Magnet mounted cavity covers
The bass weighs 8 pounds exactly.
Custom ordered Drake and crown inlay.
Luminlay blue glow in the dark side dots.


2400n-001.jpg

2400n-002.jpg

2400n-004.jpg

2400n-012.jpg

2400n-013.jpg

2400n-014.jpg

2400n-019.jpg


This was a great project for me and I hope you have enjoyed viewing it.
 
Man, that looks really good.

I do always like the looks of your builds overall, but imo this is different enough from your "usual" basses but still looks enough like your work that you should consider it a standard bass in your line.

Nicely done, Mr. Drake.
 
Last edited:
Thanks Wraub. I do like this design very much but it is a little too close to an MTD for me to make it a regular model. I keep all templates that I make so I can repeat a design, but I am sort of going away from any standard model designs. I was not getting much in the way of standard model requests. Everyone wanted something different and unique. I also get a lot of "hey, I just designed this bass and I am looking for someone to build it" type of requests. So I am working off of the customers drawings at that point. There are more headaches involved with that and I can never estimate an accurate time of completion due to the constant dramas that pop up, but I enjoy sorting it all out and bringing the design to life. I will try to post some unique builds on TB, as the custom orders come in, as I realize that many of my older posts are all of similar style basses. Thanks again.
 
GMC,
I get my carbon fiber from a source that I have kept to myself as I did not want the price to go up, but I noticed they started to advertise for the application of musical instruments, so have at it. Invalid Link Removed

It is essentially the same as the Stew mac stuff. Half the price.

Thanks Crazygtr
 
  • Like
Reactions: GMC