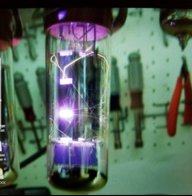
My pile of unfinished or partially-finished Sushi Boxes got a little smaller this week!
Earlier this summer I posted my
Space Heater build, which was my first try at a full-voltage tube pedal and turned out amazingly well, with the full fancy enclosure and UV-printed graphics treatment. Also in the queue are the Particle Accelerator and Diplomat, which I've finished with rattle cans and will send for UV printing in the nearish future, and the rest still with bare enclosures for lack of graphics inspiration. Among the latter group was the Black Eye, which up until last month I hadn't even begun to consider accruing parts for. I had had a vague idea what I wanted to do with the graphics, since I liked the concept of the graphics on the
production version of the Black Eye but didn't want to borrow too heavily from it. That led me down a huge rabbit hole of perusing art related to the keywords "black eye", but no concepts jumped out at me so I let it simmer on the backburner for a long time. Having a noodle with my
Invalid Link Removed gave me the idea that I'd do the Black Eye in a Legend of Zelda theme too. Behold:


For no reason other than lack of patience, I decided I would try my hand (ha) at hand-painting the enclosure for this one. I have a couple of other hand-painted pedals, but normally my partner, who is a fantastic artist and skilled with acrylics, does that work for me, since I'm a complete hack at visual arts. She was too busy this past month to take on this project so I said alright, let's see how far I get with it - worst case scenario I strip it all back and send it for printing anyway, or get an enclosure from Tayda since Nathan was nice enough to make templates for all these builds. The paint process here was
- Dominion Sure Seal One-Step self-etching primer, bake 30min @ 250-ish F (x3)
- Golden Acrylics So Flat Black #6745-2 applied with a brush, bake 20min @ 250-ish F (x3)
- Golden Fluid Acrylics Interference Red Fine #2469-1 applied with a brush, bake 20min @250-ish F. This paint is a special formulation of mica flakes suspended in an acrylic medium that makes an opalescent colour-shifting finish, so I'm pretty sure I only did one (somewhat heavy) coat of this; I recall that in my testing, applying too thick of a coating emphasized the base colour and diminished the opalescent effect.
- The art itself was done with Posca pens; more details below.
- DecoArt Americana DAS13-IC matte acrylic sealer/finisher (x3)
- Dominion Sure Seal High Gloss Crystal Clear Instant Clear Coat, thin layer (x3). There's a lot of paint on this pedal

The art itself consists of the insignia of the
Yiga Clan, a sort of evil splinter group of the
Sheikah tribe, and the background is a verse from Gojira's
The Heaviest Matter of the Universe written in
Invalid Link Removed (Golden unworldly silence / Spaceflight at speed of light / I cross the clouds and colours / The black hole is calling me / Slide on the horizon / On the frontier not to cross / Black dwarf, time's gone distorted / Heart of the dark, a whirl of light). The control labels, title and Yiga eye were done with the M15 Metallic Red Posca pen, and the Shiekah text in the background was done with the M33 Metallic Blue Posca pen. Eagle-eyed observers will notice that I didn't bake the enclosure at or after step 4. I did bake after doing the background text, which worked fine, but then I applied the rest of the graphics in red and baked again, and imagine my surprise when I found that all the red pigment had degraded in the oven, leaving only the metallic substrate behind... I reapplied the red and then had to just let the rest of the paint air-dry to prevent the degradation of the apparently thermally unstable metallic red Posca pen (so, a cautionary note to others!).
I have to also mention that I did an absolutely poopie job on the art on this pedal. I mocked up the text on Inkscape to make sure I would have the proper spacing to fit all the characters I needed to fit on the face in order to cover the entire area, a la the original Black Eye's hieroglyphic background. But, me being me, I did this job at 3 am, and from the application of the first character measured the spacing wrong, so the text neither covers the entire enclosure face nor completely fits in the lines (you can see that the last two lines have several characters that I squashed in, spacing be damned). The "Black Eye" title is also just glaringly obviously not centered. I want to keep a semi-consistent graphical theme across all my Sushi Box builds, so I had to add my warning label which, as you can see, is also botched because I miscalculated the space it would need to fit:

But the real star of this show is this hand-painted (yes, really) Sushi Box logo, which I had my partner do for me because there was no way I could do this myself. It is seriously indistinguishable from a printed label from a reasonable distance (with the exception of the blowout in the "Y" of "DIY", but you know, these things happen):

I was pretty unhappy with the quality of the paint on this for most of the process, but after voicing my frustrations, my partner told me "art is not perfect and will never be perfect, so you have to make peace with the imperfections and accept your mistakes". So, that's exactly what I'm doing and am happier for it. I also chipped the paint around the toggle switch while trying to install it, but the judiciously-chosen
washer and
Invalid Link Removed hide that neatly, so we will speak of it no more

So how does it sound? Forking spectacular. It has everything - sounds equally great on guitar or bass; does low and high-gain sounds equally well; crunchy, harmonically-rich distortion; A relatively wide-ranging but completely usable tone knob; I added a bass switch which puts extra 47uF cathode bypass capacitors in parallel with the stock 1uF capacitors at V1a and V1b, which lets you go from tight and focused lows to beefy chunky lows that are GREAT on bass. The Tube Store was having a sale on JJ tubes a little while ago, so I took the opportunity to grab a pair of them for this build, which was one of the catalysts for getting this one off the ground. Following an educated guesstimate of the sort of response I wanted from the pedal from reading other's experiences, I settled for a
JJ ECC83MG for V1 and a
JJ E83CC for V2. This turns out to be really awesome combination of tubes and I'm super happy with the sound right now. Run, don't walk, to build yourself one of these.