

Enjoy the benefits of a premium membership!
Upgrade Account
-
TalkBass has been independent since 1998. Add your voice.
Create a free account to reply to discussions, view embedded media, and browse with fewer display ads.
Join free Log in
Want zero display ads or expanded classifieds tools? Compare plans.
You are using an out of date browser. It may not display this or other websites correctly.
You should upgrade or use an alternative browser.
You should upgrade or use an alternative browser.
Black Limba 33 inch scale 5 string bass
- Thread starter Drake Custom
- Start date
More options
Who Replied?
- Aug 24, 2010
- 440
- 1,082
- Disclosures
- Builder/Owner:Drake Custom Bass Guitars
Well I am in the finishing stage and have several coats on her at this time. I just received the pups which are going to be EMG 40P and EMG 40J humbuckers.
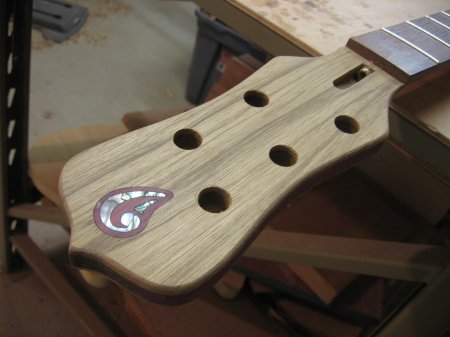
The first picture is of the inlay that I like to use. My artist/girfriend cuts out the shell and inlays the D into a piece of contrasting wood. Then we inlay the wood piece into the headstock. The most difficult step is the inlaying of the shell so we do this part first as to not screw up the headstock. If the inlay gets messed up or just dosen't look right, we can do another one without any damage to the bass. Once we are happy with the inlay, we then cut the wood/inlay piece out and shape it to the right shape. Since the outline of the wood piece has no fine details and is nice and large, it is easy to route out the cavity to fit with minimal gaps around it.
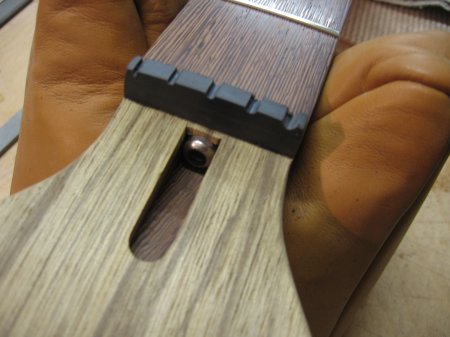
Now I move onto the "clean up" stage. This is where I pre-assemble the bass and make sure all of the holes are drilled, the pickups fit into the cavities, the body and neck blend well, and that the hardware is mounted straight. After that I assemble the bass about 80 percent of the way. To do this I first make and install the nut. It just needs to be roughed out at this point.
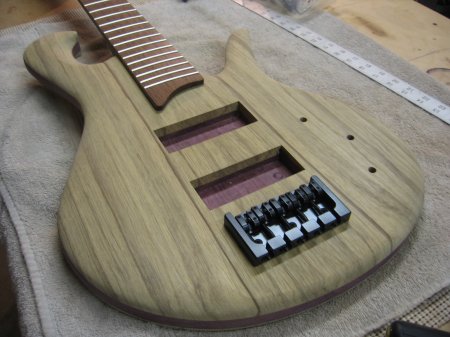
Then I locate and drill the mounting holes and mount the bridge. This bass is a string through model so I will have to drill the ferrule holes after I make sure the bridge is in the correct position.

I install the tuners and drill the holes for the little screws that keep the tuners from slipping. Once that is all done, I can use some waxed string to simulate strings to check neck angle and alignment of the neck. I use old strings most of the time but I did not have any B strings laying around.
Since my instruments are all hand carved, things can change and I want to make sure it is all good before I go through the finish process. It is always easier to fix things now than to have to re-finish after fixing things later.
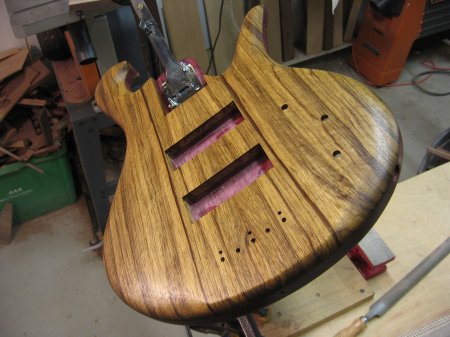
Next I perform the fine sanding stage. I sand through the grits until I get to 320 grit. Then I mount onto the bracket which is a StewMac model that mounts onto a rotating arm. I then blow the dust and sanding residue off of the bass. I spend quite a bit of time with this as the dust would be visable when the finish has cured if left in the pores. I also wipe the instrument down with naphtha to remove any oils from my hands. I do that last so not to cause the dust to stick into the pores when dampened with naphtha.

My first coat is a 50/50 mix of polyurethane and naphtha. I apply coat after coat keeping the surface wet for at least 20 minutes. This allows the finish to penetrate deep into the wood. I leave it dry for 48 hours before I mess with it. Once the solvent is evaporated out the poly is left in the wood making it a bit harder than it was. Limba is softer and drinks up a lot of finish. After it has dried I use 400 grit sand paper to sand back any dust nibs. I repeat this process twice with soft or porus woods. For Maples and other woods with tight pores I only do this once.
My finish is just a fast drying polyurethane made by Minwax. I use the satin (gold can) stuff as it looks like a traditional oil finish when cured. This finish is very durable and if applied carefully, it can look amazing.
In the pictures I only have the wash coat on.
I will apply 6-10 coats of poly depending on if I want a sealed look or let the pores show a bit.
Here is some information on this type of finishing process. They explain it better than I can. I wish I would have had this info when I first did this.
Guitar Finishing Using Wiping Varnish
finishing
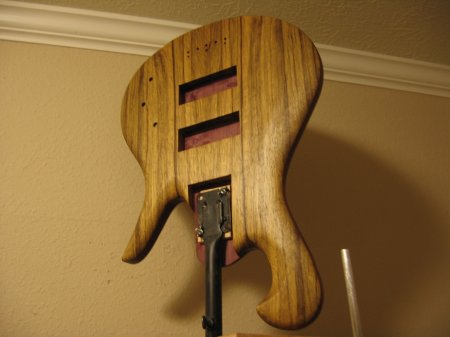
In the next two pictures you can see my elaborate drying racks. I just hook the necks and stand the bodies onto aluminum tubes sticking up out of a slab of Walnut. Works very well for me.

I will post more pictures as the finish builds. She will be completed by this next week and I will post the finished pics.
Thanks for checking out my build.
The first picture is of the inlay that I like to use. My artist/girfriend cuts out the shell and inlays the D into a piece of contrasting wood. Then we inlay the wood piece into the headstock. The most difficult step is the inlaying of the shell so we do this part first as to not screw up the headstock. If the inlay gets messed up or just dosen't look right, we can do another one without any damage to the bass. Once we are happy with the inlay, we then cut the wood/inlay piece out and shape it to the right shape. Since the outline of the wood piece has no fine details and is nice and large, it is easy to route out the cavity to fit with minimal gaps around it.
Now I move onto the "clean up" stage. This is where I pre-assemble the bass and make sure all of the holes are drilled, the pickups fit into the cavities, the body and neck blend well, and that the hardware is mounted straight. After that I assemble the bass about 80 percent of the way. To do this I first make and install the nut. It just needs to be roughed out at this point.
Then I locate and drill the mounting holes and mount the bridge. This bass is a string through model so I will have to drill the ferrule holes after I make sure the bridge is in the correct position.
I install the tuners and drill the holes for the little screws that keep the tuners from slipping. Once that is all done, I can use some waxed string to simulate strings to check neck angle and alignment of the neck. I use old strings most of the time but I did not have any B strings laying around.
Since my instruments are all hand carved, things can change and I want to make sure it is all good before I go through the finish process. It is always easier to fix things now than to have to re-finish after fixing things later.
Next I perform the fine sanding stage. I sand through the grits until I get to 320 grit. Then I mount onto the bracket which is a StewMac model that mounts onto a rotating arm. I then blow the dust and sanding residue off of the bass. I spend quite a bit of time with this as the dust would be visable when the finish has cured if left in the pores. I also wipe the instrument down with naphtha to remove any oils from my hands. I do that last so not to cause the dust to stick into the pores when dampened with naphtha.
My first coat is a 50/50 mix of polyurethane and naphtha. I apply coat after coat keeping the surface wet for at least 20 minutes. This allows the finish to penetrate deep into the wood. I leave it dry for 48 hours before I mess with it. Once the solvent is evaporated out the poly is left in the wood making it a bit harder than it was. Limba is softer and drinks up a lot of finish. After it has dried I use 400 grit sand paper to sand back any dust nibs. I repeat this process twice with soft or porus woods. For Maples and other woods with tight pores I only do this once.
My finish is just a fast drying polyurethane made by Minwax. I use the satin (gold can) stuff as it looks like a traditional oil finish when cured. This finish is very durable and if applied carefully, it can look amazing.
In the pictures I only have the wash coat on.
I will apply 6-10 coats of poly depending on if I want a sealed look or let the pores show a bit.
Here is some information on this type of finishing process. They explain it better than I can. I wish I would have had this info when I first did this.
Guitar Finishing Using Wiping Varnish
finishing
In the next two pictures you can see my elaborate drying racks. I just hook the necks and stand the bodies onto aluminum tubes sticking up out of a slab of Walnut. Works very well for me.
I will post more pictures as the finish builds. She will be completed by this next week and I will post the finished pics.
Thanks for checking out my build.

Really beautifull! The limba and amarant really match together! And the finish is great, really compliments the wood!


Turn out awesome.
You didn't meansin the spec on the nut and bridge how wide at the end of the fretboard...
Love your work.
You didn't meansin the spec on the nut and bridge how wide at the end of the fretboard...
Love your work.
- Aug 24, 2010
- 440
- 1,082
- Disclosures
- Builder/Owner:Drake Custom Bass Guitars
Thanks everyone.
The specs for neck width are 1 15/16" at the nut and 2 3/4" at the 24th fret. The spacing on the bridge is .699".
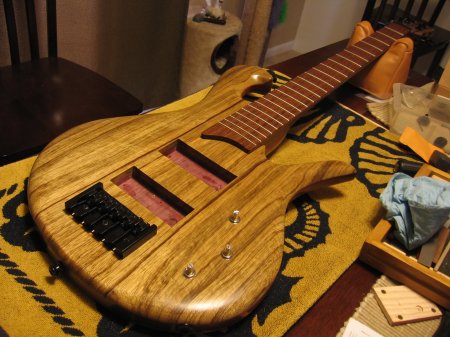
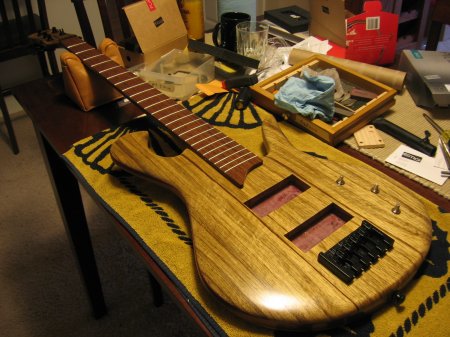
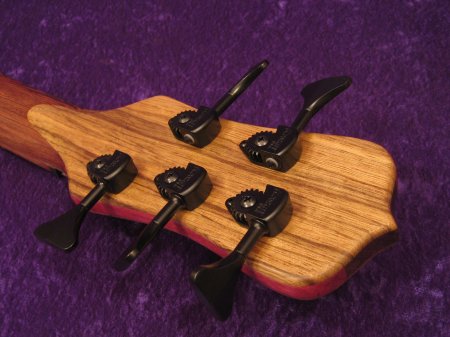
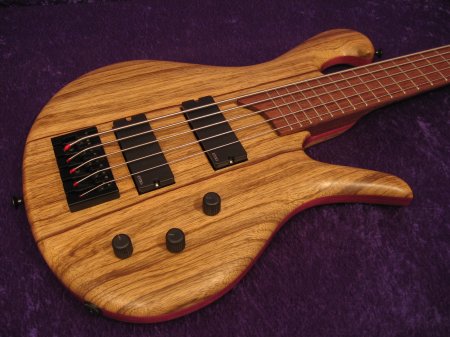
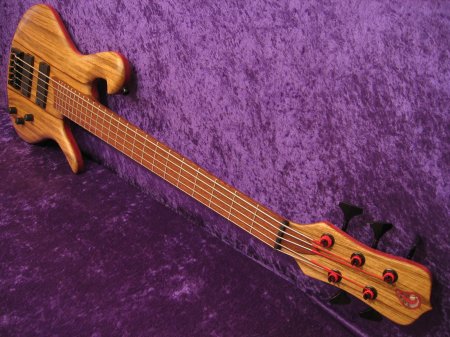
Here are some pictures of this bass being assembled and some of the finished bass. The Purpleheart will darken with age to a nice red wine color. We plan to give her some sun to speed the process. Her logo is set into Purpleheart as well.

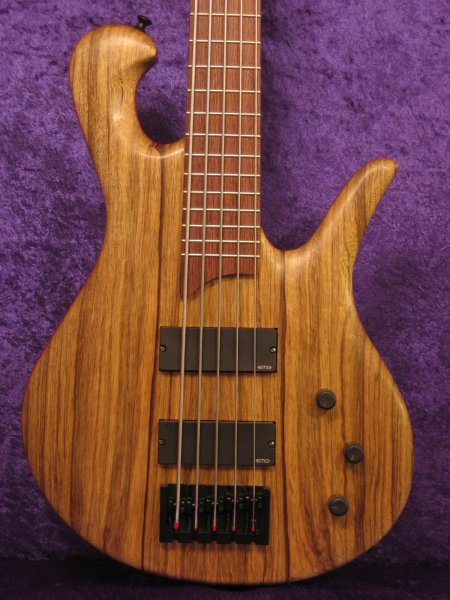
And her completed pics. There are more pictures of this bass on my website if you want to see them but I don't want to make this too long of a post.

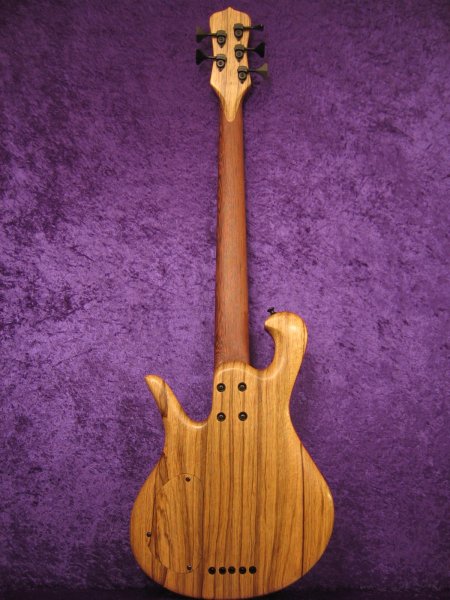

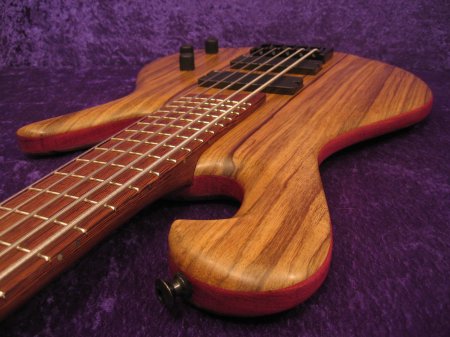
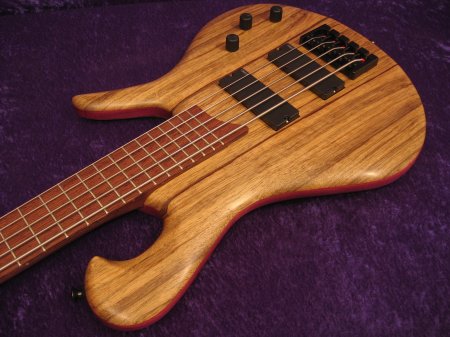
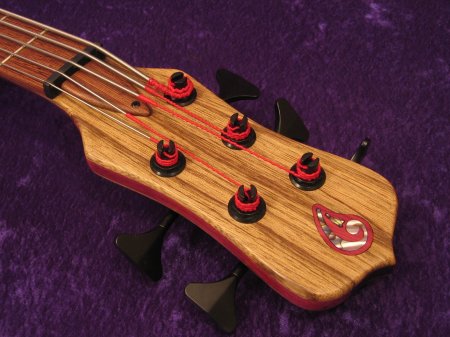
The specs for neck width are 1 15/16" at the nut and 2 3/4" at the 24th fret. The spacing on the bridge is .699".
Here are some pictures of this bass being assembled and some of the finished bass. The Purpleheart will darken with age to a nice red wine color. We plan to give her some sun to speed the process. Her logo is set into Purpleheart as well.
And her completed pics. There are more pictures of this bass on my website if you want to see them but I don't want to make this too long of a post.



Took delivery of this of this bass yesterday evening. Have gotten about three hours playing time with it so far and it is superb. Beautiful craftsmanship, it's balanced perfectly, fits well ergonomically, very light, very smooth, very firm & punchy....all the right adjectives.
Thanks, Andrew for another amazing build. It will get plenty of stage time!
Koog.
Thanks, Andrew for another amazing build. It will get plenty of stage time!
Koog.

- Aug 24, 2010
- 440
- 1,082
- Disclosures
- Builder/Owner:Drake Custom Bass Guitars
Thanks veryone for the feedback.
As you may have read, the bass is with her new owner now, so I will not be able to get any vids or clips of her. Maybe Koog will record some clips to post if you all ask nicely.
As you may have read, the bass is with her new owner now, so I will not be able to get any vids or clips of her. Maybe Koog will record some clips to post if you all ask nicely.


