• TalkBass has been independent since 1998. Add your voice.
    Create a free account to reply to discussions, view embedded media, and browse with fewer display ads.
    Join freeLog in
    Want zero display ads or expanded classifieds tools? Compare plans.

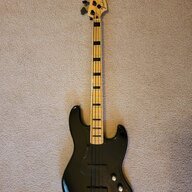
Blondes have more fun - a weekend build.

Guyker seems to be the most recent company importing parts from China to sell on Amazon. I just used a set of their tuners that seem to be pretty quality at the price and I noticed my favorite high mass/low cost bridge is being sold under their name now too. Build is looking great!
I bought black stack knobs from them. Took almost a month to get them and they didn't fit.
 
I bought black stack knobs from them. Took almost a month to get them and they didn't fit.

Buying knobs can be a pain, what with metric and imperial solid shaft sizes, two distinct sizes for split shaft pots and two different spline numbers for knurled split shaft pots. It's something I always double check if I'm not buying previously known pots and knobs. Lots of parts sellers don't identify these sorts of details, so it pays to check. Of course sometimes people just send the wrong stuff...:banghead:
 
@ChickWithaRic loving the look of your Blonde project.


Guyker seems to be the most recent company importing parts from China to sell on Amazon. I just used a set of their tuners that seem to be pretty quality at the price and I noticed my favorite high mass/low cost bridge is being sold under their name now too. Build is looking great!
I used a black set of tuners from Guyker to retro fit for Schallers when blacking out the hardware on a Peavey DynaBass Unity LTD that worked very well. Like the look and feel. The Midnight Lady.
IMG_20210804_143319238.jpg
 
Hey, good morning, I hope everybody is having a wonderful day.

I literally couldn't sleep knowing I'd majorly messed up, so I'm here early for today's episode which is called "You're Only As Good As The Last F*** Up You Got Yourself Out Of".

I shall begin by making a tapered plug. This sounds fancy but really it's just a case of shoving a piece of beech dowel into a pencil sharpener.

IMG_0320.jpg


Why a tapered plug? Because it will always, **ALWAYS**, fit as tight as a duck's tailpiece. I gave it a light smear of Titebond III (my go-to glue) and a few sharp but light dead blows with a hammer had it snugly in place. Don't go crazy. Let the weight of the hammer do the work for you. For gear heads, I used my 12oz DeWalt MIG welded Velocity finish hammer, which is lovely. I also have the 14oz framer, which blows peoples' minds. How can you have a 14oz framer, they ask. Because, design, I answer.


Back to the job in hand, the plug is in, and I need to clean up the ooze. A lightly dampened paper towel is your weapon of choice here.

IMG_0321(1).jpg


Now this is where people often mess up and wonder why their repair sticks out like a sore thumb. Once you cleaned off the excess glue, give the plug one more, light, dead blow. this will give you an almost imperceptible ooze of glue which will shrink back as the water content is absorbed into the wood. If you don't do this, you'll get a recessed ring, and nobody wants one of those. Stop sniggering. That wasn't funny. Yeah I'm looking at you.

I left that for a good while to set up, then uses a flush cutting pull saw to trim the plug back. Note the absence of damage to the surrounding dead tree.

IMG_0322.jpg


IMG_0323.jpg


Finally I finished off with my block plane set whisper fine, throat almost fully closed and a hair of a blade past the sole. I tend to work at 45 degrees across the grain of the wood surrounding the repair for this. Not for any reason I can define in words, it just feels right. I did sharpen the iron for this operation; 400 diamond wet > 1000 diamond wet > leather strop + green compound > plain leather strop. As always, begin sharpening by honing the BACK of the iron. If the back isn't flat and polished, you'll never get it sharp.

IMG_0324.jpg


My block plane weapon of choice, and again this is purely for the gear heads, is a British made Rider 69 1/2, a 21st Century re-imagining of the classic Stanley Sweetheart low angle plane. They are 90% as good as a Lie Nielsen and 40% of the cost, even with the shipping to the Untied States. That was not a typo.

IMG_0326.jpg


On the subject of tools, the most important items in my box cost less than one US dollhair.

IMG_0327.jpg


Try doing anything without them. See? Can't be done.

Next I suppose I have to re-drill the hole. Which is why we came here, I had almost forgotten. First tool is the pencil and straight edge. Next tool is the center punch. After that, a 1/16" drill to pilot, then 1/8", then full size. I didn't take progressive pictures. Sue me.

IMG_0328.jpg


I think that will be ok now. The ferrule will just about cover the plug. Got away with that one.

Thank you, everybody, for looking and for your comments and observations. I don't directly answer everybody because it seems a little bit egocentric to do so but I do read, and appreciate, every single reply.

And now, a special treat for a Monday morning.

 
Making the most of a couple of hours' unexpected free time today, I have enough room to do a couple more minor operations.

First thing I wanted to do was to relieve the cutouts for the pickup ears. One of my pet hates is mounting ears binding in their routs. It leads to frustration, poor setup, and snapped screws.

I began this freehand with just a kiss from the router into each earhole, as it were.

IMG_0330.jpg


Then I switched out to a stubby top guided cutter. You really can't have enough top guided cutters in every length you can find, and if you can afford to drop $90 on a cutter, the Yonico Ultra-Performance compression cutters are oh my goodness wonderful. I don't have one of my own. Yet. This is a cheapie, but it works perfectly well.

IMG_0331.jpg


IMG_0332.jpg


That did the job.

IMG_0333.jpg


The pickups themselves are wound to vintage specification wrt to impedance, with fiber board flatwork, cloth insulated leads, wax potted and cloth taped coils, with alnico-v magnets. If that sounds expensive, they're really not. They are Wilkinsons. I've used them before and for well under $100 a pair they punch way above their weight. I switched out the stock covers for current issue 7ender covers from the Big Box Of Useful Things. They fit perfectly.

Last job I have time for today is to drill through for the string earth. I will take this from under the bridge into the bridge pickup cavity. I won't bore you with the details. Bore? Get it? (slaps knee).

IMG_0335.jpg


That will do. Now I have to go and make a living. I hope everybody has a good start to their week. Peace x.
 
How are you getting the tight corner radius? I have pup routes in progress, the corners are 1/8” radius, so I’d need a 1/4” dia. Pattern bit to cut them. I could do it with a 1/4” down cut spiral, but it will burn the wood and template without a bearing. Amana Tool makes some mini- template bits that small, but fragile and $38 each.
 
How are you getting the tight corner radius? I have pup routes in progress, the corners are 1/8” radius, so I’d need a 1/4” dia. Pattern bit to cut them. I could do it with a 1/4” down cut spiral, but it will burn the wood and template without a bearing. Amana Tool makes some mini- template bits that small, but fragile and $38 each.
I didn't cut the tight corners myself, only the semi circular ear cutouts. I don't believe I have ever seen a top bearing cutter under 1/2" in diameter, and really wouldn't trust one much smaller anyway. If you want to cut tight radii top guided, you need to use a concentric guide bush in your router base and design & make a template of your own that takes into account the offset between guide bush and cutter. I hope that made sense.

You can get bottom guided guided cutters in very small sizes. My favorite is the Yonico dual ended 14101Q. Not a cheap cutter, but indispensible in certain situations.

Edited to add: Even though the Yonico doesn't have a bearing (and for its intended use of laminate trimming, the bearing is a nuisance and potential job wrecker) it won't burn the substrate if you keep your RPMs low as they recommend. Never use a trimmer to remove more material than its own diameter, and ideally under half its diameter. I know you know that, but it's worth repeating.

51ozqRgeuDL._AC_SL1500_.jpg
 
Last edited:
I don't reduce RPM. Smaller bits typically mean you want higher rpm, not lower. The speed of the cutter on the bit is dependent on the diameter of the bit - bigger bits need lower router speeds to keep the cutter speed down. Cutter speed (and feed rate) determines chip size. Drop the rpm on a small bit and it gets very easy to feed it too quickly. Chips get too big and snap! No more bit.

Small passes is important though. I don't swap bits, I just hog out with a Forstner and then use the small Amana bit that matches the radius I want. In pretty much all cases other than EMGs that's the 3/8 diameter bit which leaves a 3/16" radius. For EMGs I go back in with a straight 1/4" diameter bit and ride the bit on the template just enough to bite each corner.
 
  • Like
Reactions: boxerrider and Beej
What is meant by "minimum RPM"? My PC router is adjustable speed, maybe something like 1000 rpm for wee little Amana bits? Is there a rule of thumb based on bit diameter?
I turn my little Dewalt down to 1. Invalid Link Removed

The 611 has a speed range of 16K - 27K so running at "1" would be 16K or a reduction of ~40%
 
Last edited:
  • Like
Reactions: Gilmourisgod
Is that Ammana bearing replaceable? That's a deal breaker if not. To be honest I am so used to making templates with the offset between a guide bush and a cutter of a certain diameter included that it's something I don't feel a huge amount of need for, and it's also much easier to nick the edge of a direct 1:1 template with a top guided cutter than with a guide bush. I know it shouldn't happen with proper tool discipline and respect for safe operating, but we all have occasional momentary lapses.
 
They have a part number for the bearings on their website. I'm probably at about 40 or 50 pickup cavities on mine (plus a couple dozen neck pockets and other misc routing) and the bearing and cutters are ok at this point.

I don't disagree with you that bushes are a good option! If I were doing this all from scratch and needed to do high volume I would probably set up two routers, one with a half inch two flute and bushing, second with a quarter inch spiral downcut and a bushing that was 1/32" smaller. Then you could size the template for the smaller bush on the small bit. Plunge base on the 1/2" bit router with stops every quarter inch. Fixed base on the smaller bit router set to full depth. This would let you hog the cavity with the big fast cutting bit, stepping down each pass. And then trim and hit the corners with the smoother cutting smaller bit.
 
They have a part number for the bearings on their website. I'm probably at about 40 or 50 pickup cavities on mine (plus a couple dozen neck pockets and other misc routing) and the bearing and cutters are ok at this point.

I don't disagree with you that bushes are a good option! If I were doing this all from scratch and needed to do high volume I would probably set up two routers, one with a half inch two flute and bushing, second with a quarter inch spiral downcut and a bushing that was 1/32" smaller. Then you could size the template for the smaller bush on the small bit. Plunge base on the 1/2" bit router with stops every quarter inch. Fixed base on the smaller bit router set to full depth. This would let you hog the cavity with the big fast cutting bit, stepping down each pass. And then trim and hit the corners with the smoother cutting smaller bit.

I do exactly the same thing by switching out between a 9 and 11/32 bush. There's no special reason for choosing those sizes, it's just what came in my Katsu guide bush set. Incidentally that's a really good quality, accurately made set for around $40 that is directly compatible with my Makita bases for the 1/4" trimmer, both the fixed and the plunge bases will take them with no issues.

51KMYGn0d7L._AC_.jpg


Speaking of hogging out large areas, I really do need to replace or repair my drill press. With Forstner cutters, that thing can cut out waste stock very quickly, and very safely.
 
  • Like
Reactions: dwizum