
Enjoy the benefits of a premium membership!
Upgrade Account
-
TalkBass has been independent since 1998. Add your voice.
Create a free account to reply to discussions, view embedded media, and browse with fewer display ads.
Join free Log in
Want zero display ads or expanded classifieds tools? Compare plans.
You are using an out of date browser. It may not display this or other websites correctly.
You should upgrade or use an alternative browser.
You should upgrade or use an alternative browser.
Build II - Paradox MJ5 - New design!
- Thread starter roberthabraken
- Start date
More options
Who Replied?

Perhaps you should keep your red idea for the next build *hint hint*.
Not that making you a habitual builder would be a bad thing of course.....!
Red is a pig of a colour to get right. The natural colour of the wood interferes hugely plus red can easily end up....not red....getting some practice in on scrap should help you nail whichever red you have in mind of course. Personally I like reds that have had a minute amount of blue added. Mostly because I hate pink? hah
Not that making you a habitual builder would be a bad thing of course.....!
Red is a pig of a colour to get right. The natural colour of the wood interferes hugely plus red can easily end up....not red....getting some practice in on scrap should help you nail whichever red you have in mind of course. Personally I like reds that have had a minute amount of blue added. Mostly because I hate pink? hah

Just messin with you on the pickguard, as stated previously, I like the design of yours more than I should.
Have you considered any other colors/tints/stains?
wraub

No did not consider other colors. I like the combination of clear red with chrome hardware and white pearl & binding. Blue would be my second choice, but not so sparkling.
Perhaps you should keep your red idea for the next build *hint hint*.
Not that making you a habitual builder would be a bad thing of course.....!
Red is a pig of a colour to get right. The natural colour of the wood interferes hugely plus red can easily end up....not red....getting some practice in on scrap should help you nail whichever red you have in mind of course. Personally I like reds that have had a minute amount of blue added. Mostly because I hate pink? hah
Well, I didn't realize red is such a difficult color to get right. Considering, I can imagine it could easily turn out pinkish, kinda orange or not as bright as I imagine. That would be a pity, to say the least.
Let's park that idea for a while


Hopkins
Commercial User
No did not consider other colors. I like the combination of clear red with chrome hardware and white pearl & binding. Blue would be my second choice, but not so sparkling.
Well, I didn't realize red is such a difficult color to get right. Considering, I can imagine it could easily turn out pinkish, kinda orange or not as bright as I imagine. That would be a pity, to say the least.
Let's park that idea for a while
I wouldn't give up on the red just yet, try and practice on a piece of scrap cut off of the body.
Don't know if it's just the pictures or just me, but man does that neck look wide a chunky! I really dig this!
Nice to hear your dig it, btw, I suddenly know why it appears so wide to you: although it's a standard wide Jazz Bass V size neck, it has 24 frets, making it wider at the bridge end than usual. I even had trouble finding a wide enough radius block.
I wouldn't give up on the red just yet, try and practice on a piece of scrap cut off of the body.
Guess I could try that, I do have a test piece lying around...
Totally. Red is a great one to nail, but you need to work on hitting it right. There are tons of methods. Depends whether you want to keep the chatoyance of the Maple or pop the endgrain of the figure using a dye/sandback technique. I prefer keeping the movement since I am up close n' person with the instrument and I don't care how it looks to somebody across the room....hahah....
I pencil the center line and the transition areas. The rest is done on auto pilot
When I'm reaching the almost desired thickness, I will use paper templates to check my final progress.
It seems like your doing great without it, but this link [Invalid or Expired Link Removed] is extremely helpful for neck carving. It ensures you get the right feel/dimensions. I have posted this a bunch of times, sorry if you have seen it before!
Totally. Red is a great one to nail, but you need to work on hitting it right. There are tons of methods. Depends whether you want to keep the chatoyance of the Maple or pop the endgrain of the figure using a dye/sandback technique. I prefer keeping the movement since I am up close n' person with the instrument and I don't care how it looks to somebody across the room....hahah....
My plan was to dye it with a dark colour (brown or black), sand it back and then dye with a bright red colour, maybe doing a maroon kind of tint on the edges for a slight burst effect.
It seems like your doing great without it, but this link [Invalid or Expired Link Removed] is extremely helpful for neck carving. It ensures you get the right feel/dimensions. I have posted this a bunch of times, sorry if you have seen it before!
Thanks. I know that site, but did not see this article before. It is indeed a great article. Probably would have been better if followed, but since I'm already halfway, I'll save that for next time
 .
.
For the second carving session I concentrated on the overall neck shape and on the volute, mainly using a scraper (actually the blade from my spokeshave, but that works very well this way), sandpaper and sometimes a rasp or a file. I must say it's taking shape rather well and I still like my approach so far.
Invalid Link Removed
Invalid Link Removed
Invalid Link Removed
Invalid Link Removed
Invalid Link Removed
Next time I will concentrate on the transition at the body end and the neck shape on that side of the neck. The fourth and last session should be the final touch and completion of the neck profile.
Invalid Link Removed
Invalid Link Removed
Invalid Link Removed
Invalid Link Removed
Invalid Link Removed
Next time I will concentrate on the transition at the body end and the neck shape on that side of the neck. The fourth and last session should be the final touch and completion of the neck profile.

Whoah!!!!
I have missed so much! Robert, you know I am in your corner, but, I am definitely jealous of your work! This is turning out so beautifully!! I look forward to completion. I wish I could be there and share a brew with you! Believe me...I would buy!
I have missed so much! Robert, you know I am in your corner, but, I am definitely jealous of your work! This is turning out so beautifully!! I look forward to completion. I wish I could be there and share a brew with you! Believe me...I would buy!
Whoah!!!!
I have missed so much! Robert, you know I am in your corner, but, I am definitely jealous of your work! This is turning out so beautifully!! I look forward to completion. I wish I could be there and share a brew with you! Believe me...I would buy!
Thanks!! Nice to hear
 . How are you doing? Due to limited time I do not follow all build threads anymore, just a few, so I may have missed out on some. Are you still building after R. Venn? If closer by, I would love to share a brew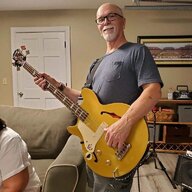
I'm amazed at how fast the neck is going after how long you waited to start shaping it! It looks really good.
Hey Robert,
I have graduated from the school. Moved back to Tennessee. I put several applications out with many companies, but, no one was hiring. So, I will start my own company in Limestone, Tennessee. I have 5 customers waiting for my shop to get started. I think that I will have the shop ready by the spring of next year. I wish I were closer, but, I think the brew will have to wait. The work is looking great and keep on inspiring us!
Thanks again!!!
Paul
I have graduated from the school. Moved back to Tennessee. I put several applications out with many companies, but, no one was hiring. So, I will start my own company in Limestone, Tennessee. I have 5 customers waiting for my shop to get started. I think that I will have the shop ready by the spring of next year. I wish I were closer, but, I think the brew will have to wait. The work is looking great and keep on inspiring us!
Thanks again!!!
Paul
Tonight I worked on the heel transition of the neck and did some finishing touches:

Must say, it feels great, very wide and thin. The shape is still a bit 'square' ... may be too much D-shaped, but I'll leave it like this for now and check back tomorrow or the day after to see how it looks then.
So, I'll present to you the more or less finished neck for my bass, I'm happy
Link Removed


Link Removed
Link Removed

Must say, it feels great, very wide and thin. The shape is still a bit 'square' ... may be too much D-shaped, but I'll leave it like this for now and check back tomorrow or the day after to see how it looks then.
So, I'll present to you the more or less finished neck for my bass, I'm happy
Link Removed
Link Removed
Link Removed
Hehe..eindelijk..!
Zei het toch...."Just carve the damn thing...!!!"
Ziet er goed uit...dude...!!!
Zei het toch...."Just carve the damn thing...!!!"
Ziet er goed uit...dude...!!!
Very clean!!!! I can't wait for the figure to jump out with a finish on it!
Me neither
Hehe..eindelijk..!
Zei het toch...."Just carve the damn thing...!!!"
Ziet er goed uit...dude...!!!
Thanks!! Btw, mind that it's an international forum, I think it's better to stick to English, so everyone's able to follow the discussion.
About the build: progress came to a halt again, being ill for over a week and working very hard too for my daily job. And you cannot imagine how much I want to finish it, being so close

What I did do is decide the neck contour is too flat, not round enough, especially near the heel area. So I have drawn some shapes and printed them for the 1st, 6th and 12th fret as a guide:

..and I've heard a great tip (thanks Daan!) if you do not have a contour gauge: just use some stiff electric wire and bend it around the neck. Kind off a McGuiver contour gauge
.So if I'm feeling better again and I do have some time to spend on the build again, I'll rush to the shop and use this tip to compare my progress with the intended contours, so I can shape the neck further to perfection. Only then, I'll start assembling..
And because I understand I keep you all waiting for such a long time, I have a sneak preview to make up for the long wait; first time the (almost finished) neck and body together, but without pickguard and pickups and such, felt great I must say (sorry for the fuzzy pic):
Link Removed

Man, that's looking good!
I've been away from the forum for a long time - I am surprised you are still at it!! I figured it would have seen a few gigs by now! ;-)
Take your time, though. I can watch good-looking builds all day long.
--tz
I've been away from the forum for a long time - I am surprised you are still at it!! I figured it would have seen a few gigs by now! ;-)
Take your time, though. I can watch good-looking builds all day long.
--tz
Man, that's looking good!
I've been away from the forum for a long time - I am surprised you are still at it!! I figured it would have seen a few gigs by now! ;-)
Take your time, though. I can watch good-looking builds all day long.
--tz
Thanks
 ... and I think you weren't the only one expecting that
Stick around, it's finished before the end of the year!
I love the idea of the wire as a gauge! Remember that you have sanding to do yet...days n days n days of it!


