I figured I should start a build thread vs continuing to pepper the Workbench thread with photos of this bass.
It will be a 4 string following my now fairly standard design originally used in the Special Edition Build Off: The Thumfinizenvette bass.
Neck is curly maple and walnut laminates. Body is walnut. Top is the slab of buckeye burl I've been flaunting in the workbench thread.
For pickups, I'm making a set of my split bass soapbar design, which is more or less a mashup of a blade Jazz pickup with the coils offset like a P pickup.
Hardware is going to be a home-made brass and aluminum bridge and Hipshot ultralite tuners in satin.
Here's some shots of the progress so far.
Here's the neck, fresh out of router planing.
 Neck blank is three pieces of curly maple and two stripes of walnut. I used a "tone block" style construction (I think that's a dumb term, but it seems to be what people call this) where the neckthrough laminates are 3/4" tall and a block of wood is glued to the back of the body section of the blank to get the thickness for the body.

After getting the blank squared up, I cut the headstock scarf and glued it back on. Normally, I orient the scarf such that the seam is up in the neck, by gluing the headstock on the face of the angled cut on the neck blank. This time, I decided to try the other option - gluing the headstock to the back of the blank.

The top came from a piece of buckeye burl I bought on eBay last year. When I get my hands on a piece of wood this nice, I try to let it sit for a good 6 months or a year out of respect for the wood, rather than jump in. This hunk of burl has been speaking to me lately so I figured it was time to dive in.
I didn't get a lot of photos of the prep process since I wasn't planning on a build thread. The burl slice is probably 36" long by a foot or so wide and about two inches thick. There's a wide section that is incredibly punky, to the point that it feels about as dense as packing peanuts or popcorn.
I pondered and postulated for about a week putting my templates on the burl in different positions and finally cut a hunk out that's bass-body sized.
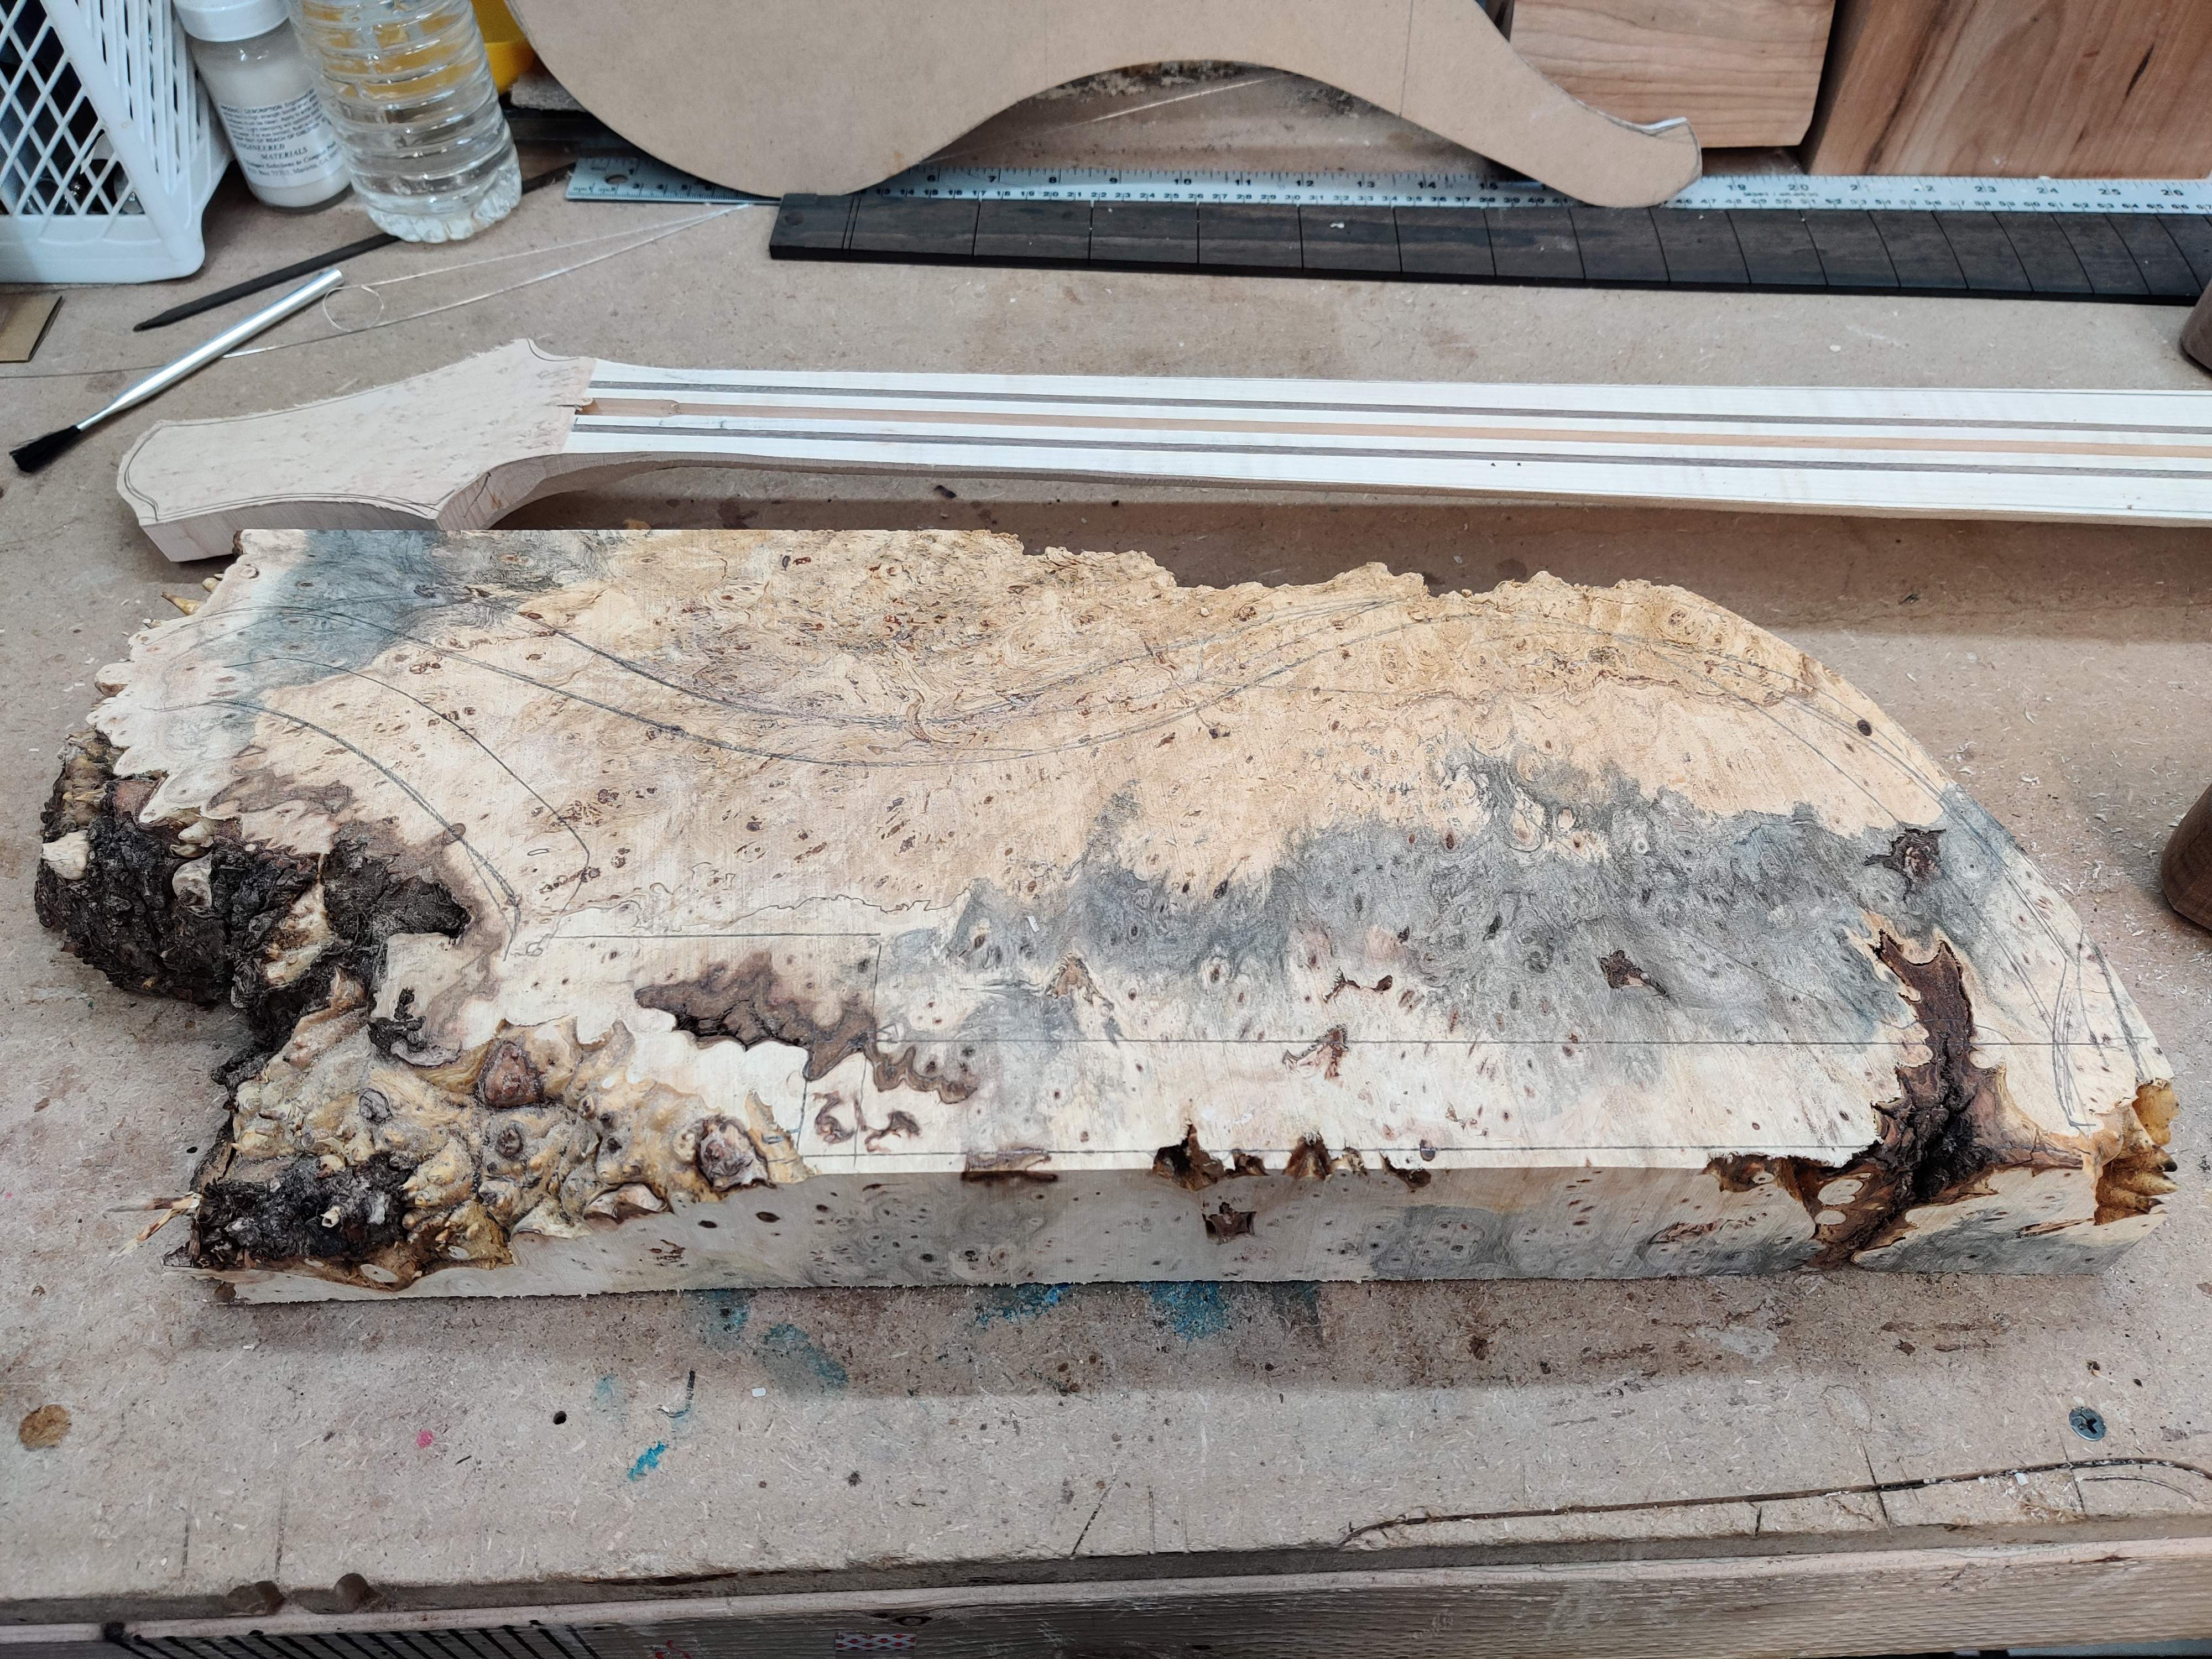
The steel blue area near the center is dense and intact, while the darker tan section towards the outboard edge is the punky part.
After cutting to size I jointed the edge in a router jig
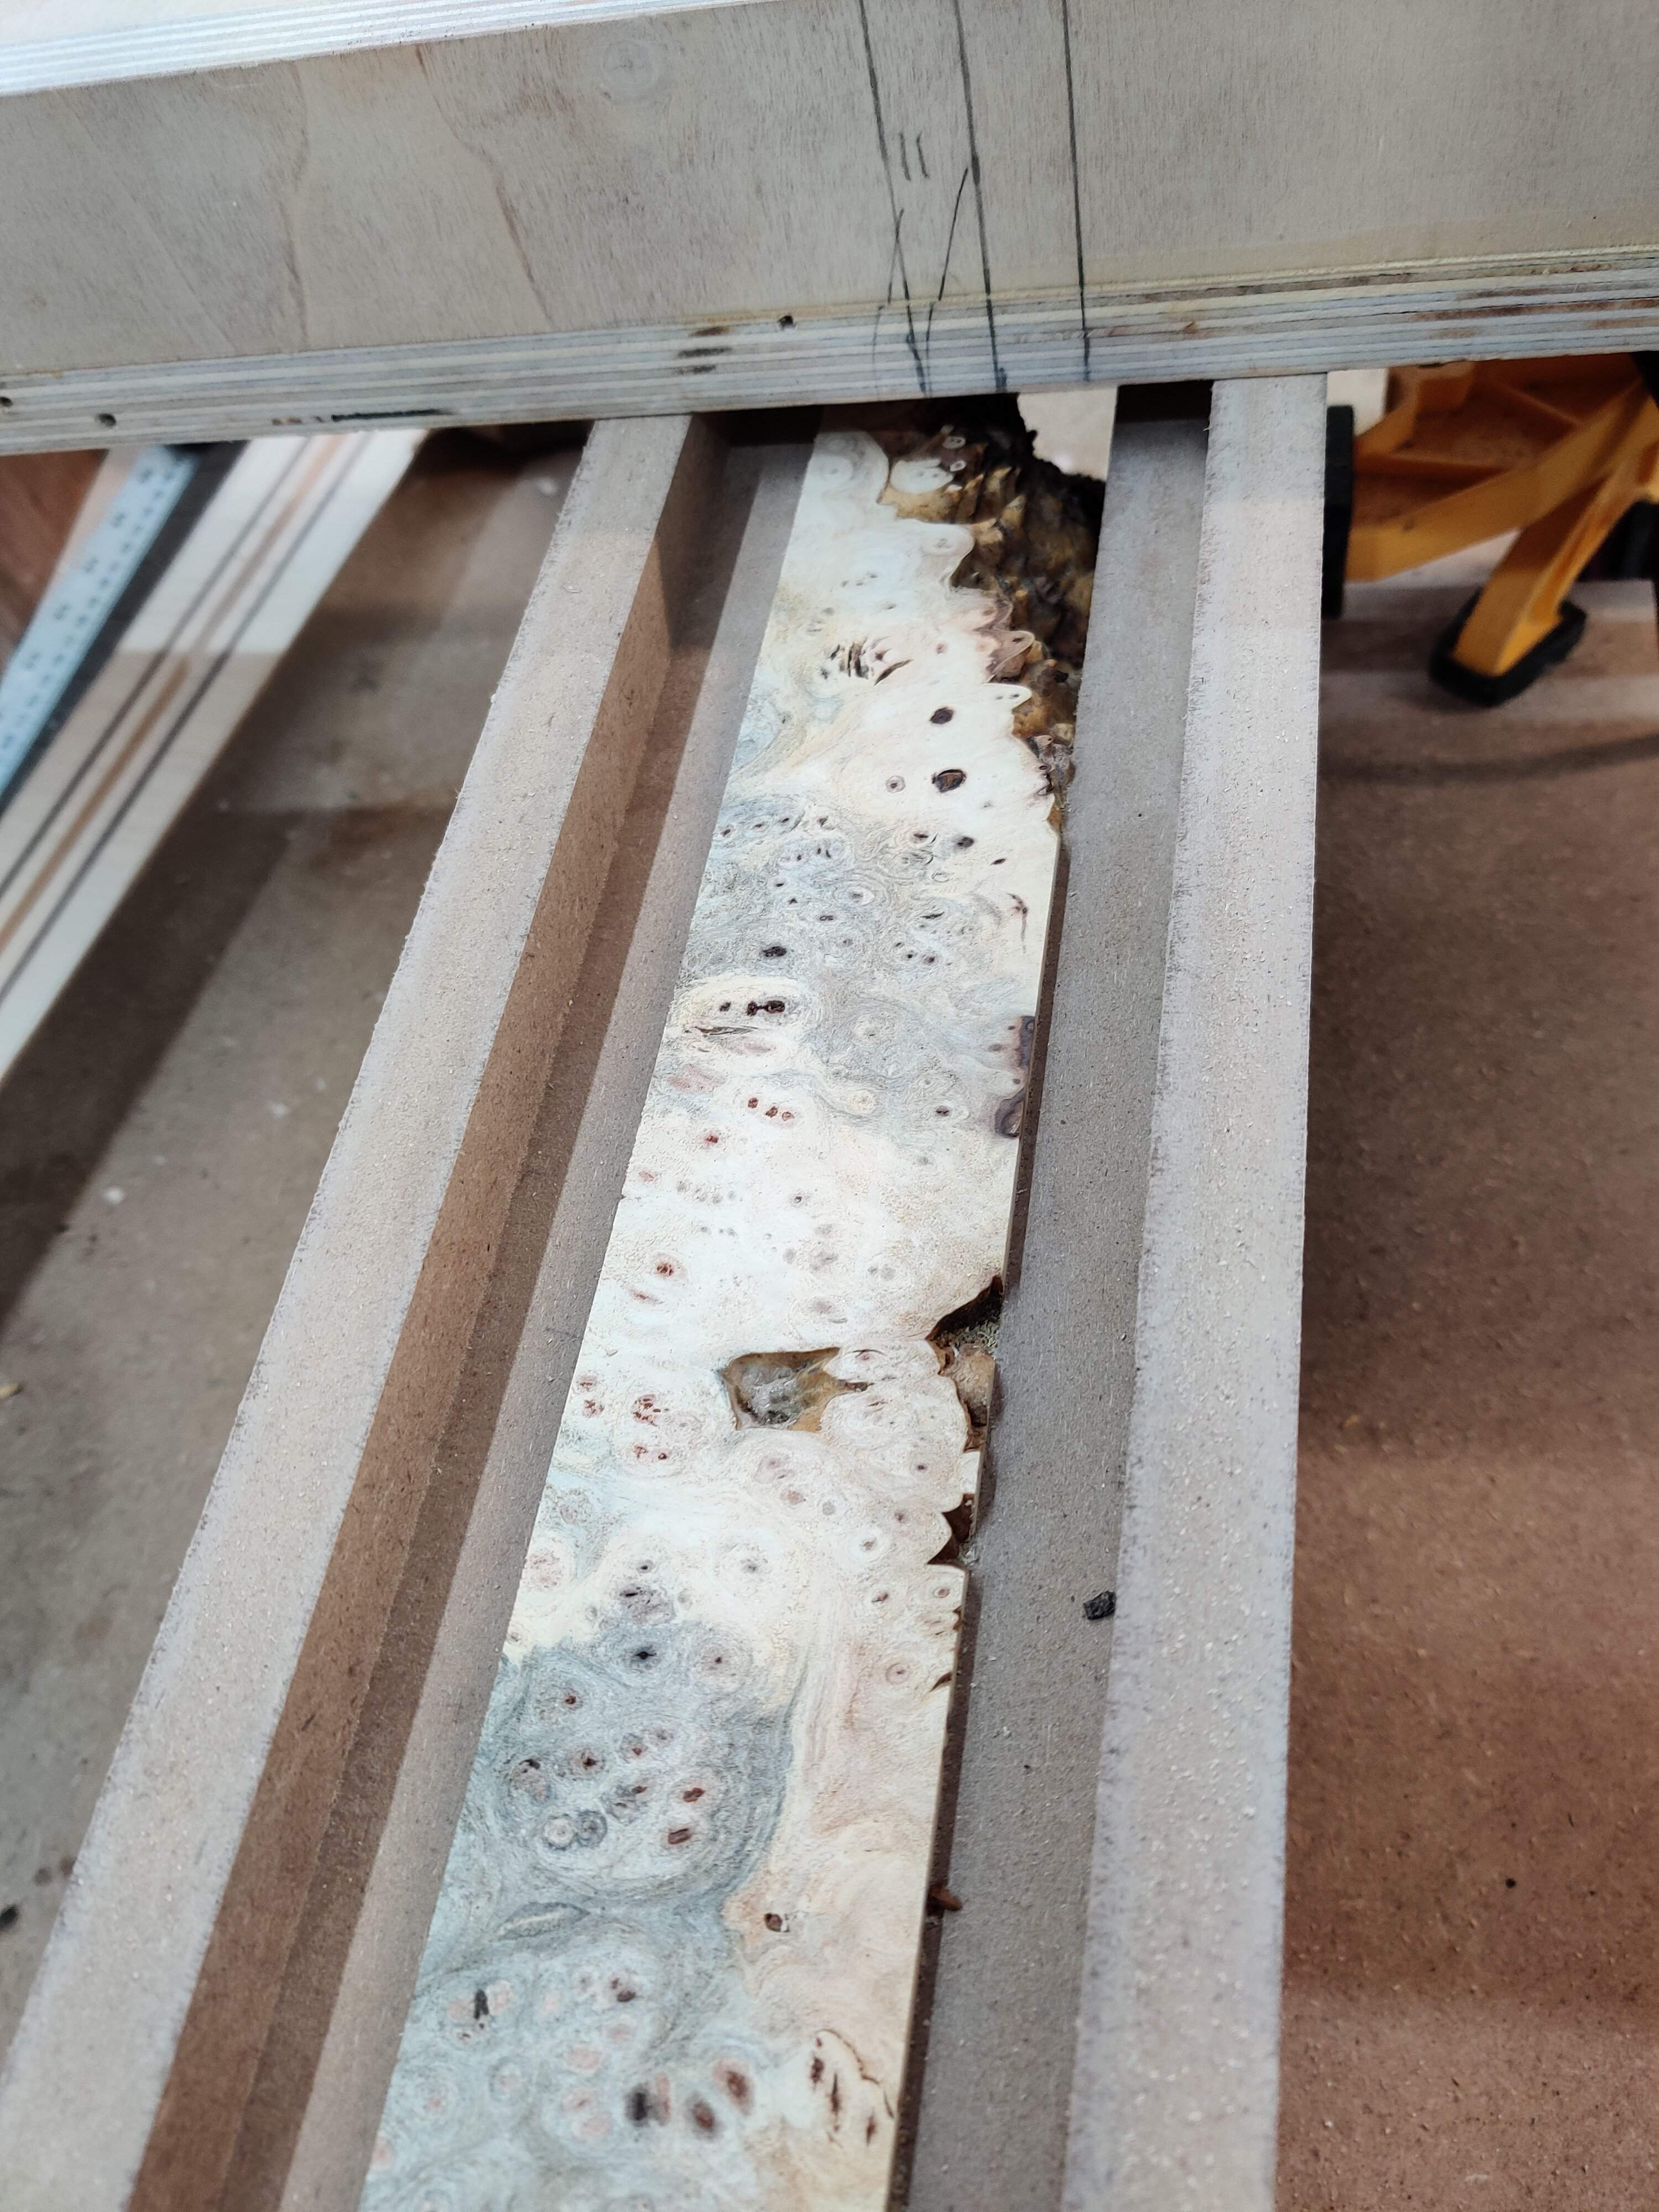
Then I sliced off a bookmatched top at a hair over 1/4" thick.

Because this wood has such punky sections I wanted to treat it well to keep it durable. I have used CPES in the past but wasn't a super fan of the intense odor and the fact that it only comes in kits larger than I really need. So I tried the TotalBoat version, which they simply call Penetrating Epoxy. It's a 2:1 mix that's very thin (maybe not QUITE as thin as CPES but close enough). Its smells like epoxy but isn't overpowering - although I wear a respirator 100% of the time I'm working with epoxy anyways, after having a friend develop a severe reaction due to over exposure after using epoxy in a hobby business for years.
The penetrating resin soaked in really well. The top drank up about twice what I expected. This stuff cures just like CPES - almost more like very hard rubber than a solid plastic. But it's very tough.
After treating with the resin, I cut out the pickup cavities (and saved the cutouts for the pickups) and I snapped a photo of the top and the fretboard placed on the body in a mockup. The resin is fairly uneven after going through the drum sander but you get the idea of what the top will look like:

After taking that photo I glued the top onto the body using TotalBoat's 5:1 slow epoxy, which is supposed to be a direct copy of West System 105/206, to the extent that they claim you can mix them (i.e. use their hardener with West resin or vice versa). I ordered it out of curiosity when I bought the TotalBoat penetrating epoxy, since it gets good reviews and it's cheaper than "real" West System products. So far so good. Once the top is cured I'll be using it to fill the voids in the top as well.
That's about two weeks of work and gets things nearly up to date. While the top cures I'm on to pickups and bridge construction!
It will be a 4 string following my now fairly standard design originally used in the Special Edition Build Off: The Thumfinizenvette bass.
Neck is curly maple and walnut laminates. Body is walnut. Top is the slab of buckeye burl I've been flaunting in the workbench thread.
For pickups, I'm making a set of my split bass soapbar design, which is more or less a mashup of a blade Jazz pickup with the coils offset like a P pickup.
Hardware is going to be a home-made brass and aluminum bridge and Hipshot ultralite tuners in satin.
Here's some shots of the progress so far.
Here's the neck, fresh out of router planing.
After getting the blank squared up, I cut the headstock scarf and glued it back on. Normally, I orient the scarf such that the seam is up in the neck, by gluing the headstock on the face of the angled cut on the neck blank. This time, I decided to try the other option - gluing the headstock to the back of the blank.
The top came from a piece of buckeye burl I bought on eBay last year. When I get my hands on a piece of wood this nice, I try to let it sit for a good 6 months or a year out of respect for the wood, rather than jump in. This hunk of burl has been speaking to me lately so I figured it was time to dive in.
I didn't get a lot of photos of the prep process since I wasn't planning on a build thread. The burl slice is probably 36" long by a foot or so wide and about two inches thick. There's a wide section that is incredibly punky, to the point that it feels about as dense as packing peanuts or popcorn.
I pondered and postulated for about a week putting my templates on the burl in different positions and finally cut a hunk out that's bass-body sized.
The steel blue area near the center is dense and intact, while the darker tan section towards the outboard edge is the punky part.
After cutting to size I jointed the edge in a router jig
Then I sliced off a bookmatched top at a hair over 1/4" thick.
Because this wood has such punky sections I wanted to treat it well to keep it durable. I have used CPES in the past but wasn't a super fan of the intense odor and the fact that it only comes in kits larger than I really need. So I tried the TotalBoat version, which they simply call Penetrating Epoxy. It's a 2:1 mix that's very thin (maybe not QUITE as thin as CPES but close enough). Its smells like epoxy but isn't overpowering - although I wear a respirator 100% of the time I'm working with epoxy anyways, after having a friend develop a severe reaction due to over exposure after using epoxy in a hobby business for years.
The penetrating resin soaked in really well. The top drank up about twice what I expected. This stuff cures just like CPES - almost more like very hard rubber than a solid plastic. But it's very tough.
After treating with the resin, I cut out the pickup cavities (and saved the cutouts for the pickups) and I snapped a photo of the top and the fretboard placed on the body in a mockup. The resin is fairly uneven after going through the drum sander but you get the idea of what the top will look like:
After taking that photo I glued the top onto the body using TotalBoat's 5:1 slow epoxy, which is supposed to be a direct copy of West System 105/206, to the extent that they claim you can mix them (i.e. use their hardener with West resin or vice versa). I ordered it out of curiosity when I bought the TotalBoat penetrating epoxy, since it gets good reviews and it's cheaper than "real" West System products. So far so good. Once the top is cured I'll be using it to fill the voids in the top as well.
That's about two weeks of work and gets things nearly up to date. While the top cures I'm on to pickups and bridge construction!










 are you going to use those brass shavings?