I don't get it. How do you learn these things if you are unwilling to try? Why the resistance to giving it a shot? Worst that can happen is I don't get it right, and I end up taking it to a luthier after all…
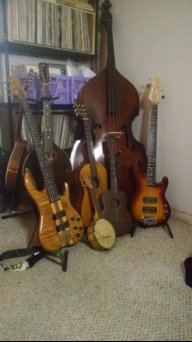
No resistance here. I say go for it. I started playing upright around 2002 and have owned three different uprights since then. I put one or more bridges on each bass, and put adjuster wheels in a few of them. Yes, I have messed up a couple bridges, but that was early on. The last several I fitted turned out great. I've even done a couple for other players after they saw how mine looked, and sounded.
I put rosewood adjuster wheels in my last bridge (3/8" shaft in the adjuster wheel) and the first couple bridges I tried to install them in split when I tried to thread the hole in the bridge leg. I discovered the wooden adjuster wheels with the larger shaft go in opposite the 1/4"x 20 aluminum adjuster wheels with the threads of the wooden wheels pointing down into the foot, not pointing up into the bridge leg like the aluminum wheels are usually installed.
As for the sound post moving or falling while working on the bass, see if you can find / borrow a bag of lead birdshot for shotgun shells. It will provide enough weight to keep the top down on the post. You can put it off to the side or toward the neck enough to work on the bass with the strings off. If you work with the bass laying on its back, the post usually stays in place unless it is an unusually loose fitting post, which is a desired thing to some players, and is definitely better that a post that's fitted too tight.
Before you start, get a good telescoping handle mirror (auto parts stores or Amazon), and rig up a pencil on a thin stick of some kind (dowel rod works well). Using the mirror and the extended pencil, mark the current location of the sound post where it contacts the back and the top. You don't have to draw a full circle around the post, just a short line in three or four equally spaced places around the post will give you a reference to see if the post moved and where to put it back. For marking around the post on the underside of the top, you will probably have to get creative on how to put the pencil
down through an F hole, but have it pointing
up toward the underside of the top. Stiff wire, u-bolt, etc. will work. You'll figure that out.
You definitely want to use the existing bridge to get a rough height for the new bridge. On new bridges, the feet are very thick and the top edge where the strings sit is long. Both can be cut off rough before starting the feet fitting process. Cut it long and work it down to fit.
By the way, if you have a $20k German / European bass from the 1800s, you might want to take it to a
highly experienced upright luthier. I was working on two laminated basses and one carved top, none of which were worth even $2k (at the time), so a scratch or ding didn't cause major cortisol flow. My current bass (1952 Kay M-1) wasn't anywhere near mint when I bought it, so any scratches I put on it have blended in….
Go slow, check fit often. When you think you have the feet fitted to the top, you can use chalk line powder on the top of the bass to set the bridge feet on to see if you have a good fit. You want to see uniform chalk on the feet bottoms all the way out to each corner of the foot and all points in between. You can also use powdered graphite to check fit. I have used a Dremel tool for the very fine adjusting of the feet bottoms. Real luthiers use a super sharp knife. I'm not that good (yet).
There are many places on the interwebs with methods, tips, & tricks. Read a lot before diving in.