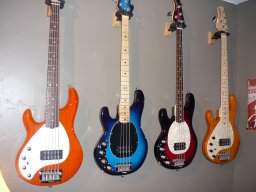
Defretting isnt really that scary of a job to do. I have done this process many many times. Just finished refinishing my Acoustic Bass Guitar. DISCLAIMER I AM NOT RESPOSIBLE FOR ANY DAMAGES YOU DO TO YOUR BASS OR YOURSELF,YOUR HOUSE,OR YOUR DOG. DO THIS AT YOUR OWN RISK.
What You'll Need:
3M Blue Painters Tape $4
A Clothes Iron
SandPaper in the following grits: Remember the lowest the number the more rough itll be. A pack of 8 is ussually $3
60 grit
150 Grit
400 Grit
Denatured Alcahol $3
Mineral Oil$4
Wood Putty Same Color as your board, you might have to buy 2 colors and mix match the 2 so you have a better blend of ur wood color. I recommend Minwax they are small tubs that run for around $4
A Butter Knife
A 1inch Putty Knife, price ranges from style and quality starts at $4
Your Choise of Sealer, can be anything from:
Shelac(very thin coat sealer less durable of all sealers but brighter sound good for maple.)
Polyurathane: Medium Strenght sealer good for rosewood or any dark wood
Boat Spar:Very Thick, highly durable, good for any wood slight dampens treble notes, but gives you a thicker bassier sound.
Epoxy: There are many wood epoxy out there but the one I reccomend is System 3 Mirror Coat. Pretty much the holy grail of sealers. Easiest to maintain and apply best tonal response but the pricey and limit to online orders if you dont live near a distributor. ussually $40 a pint.
Pliers, needle nose is better,
Small Hammer Just Case
5 1inch Foam Brushes, 48 cents each
First if your bass neck can be removed do so, its alot easier on sanding and you wont get any dust on the body. If you cant just use 3m blue scotch tape that can be found at Home Depot, Lowe's etc. for around $4 bucks, tape around where the neck meets the the body and any pick ups or anything you feel should be protected. Now take off your strings clean your fingerboard and give a good rub of MIneral oil. Let the wood absorb the most that it can, rub it every 2 hours for 6 hours. Theory here is that you want to nurish the wood as much as you can once you seal that wood with a sealer, the wood inside would be mal nourished and dry and theres nothing you can do about it.
Second Now,get your tape and tape the edge of the fingerboard towards the neck and tape the outside edges of your frets.
Third Now heat up a clothes iron, and start at the 1 fret, move the iron up and down slowly over a rag. Do this so if you touch the wood with the iron it wont scortch the wood and gives more a gentle heat to wiggle out the fret and loosen up any glue.
Four With your putty knife try to get inbetween where the fret meets the fingerboard and neck at the end, just to gently snug it and and give it slight play, once enough of the fret is lifted get your pliers and slowly pull up on the fret as even as you can. Now if you have the tape at the edges it should cleanly come off and not take any chuck of the fretboard with it.
5: repeat step 3 and 4 to all frets, you will get the hang of how to remove your frets by the 6th one or so.
7: Now with all your frets removed take off all the tape. Get a rag and clean the fretboard of any glue residue.
8. Get your wood putty and blend to desired shade of color if need it (just get the 2 colors in wat ever ratio you need and knead to desired color kinda like playdo). Get your butterknife and clean out any junk left in the holes your frets were preciously on. Jam putty with your fingers in to the gaps a little at a time and pack the putty in with the knife and rub a small layer of putty to finish it off. The reason why I like this puddy over any other method is cuz its the easiest, no need to file it or sand it or anything, Just press in. NOTE this type of puddy wont ever harden so you cant mess anything up.
9:Clean the fingerboard off any debri and start sanding. First start with you 60 grit. Dont apply too much force, when sanding sligtly cup your hand like a U to keep your radious. Just a very sligthly slack in your and and sand from left to right try not to stay in one spot or else it will become more even. After this initial sand your board will loose some of its color but thats ok. Now move to your lighter grit of 150. repeat the same process, and then the same for the 400. The reason for changes in grits is beause first you wanna start rouch to take out any imperfections in the wood, then lighter to clean up the scratches left by the previous sandpaper. Sand until the sandpaper trail is gone or satisfactory, I suggest rub the 400 a couple of times for the best results.
10:Clean the board with the alcahol to remove any dust and oil and let the alcahol dry out for 5 mins or so.
11:The most important part the sealer. Read the instructions of the can and see how its intented to be put on, every sealer is different but ussually consist of

for this tutorial im using the boat spar)
Do not shake can before opening, stir well and be in a well ventilated room, turn of any fans or source of wind.
Now with your foam brush dip it half way into can and remove any excess of the foam(just rub the outside against the rim of can and give a slight press on the lip of the can to remove a little of the excess.
Start at the thinest point of your neck and with one motion move all the way to the end of your neck, try to keep your wrist straight and dont stop. Then ussually a little bit of your fretboard will be left unsealed, flip your brush to the side that you didnt use and move up to the fretboard and coat whatever you missed.
Now wait for the surface to dry if you want to do another coat, with boat spar and epoxys u dont need to sand the surface again to apply another layer, with shalac and polyurathane sanding is needed for every layer.
I suggest at least 3 coats of sealer apply a layer every 5 hours or so or when ever surface is no longer tacky or sticky. Drying times depends on weather, humidity, thickness of coats and the wood you sealed.
If any airbubbles have appered you can blow them out with any blowtorch lighter. Move the flame 6 inches away from surface and just move the flame up and down till the bubble poped try not to stay in the same place.
Wait 12 hours after your last layer and test the surface get a tooth pick and poke in a inconspicuous area of the fingerboard to check if try, this is alos good to check the sealer inbeetween coats. after 18 hours your bass is ready to be restrung and tuned. Play the bass lightly for the next 2 days and check your intonation and the bow of your neck, check for any buzzess or any dead spots. Take to a guitar tech if you are unconfortable with the precise tuning of your instrument.
Have your favorite drink and play some tunes, your are done!
I have used all types of sealers and by far my favorite is boat spar. Shalac wears to thin and poly isnt as full sounding. Spar is slightly cheaper than MIrror coat and if your a beginner in wood working itd be easier to mess up with a $3 dollar can of shallac than a $40 can of MIrror coat. Foam Brushes are better than bristhles because foam applys more of a even and smooth coat than a bristle ever could.
Also sorry for this super long post with no pictures. I hope this answers and questions, and maybe this can be stickeyd I read alot on the internet, how people are always confused by something about fretless boards and I hope this made the process a whole lot easier to understand cheers.
You may post this on whatever thread as you wish as long as you reconigze the original author and post this for no profits.