...well, sorta. Here's a list of limitations, disclaimers, etc:
*Not my idea. I ripped it off from a G&L users' website.
*The platform is the G&L locking bridge with thru-body stringing option. I'm of the assumption the mod will work on virtually any thru-body configuration like the Peavey Millennium.
*The mod renders the string-thru option useless but is easily reversible.
*The parts are readily available and the project itself require only the most basic of tool skills.
*The premise is that the G&L proprietary bridge is held in place by only 2 screws and is prone to "lift". The project reinforces bridge attachment while the addt'l hardware adds some mass.
*Excuse the poor photography...the shakes are back.
*Tools and hardware required: set of micro files, PH and FH screwdrivers, hacksaw and/or Dremel tool with cut-off wheel or narrow grinding wheel, 6/32 2" steel machine screws (PH / flathead), 6/32 threaded aluminum spacers 1/4" X 1/4" (available thru McMaster Carr if necessary).
Here's the hardware. The screws have been cut back to 1 13/16" length...YMMV depending on body thickness. The spacers were notched on one end to accommodate a FH screwdriver (see last pic). You can use the Dremel...I did mine by hand with the side of an el-cheapo flat file.
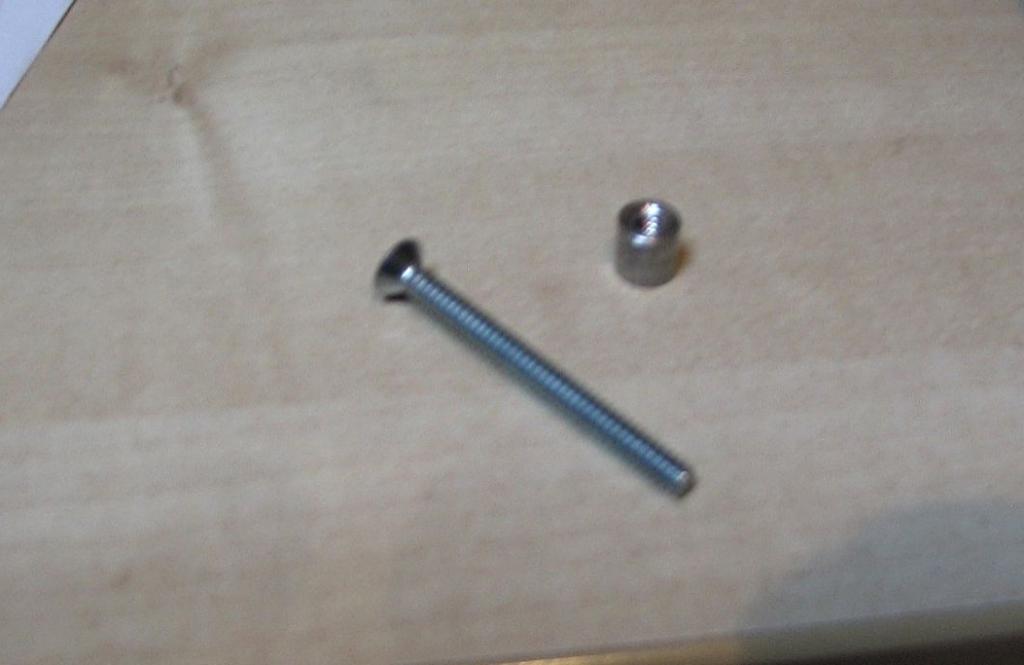
You may have to cut back the screw a few mm so as not crowd the spacer's notch.
I removed each string, one at a time, and inserted the screws thru the bridge / body.
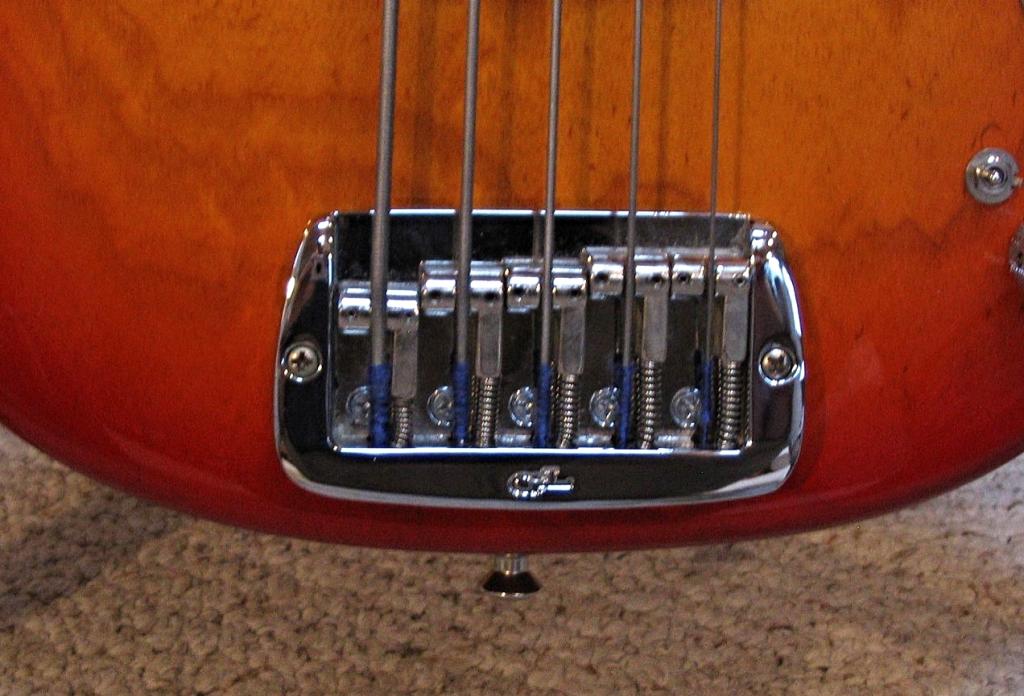
The notched spacers (prepped with a drop of blue Loctite) are inserted in the string ferrules on the body reverse and threaded onto the exposed screw thread. There is minimal wiggle room so be prepared to grind off addt'l screw material if necessary. Apply a PH screwdriver to the front, FH to the rear and crank 'er up.

Pretty neat, huh? Does it work? Well, the bridge hasn't flown off yet and the sustain is slightly better on my test instrument. I really cannot attribute this to change of bridge mass, though. The project is akin to adding inserts anywhere one component interfaces with another.
Enjoy and let me know if you have questions.
Riis
*Not my idea. I ripped it off from a G&L users' website.
*The platform is the G&L locking bridge with thru-body stringing option. I'm of the assumption the mod will work on virtually any thru-body configuration like the Peavey Millennium.
*The mod renders the string-thru option useless but is easily reversible.
*The parts are readily available and the project itself require only the most basic of tool skills.
*The premise is that the G&L proprietary bridge is held in place by only 2 screws and is prone to "lift". The project reinforces bridge attachment while the addt'l hardware adds some mass.
*Excuse the poor photography...the shakes are back.
*Tools and hardware required: set of micro files, PH and FH screwdrivers, hacksaw and/or Dremel tool with cut-off wheel or narrow grinding wheel, 6/32 2" steel machine screws (PH / flathead), 6/32 threaded aluminum spacers 1/4" X 1/4" (available thru McMaster Carr if necessary).
Here's the hardware. The screws have been cut back to 1 13/16" length...YMMV depending on body thickness. The spacers were notched on one end to accommodate a FH screwdriver (see last pic). You can use the Dremel...I did mine by hand with the side of an el-cheapo flat file.
You may have to cut back the screw a few mm so as not crowd the spacer's notch.
I removed each string, one at a time, and inserted the screws thru the bridge / body.
The notched spacers (prepped with a drop of blue Loctite) are inserted in the string ferrules on the body reverse and threaded onto the exposed screw thread. There is minimal wiggle room so be prepared to grind off addt'l screw material if necessary. Apply a PH screwdriver to the front, FH to the rear and crank 'er up.
Pretty neat, huh? Does it work? Well, the bridge hasn't flown off yet and the sustain is slightly better on my test instrument. I really cannot attribute this to change of bridge mass, though. The project is akin to adding inserts anywhere one component interfaces with another.
Enjoy and let me know if you have questions.
Riis